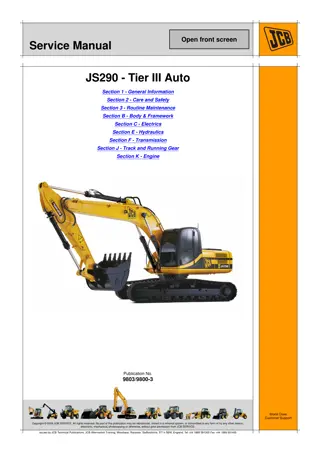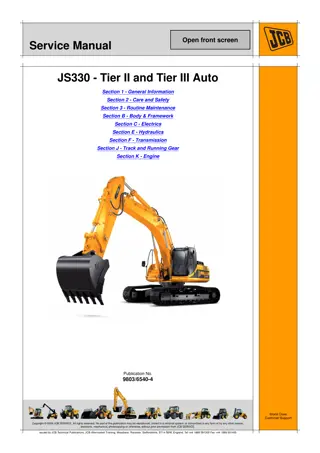
JCB JS330, JS450, JS460 and JS500 Tracked Excavator Service Repair Manual Instant Download
Please open the website below to get the complete manualnn//
Download Presentation

Please find below an Image/Link to download the presentation.
The content on the website is provided AS IS for your information and personal use only. It may not be sold, licensed, or shared on other websites without obtaining consent from the author. Download presentation by click this link. If you encounter any issues during the download, it is possible that the publisher has removed the file from their server.
E N D
Presentation Transcript
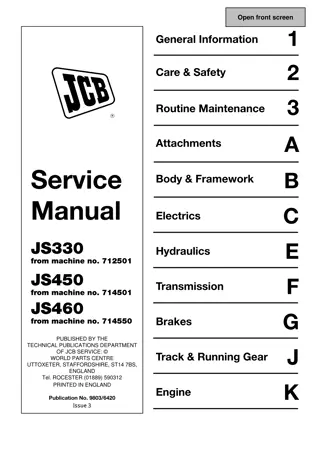
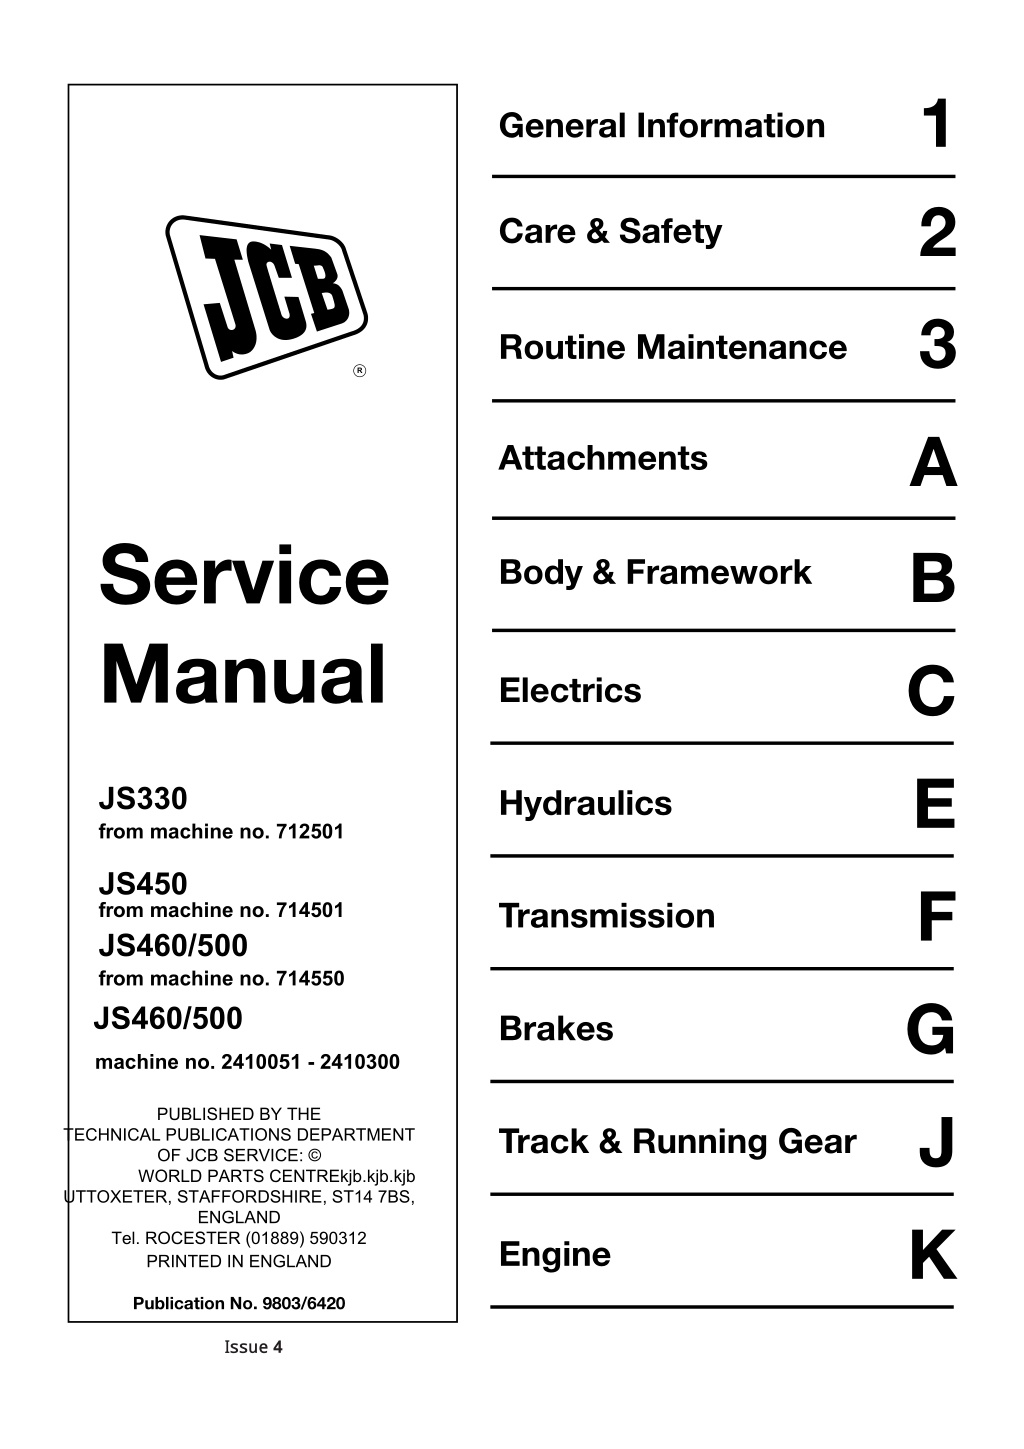
1 2 3 General Information Care & Safety Routine Maintenance R A B C E F G J K Attachments Service Manual Body & Framework Electrics JS330 from machine no. 712501 Hydraulics JS450 from machine no. 714501 JS460/500 from machine no. 714550 JS460/500 machine no. 2410051 - 2410300 Transmission Brakes PUBLISHED BY THE Track & Running Gear TECHNICAL PUBLICATIONS DEPARTMENT OF JCB SERVICE: WORLD PARTS CENTREkjb.kjb.kjb UTTOXETER, STAFFORDSHIRE, ST14 7BS, ENGLAND Tel. ROCESTER (01889) 590312 PRINTED IN ENGLAND Engine Publication No. 9803/6420 Issue 4
Introduction This publication is designed for the benefit of JCB Distributor Service Engineers who are receiving, or have received, training by JCB Technical Training Department. These personnel should have a sound knowledge of workshop practice, safety procedures, and general techniques associated with the maintenance and repair of hydraulic earthmoving equipment. Renewal of oil seals, gaskets, etc., and any component showing obvious signs of wear or damage is expected as a matter of course. It is expected that components will be cleaned and lubricated where appropriate, and that any opened hose or pipe connections will be blanked to prevent excessive loss of hydraulic fluid and ingress of dirt. Finally, please remember above al else SAFETY MUST COME FIRST! l The manual is compiled in sections, the first three are numbered and contain information as follows: 1 2 3 = = = General Information - includes torque settings and service tools. Care & Safety - includes warnings and cautions pertinent to aspects of workshop procedures etc. Routine Maintenance - includes service schedules and recommended lubricants for the whole machine. The remaining sections are alphabetically coded and deal with Dismantling, Overhaul etc. of specific components, for example: A B = = Attachments Body & Framework ...etc The page numbering in each alphabetically coded section is not continuous. This allows for the insertion of new items in later issues of the manual. Section contents, technical data, circuit descriptions, operation descriptions etc. are inserted at the beginning of each alphabetically coded section. All sections are listed on the front cover; tabbed divider cards align directly with individual sections on the front cover for reference. rapid Where a torque setting is given as a single figure it may be varied by plus or minus 3%. Torque figures indicated are for dry threads, hence for lubricated threads may be reduced by one third. Left Hand and Right Hand are as viewed from the rear of the machine facing forwards. Note: In this manual the term swing may sometimes be used in place of slew and the term arm may sometimes be used in place of dipper . 9803/6420 Issue 1
General Information Section 1 Section 1 i i Contents Page No. Bolt and Nut Torque Specifications 1 - 1 Torque Settings 1 - 2 Service Tools Section B - Body & Framework Section C - Electrics Section E - Hydraulics * 3 - 1 4 - 1 5 - 1 Sealing and Retaining Compounds 6 - 1 9803/6420 Issue 2*
https://www.ebooklibonline.com Hello dear friend! Thank you very much for reading. Enter the link into your browser. The full manual is available for immediate download. https://www.ebooklibonline.com
General Information Section 1 Section 1 Bolt and Nut Torque Specifications 1 - 1 1 - 1 JS330/JS450/460 and Variants Tighten the bolts and nuts according to the table. Before and after daily work, check the bolts and nuts for looseness and for those missing. Tighten if loose and renew if missing. Tighten the bolts and nuts after the first 50 hours of the running-in stage and every 250 hours thereafter. Tightening Torque Table Bolt Wrench Tightening Torque No Tightening Point Diameter mm Nm kgf m lbf ft JS330/JS450-460 JS330/JS450-460 JS330/JS450-460 JS330/JS450-460 JS330/JS450-460 * 1 Travel Motor M24 36 900~1051 92~107 663~775 2 Drive Sprocket M20/M24 30/36 521~608/900~1051 53~62/92~107 384~448/663~775 3 Take-up Roller M16 24 267~312 27~32 197~230 4 Upper (Carrier) Roller (Standard) M16 24 267~312 27~32 197~230 (Heavy Duty) M18 27 371~432 38~44 273~318 5 Lower (Track) Roller M20/24 30/36 521~608/900~1051 53~62/92~107 384~448/603~775 6 Track Guard M20/24 30/36 521~608/900~1051 53~62/92~107 384~448/603~775 7 Shoe Bolt (Standard) M20 30 755~931 77~95 557~687 (Heavy Duty) M22 32 980~1180 100~120 723~871 8 Counter weight M27/M42 41/65 1335~1540/1470 136~158/150 985~1136/1084 9 Turntable Bearing (Lower Frame) M24 36 900~1050 92~107 664~775 10 Turntable Bearing (Slew Frame) M24 36 900~1050 92~107 664~775 11 Slew Equipment M24 36 900~1050 92~107 664~775 12 Engine (Engine Mount) M20 30 289~337 30~34 213~248 13 Engine Bracket M12&M14 19&22 108~127/176~196 11~13/18~20 79~93/130~144 14 Radiator M16 24 127~147 13~15 93~108 15 Hydraulic Pump M12 19 63~73 6.4~7.4 46~54 16 Oil Tank M16 24 196 20 144 17 Fuel Tank M16 24 245 25 180 18 Control Valve M16/M20 24/30 196/343 20/35 144/253 19 Rotating Joint M12&M16 19&24 65~95/245~290 7~10/25~30 48~70/180~214 20 Cab M16 24 128~142 13~15 94~105 21 Battery M10 17 20~29 2~3 14.7~21.4 Note: Use JCB Threadlocker and Sealer (High Strength) on those marked and tighten to the torque listed in the above table. The tightening torques for the bolts and nuts not listed above are as follows: Bolt Diameter (size) M6 M8 M10 M12 M14 M16 M18 M20 Wrench mm 10 13 17 19 22 24 27 30 Hex. bolt Nm 6.9 15.7 32.3 58.8 98.0 137.2 196.0 274.4 Tightening kgf m .69 1.7 3.3 5.9 9.9 13.9 20 28 Torque lbf ft 5 12 24 43 72 101 145 203 Wrench mm 5 6 8 10 12 14 14 17 Hex. socket head Nm 8.8 21.6 42.1 78.4 117.6 176.4 245.0 343.0 Tightening bolt kgf m .89 2.2 4.3 8.0 12 17.9 24.9 34.9 Torque lbf ft 6.5 16 31 58 87 130 180 253 9803/6420 Issue 3*
General Information Section 1 Section 1 Torque Settings 1 - 2 1 - 2 Torque Settings Note 1: The figures quoted are for non-plated fasteners and are to be used only when there is no torque setting specified in the relevant procedure in this service manual. Note 2: The 4T grade settings DO NOT APPLY to fasteners used on the engine. If any 4T specification fasteners are found on the engine, these must be tightened to the figure quoted in the relevant engine manual. Bolt Size Strength Grade of Bolt or Stud 8.8 4T 10.9 12.9 Nm kgf m lbf ft Nm kgf m lbf ft Nm kgf m lbf ft Nm kgf m lbf ft M3 0.39 0.04 0.28 - - - - - - M4 0.78 0.08 0.57 - - - - - - - - - M5 1.67 0.17 1.2 - - - - - - - - - M6 2.84 0.29 2.1 8.04 0.82 5.9 11.3 1.15 8.3 - - - M8 48 4.90 35.4 7.06 0.72 5.2 19.6 2.00 14.5 27.7 2.82 20.4 M10 14.0 1.43 10.3 39.1 3.99 28.8 55.0 5.61 40.6 94 9.2 66.4 M12 24.6 2.51 18.1 68.5 6.98 50.5 96.2 9.81 71 166 16.9 122 M16 61.9 6.31 45.7 173 17.6 127.6 242 24.7 178.5 400 40.8 295 M20 122 12.4 90 337 34.4 249 475 48.4 350 - - - M22 167 17.0 123 464 47.3 342 652 66.5 481 - - - M24 210 21.4 155 584 59.5 431 821 83.7 606 - - - M27 311 31.7 229 864 88.1 637 1220 124 900 - - - M30 420 42.8 310 1170 119 863 1650 168 1217 - - - M33 576 58.7 425 1600 163 1180 2260 230 1667 - - - M36 736 75.1 543 2050 209 1512 2880 294 2124 - - - M39 961 98.0 709 2680 273 1977 3760 383 2773 - - - M42 1190 121 878 3300 336 2434 4640 473 3422 - - - M45 1490 152 1099 4140 422 3054 5820 593 4293 - - - M48 1780 182 1312 4960 506 3659 6970 711 5141 - - - 9803/6420 Issue 2*
Routine Maintenance Section 3 Section 3 Greasing 3 - 1 3 - 1 ! WARNING ! General Notes You will be working close into the machine for these jobs. Lower the attachments if possible. Remove the starter key and disconnect the battery. This will prevent the engine being started. 8-3-1-3 For the type of grease to use at each point, see Lubricants and Capacities. Do not mix different types of grease. Keep them separate. Slew Ring Bearing 1 The three grease nipples are grouped together on the front of the machine. Slew Ring Teeth and Slew Pinion Ensure slew ring is kept full of grease. Always grease whenever the machine has been steam-cleaned. For location of the slew ring gear refer to component Location Diagrams . 1 Make the Machine Safe Stop the engine and remove the starter key. 2 Grease the Slew Ring a Remove the Inspection port cover A (on the lower centre section). b Remove the grease discharge port cover B (on the lower inner side). C A c Remove contaminated grease. B d Replace the discharge port cover. e Apply grease to the slew ring via aperture C. 3 Slew the Machine Start the engine and slew the machine a few degrees. Stop the engine, remove the starter key and apply grease again. JS03670 Repeat until the whole ring is greased. Check that grease exudes around the entire circumference. 4 Refit the Cover 9803/6420 Issue 1
Routine Maintenance Section 3 Section 3 Greasing (continued) 3 - 2 3 - 2 !? ? WARNING ! Excavator End You will be working close into the machine for these jobs. Lower the attachments if possible. Remove the starter key and disconnect the battery. This will prevent the engine being started. 8-3-1-3 16 Grease Points (No.) Greasing Points Reference drawing Number of greasing points } Boom 3. Boom ram, eye end pin 1 2. Centralised greasing (total of 6 points) Dipper ram, dump end pin 1. Boom ram, dump end pin 2 2. Bucket ram to Bucket linkage pin 2. Bucket linkage to Bucket pin 3 1. (total of 5 points) Dipper to Bucket Linkage pin 1. Dipper to Bucket pin 1. Bucket ram, dump end pin 1. Dipper ram, eye end pin 4 1. (total of 3 points) Boom to Dipper, connecting pin 1. Note: The JS450/460 has the EMS (Easy Maintenance System) bearings, using a bush and plated pin system it is possible to extend the excavator lubrication intervals to 1000 hours (this does not include bucket pins which should be greased at 50 hour intervals). 1 2 A357550 4 3 9803/6420 Issue 2*
Routine Maintenance Section 3 Section 3 Greasing (continued) 3 - 3 3 - 3 Excavator End JS11110 9803/6420 Issue 2*
Routine Maintenance Section 3 Section 3 Battery 4 - 1 4 - 1 First Aid - Electrolyte Check the Electrolyte Level 1 Open the Battery Compartment A EYES A FLUSH WITH WATER FOR 15 MINUTES. GET MEDICAL HELP FAST. IF SWALLOWED DO NOT INDUCE VOMITING. DRINK LARGE QUANTITIES OF WATER OR MILK. Then drink milk of magnesia, beaten egg or vegetable oil. A357560 SKIN Remove the two bolts B securing the metal plate above the battery. Remove the plate C. FLUSH WITH WATER. REMOVE AFFECTED CLOTHING. ! Batteries give off an explosive gas. Do not smoke when handling or working on the battery. Keep the battery away from sparks and naked flames. ! WARNING 2 Check the Level Remove covers and look at the level in each cell. The electrolyte should be 6 mm. (0.25 inch) above the plates. Top up if necessary with distilled water or de-ionized water. ! Do not top the battery up with acid. The electrolyte could boil out and burn you. 2-3-4-6 3 Check the Connections Make sure that the terminals are tight and clean. Coat them with petroleum jelly to prevent corrosion. Battery electrolyte contains sulphuric acid. It can burn you if it touches your skin or eyes. Wear goggles. Handle the battery carefully to prevent spillage. ! WARNING Keep metallic items (watches, rings, zippers etc) away from the battery terminals. Such items could short the terminals and burn you. Set all switches in the cab to OFF before disconnecting the battery. When disconnecting the battery, take off the earth (-) lead first. When reconnecting, fit the positive (+) lead first. Refit the metal plate C above the battery. Refit the two securing bolts B. Re-charge the battery away from the machine, in a well- ventilated area. Switch the charging circuit off before connecting or disconnecting the battery. When you have installed the battery in the machine, wait five minutes before connecting it up. 5-3-4-3 ! Do not disconnect the alternator, the battery, or any part of the charging circuit with the engine running. ! CAUTION B B 8-3-4-1 C C Charge Rate Depending on the Battery specific Gravity Temperature 20 C 0 C -10 C Charge Rate 100% (satisfactory) 1.26 1.27 1.28 90% (satisfactory) 1.24 1.25 1.26 80% (charge) 1.22 1.23 1.24 A357710 75% (charge) 1.21 1.22 1.23 If the battery is charged and the charge rate is less than 75%, replace the battery. 9803/6420 Issue 2*
Routine Maintenance Section 3 Section 3 Hydraulics 5 - 1 5 - 1 Releasing Tank Pressure ! ! WARNING DO NOT remove the hydraulic tank filler cap or cover plate when the engine is running. The hydraulic system is under pressure. You or others could be injured. First stop the engine and then release the pressure. 8-3-4-4/1 ! The temperature of the hydraulic oil will be high soon after stopping the engine. Wait until it cools down (less than 40 C) before beginning maintenance. 8-3-4-10 ! WARNING 1 Prepare the Machine Position the machine on level ground. Stop the engine. Remove the starter key. A B 2 Locate the Hydraulic Oil Tank Filler Cap or Filler Plate Refer to Component Location Diagrams at the end of this section. 3 Release Tank Pressure C JS09771 Loosen air release plug A and allow tank pressure to disperse. When no more air escapes loosen the plug a bit further to confirm the tank is no longer pressurised. Retighten the air release plug. Remove retaining screws B and lift off filler plate C. Air Bleeding Procedures ! Hydraulic Pressure ! WARNING Air Bleeding Sequence Air Bleeding from slew motor Hydraulic fluid at system pressure can injure you. Before disconnecting or connecting hydraulic hoses, stop the engine and operate the controls to release pressure trapped in the hoses. Make sure the engine cannot be started while the hoses are open. INT-3-1-11/1 Air Bleeding Air Bleeding from pump Check from ram Hydraulic oil or pump replacement O O O O Ram replacement O O Slew motor replacement O O 9803/6420 Issue 2*
Routine Maintenance Section 3 Section 3 Hydraulics (continued) 5 - 2 5 - 2 Air Bleeding Procedures (continued) 6 Repeat step 3 if necessary. Air Bleeding from Hydraulic Pump After Dismantling and Assembly Note: See illustration for reversed port references on the JS450 machine. ! The temperature of the hydraulic oil will be high soon after stopping the engine. Wait until it cools down (less than 40 C) before beginning maintenance. 8-3-4-10 1 Open bleed port D and drain port R and bleed air. ! WARNING 2 When hydraulic oil flows from drain port R, close and tighten plug. 3 Fill the pump with clean hydraulic fluid through bleed port D until oil overflows. Close and tighten plug. 4 Start the engine and run at idling speed until the complete system warms up. After Changing the Hydraulic Fluid Carry out steps 5 and 6 of After Dismantling and Assembly. 5 Carefully loosen bleed plug D and release any trapped air. D D R JS 330 D R R JS 450 JS09570 9803/6420 Issue 1
Routine Maintenance Section 3 Section 3 Hydraulics (continued) 5 - 3 5 - 3 Air Bleeding Procedures (continued) Air Bleeding from Ram Air Bleeding from the Slew Motor ! ! WARNING ! Hydraulic Pressure ! WARNING DO NOT remove the hydraulic tank filler cap or cover plate when the engine is running. The hydraulic system is under pressure. You or others could be injured. First stop the engine and then release the pressure. 8-3-4-4/1 ! The temperature of the hydraulic oil will be high soon after stopping the engine. Wait until it cools down (less than 40 C) before beginning maintenance. 8-3-4-10 Hydraulic fluid at system pressure can injure you. Before disconnecting or connecting hydraulic hoses, stop the engine and operate the controls to release pressure trapped in the hoses. Make sure the engine cannot be started while the hoses are open. ! The temperature of the hydraulic oil will be high soon after stopping the engine. Wait until it cools down (less than 40 C) before beginning maintenance. 8-3-4-10 ! WARNING INT-3-1-11/1 ! WARNING 1 Prepare the Machine a Position the machine on level ground. b Idle the engine at low speed, loosen the air bleeding plug A and check that oil comes out from the air bleeding port. 1 Prepare the Machine a Position the Machine on level ground. b Idle the engine at low speed and retract each ram 4 or 5 times without reaching the stroke end (about 100mm (4 in.) before the end of the ram). DO NOT SLEW THE MACHINE. c If no oil comes out, stop the engine, remove the air bleeding plug A and fill the motor case with hydraulic oil. c Operate each ram 3 or 4 times to the stroke end to completely bleed the air. d Install the air bleeding plug. Tighten and then loosen again. d Stop the engine and allow the bubbles to make their way through the hydraulic tank. e Idle the engine at low speed and continue to run until oil comes out from the air bleeding port. f Completely tighten the air bleeding plug. g Idle the engine at low speed and slowly slew the machine left to right evenly more than 2 turns. h Stop the engine and allow the bubbles to make their way through the hydraulic tank. 9803/6420 Issue 1
Routine Maintenance Section 3 Section 3 Hydraulics (continued) 5 - 4 5 - 4 For location of hydraulic oil tank see Component Location Diagram. ! Fine jets of hydraulic fluid at high pressure can penetrate the skin. Do not use your fingers to check for hydraulic fluid leaks. Do not put your face close to suspected leaks. Hold a piece of cardboard close to suspected leaks and then inspect the cardboard for signs of hydraulic fluid. If hydraulic fluid penetrates your skin get medical help immediately. INT-3-1-10/1 A ! WARNING Checking the Fluid Level 1 Prepare the Machine Position the machine on level ground with the bucket and dipper rams fully extended and the boom lowered to rest the attachment on the ground, as at A. 2 Check the Level Look at the fluid level in the sight tube should be between the two marks on the tube. If the fluid is cloudy, water or air has entered the system. Water or air in the system could damage the hydraulic pump. B. The level B JS03640 Topping up Fluid Level ! WARNING ! DO NOT remove the hydraulic tank filler cap or cover plate when the engine is running. The hydraulic system is under pressure. You or others could be injured. First stop the engine and then release the pressure. 8-3-4-4/1 1 Prepare the Machine Position the Machine on level ground as at A. Stop the engine. Remove the starter key. 2 Locate the Hydraulic Oil Tank or Filler Plate See Component location Diagrams. 3 Release Tank Pressure See Releasing Tank Pressure. 4 Add Fluid. a Remove plug C. C b Refill oil through the filler port using a suitable tundish. JS09180 c Check the level through the level gauge on the side of the tank. d Refit plug C. 9803/6420 Issue 2*
Routine Maintenance Section 3 Section 3 Hydraulics (continued) 5 - 5 5 - 5 Changing the Hydraulic oil ! ! WARNING A DO NOT remove the hydraulic tank filler cap or cover plate when the engine is running. The hydraulic system is under pressure. You or others could be injured. First stop the engine and then release the pressure. 8-3-4-4/1 ! Hydraulic Pressure Oil is toxic. If you swallow any oil, do not induce vomiting, seek medical advice. Used engine oil contains harmful contaminants which can cause skin cancer. Do not handle used engine oil more than necessary. Always use barrier cream or wear gloves to prevent skin contact. Wash skin contaminated with oil thoroughly in warm soapy water. Do not use petrol, diesel fuel or paraffin to clean your skin. INT-3-2-3 ! WARNING B C 1 Prepare the Machine Position the machine on level ground as at A. Stop the engine. Remove the starter key. F 2 Locate the Hydraulic oil tank or Filler Plate. See Component Location Diagrams at the end of the section. E 3 Release Tank Pressure See Releasing Tank Pressure. 4 Drain the Hydraulic Oil Tank a Remove the filler port cover B and 'O'-ring C. D JS10980 b Use a pump and discharge the hydraulic oil into an empty waste container. c Remove the drain plug D on the bottom of the Tank and drain the remaining oil from the tank (have a drain pan ready). 9 Check for Leaks a Start the engine and run it for around 5 minutes without load. 5 Replace the Suction Strainer E See Changing the Suction Strainer. b Slowly operate the travel, slew and cylinders several times. 6 Replace the Return Filter F See Changing the Return Filter. 10 Check the Fluid Level See Checking the Fluid Level. 7 Seal the System a Refit Drain plug D. b Refill the Tank Refill the Tank with Hydraulic oil (See Lubricants and Capacities for the type of fluid) to the specified level see Checking the Fluid Level. c Install the 'O'-ring C and filler port cover B. Note: If the 'O'-Ring C is damaged, replace it with a new one. 8 Bleed the Hydraulic Components See Air Bleeding Procedures 9803/6420 Issue 1
Routine Maintenance Section 3 Section 3 Hydraulics (continued) 5 - 6 5 - 6 Changing the Return Filter Element B 1 Prepare the Machine Position the machine on level ground. Stop the engine. Remove the starter Key. 2 Locate the Return filter. Refer to Components Location Diagrams at the end of this section. C 3 Release Tank Pressure. See Releasing Tank Pressure. 4 Removing the Element a Remove the retaining bolts B and take off cover plate C complete with its O ring seal. D b Remove spring D, by-pass valve E and element F. E 5 Fit a New Element Re-assemble in reverse order using a new filter element F and a new cover plate O ring. 6 Seal the System Refit cover plate C and secure with bolts B. F JS11071 9803/6420 Issue 2*
Routine Maintenance Section 3 Section 3 Hydraulics (continued) 5 - 7 5 - 7 Cleaning/Changing the Suction Strainer 1 Prepare the Machine Position the machine on level ground. Stop the engine. Remove the starter key. 2 Locate the Suction Strainer 3 Release Tank Pressure See Releasing Tank Pressure. 4 Remove the suction Strainer a Remove the retaining bolts A and washers D, lift off cover plate B. B D A b Remove the suction strainer C and clean with a suitable solvent or renew. 5 Fit the Suction Strainer Fitting is a reversal of removal. 6 Check the Hydraulic fluid Level See Checking the Fluid Level. 7 Seal the System Refit the cover plate B together with its 'O'-ring. C Note: Check the 'O'-ring, if it is worn or damaged replace it with a new one and secure with bolts A and washers D. JS11050 9803/6420 Issue 2*
Routine Maintenance Section 3 Section 3 Hydraulics (continued) 5 - 8 5 - 8 Changing the Air Breather Element 1 Prepare the Machine Position the machine on level ground. Stop the engine. Remove the starter key. A 2 Release Tank Pressure See Releasing Tank Pressure. 3 Remove Filler Cap A 4 Locate the Air Breather See illustration. 5 Replace the Air Breather Element Use an Allen key to remove socket head bolt which secures the air breather element inside the cap. Remove the element. Fit and secure a new element. 6 Refit Filler Cap A Line up the alignment marks and tighten fully. The retaining pin will spring back to secure the filler cap. JS11061 9803/6420 Issue 2*
Routine Maintenance Section 3 Section 3 Hydraulics (continued) 5 - 9 5 - 9 Draining Tank Impurities G 1 Prepare the Machine Position the machine on level ground. stop the engine. Remove the Starter Key. P 2 Release Tank Pressure See Releasing Tank Pressure. 3 Remove Filler Plate P 4 Drain the Tank Impurities Open drain plug R and drain off accumulated water and other deposits. This task is complete when clean hydraulic fluid flows out. 5 Seal the System Close drain plug R. Refit filler plate P and secure with bolts G. JS11072 R A370340 Changing the Pilot Oil Filter 1 Prepare the Machine Position the machine on level ground. Stop the engine. Remove the starter key. 2 Release Tank Pressure (See Releasing Tank Pressure). 3 Locate the Pilot Oil Filter 4 Dismantle the Filter a Using a wrench on the case, unscrew the filter case A from the filter head B. Take care not to spill the oil it contains. b Remove and discard the element C and O-ring D. 5 Clean the Filter Base and Case Discard any fluid in the filter case. Clean out the case and the underside of the head. A370370 B D 6 Fit New Filter Components a Coat the new O-ring D with hydraulic fluid and locate in the filter head B. C b Coat the seal area of the new element C and install it in the filter case A. A c Screw the filter case A to the head B and tighten with the wrench. JS03791 9803/6420 Issue2*
Routine Maintenance Section 3 Section 3 Hydraulics (continued) 5 - 10 5 - 10 Changing the Breaker In-line Filter Note: This filter should be changed at the intervals stated in Service Schedules or when the visual indicator X has popped up. DO NOT USE THE BREAKER WITH A BLOCKED FILTER. X 1 Prepare the Machine Position the machine on level ground. Stop the engine. Remove the starter key. 2 Release Tank Pressure (See Releasing Tank Pressure). B 3 Locate the Filter 4 Remove the Oil Filter Unscrew and remove filter A from head B. 5 Fit the New Filter Coat the seal of the new filter with clean hydraulic fluid. Screw the new filter into head B and tighten. Check and top up the hydraulic fluid level. A JS06700 Changing the Drain Line Filter 1 Prepare the Machine Position the machine on level ground. Stop the engine. Remove the starter key. 2 Release Tank Pressure (See Releasing Tank Pressure). B 3 Locate the Filter 4 Remove the Oil Filter Unscrew and remove filter A from head B. A 5 Fit the New Filter Coat the seal of the new filter with clean hydraulic fluid. Screw the new filter into head B and tighten. Check and top up the hydraulic fluid level. JS02830 9803/6420 Issue 2*
Routine Maintenance Section 3 Section 3 Hydraulics (continued) 5 - 11 5 - 11 Changing the Nephron Filter (JS450) ! The temperature of the hydraulic oil will be high soon after stopping the engine. Wait until it cools down (less than 40 C) before beginning maintenance. 8-3-4-10 ! WARNING 1 Prepare the Machine Position the machine on level ground. Stop the engine. Remove the starter key. 2 Release Tank Pressure See Releasing Tank Pressure. 3 Remove the Nephron Filter A a Close the two stop cocks B of the nephron filter case C. b Remove the retaining bolts D, washers E and lift the cover F, together with the 'O'-ring G and spring H. c Slowly lift the Nephron filter A and remove. Note: Be careful not to drop any dirt from the nephron filter A. 4 Replace the Nephron filter A a Peel off the 4 foil seals of the new nephron filter (one on the upper and lower side, and the other two on the sides). Note: If the foil is not removed, the filter will not function properly. B Close F G I D H b Slowly sink the new nephron filter A into its case. E c Install the spring H, 'O'-ring G and cover F, secure with bolts D and washers E. Open d Open the two stop cocks B on the nephron filter case C. C A 5 Air Bleeding a Start the engine and set at low idling, loosen the plug I, tighten the plug when hydraulic oil flows out. JS09120 b Stop engine and Check the hydraulic oil level. See Checking the Fluid Level. 9803/6420 Issue 2*
Routine Maintenance Section 3 Section 3 Hydraulics (continued) 5 - 12 5 - 12 Changing the Plexus Filter (JS330/JS460) ! The temperature of the hydraulic oil will be high soon after stopping the engine. Wait until it cools down (less than 40 C) before beginning maintenance. 8-3-4-10 J E D ! WARNING A F G H 1. Prepare the Machine Position the machine on level ground. Stop the engine. Remove the starter key. A 2. Locate the Plexus Filter Refer to the Identification of Machine Components. 3. Release Tank Pressure (See Releasing Tank Pressure). 4. Remove the Plexus Filter a. Close the two filter case cocks B and C by turning them to position X. X b. Remove bolts and washers E, B C c Slacken the nuts G and insert the screws F to lift off the cover D. d Remove the cover D and remove the O-ring H. Y e Lift up the Plexus filter A carefully and remove. Take care not to drop any sediment. 5. Fit a New Element a Slowly immerse the new Plexus filter A. Install the O-ring H, cover D, nuts G and bolts F and bolts E. C b Torque tighten bolts E to 20Nm (15 lbf ft) B c Open the cocks B and C by turning them to position Y. 6. Priming the Nephron Filter a Start the engine and set at low idling, loosen plug J, then tighten the plug when hydraulic oil flows out. b. Stop the engine, check the hydraulic oil level and top-up if low. (See Checking the Fluid Level). 9803/6420 Issue 4*
Routine Maintenance Section 3 Section 3 Transmission 6 - 1 6 - 1 Checking the Track Gearbox Oil Level 1 Prepare the Machine Position the machine on level ground with the level and filler plugs in the positions shown, with the filler plug uppermost as at X. 2 Check the Level on One Side Clean the area around filler plug A and level plug B and remove both plugs. Oil should run from plug B. Top up through plug A if necessary. (See Fluids and Capacities for oil types). 3 Clean and Refit the Plug(s) Make sure they are tight. 4 Check the Level on the Other Side Repeat steps 1 to 3. Changing the Track Gearbox Oil 1 Prepare the Machine Position the machine on level ground with the level/filler plug A and drain plug B in the positions shown as at Y. X Y Drain the Oil on One Side a Place a container below the drain plug to catch the oil. The container must be large enough to hold the maximum gearbox capacity (see Fluids and Capacities). ! Oil will gush from the hole when the drain plug is removed. Keep to one side when you remove the drain plug. 2-3-4-2 2 A A B ! CAUTION B JS111 b Remove filler/level plug A and drain plug B. Allow the oil to drain out. Key c Wipe the plugs clean. Make sure you remove all metal particles. A B filler/level plug level/drain plug d Wrap seal tape on the drain plug and refit. 3 Fill with New Oil See Lubricants and Capacities for oil type and volume. a Pour new oil through filler/level plug A until oil runs out of plug A. b Clean and wrap seal tape around the plug. Tightly refit filler/level plug A. 4 Change the Oil on the Other Side Repeat steps 1 to 3. 5 Check for Leaks Run the machine, operate the tracking controls and then make sure there are no leaks. 9803/6420 Issue 2*
Routine Maintenance Section 3 Section 3 6 - 2 Transmission (continued) 6 - 2 Checking the Slew Gearbox Oil Level 1 Prepare the Machine JS330/JS450/JS460 Position the machine on level ground. Stop the engine and remove the starter key. A 2 Locate the Slew Gearbox A See Component Location Diagrams at the end of this section. B 3 Check the Level C a Remove the dipstick A, wipe it clean and replace. b Remove the dipstick again and check that the oil level is within the range B. c If necessary, top up through filler port C. (See Fluids and Lubricants for oil type). 4 Replace the Dipstick. Changing the Slew Gearbox Oil D 1 Prepare the Machine Position the machine on level ground. Stop the engine and remove the starter key. 2 Drain the Oil a Remove the drain plug D. Allow the oil to drain out. b Wipe the drain plug clean. Remove any metallic particles. c Refit the drain plug. Make sure it is tight. 3 Fill with New Oil See Fluids and Lubricants for oil type and volume. Fill with new oil through filler port C until it reaches the full mark on the dipstick when settled. Replace the dipstick. 4 Check for Leaks Run the machine, operate the slew controls and make sure there are no leaks. 9803/6420 Issue 4*
Routine Maintenance Section 3 Section 3 Tracks and Running Gear 7- 1 7 - 1 Cleaning the Tracks ! ! WARNING ! ! WARNING Rotating the tracks off the ground may cause stones and other debris to be thrown with considerable force. If you are on the outside, keep well clear. Keep other people well clear. 8-3-3-2 If two people are doing this job make sure that the person working the controls is a competent operator. If the wrong control lever is moved, or if the controls are moved violently, the other person could be killed or injured. When it is safe to do so and you are sure that everyone is clear of the machine, operate the controls to rotate the track which is off the ground. Rotate it first one way and then the other to shake off the mud. If necessary, the person outside may use water to get the mud off. If you will be working with another person, make sure you both understand what the other will be doing. Learn and use the recognised signalling procedures. Do not rely on shouting - he will not hear you. To clean the tracks you must turn them. When the tracks are turning, keep clear of rotating parts. 4 Inspect the Track When you have finished, inspect the track rollers, sprockets and idler wheels for damage and oil leaks. Before starting this job, make sure that you have no loose clothing (cuffs, ties, etc) which could get caught in rotating parts. 5 Lower the Track Operate the boom and dipper controls to lower the track to the ground. Keep people not involved with the job well away! 8-3-3-1 6 Repeat for the Opposite Track Slew the boom round to the other side and repeat steps 2 to 5 inclusive for the other track. 1 Prepare the Machine Park the machine on level ground. Open the bucket and slew the boom until it is at 90 to the track. Lower the bucket to the ground. 2 Raise the Track Operate the boom and dipper controls so that the track on the side nearest the bucket is lifted up clear of the ground. 3 Rotate the Track 9803/6420 Issue 2*
Suggest: If the above button click is invalid. Please download this document first, and then click the above link to download the complete manual. Thank you so much for reading
Routine Maintenance Section 3 Section 3 Tracks and Running Gear (continued) 7 - 2 7 - 2 Checking/Adjusting the Track Tension 1 Prepare the Machine Position the machine on level ground. Run it backwards and forwards several times. Stop after running it forwards. Carry out steps 1 to 3 of Cleaning the Tracks. Block up the undercarriage frame. Finish track rotation by running the track forwards. Stop the engine and remove the starter key. ! NEVER position yourself or any part of your body under a raised machine which is not properly supported. If the machine moves unexpectedly you could become trapped and suffer serious injury or be killed. INT-3-3-7 ! WARNING A JS03770 B B 2 Check the Tension Measure gap A in line with the third roller from the front and between the lower surface of the track frame and the upper surface of the shoe. The dimension should be 340-360 mm for hard ground conditions. C C 3 Adjust the Track Tension Adjustment is made by either injecting or releasing grease from the check valve B. Inject grease to reduce the gap (increase the tension) or open to release grease and increase the gap. ! WARNING When opening the check valve always stand to one side and loosen a little at a time until grease starts to come out. If you over-loosen too much grease could spurt out or the valve cover fly out and cause serious injury. 8-3-4-5 A A A343970 ! WARNING Under no circumstances must the check valve be dismantled or any attempt made to remove the grease nipple from the check valve 8-3-4-9 If a gap C exists between the idler wheel shaft and the track frame, you may use pressure to apply the grease. If there is no gap C after the application of grease, then the necessary repairs must be carried out. Note: Excessive tension can cause the track rail to wear the drive rollers and sprocket, insufficient tension can cause wear to the drive sprocket and track rail. 4 Lower the Track Remove the blocks from beneath the undercarriage and lower the track to the ground using the boom and dipper controls. 5 Repeat for the Opposite Track Slew the boom round to the other side and repeat steps 1 to 4 above. 9803/6420 Issue 2*
https://www.ebooklibonline.com Hello dear friend! Thank you very much for reading. Enter the link into your browser. The full manual is available for immediate download. https://www.ebooklibonline.com


