Introduction of GPIO & Physical Computing of Raspberry Pi
The Raspberry Pi's GPIO pins are a standout feature for physical computing enthusiasts, opening up a world of possibilities for connecting and controlling hardware components. Get ready to delve into the realm of GPIO and unleash the potential of these versatile pins for your projects. Whether you're a beginner or an experienced maker, understanding GPIO and physical computing on the Raspberry Pi can elevate your skills and creativity to a whole new level. Dive in and start experimenting with the incredible capabilities that these GPIO pins offer.

Download Presentation

Please find below an Image/Link to download the presentation.
The content on the website is provided AS IS for your information and personal use only. It may not be sold, licensed, or shared on other websites without obtaining consent from the author.If you encounter any issues during the download, it is possible that the publisher has removed the file from their server.
You are allowed to download the files provided on this website for personal or commercial use, subject to the condition that they are used lawfully. All files are the property of their respective owners.
The content on the website is provided AS IS for your information and personal use only. It may not be sold, licensed, or shared on other websites without obtaining consent from the author.
E N D
Presentation Transcript
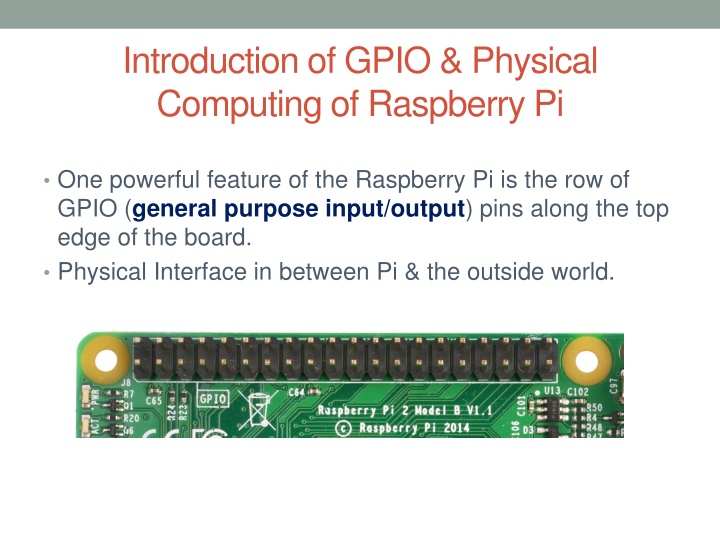
Introduction of GPIO & Physical Computing of Raspberry Pi One powerful feature of the Raspberry Pi is the row of GPIO (general purpose input/output) pins along the top edge of the board. Physical Interface in between Pi & the outside world.
How GPIO Pin works? OUTPUT: Each pin can turn on or off,or go HIGH or LOW in computing terms. When the pin is HIGH it outputs 3.3 volts (3v3); when the pin is LOW it is off.
How GPIO Pin works? OUTPUT: The LED is connected to a GPIO pin (which can output +3v3) and a ground pin (which is 0v) INPUT: For input connect button across an input pin and a ground pin.
A NOTE ON PIN NUMBERING When programming the GPIO pins there are two different ways to refer to them: GPIO numbering and physical numbering. GPIO NUMBERING These are the GPIO pins as the computer sees them. The numbers don't make any sense to humans, they jump about all over the place, so there is no easy way to remember them. You will need a printed reference or a reference board that fits over the pins.
PHYSICAL NUMBERING The other way to refer to the pins is by simply counting across and down from pin 1 at the top left (nearest to the SD card). This is 'physical numbering' and it looks like this:
Controlling The Led With Python import RPi.GPIO as GPIO GPIO.setmode(GPIO.BOARD) GPIO.setup(7, GPIO.OUT) GPIO.output(7,True) ## Import GPIO library ## Use board pin numbering ## Setup GPIO Pin 7 to OUT ## Turn on GPIO pin 7