How to Schedule a Screening at Quest Diagnostics
Learn how to schedule a screening at a Quest Diagnostics Patient Service Center step-by-step. Create an account, choose a location, select a date and time, confirm your appointment, and access your order requisition. Easily manage your appointment from the dashboard.
Download Presentation

Please find below an Image/Link to download the presentation.
The content on the website is provided AS IS for your information and personal use only. It may not be sold, licensed, or shared on other websites without obtaining consent from the author.If you encounter any issues during the download, it is possible that the publisher has removed the file from their server.
You are allowed to download the files provided on this website for personal or commercial use, subject to the condition that they are used lawfully. All files are the property of their respective owners.
The content on the website is provided AS IS for your information and personal use only. It may not be sold, licensed, or shared on other websites without obtaining consent from the author.
E N D
Presentation Transcript
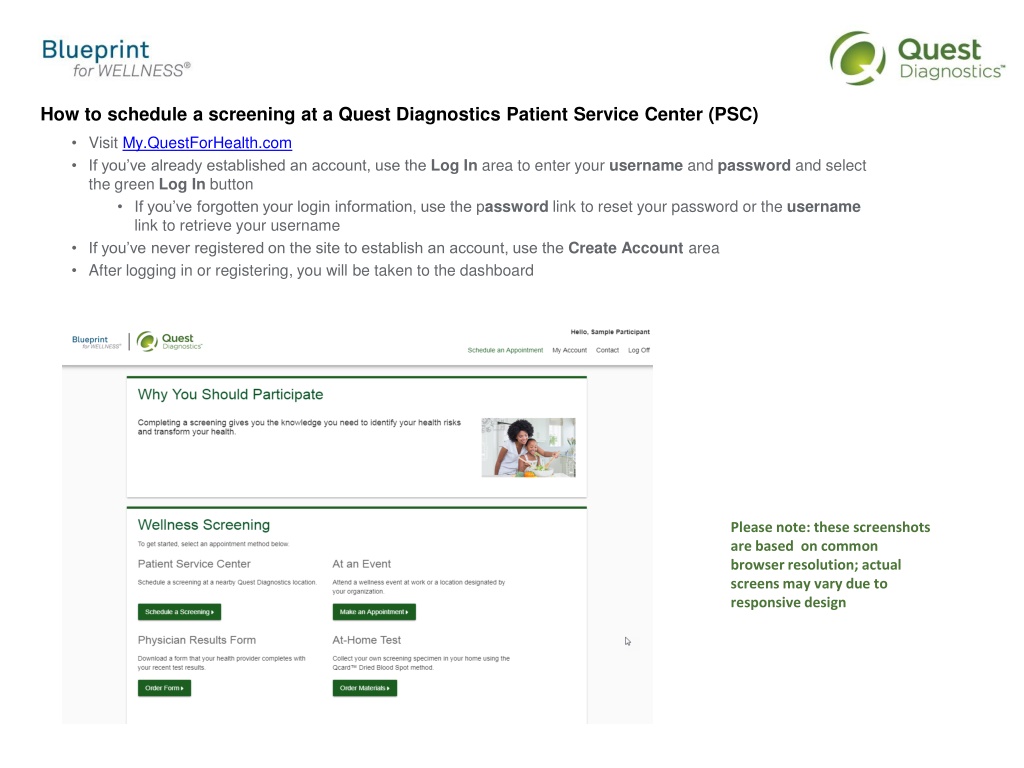
How to schedule a screening at a Quest Diagnostics Patient Service Center (PSC) Visit My.QuestForHealth.com If you ve already established an account, use the Log In area to enter your username and password and select the green Log In button If you ve forgotten your login information, use the password link to reset your password or the username link to retrieve your username If you ve never registered on the site to establish an account, use the Create Account area After logging in or registering, you will be taken to the dashboard Please note: these screenshots are based on common browser resolution; actual screens may vary due to responsive design
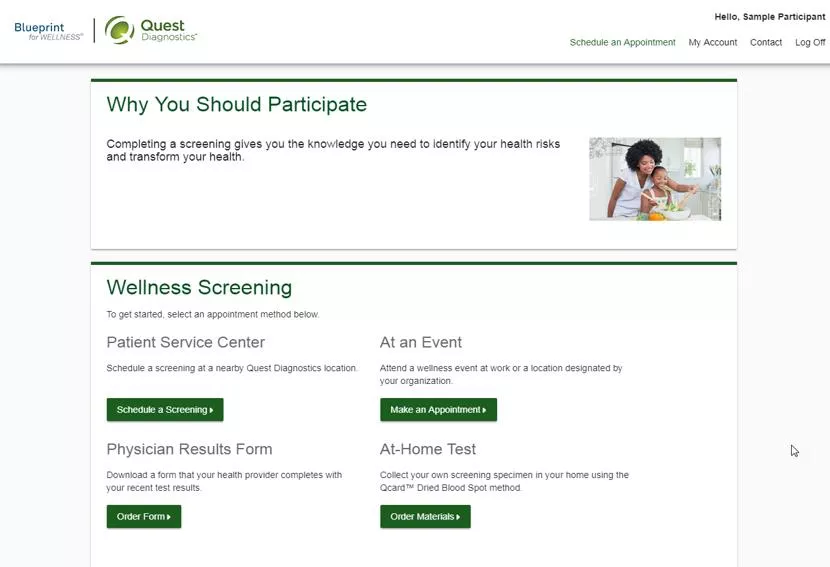
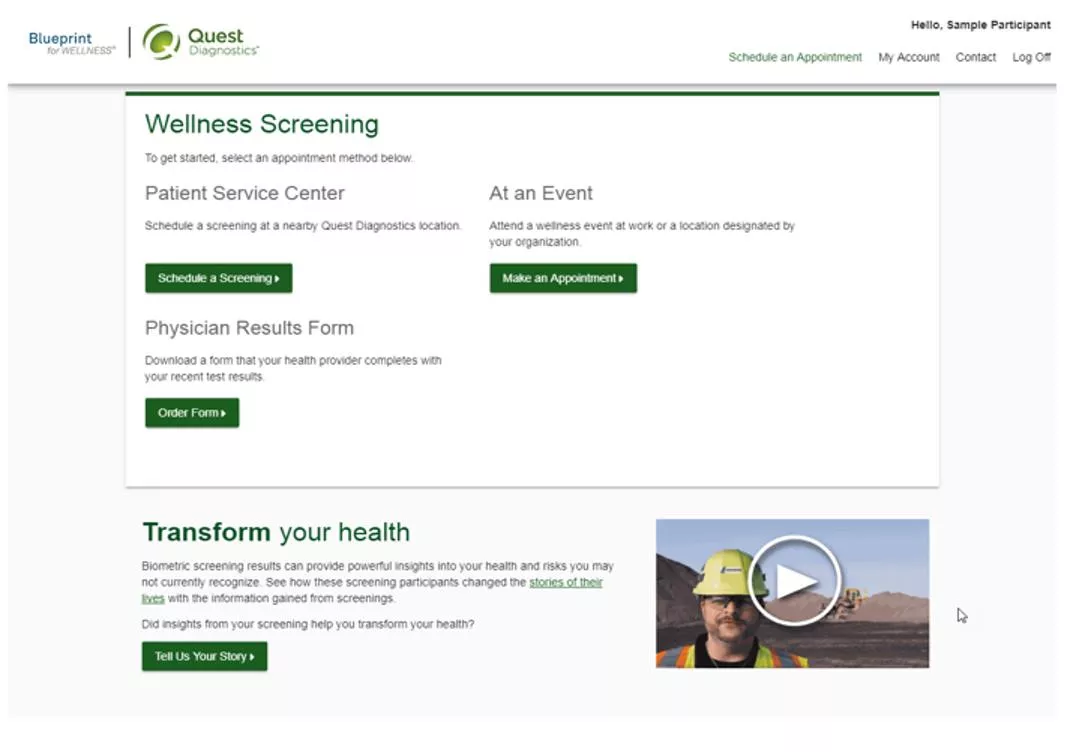
To schedule a screening at a PSC, in the Wellness Screening section, under Patient Service Center, select the green Schedule a Screening button
Select the Quest Diagnostics PSC location where youd like to complete your screening Note: To search for PSC locations in other areas than your home zip code, simply change the zip code Select the Continue button
Click on the calendar icon to choose a date for your screening Select the Time you would like to complete your screening. Note: Unavailable times will not display. select the Continue button
Verify that all the appointment details shown on the screen are accurate select the Confirm button NOTE: Your appointment is not scheduled until you select the green Confirm button
Once your appointment has been scheduled you will arrive at the Confirmation screen You can download your Order Requisition by selecting Print Order Requisition on the left side of the screen select the green Back to Dashboard link to return to the dashboard
On the dashboard, you will be able to see your scheduled appointment You can select the green Download to Calendar link to add the appointment to your calendar If needed, you can also use the green buttons to cancel or reschedule your appointment selecting the Need more appointment information? link will take you back to the appointment confirmation page
