FAILURE ANALYSIS
Failure analysis is crucial for addressing disruptions in components or assemblies, preventing recurrence, and ensuring safety. Explore the causes of failure, general procedures, and key considerations in failure analysis to enhance reliability and performance.
Download Presentation

Please find below an Image/Link to download the presentation.
The content on the website is provided AS IS for your information and personal use only. It may not be sold, licensed, or shared on other websites without obtaining consent from the author.If you encounter any issues during the download, it is possible that the publisher has removed the file from their server.
You are allowed to download the files provided on this website for personal or commercial use, subject to the condition that they are used lawfully. All files are the property of their respective owners.
The content on the website is provided AS IS for your information and personal use only. It may not be sold, licensed, or shared on other websites without obtaining consent from the author.
E N D
Presentation Transcript
FAILURE ANALYSIS M.Chandra. Lect./EM
Points of discussion Need for failure analysis. Defining failure of component. Causes of failure of mechanical components. General procedure of failure analysis. Failure mechanisms
Need for Failure Analysis Whenever failure of a component or a complete assembly takes place, disruption is observed, reliability and punctuality are hampered. In some of the cases safety is violated. Hence, whenever failure of any component takes place it becomes necessary to investigate it properly so that its recurrence is avoided.
When to Consider Failure In general, an engineering component or assembly is considered to have failed under the following three conditions when the component is Inoperable Operates but does not perform the intended function Operates but safety and reliability is very poor
Failure Analysis Failure analysis is a systematical approach of investigation to establish the important causes of the failure. Therefore , it is worth to familiar with 1. Fundamental causes of failure of mechanical components 2. General approach to be used for the failure analysis and prevention.
Fundamental Causes of Failure Improper design Improper selection of material Defect and discontinuities in metal itself Improper processing of materials Poor service conditions Poor assembly Poor maintenance
Improper Design: Design is developed without full knowledge of stress conditions owing to complexity of the geometry and Inability to use proper criteria for designing the engineering components. Duplicating a successful design for more severe loading condition.
Improper Selection Of Material Selection of a material for developing the design of a mechanical component in sight of operating conditions should be based on expected failure mechanism such as Ductile and brittle fracture. Fatigue. Creep. Corrosion. Wear etc.
Contd. For each type of expected failure mechanism a combination of the mechanical , physical and chemical properties should be possessed by the potential material to be selected for developing a design.
Contd. Deficient material selection can occur due to Reliance on test data for selection on material. Inability to select material in light of the expected failure mechanism to develop criteria for the design purpose.
Contd. Failure Mechanism Ductile fracture Brittle fracture Design Criteria Yield strength Fracture toughness, notch toughness, DBTT Fatigue strength with stress raiser, hardness Creep rate at given temperature Yield strength Toughness, corrosion resistance to specific temperature Fatigue Creep Plastic deformation SCC
Presence of defects and discontinuities in Presence of defects and discontinuities in raw/stock metal raw/stock metal Materials being used component may be deficient in many ways For eg: Rods , plates and flats produced by bulk deformation based process like rolling , forging and extrusion may have unfavorable flow of grains, surface cracks etc. While casting may have blow holes, porosity and dissolved gasses in solids for fabrication of an engineering
Unfavorable manufacturing processing Unfavorable manufacturing processing conditions conditions A wide range of manufacturing processes are Casting Forming Machining Welding cleaning Other processes like heat treatment , case hardening , surface coating etc.
Contd. The selection of inappropriate combination of process parameters for each of above mentioned manufacturing processes can lead to development of oDiscontinuities oDefects oUnfavorable metallurgical changes and so deterioration in performance of final product during the service.
Contd. Contd. These imperfections and impurities are mostly process specific and can exist in variety of forms due to improper selection of manufacturing processes and their parameters. For eg : in welding , as crater ,SC, PMZ , weld toe etc.
Poor service conditions: Failure of an engineering component abnormal service condition experienced by them for which they are not designed. These may appear in form of exposure of component to o Excessive high rate of loading o Unfavorable oxidation, corrosive, erosive environment oHigher or lower temperature ,conditions for which it has not been designed. can occur due
Poor assembly Error in assembly can be resulted in various ways such as: oAmbiguity in instructions oInsufficient or inappropriate assembly procedure oMisalignment oPoor workmanship Sometimes failures are also caused by the inadvertent error performed by the workers during assembly.
Poor Maintenance Strategy The failure of many moving mechanical components takes place due to poor maintenance plan. A very developed maintenance plan indicating each and very important step to be used for maintenance when, where, who and how is specified explicitly. Lack of information on proper schedule of maintenance ,procedure of the maintenance frequently cause premature failure of the moving components . such what,
General procedure for failure analysis In the field of engineering ,mechanical components are : Made using variety of material. Processed by different manufacturing processes and Used in extremely wide range of service condition. Potential causes of failure of the components and their mechanism also numerous.
Establishing Failure Analysis procedure Establishing Failure Analysis procedure Therefore, procedure of failure analysis of each component should be different. Failure analysis procedure for each case must be developed after giving proper thought on 1. Possible sequence of events before failure along with proper evaluation of the situation 2 Proper consideration of material, manufacturing process, service history and actual working condition.
So how to go ahead The sequence of steps will largely be determined by the findings of the investigation at any stage. Main objective of collecting evidences regarding causes of the failure is to establish sequence of events prior to the failure. Provide suitable recommendations can be made to prevent the similar failure in future.
General procedure for Failure Analysis Collection of background information about failed components. Preliminary examination of failed components. Macroscopic observation of fracture surfaces and components. Selection, preservation of the sample. Chemical analysis. Evaluation of the mechanical properties of the failed components. Microscopic observation of fracture components Establishing the fracture mechanism. Analysis of findings of inspection.
FRACTURE Fracture is a separation of an object into two or more pieces under the action of load. Brittle fracture: It is the sudden , very rapid cracking of component under stress where metal exhibits little or no evidence of ductility before fracture. Rapid crack propagation Perpendicular to applied load Crystalline in nature Ductile fracture: Fracture occurs with plastic deformation. Fibrous in nature.
Factors contributing brittle failure Three basic factors contribute to a brittle cleavage type of fracture: A triaxial state of stress. A low temperature. A high strain rate / a rapid rate of loading.
DUCTILE-TO-BRITTLE TRANSITION The notch bar impact test is most meaningful when conducted over a range of temperature, so that the temperature at which the ductile to brittle transition takes place can be determined. The energy absorbed decreases with decreasing temperature. But for most cases the decrease does not occur sharply at a certain temperature.
Contd. Transition temperature is a important factor in selecting material from the stand point of notch toughness. The material with the lowest transition temperature is to be preferred. Reliance on impact resistance at only one temperature can be misleading.
Stress-Strain Curve STRESS STAIN CURVE FOR BRITTLE AND DUCTILE FALURE
TOUGHNESS VS TEMP Toughness is a function of temperature & the impact value of a material changes with temp. Generally, at lower temps, the impact energy of a material is decreased Charpy or Izod test is often repeated many times with each specimen tested at a different temperature. Material is more brittle at low temperatures & toughness is low. Material is more ductile at high temperatures & toughness is higher.
METALLERGICAL FACTORS AFFECTING TRANSITION TEMPERATURE Changes in chemical composition or microstructure of mild steel can change in transition temperature. The large change in transition temperature result from changes in the amount of carbon and manganese. Transition temperature is raised by carbon content in steel. Transition temperature is lowered by the Mn content in steel. Mn : C ratio should be at least 3:1 for satisfactory notch toughness. P has a strong effect in raising the transition temperature.
Contd. Ni (upto 2%) is beneficial in lowering transition temperature. Si (above 0.25%) appears to raise the transition temperature. Mo raises the transition temperature almost as rapidly as carbon. Cr has little effect. O2 content has a strong effect in raising transition temperature. Grain size has a strong effect on transition temperature-decrease in grain size decreases transition temperature.
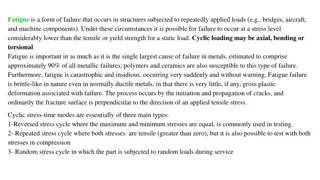
Fatigue failure Fatigue is the progressive, localized, permanent structural change that occurs in a material subjected to repeated or fluctuating strains at stresses having a maximum value less than the tensile strength of the material. Fatigue failure is caused by the simultaneous action of cyclic stress, tensile stress and plastic strain.
Appearance of fatigue fracture Fatigue results in a brittle appearing fracture, with no gross deformation at the fracture. A fatigue failure can usually be recognized from the appearance of the fracture surface which shows a smooth region due to rubbing action as the crack propagates through the section and a rough region where the material has failed in a ductile manner when the cross section was no longer able to carry the load . Frequently the progress of the fracture is indicated by a series of rings or beachmarks progressing inward from the point of initiation of the failure. Fatigue failure usually occurs at a point of stress concentration.
Type of loading: Features on the fracture surface are strongly affected by the type and magnitude of loading. Unidirectional bending: Reversed bending: Rotational bending: Torsional loading:
Type of loading: Unidirectional bending: Fatigue cracking may be initiated at the point of highest stress, adjacent to the rigid mounting. Several cracks may have been active before one of them become large enough to cause the final fracture. Reversed bending: If the loading is alternating instead of fluctuating , fatigue may be initiated on both sides. Final fracture zone will be in between two fatigue zones. The size of final fracture zone is indicative of the relative loading.
Type of loading: Rotational bending: Rotating round shaft is commonly subjected to rotational bending. Every point on the periphery sustains a tensile stress, then a compressive stress , once every revolution. Asymmetrical development of crack front to extend preferentially in the direction opposite to that of rotation. The crack front usually swings around about 150 or more. Distribution of the origins of a multiple-origin crack.
Type of loading: Torsional loading: Same beach marks and ridges as those produced by bending stress, Longitudinal stress raisers are of considerable practical importance. Orientation of fracture is 450 to the shaft centerline. Fracture face typically has one or more origins.
Reversed torsional fatigue Two 450 cracks started at the keyway Failure of a splined shaft
Endurance limit Fatigue limit (endurance limit) occurs for some materials (e.g. some Fe and Ti alloys). In this case, the S N curve becomes horizontal at large N. The fatigue limit is a maximum stress amplitude below which the material never fails, no matter how large the number of cycles is.
Factor affecting Fatigue life & Solution Quality of the surface (scratches, sharp transitions). Magnitude of stress Solutions: Polishing (removes machining flaws etc.) Introducing compressive stresses (compensate for applied tensile stresses) into thin surface layer by Shot Peening Case Hardening Optimizing geometry - avoid internal corners, notches etc.
Thank You! Thank You!


