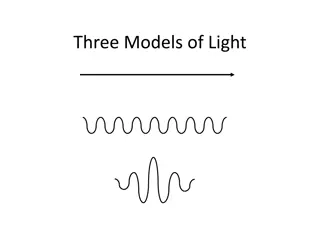
Exploring Light and Its Properties with Year 6 Students
Dive into the world of light with Year 6 students and their parents through engaging activities and discussions. Explore how light travels, the concept of rays, and the interaction of light with different materials. Support your child's learning in science by understanding key principles about light and its behavior. This session aims to enhance your child's understanding of the properties of light through hands-on activities and thought-provoking discussions.

Download Presentation

Please find below an Image/Link to download the presentation.
The content on the website is provided AS IS for your information and personal use only. It may not be sold, licensed, or shared on other websites without obtaining consent from the author. If you encounter any issues during the download, it is possible that the publisher has removed the file from their server.
You are allowed to download the files provided on this website for personal or commercial use, subject to the condition that they are used lawfully. All files are the property of their respective owners.
The content on the website is provided AS IS for your information and personal use only. It may not be sold, licensed, or shared on other websites without obtaining consent from the author.
E N D
Presentation Transcript
Year 6: Light Year 6: Light For parents Thank you for supporting your child s learning in science. Before the session: Please read slide 2 so you know what your child is learning and what you need to get ready. As an alternative to lined paper, slide 6 may be printed for your child to record on. During the session: Share the learning intentions on slide 2. Support your child with the main activities on slides 3-7, as needed. Slides 8 has further, optional activities. Slide 9 has a glossary of key terms. Reviewing with your child: Slide 10 gives an idea of what your child may produce. Light travels in straight lines Light travels in straight lines Year 6 Year 6 Age 10 Age 10- -11 11
Light Light Light travels in straight lines Light travels in straight lines Activities (pages 3-7): 35 - 45 mins Key Learning We see things because light travels from a light source into our eyes. Light travels in straight lines. Household items to support learning: two non-opaque coloured plastic cups/bowls access to a window and an indoor light Use lined paper, a ruler and a pencil for recording. Alternatively you may wish to print page 6 as a worksheet. I can draw ray diagrams showing how light travels from a light source into an eye. Find out more (page 8) You may like to model how light travels through different materials. For this you will need: the kitchen draining board, a marble, kitchen foil. 2
Explore, review, think, talk Explore, review, think, talk What do you already know about light and how it travels through materials? What do you already know about light and how it travels through materials? (5 (5- -10 minutes) 10 minutes) Cover your eyes with your hands and open your eyes. Talk or think about what you see and why. Uncover your eyes and look through a window. Talk or think about how things look and why. Next hold two plastic cups,oneovereach eye. What can you see now? Your hands are opaque. They block lighttravellingtoyoureyes,soit sdark. Glass is transparent. Light passes through glass easily, so you see a clear image. The cups are translucent, meaning that they let some light through. What you see is cloudy or blurred. Now watch this short clip all about light www.youtube.com/watch?v=a8xt_m4iMYc 3
Explore, review, think, talk Explore, review, think, talk What do you already know about how light travels? What do you already know about how light travels? (10 minutes) (10 minutes) Think or talk about what these pictures tell you about how light travels Lighthouse beam Shadows of trees Sunlight through windows Sunlight in woods Sunlight through the clouds Shadows and reflections Laser light show 4
Investigating how light travels and drawing ray diagrams Investigating how light travels and drawing ray diagrams Observing what you can and can t see and representing how light travels Observing what you can and can t see and representing how light travels (5 (5- -10 minutes) 10 minutes) Make a tube by rolling up a piece of paper. Hold it up to one eye like a telescope, and close or cover your other eye. Point this at a room light/lamp giving out light (not the Sun). Talk or think about what you can see through the tube. You can only see what is directly in line with the tube (and the inside of it). This is because light travels in a straight line, so the only light entering your eye has travelled along the tube. That s why we can t see round corners. We can draw a ray diagram to show the path of light travelling from a light source to your eye: My eye light ray Lamp (light source ) The arrow shows the direction in which light travels from the light source into your eye. 5
I can draw ray diagrams showing how light travels from a light source into an eye. Draw two labelledray diagrams showing how a light ray travels in straight lines from a light source to your eyes. In 1) use a torch for the light source and in 2) a candle. 1) Tips: Use a ruler for your straight lines. Always draw an arrow on each line showing the direction that the light is travelling in. 2) Only draw one light ray from each light source (even though light is normally emitted in lots of different directions). 6
Think and find out more Think and find out more Explore what questions you have about light and find more about it. Explore what questions you have about light and find more about it. (15 minutes) (15 minutes) What questions do you have about light? Here are some pictures that might help you think of some Watch this short clip and write down 10 new things you learn. www.youtube.com/watch?v=a8xt_m4iMYc Learn more about the speed of light and find out how long it takes for the Sun s light to reach Earth. https://kids.kiddle.co/Speed_of_light and/or www.youtube.com/watch?v=Z2ii1ydXKZY (0.5 -3mins) Find out about the invention of the electric light bulb. www.dkfindout.com/uk/science/amazing-inventions/ light-bulb 7
Take it further Modelling light rays in materials Take it further Modelling light rays in materials Observing a model of light travelling though different types of material Observing a model of light travelling though different types of material (Optional (Optional - - 10 minutes) 10 minutes) Light rays are affected when they hit something: When a light ray hits an opaque material it is reflected and/or its energy is absorbed. Light cannot travel through an opaque material. When light hits a translucent material only some of it goes through. The light rays that continue change direction in an unpredictable way. This scattering blurs the image. When a light ray hits a transparent material at right angles, its direction remains the same. This means we see a clear image through air and windows. You could model a light ray hitting transparent, translucent and opaque materials. To do this: Roll a marble along a groove on your kitchen draining board and place something solid in its path. Which property does this represent? Now place a flat piece of paper in the marble s path. Which property does this represent? Finally smooth some kitchen foil into the grooves of the draining board along part of the marble s path. What happens to it now? 8
Glossary of terms dark (scientific): Dark is the absence of light. (everyday): Almost no light. image: Animageisapictureofhowyouseeobjectswhenlightfromthemreachesyoureyes. light:Light is the form of energy that makes it possible for us to see things with our eyes. light ray: A light ray is a straight line showing the direction of travel of light. light source: A light source emits (gives out) light. It can be natural or man-made. opaque: Opaque materials/objects block all light. ray diagram: A ray diagram is a drawing showing the straight-line paths that light travels in from a light source to the eye, often reflecting off objects on the way. reflect: Light reflectswhen it bounces back off a surface or object. All objects reflect some light otherwise we couldn t see them. scatter: If a light ray scatters it changes direction to a different random direction. straight lines: A straight line continues in the same direction and does not curve. transparent: Transparent materials look clear, as all light passes through them. translucent: Translucent materials block some of the light and scatter the rest. This makes the images appear blurred. 9
Possible learning outcome for reviewing your work: I can draw ray diagrams showing how light travels from a light source into an eye The light source is a torch in the first diagram. The light ray comes out of the front of the torch. It should be drawn touching the torch. In real life light rays are emitted (given out) in many directions from the front of the torch like this: Always use a ruler to represent light rays, since light travels in straight lines. You can either draw an eye or a face, but the light ray must point towards the eye. In order to see anything, light either emitted by the object (or light from a light source reflected off an object) must enter the eye. In the second diagram the light source is a candle. The light ray should be shown starting from the flame (not the middle of the candle). It should be drawn touching the flame. In reality light rays are emitted (given out) in all directions from a candle flame like this: In a labelled diagram all the important things should be labelled. If the diagram looks too crowded, you can move your words to the edges of the page and use arrows to indicate what object they relate to. 10