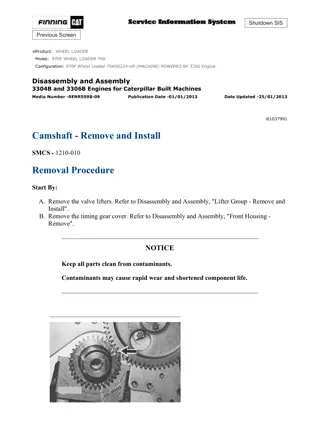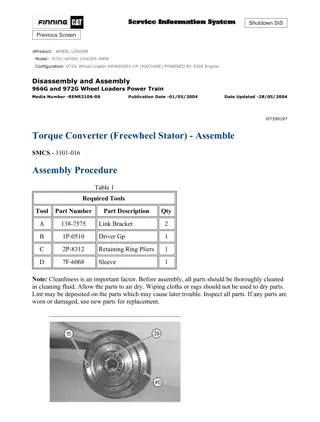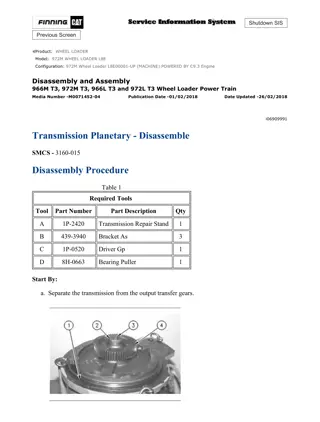
Caterpillar Cat 924H Wheel Loader (Prefix KLN) Service Repair Manual Instant Download
Please open the website below to get the complete manualnn//
Download Presentation

Please find below an Image/Link to download the presentation.
The content on the website is provided AS IS for your information and personal use only. It may not be sold, licensed, or shared on other websites without obtaining consent from the author. Download presentation by click this link. If you encounter any issues during the download, it is possible that the publisher has removed the file from their server.
E N D
Presentation Transcript
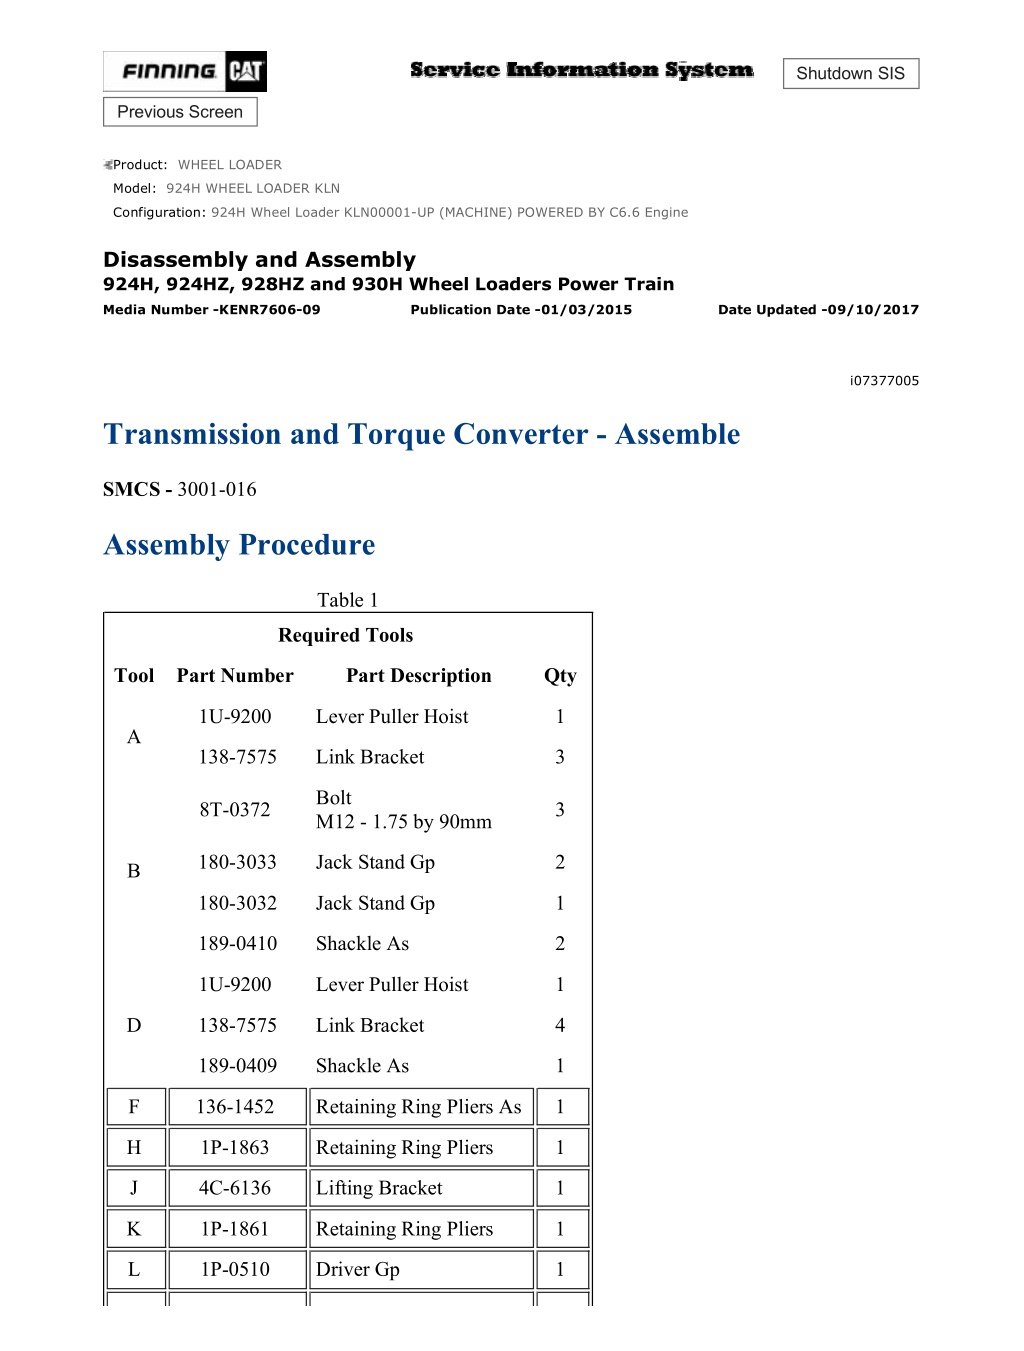
924H Wheel Loader KLN00001-UP (MACHINE) POWERED BY C6.6 Engine(SEBP... 1/32 Shutdown SIS Previous Screen Product: WHEEL LOADER Model: 924H WHEEL LOADER KLN Configuration: 924H Wheel Loader KLN00001-UP (MACHINE) POWERED BY C6.6 Engine Disassembly and Assembly 924H, 924HZ, 928HZ and 930H Wheel Loaders Power Train Media Number -KENR7606-09 Publication Date -01/03/2015 Date Updated -09/10/2017 i07377005 Transmission and Torque Converter - Assemble SMCS - 3001-016 Assembly Procedure Table 1 Required Tools Tool Part Number Part Description Qty 1U-9200 Lever Puller Hoist 1 A 138-7575 Link Bracket 3 Bolt M12 - 1.75 by 90mm 8T-0372 3 180-3033 Jack Stand Gp 2 B 180-3032 Jack Stand Gp 1 189-0410 Shackle As 2 1U-9200 Lever Puller Hoist 1 D 138-7575 Link Bracket 4 189-0409 Shackle As 1 F 136-1452 Retaining Ring Pliers As 1 H 1P-1863 Retaining Ring Pliers 1 J 4C-6136 Lifting Bracket 1 K 1P-1861 Retaining Ring Pliers 1 L 1P-0510 Driver Gp 1 https://127.0.0.1/sisweb/sisweb/techdoc/techdoc_print_page.jsp?returnurl=/sis... 2021/1/11
924H Wheel Loader KLN00001-UP (MACHINE) POWERED BY C6.6 Engine(SEBP... 2/32 M 4C-3652 Compressor Assembly 1 N 1P-1857 Retaining Ring Pliers 1 R 4C-6399 Compressor Assembly 1 S 9S-3263 Thread Lock Compound - T 1U-8846 Gasket Sealant - U 4C-6402 Expander Tool Gp 1 V 8S-2328 Dial Indicator Gp 1 Note: Cleanliness is an important factor. Before assembly, thoroughly clean all parts in cleaning fluid. Allow the parts to air dry. Do not use wiping cloths or rags to dry parts. Lint may be deposited on the parts which may cause trouble. Inspect all parts. If any parts are worn or damaged, use new parts for replacement. Dirt and other contaminants can damage the precision component. Perform assembly procedures on a clean work surface. Keep components covered and protected at all times. Note: Check the O-ring seals, the gaskets, and the seals for wear or for damage. Replace the components, if necessary. NOTICE Care must be taken to ensure that fluids are contained during performance of inspection, maintenance, testing, adjusting, and repair of the product. Be prepared to collect the fluid with suitable containers before opening any compartment or disassembling any component containing fluids. Refer to Special Publication, NENG2500, "Dealer Service Tool Catalog" for tools and supplies suitable to collect and contain fluids on Cat products. Dispose of all fluids according to local regulations and mandates. https://127.0.0.1/sisweb/sisweb/techdoc/techdoc_print_page.jsp?returnurl=/sis... 2021/1/11
924H Wheel Loader KLN00001-UP (MACHINE) POWERED BY C6.6 Engine(SEBP... 3/32 Illustration 1 g01399408 1. Install gear (148) and retaining ring (147). Raise the temperature of bearing cone (146) to install bearing cone (146). Illustration 2 g01399402 2. Raise the temperature of bearing cone (145) to install bearing cone (145). Illustration 3 g01399398 3. Lower the temperature of bearing cup (143) and install bearing cup (143). Install lip seal (144). Note: Lubricate the sealing lip with the lubricant that is being sealed. 4. Install shield assembly (142) and bolts (141). Tighten bolts (141) to a torque of 55 10 N m (41 7 lb ft). https://127.0.0.1/sisweb/sisweb/techdoc/techdoc_print_page.jsp?returnurl=/sis... 2021/1/11
https://www.ebooklibonline.com Hello dear friend! Thank you very much for reading. Enter the link into your browser. The full manual is available for immediate download. https://www.ebooklibonline.com
924H Wheel Loader KLN00001-UP (MACHINE) POWERED BY C6.6 Engine(SEBP... 4/32 Illustration 4 g01399397 5. Install the output shaft and gear (140). Illustration 5 g01399379 6. Install lip seal (137). Lower the temperature of bearing cup (136) and install bearing cup (143). Install seal (135). Illustration 6 g06299489 7. Install shims (134), cage (133), and bolts (132). https://127.0.0.1/sisweb/sisweb/techdoc/techdoc_print_page.jsp?returnurl=/sis... 2021/1/11
924H Wheel Loader KLN00001-UP (MACHINE) POWERED BY C6.6 Engine(SEBP... 5/32 8. Use shims as required to achieve 0.06 mm (0.002 inch) to 0.13 mm (0.005 inch) of end play on the output shaft. 9. Tighten bolts (132) to a torque of 70 10 N m (52 7 lb ft). Illustration 7 g01399325 10. Install lever (131) and parking brake assembly (130). 11. Install plate (129). Install bolts (128). Illustration 8 g01399321 12. Install brake drum (127) and yoke (126) together. Install seal (125). https://127.0.0.1/sisweb/sisweb/techdoc/techdoc_print_page.jsp?returnurl=/sis... 2021/1/11
924H Wheel Loader KLN00001-UP (MACHINE) POWERED BY C6.6 Engine(SEBP... 6/32 Illustration 9 g01399193 13. Install washer (124) and bolt (123). Tighten bolt (123) to a torque of 120 20 N m (89 15 lb ft). Illustration 10 g01399185 14. Install yoke (122), washer (121), and bolt (120). Tighten bolt (120) to a torque of 120 20 N m (89 15 lb ft). Illustration 11 g01399032 15. Lower the temperature of bearing cup (117) and install bearing cup (117). Install bearings (118) and (119). https://127.0.0.1/sisweb/sisweb/techdoc/techdoc_print_page.jsp?returnurl=/sis... 2021/1/11
924H Wheel Loader KLN00001-UP (MACHINE) POWERED BY C6.6 Engine(SEBP... 7/32 Illustration 12 g01399007 16. Install gear (114). Raise the temperature of bearing cone (113) and carrier (111). Install bearing cone (113) and carrier (111). Install ring seal (112) onto carrier (111). 17. Raise the temperature of bearing cone (116). Install gear (115) and bearing cone (116). Illustration 13 g01398975 18. Install input shaft assembly (110). Illustration 14 g01400893 19. Install seals (109) onto the piston. https://127.0.0.1/sisweb/sisweb/techdoc/techdoc_print_page.jsp?returnurl=/sis... 2021/1/11
924H Wheel Loader KLN00001-UP (MACHINE) POWERED BY C6.6 Engine(SEBP... 8/32 Illustration 15 g01401266 Illustration 16 g01398781 Note: Lubricate the seals and the bore with the lubricant that is being sealed. 20. Position first gear and third gear clutch group (81), as shown. Install piston (108) and spring (107). 21. Install seal assembly (105) and ring (106). Illustration 17 g01398814 https://127.0.0.1/sisweb/sisweb/techdoc/techdoc_print_page.jsp?returnurl=/sis... 2021/1/11
924H Wheel Loader KLN00001-UP (MACHINE) POWERED BY C6.6 Engine(SEBP... 9/32 Improper assembly of parts that are spring loaded can cause bodily injury. To prevent possible injury, follow the established assembly procedure and wear protective equipment. 22. Position Tooling (R) onto seal assembly (105). Use Tooling (R) and a suitable press to compress the clutch spring. Install retaining ring (104). Slowly release the spring tension. Illustration 18 g01398776 23. Install retaining ring (102). Install clutch plates and discs (103). 24. Install plate (101) and retaining ring (100). Illustration 19 g01398774 25. Install washer (99) and thrust disc (98). https://127.0.0.1/sisweb/sisweb/techdoc/techdoc_print_page.jsp?returnurl=/sis... 2021/1/11
924H Wheel Loader KLN00001-UP (MACHINE) POWERED BY C6.6 Engine(SE... 10/32 Illustration 20 g01398773 26. Lower the temperature of bearing (97) to install bearing (97) into hub (96). Install hub (96) onto gear (94). 27. Use Tooling (H) to install retaining ring (95). Illustration 21 g01398567 28. Install gear (94) and thrust disc (93). Illustration 22 g01398565 29. Install gear (92) and spacer (91). https://127.0.0.1/sisweb/sisweb/techdoc/techdoc_print_page.jsp?returnurl=/sis... 2021/1/11
924H Wheel Loader KLN00001-UP (MACHINE) POWERED BY C6.6 Engine(SE... 11/32 Illustration 23 g01401044 30. Raise the temperature of bearing (90) to install bearing (90). 31. Refer to Step 58 through 65 for the assembly of the clutch pack. Illustration 24 g01398664 32. Install thrust disc (89). https://127.0.0.1/sisweb/sisweb/techdoc/techdoc_print_page.jsp?returnurl=/sis... 2021/1/11
924H Wheel Loader KLN00001-UP (MACHINE) POWERED BY C6.6 Engine(SE... 12/32 Illustration 25 g01398657 33. Lower the temperature of bearing (88) to install bearing (88) into hub (85). Use Tooling (K) to Install retaining ring (87). Illustration 26 g01398645 34. Use Tooling (L) to install hub (85) into gear (84). Use Tooling (H) to install retaining ring (86). Illustration 27 g01398561 35. Install gear (84), thrust disc (83), and retaining ring (82). https://127.0.0.1/sisweb/sisweb/techdoc/techdoc_print_page.jsp?returnurl=/sis... 2021/1/11
924H Wheel Loader KLN00001-UP (MACHINE) POWERED BY C6.6 Engine(SE... 13/32 Illustration 28 g01398560 36. Attach Tooling (J) and a suitable lifting device to first gear and third gear clutch group (81). The weight of clutch group (81) is approximately 45 kg (100 lb). Install clutch group (81). Illustration 29 g01401308 37. Position the reverse and second clutch group (60), as shown. 38. Refer to Step 58 through 65 for the assembly of the clutch pack. 39. Install thrust disc (80). Illustration 30 g01398456 40. Lower the temperature of bearing (79) to install bearing (79) into hub (76). Use Tooling (K) to Install retaining ring (78). https://127.0.0.1/sisweb/sisweb/techdoc/techdoc_print_page.jsp?returnurl=/sis... 2021/1/11
924H Wheel Loader KLN00001-UP (MACHINE) POWERED BY C6.6 Engine(SE... 14/32 Illustration 31 g01398437 41. Use Tooling (L) to install hub (76) into gear (75). Use Tooling (H) to install retaining ring (77). Illustration 32 g01398280 42. Install gear (75). https://127.0.0.1/sisweb/sisweb/techdoc/techdoc_print_page.jsp?returnurl=/sis... 2021/1/11
924H Wheel Loader KLN00001-UP (MACHINE) POWERED BY C6.6 Engine(SE... 15/32 Illustration 33 g01398180 43. Install thrust disc (74), thrust disc (73), spacer (72), gear (71), spacer (70), and bearing (69). 44. Raise the temperature of bearing (69) to install bearing cone (69). https://127.0.0.1/sisweb/sisweb/techdoc/techdoc_print_page.jsp?returnurl=/sis... 2021/1/11
924H Wheel Loader KLN00001-UP (MACHINE) POWERED BY C6.6 Engine(SE... 16/32 Illustration 34 g01401335 45. Reposition the reverse and second clutch group (60), as shown. 46. Refer to Step 58 through 65 for the assembly of the clutch pack. 47. Install thrust disc (68). Illustration 35 g01398270 48. Lower the temperature of bearing (67) to install bearing (67) into hub (64). Use Tooling (K) to install retaining ring (66). Illustration 36 g01398268 49. Use Tooling (L) to install hub (64) into gear (63). Use Tooling (H) to install retaining ring (63). https://127.0.0.1/sisweb/sisweb/techdoc/techdoc_print_page.jsp?returnurl=/sis... 2021/1/11
924H Wheel Loader KLN00001-UP (MACHINE) POWERED BY C6.6 Engine(SE... 17/32 Illustration 37 g01397987 50. Install gear (63), thrust disc (62), and retaining ring (61). Illustration 38 g01397984 51. Attach Tooling (J) and a suitable lifting device to the reverse and second clutch group (60). The weight of clutch group (60) is approximately 32 kg (70 lb). Install clutch group (60). Illustration 39 g01397953 52. Position the forward low and the forward high clutch group (26), as shown. 53. Refer to Step 58 through 65 for the assembly of the clutch pack. https://127.0.0.1/sisweb/sisweb/techdoc/techdoc_print_page.jsp?returnurl=/sis... 2021/1/11
924H Wheel Loader KLN00001-UP (MACHINE) POWERED BY C6.6 Engine(SE... 18/32 54. Install thrust disc (59). Illustration 40 g01397964 Illustration 41 g01401685 Dimension (X) is 5.25 0.25 mm (0.207 0.010 inch). 55. Install bearing (58) into the hub at the depth of 5.25 0.25 mm (0.207 0.010 inch). 56. Use Tooling (K) to remove retaining ring (57) from hub (56). https://127.0.0.1/sisweb/sisweb/techdoc/techdoc_print_page.jsp?returnurl=/sis... 2021/1/11
924H Wheel Loader KLN00001-UP (MACHINE) POWERED BY C6.6 Engine(SE... 19/32 Illustration 42 g01397884 57. Install hub (56), thrust disc (55), and retaining ring (54). Illustration 43 g01397564 https://127.0.0.1/sisweb/sisweb/techdoc/techdoc_print_page.jsp?returnurl=/sis... 2021/1/11
924H Wheel Loader KLN00001-UP (MACHINE) POWERED BY C6.6 Engine(SE... 20/32 Personal injury can result from being struck by parts propelled by a released spring force. Make sure to wear all necessary protective equipment. Follow the recommended procedure and use all recommended tooling to release the spring force. 58. Reposition the clutch group, as shown. If equipped, install ball (51), spring (50), retainer (49), seal (48), and retaining ring (47) into body (52). 59. Lubricate the bore and seal (48) with the lubricant that is being sealed and install valve assembly (53). 60. Install rings (46). Illustration 44 g01397562 61. Install seals (45) onto piston (44). Note: Lubricate the seals with the lubricant that is being sealed. https://127.0.0.1/sisweb/sisweb/techdoc/techdoc_print_page.jsp?returnurl=/sis... 2021/1/11
924H Wheel Loader KLN00001-UP (MACHINE) POWERED BY C6.6 Engine(SE... 21/32 Illustration 45 g01397502 62. Install piston (44). 63. Install spring (43) and retainer (42). Illustration 46 g01397484 https://127.0.0.1/sisweb/sisweb/techdoc/techdoc_print_page.jsp?returnurl=/sis... 2021/1/11
924H Wheel Loader KLN00001-UP (MACHINE) POWERED BY C6.6 Engine(SE... 22/32 Personal injury can result from being struck by parts propelled by a released spring force. Make sure to wear all necessary protective equipment. Follow the recommended procedure and use all recommended tooling to release the spring force. 64. Install Tooling (M) onto retainer (42). Use Tooling (M) and a suitable press to compress the clutch spring. Install retaining ring (41). Slowly release the spring tension. Illustration 47 g01397401 65. Install discs (39) and plates (40). Install plate (38) and retaining ring (37). https://127.0.0.1/sisweb/sisweb/techdoc/techdoc_print_page.jsp?returnurl=/sis... 2021/1/11
924H Wheel Loader KLN00001-UP (MACHINE) POWERED BY C6.6 Engine(SE... 23/32 Illustration 48 g01396540 66. Install thrust disc (36). Illustration 49 g01396539 67. Lower the temperature of bearing (35) to install bearing (35) into hub (32). Use Tooling (K) to install retaining ring (34). https://127.0.0.1/sisweb/sisweb/techdoc/techdoc_print_page.jsp?returnurl=/sis... 2021/1/11
924H Wheel Loader KLN00001-UP (MACHINE) POWERED BY C6.6 Engine(SE... 24/32 Illustration 50 g01396271 68. Use Tooling (L) to install hub (32) into gear assembly (31). Use Tooling (H) to install retaining ring (33). Illustration 51 g01397412 69. Install gear assembly (31). Illustration 52 g01397406 70. Install thrust disc (30) and retaining ring (29). Note: If the plugs in the shaft were removed during disassembly use Tooling (U) to install the plugs. https://127.0.0.1/sisweb/sisweb/techdoc/techdoc_print_page.jsp?returnurl=/sis... 2021/1/11
924H Wheel Loader KLN00001-UP (MACHINE) POWERED BY C6.6 Engine(SE... 25/32 Illustration 53 g01396258 71. Use Tooling (J) and a suitable lifting device to remove the forward low and the forward high clutch group (26). The weight of the clutch group is approximately 27 kg (60 lb). Position shaft assembly (27) out of the way and install the forward low and the forward high clutch group (26). 72. Install sensors (28). Tighten sensors (28) to a torque of 37 7 N m (27 5 lb ft). Illustration 54 g01396015 73. Lower the temperature of bearing cup (24) and install bearing cup (24). Lower the temperature of bearings (25) and install bearings (25). https://127.0.0.1/sisweb/sisweb/techdoc/techdoc_print_page.jsp?returnurl=/sis... 2021/1/11
924H Wheel Loader KLN00001-UP (MACHINE) POWERED BY C6.6 Engine(SE... 26/32 Illustration 55 g01396014 74. Install bearing (22) into bearing support (21). Install bearing support (21) into the bearing. Use Tooling (H) to install retaining ring (23). Illustration 56 g01401529 Illustration 57 g01396199 https://127.0.0.1/sisweb/sisweb/techdoc/techdoc_print_page.jsp?returnurl=/sis... 2021/1/11
924H Wheel Loader KLN00001-UP (MACHINE) POWERED BY C6.6 Engine(SE... 27/32 75. Use a suitable press to install bearing assembly (20) into gear (18). Use Tooling (F) to install retaining ring (19). 76. Install gear (18) onto the stator support. Apply Tooling (S) to the threads of bolts (17). Install bolts (17). 77. Tighten bolts (17) to a torque of 12 3 N m (106 27 lb in). Illustration 58 g01393451 Illustration 59 g01395994 78. Install gear assembly (16) and bolts (15). Tighten bolts (15) to a torque of 55 10 N m (41 7 lb ft). https://127.0.0.1/sisweb/sisweb/techdoc/techdoc_print_page.jsp?returnurl=/sis... 2021/1/11
Suggest: If the above button click is invalid. Please download this document first, and then click the above link to download the complete manual. Thank you so much for reading
924H Wheel Loader KLN00001-UP (MACHINE) POWERED BY C6.6 Engine(SE... 28/32 Illustration 60 g01393407 79. Apply a continuous bead of Tooling (T) to the mating surface of the transmission housings. 80. Attach Tooling (D) and a suitable lifting device to housing assembly (13). The weight of housing assembly (13) is approximately 141 kg (310 lb). Position housing assembly (13) and install bolts (14). Tighten bolts (14) to a torque of 55 10 N m (41 7 lb ft). Illustration 61 g03336943 81. Use Tooling (V) to check the end play. Make sure that the shafts are free. After checking clearence, rotate shaft 7 times to ensure tapered roller bearing is seated. Use shims to obtain 0.05 mm (0.002 inch) to 0.15 mm (0.006 inch) of end play. https://127.0.0.1/sisweb/sisweb/techdoc/techdoc_print_page.jsp?returnurl=/sis... 2021/1/11
https://www.ebooklibonline.com Hello dear friend! Thank you very much for reading. Enter the link into your browser. The full manual is available for immediate download. https://www.ebooklibonline.com

