Caterpillar Cat 910 COMPACT WHEEL LOADER (Prefix 80U) Service Repair Manual Instant Download (80U00001-06734)
Please open the website below to get the complete manualnn//
Download Presentation

Please find below an Image/Link to download the presentation.
The content on the website is provided AS IS for your information and personal use only. It may not be sold, licensed, or shared on other websites without obtaining consent from the author. Download presentation by click this link. If you encounter any issues during the download, it is possible that the publisher has removed the file from their server.
E N D
Presentation Transcript
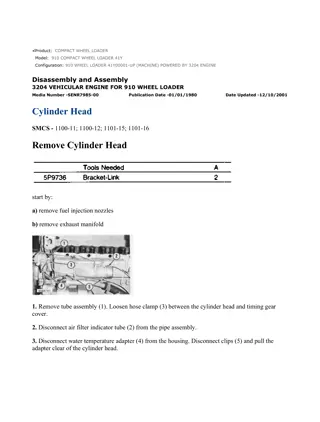
w 1/3(W) Product: COMPACT WHEEL LOADER Model: 910 COMPACT WHEEL LOADER 80U Configuration: 910 WHEEL LOADER 80U00001-06734 (MACHINE) Disassembly and Assembly 3204 VEHICULAR ENGINE FOR D3 TRACTOR, 931 TRACK-TYPE LOADER Media Number -REG01219-02 Publication Date -01/08/1978 Date Updated -10/10/2001 Cylinder Head (Precombustion Chamber) SMCS - 1100-11; 1100-12 Remove Cylinder Head (Precombustion Chamber) start by: a) remove rocker shaft and push rods (precombustion chamber) b) remove exhaust manifold 1. Remove fuel injection lines (1). Put caps on all openings to keep dirt out. 2. Loosen the hose clamp on the water connection between the head and timing gear cover. 3. Remove bolts (2) that hold the cylinder head to the cylinder block. 4. Install a 5/16"-18 NC forged eyebolt (3) in the cylinder head as shown. Fasten a hoist and remove the cylinder head. The weight is 130 lb. (59 kg). https://127.0.0.1/sisweb/sisweb/techdoc/techdoc_print_page.jsp?returnurl=/sisweb/sisw... 2023/5/16
w 2/3(W) Install Cylinder Head (Precombustion Chamber) 1. Clean the surfaces of the cylinder head and the cylinder block that make contact with each other. Make sure the surfaces are clean and dry. Install a new, dry gasket on the cylinder block. 2. Inspect the condition of water ferrule and seal (2). Make a replacement if needed. Put water ferrule and seal (2) in position with the adjusting screw of hose clamp (1) toward the top and approximately 45 to the right of vertical as seen from the front of the engine. 3. Make sure the seal is installed all the way into counterbore. 4. Install a 5/16"-18 NC forged eyebolt (3) in the head and fasten a hoist. Put the cylinder head in position on the cylinder block. 5. Put 5P3931 Anti-Seize Compound on the threads of the bolts and install the bolts that hold the cylinder head in place. Tighten the bolts in the cylinder head according to the following HEAD BOLT CHART. end by: a) install exhaust manifold b) install rocker shaft and push rods (precombustion chamber) https://127.0.0.1/sisweb/sisweb/techdoc/techdoc_print_page.jsp?returnurl=/sisweb/sisw... 2023/5/16
w 3/3(W) https://127.0.0.1/sisweb/sisweb/techdoc/techdoc_print_page.jsp?returnurl=/sisweb/sisw... 2023/5/16
https://www.ebooklibonline.com Hello dear friend! Thank you very much for reading. Enter the link into your browser. The full manual is available for immediate download. https://www.ebooklibonline.com
w 1/4(W) Product: COMPACT WHEEL LOADER Model: 910 COMPACT WHEEL LOADER 80U Configuration: 910 WHEEL LOADER 80U00001-06734 (MACHINE) Disassembly and Assembly 3204 VEHICULAR ENGINE FOR D3 TRACTOR, 931 TRACK-TYPE LOADER Media Number -REG01219-02 Publication Date -01/08/1978 Date Updated -10/10/2001 Cylinder Head SMCS - 1101-15; 1101-16 Disassemble Cylinder Head start by: a) remove cylinder heads 1. Fasten a hoist and put the cylinder head in position on tool (A). Use adapter plates (1) from tooling (A) to hold the head in place. https://127.0.0.1/sisweb/sisweb/techdoc/techdoc_print_page.jsp?returnurl=/sisweb/sisw... 2023/5/16
w 2/4(W) 2. Put the valve springs under compression with tool (C). 3. Remove the locks from the valves. 4. Remove tool (C), retainer, spring, washer and valve from the cylinder head. Put identification on the valve as to its location in the cylinder head. 5. Check the valve spring force with tool (B). Spring force must be 35 5 lb. (155 22 N) when the length of the spring force is 1.715 in. (43.56 mm). 6. Do Steps 2 through 5 for the remainder of the valves. 7. Remove the valve seat inserts with tooling (D). NOTE: The valve guides are part of the cylinder head. Measure the bore in each valve guide .75 in. (19.0 mm) from the outside edge on both ends of each valve guide. The bore must be .3745 .0005 in. (9.512 0.013 mm). The maximum permissible bore is .3760 in. (9.550 mm). Valve guides worn more than the maximum specification can be made to the original size by knurling. See RECONDITIONING PROCEDURES FORM NO. REG00867. Assemble Cylinder Head https://127.0.0.1/sisweb/sisweb/techdoc/techdoc_print_page.jsp?returnurl=/sisweb/sisw... 2023/5/16
w 3/4(W) 1. Clean and remove burrs and all foreign material from the valve seat bores. 2. Lower the temperature of the valve seat inserts and install them with tooling (A). NOTICE Do not make the diameter of the extractor (part of tooling A) in valve seat insert larger when the insert is installed in the cylinder head. 3. Grind the valve inserts according to specifications given in ENGINE SPECIFICATIONS. 4. Put clean engine oil on the valve stem. Install the valve, washer (3), spring (2) and retainer (1) in the cylinder head. https://127.0.0.1/sisweb/sisweb/techdoc/techdoc_print_page.jsp?returnurl=/sisweb/sisw... 2023/5/16
w 4/4(W) 5. Put the valve spring under compression with tool (C). 6. Install the locks on the valve stem with tool (B). Make sure locks (4) are in their correct position on the valve. The locks can be thrown from the valve when tool (C) is released if the locks are not in their correct position on the valve. 7. Remove tool (C) and hit the valve with a rubber hammer to be sure the locks are in their correct position. 8. Do Steps 4 through 7 for the remainder of the valves. end by: a) install cylinder heads https://127.0.0.1/sisweb/sisweb/techdoc/techdoc_print_page.jsp?returnurl=/sisweb/sisw... 2023/5/16
w 1/2(W) Product: COMPACT WHEEL LOADER Model: 910 COMPACT WHEEL LOADER 80U Configuration: 910 WHEEL LOADER 80U00001-06734 (MACHINE) Disassembly and Assembly 3204 VEHICULAR ENGINE FOR D3 TRACTOR, 931 TRACK-TYPE LOADER Media Number -REG01219-02 Publication Date -01/08/1978 Date Updated -10/10/2001 Valve Lifters SMCS - 1209-11; 1209-12 Remove Valve Lifters start by: a) remove cylinder head 1. Remove valve lifters (1) from the cylinder block with tool (A). Install Valve Lifters 1. Put STP Oil Treatment or Casite Motor Honey on the lifter face that makes contact with the camshaft. https://127.0.0.1/sisweb/sisweb/techdoc/techdoc_print_page.jsp?returnurl=/sisweb/sisw... 2023/5/16
w 2/2(W) 2. Install the valve lifters in the cylinder block with tool (A). end by: a) install cylinder head https://127.0.0.1/sisweb/sisweb/techdoc/techdoc_print_page.jsp?returnurl=/sisweb/sisw... 2023/5/16
w 1/2(W) Product: COMPACT WHEEL LOADER Model: 910 COMPACT WHEEL LOADER 80U Configuration: 910 WHEEL LOADER 80U00001-06734 (MACHINE) Disassembly and Assembly 3204 VEHICULAR ENGINE FOR D3 TRACTOR, 931 TRACK-TYPE LOADER Media Number -REG01219-02 Publication Date -01/08/1978 Date Updated -10/10/2001 Oil Pan SMCS - 1302-11; 1302-12 Remove Oil Pan 1. Remove drain plug (4) and drain the oil from the oil pan. 2. Remove oil level gauge (1). Remove bolts (2) that hold the oil pan in place. 3. Fasten a hoist to the engine. Lift the engine and remove oil pan (3). 4. Lower the engine on the engine stand. Install Oil Pan 1. Fasten a hoist and lift the engine. Inspect the oil pan gasket. Install a new one if needed. 2. Put oil pan (1) in position on the engine stand as shown. https://127.0.0.1/sisweb/sisweb/techdoc/techdoc_print_page.jsp?returnurl=/sisweb/sisw... 2023/5/16
w 2/2(W) 3. Lower the engine on to the oil pan. Install the bolts that hold the oil pan to the cylinder block. 4. Install the oil level gauge. 5. Tighten the drain plug to a torque of 50 10 lb.ft. (70 14 N m). 6. Fill the engine with oil to the correct level. https://127.0.0.1/sisweb/sisweb/techdoc/techdoc_print_page.jsp?returnurl=/sisweb/sisw... 2023/5/16
w 1/3(W) Product: COMPACT WHEEL LOADER Model: 910 COMPACT WHEEL LOADER 80U Configuration: 910 WHEEL LOADER 80U00001-06734 (MACHINE) Disassembly and Assembly 3204 VEHICULAR ENGINE FOR D3 TRACTOR, 931 TRACK-TYPE LOADER Media Number -REG01219-02 Publication Date -01/08/1978 Date Updated -10/10/2001 Connecting Rod Bearings SMCS - 1219-10 Remove And Install Connecting Rod Bearings start by: a) remove oil pan 1. Turn the crankshaft until two pistons are at bottom center. Remove connecting rod caps (1) from the two connecting rods. Remove the lower half of the bearings from the caps. 2. Push the connecting rods away from the crankshaft and remove the upper half of the bearings. NOTICE Be careful not to damage the crankshaft journals. Do not turn the crankshaft while any of the connecting rod caps are removed. https://127.0.0.1/sisweb/sisweb/techdoc/techdoc_print_page.jsp?returnurl=/sisweb/sisw... 2023/5/16
w 2/3(W) 3. Clean the surfaces where the bearings fit. Install the upper half of the new bearings in the rods. Put clean SAE 30 oil on the bearings and crankshaft journals. Put the connecting rods in position on the crankshaft. 4. Clean the surfaces where the bearings fit. Install the lower half of the new bearings in the caps. Put clean SAE 30 oil on the bearings, bolt threads and contact surfaces of the nuts. NOTICE When the connecting rod caps are installed make sure that the numbers on the side of the caps are next to and respective with the number on the side of the connecting rods. 5. Check the bearing clearance with wire (A). Put the caps (1) in position on the connecting rods and install the nuts. Tighten the nuts to a torque of 30 3 lb.ft. (40 4 N m). Put a mark on each nut and the end of each bolt. Tighten the nuts 60 5 more. https://127.0.0.1/sisweb/sisweb/techdoc/techdoc_print_page.jsp?returnurl=/sisweb/sisw... 2023/5/16
w 3/3(W) 6. Remove the cap. Measure the thickness of the wire. The rod bearing clearance must be .0033 .0018 in. (0.084 0.046 mm). The maximum permissible clearance is .007 in. (0.18 mm). 7. Put the caps in position on the connecting rods and install the nuts. Tighten the nuts to a torque of 30 3 lb.ft. (40 4 N m). Put a mark on each nut and the end of each bolt. Tighten the nuts 60 5 more. 8. Do Steps 1 through 7 again for the other bearings. end by: a) install oil pan https://127.0.0.1/sisweb/sisweb/techdoc/techdoc_print_page.jsp?returnurl=/sisweb/sisw... 2023/5/16
w 1/3(W) Product: COMPACT WHEEL LOADER Model: 910 COMPACT WHEEL LOADER 80U Configuration: 910 WHEEL LOADER 80U00001-06734 (MACHINE) Disassembly and Assembly 3204 VEHICULAR ENGINE FOR D3 TRACTOR, 931 TRACK-TYPE LOADER Media Number -REG01219-02 Publication Date -01/08/1978 Date Updated -10/10/2001 Crankshaft Main Bearings SMCS - 1203-10 Remove And Install Crankshaft Main Bearings start by: a) remove oil pan 1. The main bearing caps are installed with the part number toward the front of the engine. Each cap has a number on the bottom of the cap which is the same as the number on the camshaft side of the cylinder block. 2. Remove the bolts that hold main cap (1). Remove bearing cap (1) and the lower half of the main bearing. 3. Remove the bearing from the cap. https://127.0.0.1/sisweb/sisweb/techdoc/techdoc_print_page.jsp?returnurl=/sisweb/sisw... 2023/5/16
w 2/3(W) 4. Turn the crankshaft until tool (A) can be installed in the oil hole in the crankshaft journal. Install tool (A). Turn the crankshaft in the direction which will push the upper main bearing out, tab end first. NOTICE If the crankshaft is turned in the wrong direction, the tab of the bearing will be pushed between the crankshaft and the cylinder block. This will cause damage to the crankshaft and block. 5. Put clean engine oil on the lower bearings. Install lower bearings in the bearing caps. 6. Put clean engine oil on the upper bearings (the bearing with the oil hole). Install upper bearings in the cylinder block with tool (A). NOTE: Be sure the tab on the back of the bearings fits in the groove of the caps and cylinder block. NOTICE When bearing caps are installed, make sure the caps are installed with the part number toward the front of the engine and the number on the bottom of the cap is the same as the number on the camshaft side of the engine. NOTE: When the bearing clearance is checked and the engine is in a vertical position, such as in the vehicle, the crankshaft will have to be lifted up and held against the upper halves of the main https://127.0.0.1/sisweb/sisweb/techdoc/techdoc_print_page.jsp?returnurl=/sisweb/sisw... 2023/5/16
w 3/3(W) bearings to get a correct measurement with wire (B). The wire will not hold the weight of the crankshaft and give a correct indication. If the engine is in a horizontal position, such as on an engine stand, it is not necessary to hold the crankshaft up. Do not turn crankshaft when lead wire is in position to check clearance. If lead wire is not available, PLASTIGAGE can be used to check bearing clearance. 7. Check the bearing clearance with tool (B) as follows: a) Put tool (B) and cap (1) in position and install the bolts. Tighten the bolts to a torque of 120 10 lb.ft. (160 14 N m). b) Remove the bearing cap and measure the thickness of the wire. The main bearing clearance must be .0030 to .0066 (0.076 to 0.168 mm). The maximum permissible clearance is .010 in. (0.25 mm). 8. Put clean SAE 30 oil on the bolt threads and lower half of the main bearing. Put bearing cap (1) and lower half of main bearing (2) in position on the engine. Install the bolts. Tighten the bolts to a torque of 120 10 lb.ft. (160 14 N m). 9. Do Steps 1 through 9 for the remainder of the bearings. NOTE: When a replacement of the thrust plates on No. 3 main bearing is made, install the thrust plates with the identification "BLOCK SIDE" next to the block. 10. Check the crankshaft end play with tooling (C). The end play is controlled by the thrust bearing on No. 3 main bearing. The end play with a new bearing must be .0025 to .0190 in. (0.064 to 0.483 mm). The maximum permissible end play for used bearings is .035 in. (0.89 mm). https://127.0.0.1/sisweb/sisweb/techdoc/techdoc_print_page.jsp?returnurl=/sisweb/sisw... 2023/5/16
w 1/4(W) Product: COMPACT WHEEL LOADER Model: 910 COMPACT WHEEL LOADER 80U Configuration: 910 WHEEL LOADER 80U00001-06734 (MACHINE) Disassembly and Assembly 3204 VEHICULAR ENGINE FOR D3 TRACTOR, 931 TRACK-TYPE LOADER Media Number -REG01219-02 Publication Date -01/08/1978 Date Updated -10/10/2001 Pistons SMCS - 1214-11; 1214-12 Remove Pistons start by: a) remove cylinder head b) remove oil pan 1. Remove the carbon ridge from the top inside surface of the cylinders with tool (A). 2. Turn the crankshaft until two pistons are at bottom center. https://127.0.0.1/sisweb/sisweb/techdoc/techdoc_print_page.jsp?returnurl=/sisweb/sisw... 2023/5/16
w 2/4(W) 3. Remove two nuts (1). Remove rod cap (2). Put pieces of rubber hose or tape on the threads of the connecting rod bolts as protection for the crankshaft. 4. Push the piston and connecting rod away from the crankshaft until the piston rings are above the cylinder block. 5. Remove piston (3) and the connecting rod. Keep each connecting rod with its respective connecting rod and piston. NOTICE Do not turn the crankshaft while any of the connecting rods are in the engine without the caps installed. 6. Do Steps 2 through 5 for the remainder of the pistons. Install Pistons 1. Put clean engine oil on the piston rings, connecting rod bearings, cylinder walls and crankshaft bearing journals. 2. Turn the crankshaft until the bearing journal for the piston to be installed is at bottom center. https://127.0.0.1/sisweb/sisweb/techdoc/techdoc_print_page.jsp?returnurl=/sisweb/sisw... 2023/5/16
Suggest: For more complete manuals. Please go to the home page. https://www.ebooklibonline.com If the above button click is invalid. Please download this document first, and then click the above link to download the complete manual. Thank you so much for reading
w 3/4(W) 3. Make sure the piston ring gaps are at least 120 apart on the piston. 4. Use tool (A) and install the piston in the engine in the same cylinder bore from which it was removed. The hole (crater) in the top of the piston must be toward the camshaft side of the engine for direct injection engines. The valve reliefs in the top of the piston for the precombustion engine must be toward the camshaft side of the engine. NOTE: For more detail about the installation of connecting rod bearings see REMOVE AND INSTALL CONNECTING ROD BEARINGS. 5. Check the bearing clearances with tool (B). 6. Put clean engine oil on the threads of the bolts and contact surfaces of the nuts for the connecting rod caps. NOTICE When the connecting rod caps are installed, make sure that the number on the side of the cap is next to and respective with the number on the side of the connecting rod. https://127.0.0.1/sisweb/sisweb/techdoc/techdoc_print_page.jsp?returnurl=/sisweb/sisw... 2023/5/16
w 4/4(W) 7. Put the cap (1) in position on the connecting rod and install the nuts. Tighten the nuts to a torque of 30 3 lb.ft. (40 4 N m). Put a mark on each nut and the end of each bolt. Tighten the nuts 60 5 more. 8. Do Steps 1 through 7 for the remainder of the pistons. end by: a) install cylinder heads b) install oil pan https://127.0.0.1/sisweb/sisweb/techdoc/techdoc_print_page.jsp?returnurl=/sisweb/sisw... 2023/5/16
https://www.ebooklibonline.com Hello dear friend! Thank you very much for reading. Enter the link into your browser. The full manual is available for immediate download. https://www.ebooklibonline.com

