Caterpillar Cat 315B and 315B L TRACK-TYPE EXCAVATOR (Prefix 1SW) Service Repair Manual Instant Download
Please open the website below to get the complete manualnn// n
Download Presentation

Please find below an Image/Link to download the presentation.
The content on the website is provided AS IS for your information and personal use only. It may not be sold, licensed, or shared on other websites without obtaining consent from the author. Download presentation by click this link. If you encounter any issues during the download, it is possible that the publisher has removed the file from their server.
E N D
Presentation Transcript
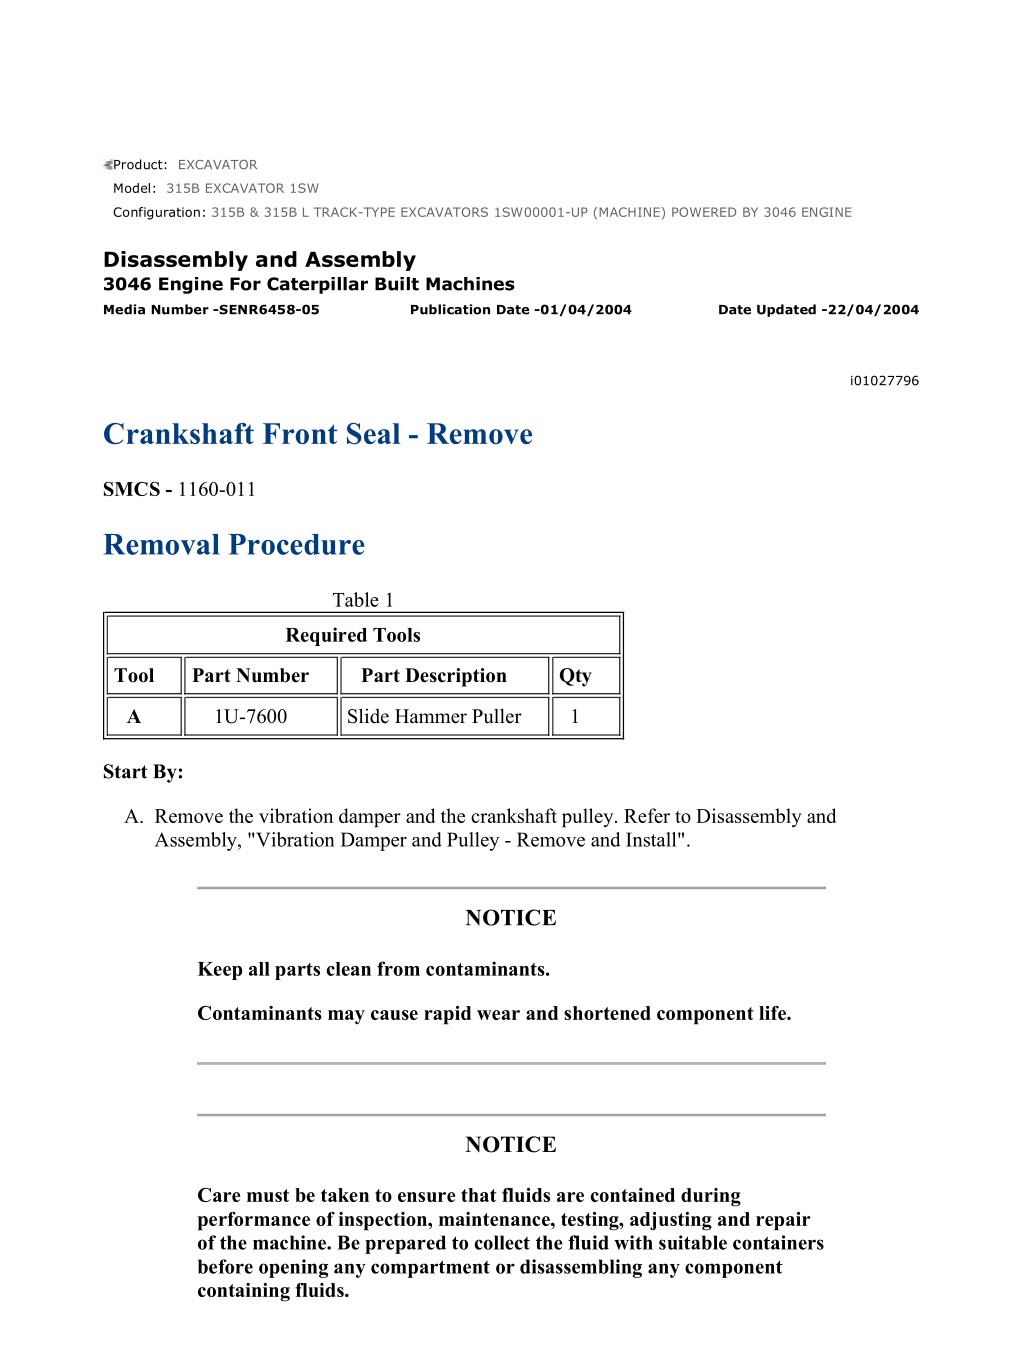
315B & 315B L TRACK-TYPE EXCAVATORS 1SW00001-UP (MACHINE) POW... 1/2 Product: EXCAVATOR Model: 315B EXCAVATOR 1SW Configuration: 315B & 315B L TRACK-TYPE EXCAVATORS 1SW00001-UP (MACHINE) POWERED BY 3046 ENGINE Disassembly and Assembly 3046 Engine For Caterpillar Built Machines Media Number -SENR6458-05 Publication Date -01/04/2004 Date Updated -22/04/2004 i01027796 Crankshaft Front Seal - Remove SMCS - 1160-011 Removal Procedure Table 1 Required Tools Tool Part Number Part Description Qty A 1U-7600 Slide Hammer Puller 1 Start By: A. Remove the vibration damper and the crankshaft pulley. Refer to Disassembly and Assembly, "Vibration Damper and Pulley - Remove and Install". NOTICE Keep all parts clean from contaminants. Contaminants may cause rapid wear and shortened component life. NOTICE Care must be taken to ensure that fluids are contained during performance of inspection, maintenance, testing, adjusting and repair of the machine. Be prepared to collect the fluid with suitable containers before opening any compartment or disassembling any component containing fluids. https://127.0.0.1/sisweb/sisweb/techdoc/techdoc_print_page.jsp?returnurl=/sis... 2020/12/12
315B & 315B L TRACK-TYPE EXCAVATORS 1SW00001-UP (MACHINE) POW... 2/2 Refer to Special Publication, NENG2500, "Caterpillar Tools and Shop Products Guide", for tools and supplies suitable to collect and contain fluids in Caterpillar machines. Dispose of all fluids according to local regulations and mandates. Illustration 1 g00529162 1. Drill three evenly spaced 3 mm (.12 inch) holes in crankshaft front seal (1) . 2. Use Tool (A) and remove crankshaft front seal (1) . https://127.0.0.1/sisweb/sisweb/techdoc/techdoc_print_page.jsp?returnurl=/sis... 2020/12/12
315B & 315B L TRACK-TYPE EXCAVATORS 1SW00001-UP (MACHINE) POW... 1/2 Product: EXCAVATOR Model: 315B EXCAVATOR 1SW Configuration: 315B & 315B L TRACK-TYPE EXCAVATORS 1SW00001-UP (MACHINE) POWERED BY 3046 ENGINE Disassembly and Assembly 3046 Engine For Caterpillar Built Machines Media Number -SENR6458-05 Publication Date -01/04/2004 Date Updated -22/04/2004 i01027827 Crankshaft Front Seal - Install SMCS - 1160-012 Installation Procedure Table 1 Required Tools Tool Part Number Part Description Qty 4C-6376 Seal Installer Stud 1 A 4C-6377 Seal Installer Washer 1 4C-6378 Seal Installer Sleeve 1 NOTICE Keep all parts clean from contaminants. Contaminants may cause rapid wear and shortened component life. https://127.0.0.1/sisweb/sisweb/techdoc/techdoc_print_page.jsp?returnurl=/sis... 2020/12/12
https://www.ebooklibonline.com Hello dear friend! Thank you very much for reading. Enter the link into your browser. The full manual is available for immediate download. https://www.ebooklibonline.com
315B & 315B L TRACK-TYPE EXCAVATORS 1SW00001-UP (MACHINE) POW... 2/2 Illustration 1 g00529163 1. Clean the faces of all the mating parts. Apply a thin coat of clean engine oil to a new crankshaft front seal. 2. Install new crankshaft front seal (1) with Tool (A) . 3. Remove Tool (A) and check crankshaft front seal (1) for correct installation. 4. Apply clean engine oil to the face of the crankshaft pulley that will be in contact with the new crankshaft front seal. End By: Install the vibration damper and the pulley. Refer to Disassembly and Assembly, "Vibration Damper and Pulley - Remove and Install". https://127.0.0.1/sisweb/sisweb/techdoc/techdoc_print_page.jsp?returnurl=/sis... 2020/12/12
315B & 315B L TRACK-TYPE EXCAVATORS 1SW00001-UP (MACHINE) POW... 1/4 Product: EXCAVATOR Model: 315B EXCAVATOR 1SW Configuration: 315B & 315B L TRACK-TYPE EXCAVATORS 1SW00001-UP (MACHINE) POWERED BY 3046 ENGINE Disassembly and Assembly 3046 Engine For Caterpillar Built Machines Media Number -SENR6458-05 Publication Date -01/04/2004 Date Updated -22/04/2004 i01646292 Gear Group (Front) - Remove - Idler Gear Only SMCS - 1206-011 Removal Procedure Table 1 Required Tools Tool Part Number Part Description Qty A 9U-6148 Idler Shaft Puller 1 Start By: A. Remove the front housing. Refer to Disassembly and Assembly, "Housing (Front) - Remove". NOTICE Keep all parts clean from contaminants. Contaminants may cause rapid wear and shortened component life. NOTICE Care must be taken to ensure that fluids are contained during performance of inspection, maintenance, testing, adjusting and repair of the product. Be prepared to collect the fluid with suitable containers before opening any compartment or disassembling any component containing fluids. https://127.0.0.1/sisweb/sisweb/techdoc/techdoc_print_page.jsp?returnurl=/sis... 2020/12/12
315B & 315B L TRACK-TYPE EXCAVATORS 1SW00001-UP (MACHINE) POW... 2/4 Refer to Special Publication, NENG2500, "Caterpillar Tools and Shop Products Guide" for tools and supplies suitable to collect and contain fluids on Caterpillar products. Dispose of all fluids according to local regulations and mandates. Note: Before removal, ensure that the marks on the timing gears are in alignment. Align the fuel injection drive gear with the "33" mark with the "3" mark on the idler gear. Make an alignment of the "2" mark on the camshaft gear with the "22" mark on the idler gear. Align the "1" mark on the crankshaft gear with the "11" mark on the idler gear. The No. 1 cylinder is at the top center position when these marks are in alignment. Illustration 1 g00559575 Illustration 2 g00559536 1. Remove idler gear bolt (1) and the washer from the idler gear shaft . 2. Remove thrust plate (2) . 3. Remove idler gear (3) . https://127.0.0.1/sisweb/sisweb/techdoc/techdoc_print_page.jsp?returnurl=/sis... 2020/12/12
315B & 315B L TRACK-TYPE EXCAVATORS 1SW00001-UP (MACHINE) POW... 3/4 Illustration 3 g00559567 Illustration 4 g00559569 4. Use Tool (A) and remove idler shaft (4) from the cylinder block. Illustration 5 g00559572 5. If necessary, remove five bolts (5) that hold front plate (6) to the cylinder block. https://127.0.0.1/sisweb/sisweb/techdoc/techdoc_print_page.jsp?returnurl=/sis... 2020/12/12
315B & 315B L TRACK-TYPE EXCAVATORS 1SW00001-UP (MACHINE) POW... 4/4 6. Remove front plate (6) and the gasket. Note: See the following list for the removal of the other gears in the front gear group. In order to remove the camshaft gear, refer to Disassembly and Assembly, "Camshaft - Remove and Install". In order to remove the fuel injection pump gear, refer to Disassembly and Assembly, "Fuel Injection Pump Housing and Governor - Remove". In order to remove the gear to the engine oil pump, refer to Disassembly and Assembly, "Engine Oil Pump - Remove". In order to remove the crankshaft front gear, refer to Disassembly and Assembly, "Crankshaft Gear - Remove and Install". https://127.0.0.1/sisweb/sisweb/techdoc/techdoc_print_page.jsp?returnurl=/sis... 2020/12/12
315B & 315B L TRACK-TYPE EXCAVATORS 1SW00001-UP (MACHINE) POW... 1/3 Product: EXCAVATOR Model: 315B EXCAVATOR 1SW Configuration: 315B & 315B L TRACK-TYPE EXCAVATORS 1SW00001-UP (MACHINE) POWERED BY 3046 ENGINE Disassembly and Assembly 3046 Engine For Caterpillar Built Machines Media Number -SENR6458-05 Publication Date -01/04/2004 Date Updated -22/04/2004 i01045442 Gear Group (Front) - Install - Idler Gear Only SMCS - 1206-012 Installation Procedure NOTICE Keep all parts clean from contaminants. Contaminants may cause rapid wear and shortened component life. Illustration 1 g00559572 1. Install a new gasket and front plate (6) . Note: Ensure that all mating surfaces are clean and free of old gasket material. https://127.0.0.1/sisweb/sisweb/techdoc/techdoc_print_page.jsp?returnurl=/sis... 2020/12/12
315B & 315B L TRACK-TYPE EXCAVATORS 1SW00001-UP (MACHINE) POW... 2/3 2. Install five bolts (5) that hold front plate (6) to the cylinder block. Tighten these bolts to a torque of 10 to 13 N m (7 to 10 lb ft). Illustration 2 g00559567 3. Install idler shaft (4) onto the cylinder block. Note: If necessary, cool the idler shaft to 0 C (32 F) before installation. Illustration 3 g00559536 Note: Ensure that the marks on the timing gears are in alignment. Align the fuel injection drive gear with the "33" mark with the "3" mark on the idler gear. Make an alignment of the "2" mark on the camshaft gear with the "22" mark on the idler gear. Align the "1" mark on the crankshaft gear with the "11" mark on the idler gear. The No. 1 cylinder is at the top center position when these marks are in alignment. 4. Install idler gear (3) . 5. Install thrust plate (2) . 6. Install the washer and idler gear bolt (1) onto thrust plate (2). Tighten idler gear bolt (1) to a torque of 34 5 N m (25 4 lb ft). https://127.0.0.1/sisweb/sisweb/techdoc/techdoc_print_page.jsp?returnurl=/sis... 2020/12/12
315B & 315B L TRACK-TYPE EXCAVATORS 1SW00001-UP (MACHINE) POW... 3/3 Note: For more information, refer to the Specifications Module, "Gear Group (Front)". Note: See the following list for the installation of the other gears in the front gear group. In order to install the camshaft gear, refer to Disassembly and Assembly, "Camshaft - Remove and Install". In order to install the fuel injection pump gear, refer to Disassembly and Assembly, "Fuel Injection Pump Housing and Governor - Install". In order to install the gear from the engine oil pump, refer to Disassembly and Assembly, "Engine Oil Pump - Install". In order to install the crankshaft front gear, refer to Disassembly and Assembly, "Crankshaft Front Gear - Remove and Install". End By: Install the front housing. Refer to Disassembly and Assembly, "Housing (Front) - Install". https://127.0.0.1/sisweb/sisweb/techdoc/techdoc_print_page.jsp?returnurl=/sis... 2020/12/12
315B & 315B L TRACK-TYPE EXCAVATORS 1SW00001-UP (MACHINE) POW... 1/3 Product: EXCAVATOR Model: 315B EXCAVATOR 1SW Configuration: 315B & 315B L TRACK-TYPE EXCAVATORS 1SW00001-UP (MACHINE) POWERED BY 3046 ENGINE Disassembly and Assembly 3046 Engine For Caterpillar Built Machines Media Number -SENR6458-05 Publication Date -01/04/2004 Date Updated -22/04/2004 i01646584 Housing (Front) - Remove SMCS - 1162-011 Removal Procedure Start By: A. Remove the alternator. Refer to Disassembly and Assembly, "Alternator - Remove and Install". B. Remove the vibration damper and the pulley. Refer to Disassembly and Assembly, "Vibration Damper and Pulley - Remove and Install". NOTICE Keep all parts clean from contaminants. Contaminants may cause rapid wear and shortened component life. NOTICE Care must be taken to ensure that fluids are contained during performance of inspection, maintenance, testing, adjusting and repair of the product. Be prepared to collect the fluid with suitable containers before opening any compartment or disassembling any component containing fluids. Refer to Special Publication, NENG2500, "Caterpillar Tools and Shop Products Guide" for tools and supplies suitable to collect and contain fluids on Caterpillar products. https://127.0.0.1/sisweb/sisweb/techdoc/techdoc_print_page.jsp?returnurl=/sis... 2020/12/12
315B & 315B L TRACK-TYPE EXCAVATORS 1SW00001-UP (MACHINE) POW... 2/3 Dispose of all fluids according to local regulations and mandates. Illustration 1 g00560210 1. Remove four bolts (1) and the washers from fan pulley (2) . 2. Remove fan pulley (2) . Illustration 2 g00529390 3. If equipped, remove bolts (3) and the washers from front housing (8) . 4. Remove five bolts (4) and the washers from cover (5) for the fuel injection pump gear. 5. Remove cover (5) for the engine oil pump. 6. Remove six bolts (6) and the washers that secure the engine oil pan to the front housing. 7. Remove bolts (7) that secure front housing (8) to the cylinder block. 8. Remove front housing (8) . https://127.0.0.1/sisweb/sisweb/techdoc/techdoc_print_page.jsp?returnurl=/sis... 2020/12/12
315B & 315B L TRACK-TYPE EXCAVATORS 1SW00001-UP (MACHINE) POW... 3/3 Illustration 3 g00529391 9. If equipped, remove cover (9) for the camshaft gear. 10. Check the condition of crankshaft front seal (10). If the crankshaft front seal is worn or damaged, use a new part for replacement. Refer to Disassembly and Assembly, "Crankshaft Front Seal - Remove" for removal of the crankshaft front seal . Illustration 4 g00529392 11. Remove bearing (12), if equipped. If the bearing is worn or damaged, use a new part for replacement. 12. Clean old gasket material (11) from the contact surface of front housing (8) and the timing gear plate. https://127.0.0.1/sisweb/sisweb/techdoc/techdoc_print_page.jsp?returnurl=/sis... 2020/12/12
315B & 315B L TRACK-TYPE EXCAVATORS 1SW00001-UP (MACHINE) POW... 1/3 Product: EXCAVATOR Model: 315B EXCAVATOR 1SW Configuration: 315B & 315B L TRACK-TYPE EXCAVATORS 1SW00001-UP (MACHINE) POWERED BY 3046 ENGINE Disassembly and Assembly 3046 Engine For Caterpillar Built Machines Media Number -SENR6458-05 Publication Date -01/04/2004 Date Updated -22/04/2004 i01646599 Housing (Front) - Install SMCS - 1162-012 Installation Procedure NOTICE Keep all parts clean from contaminants. Contaminants may cause rapid wear and shortened component life. Note: Check the condition of the gaskets and the O-ring seals. If the gaskets or the O-ring seals are damaged or worn, use new parts for replacement. Illustration 1 g00529392 https://127.0.0.1/sisweb/sisweb/techdoc/techdoc_print_page.jsp?returnurl=/sis... 2020/12/12
315B & 315B L TRACK-TYPE EXCAVATORS 1SW00001-UP (MACHINE) POW... 2/3 1. Clean old gasket material (11) from the contact surface of front housing (8) and the timing gear plate. Install a new gasket. 2. Install bearing (12), if equipped. If the bearing is worn or damaged, use a new part for replacement. 3. Install O-ring seal (13) onto cover (9), if equipped. Illustration 2 g00529391 4. Install a new crankshaft front seal (10), if the crankshaft front seal was removed. Refer to Disassembly and Assembly, "Crankshaft Front Seal - Install". 5. If equipped, install camshaft gear cover (9) onto front housing (8) . Illustration 3 g00529390 6. Install front housing (8) . 7. Install bolts (7) in order to fasten front housing (8) onto the cylinder block. 8. Install the washers and six bolts (6) in order to secure front housing (8) onto engine oil pan. 9. Install cover (5) for fuel injection pump gear. https://127.0.0.1/sisweb/sisweb/techdoc/techdoc_print_page.jsp?returnurl=/sis... 2020/12/12
315B & 315B L TRACK-TYPE EXCAVATORS 1SW00001-UP (MACHINE) POW... 3/3 10. Install the washers and five bolts (4) in order to secure cover (5) for fuel injection pump gear onto front housing (8) . 11. If equipped, install the washers and bolts (3) in order to secure camshaft gear cover (9) onto front housing (8) . Illustration 4 g00560210 12. Install fan pulley (2) . 13. Install the washers and four bolts (1) in order to secure fan pulley (2) onto the water pump. End By: a. Install the vibration damper and the pulley. Refer to Disassembly and Assembly, "Vibration Damper and Pulley - Remove and Install". b. Install the alternator. Refer to Disassembly and Assembly, "Alternator - Remove and Install". https://127.0.0.1/sisweb/sisweb/techdoc/techdoc_print_page.jsp?returnurl=/sis... 2020/12/12
315B & 315B L TRACK-TYPE EXCAVATORS 1SW00001-UP (MACHINE) POW... 1/3 Product: EXCAVATOR Model: 315B EXCAVATOR 1SW Configuration: 315B & 315B L TRACK-TYPE EXCAVATORS 1SW00001-UP (MACHINE) POWERED BY 3046 ENGINE Disassembly and Assembly 3046 Engine For Caterpillar Built Machines Media Number -SENR6458-05 Publication Date -01/04/2004 Date Updated -22/04/2004 i01579643 Valve Mechanism Cover - Remove and Install SMCS - 1107-010 Removal Procedure NOTICE Keep all parts clean from contaminants. Contaminants may cause rapid wear and shortened component life. Illustration 1 g00530277 1. Loosen two hose clamps and remove hose (3) from the air inlet manifold and the turbocharger. https://127.0.0.1/sisweb/sisweb/techdoc/techdoc_print_page.jsp?returnurl=/sis... 2020/12/12
315B & 315B L TRACK-TYPE EXCAVATORS 1SW00001-UP (MACHINE) POW... 2/3 2. Loosen the clamps and disconnect two hoses (1) from valve mechanism cover (2) . 3. Remove seven bolts (4) and the washers from valve mechanism cover (2) . 4. Remove valve mechanism cover (2) . Illustration 2 g00530278 5. Remove gasket (5) from valve mechanism cover (2) . Installation Procedure NOTICE Keep all parts clean from contaminants. Contaminants may cause rapid wear and shortened component life. Illustration 3 g00530278 https://127.0.0.1/sisweb/sisweb/techdoc/techdoc_print_page.jsp?returnurl=/sis... 2020/12/12
315B & 315B L TRACK-TYPE EXCAVATORS 1SW00001-UP (MACHINE) POW... 3/3 1. Check the condition of gasket (5) on valve mechanism cover (2). If the gasket is worn or damaged, use a new part for replacement. Illustration 4 g00530277 2. Install valve mechanism cover (2) and bolts (4). Torque the bolts to 3 N m to 5 N m (26 lb in to 44 lb in). 3. Install two hoses (1) onto valve mechanism cover (2) and tighten the clamps that secure the hoses. 4. Install hose (3) and tighten the two clamps that secure the hose. https://127.0.0.1/sisweb/sisweb/techdoc/techdoc_print_page.jsp?returnurl=/sis... 2020/12/12
315B & 315B L TRACK-TYPE EXCAVATORS 1SW00001-UP (MACHINE) POW... 1/2 Product: EXCAVATOR Model: 315B EXCAVATOR 1SW Configuration: 315B & 315B L TRACK-TYPE EXCAVATORS 1SW00001-UP (MACHINE) POWERED BY 3046 ENGINE Disassembly and Assembly 3046 Engine For Caterpillar Built Machines Media Number -SENR6458-05 Publication Date -01/04/2004 Date Updated -22/04/2004 i01030044 Rocker Shaft and Pushrod - Remove SMCS - 1102-011; 1208-011 Removal Procedure Start By: A. Remove the valve mechanism cover. Refer to Disassembly and Assembly, "Valve Mechanism Cover - Remove and Install". NOTICE Keep all parts clean from contaminants. Contaminants may cause rapid wear and shortened component life. Illustration 1 g00530465 https://127.0.0.1/sisweb/sisweb/techdoc/techdoc_print_page.jsp?returnurl=/sis... 2020/12/12
315B & 315B L TRACK-TYPE EXCAVATORS 1SW00001-UP (MACHINE) POW... 2/2 1. Loosen adjusting screws (1) on rocker arms. 2. Loosen six short bolts (3) and the washers on the rocker arm brackets. 3. Loosen six rocker bracket bolts (2) . Note: Rocker bracket bolts are the longer bolts. 4. Remove six rocker bracket bolts (2) from the rocker arm brackets. 5. Remove six short bolts (3) and the washers from the rocker arm brackets. 6. Remove the rocker shaft assembly. Illustration 2 g00530467 7. Put identification marks on pushrods (4) in order to identify the location of the pushrods in the engine. Remove pushrods (4) . https://127.0.0.1/sisweb/sisweb/techdoc/techdoc_print_page.jsp?returnurl=/sis... 2020/12/12
315B & 315B L TRACK-TYPE EXCAVATORS 1SW00001-UP (MACHINE) POW... 1/2 Product: EXCAVATOR Model: 315B EXCAVATOR 1SW Configuration: 315B & 315B L TRACK-TYPE EXCAVATORS 1SW00001-UP (MACHINE) POWERED BY 3046 ENGINE Disassembly and Assembly 3046 Engine For Caterpillar Built Machines Media Number -SENR6458-05 Publication Date -01/04/2004 Date Updated -22/04/2004 i02063400 Rocker Shaft - Disassemble SMCS - 1123-015 Disassembly Procedure Table 1 Required Tools Tool Part Number Part Description Qty A 1P-1855 Retaining Ring Pliers 1 Start By: A. Remove the rocker shaft and pushrods. Refer to Disassembly and Assembly, "Rocker Shaft and Pushrod - Remove". NOTICE Keep all parts clean from contaminants. Contaminants may cause rapid wear and shortened component life. https://127.0.0.1/sisweb/sisweb/techdoc/techdoc_print_page.jsp?returnurl=/sis... 2020/12/12
315B & 315B L TRACK-TYPE EXCAVATORS 1SW00001-UP (MACHINE) POW... 2/2 Illustration 1 g00531311 1. Use Tool (A) to remove snap ring (1) on each end of the rocker shaft assembly. Illustration 2 g00531306 2. Remove twelve rockers (2), six rocker arm shaft brackets (4) and six springs (3) from each end of shaft assembly (5) . Note: Mark the location and the position of each component for later assembly. 3. Remove plugs (6) from each end of shaft assembly (5) . https://127.0.0.1/sisweb/sisweb/techdoc/techdoc_print_page.jsp?returnurl=/sis... 2020/12/12
315B & 315B L TRACK-TYPE EXCAVATORS 1SW00001-UP (MACHINE) POW... 1/2 Product: EXCAVATOR Model: 315B EXCAVATOR 1SW Configuration: 315B & 315B L TRACK-TYPE EXCAVATORS 1SW00001-UP (MACHINE) POWERED BY 3046 ENGINE Disassembly and Assembly 3046 Engine For Caterpillar Built Machines Media Number -SENR6458-05 Publication Date -01/04/2004 Date Updated -22/04/2004 i02063398 Rocker Shaft - Assemble SMCS - 1102-016 Assembly Procedure Table 1 Required Tools Tool Part Number Part Description Qty A 1P-1855 Retaining Ring Pliers 1 NOTICE Keep all parts clean from contaminants. Contaminants may cause rapid wear and shortened component life. https://127.0.0.1/sisweb/sisweb/techdoc/techdoc_print_page.jsp?returnurl=/sis... 2020/12/12
315B & 315B L TRACK-TYPE EXCAVATORS 1SW00001-UP (MACHINE) POW... 2/2 Illustration 1 g00531306 1. Install twelve rockers (2), six rocker arm shaft brackets (4) and six springs (3) onto shaft assembly (5) . 2. Install plugs (6) into each end of shaft assembly (5) . Illustration 2 g00531311 3. Use Tool (A) to install snap ring (1) on each end of the rocker shaft assembly. End By: Install the rocker shaft and pushrods. Refer to Disassembly and Assembly, "Rocker Shaft and Pushrods - Install". https://127.0.0.1/sisweb/sisweb/techdoc/techdoc_print_page.jsp?returnurl=/sis... 2020/12/12
315B & 315B L TRACK-TYPE EXCAVATORS 1SW00001-UP (MACHINE) POW... 1/2 Product: EXCAVATOR Model: 315B EXCAVATOR 1SW Configuration: 315B & 315B L TRACK-TYPE EXCAVATORS 1SW00001-UP (MACHINE) POWERED BY 3046 ENGINE Disassembly and Assembly 3046 Engine For Caterpillar Built Machines Media Number -SENR6458-05 Publication Date -01/04/2004 Date Updated -22/04/2004 i01579663 Rocker Shaft and Pushrod - Install SMCS - 1102-012; 1208-012 Installation Procedure NOTICE Keep all parts clean from contaminants. Contaminants may cause rapid wear and shortened component life. Illustration 1 g00530467 1. Install pushrods (4) . https://127.0.0.1/sisweb/sisweb/techdoc/techdoc_print_page.jsp?returnurl=/sis... 2020/12/12
315B & 315B L TRACK-TYPE EXCAVATORS 1SW00001-UP (MACHINE) POW... 2/2 Note: Ensure that the pushrods are installed in the original location and seated in the valve lifters correctly. Illustration 2 g00530465 2. Install the rocker shaft assembly. 3. Install six rocker bracket bolts (2) and tighten the rocker bracket bolts to a torque of 15 5 N m (11 4 lb ft). Note: Rocker bracket bolts are the longer bolts. 4. Install six short bolts (3) and the washers. Tighten the short bolts to a torque of 15 5 N m (11 4 lb ft). 5. Adjust the inlet valve lash and the exhaust valve lash to 0.25 mm (0.010 inch). Refer to Testing and Adjusting, "Air Inlet and Exhaust System" for more information on setting the valve lash. Tighten adjusting screws (1) . End By: Install the valve mechanism cover. Refer to Disassembly and Assembly, "Valve Mechanism Cover - Remove and Install". https://127.0.0.1/sisweb/sisweb/techdoc/techdoc_print_page.jsp?returnurl=/sis... 2020/12/12
Suggest: If the above button click is invalid. Please download this document first, and then click the above link to download the complete manual. Thank you so much for reading
315B & 315B L TRACK-TYPE EXCAVATORS 1SW00001-UP (MACHINE) POW... 1/3 Product: EXCAVATOR Model: 315B EXCAVATOR 1SW Configuration: 315B & 315B L TRACK-TYPE EXCAVATORS 1SW00001-UP (MACHINE) POWERED BY 3046 ENGINE Disassembly and Assembly 3046 Engine For Caterpillar Built Machines Media Number -SENR6458-05 Publication Date -01/04/2004 Date Updated -22/04/2004 i01032735 Cylinder Head - Remove SMCS - 1100-011 Removal Procedure Start By: A. Remove the turbocharger. Refer to Disassembly and Assembly, "Turbocharger - Remove". B. Remove the rocker shaft and pushrods. Refer to Disassembly and Assembly, "Rocker Shaft and Pushrods - Remove". C. Remove the fuel injection nozzles in order to protect from damage. Refer to Disassembly and Assembly, "Fuel Injection Nozzles - Remove". D. Remove the glow plugs in order to protect from damage. Refer to Disassembly and Assembly, "Glow Plugs - Remove and Install". NOTICE Keep all parts clean from contaminants. Contaminants may cause rapid wear and shortened component life. NOTICE Care must be taken to ensure that fluids are contained during performance of inspection, maintenance, testing, adjusting and repair of the machine. Be prepared to collect the fluid with suitable containers before opening any compartment or disassembling any component containing fluids. https://127.0.0.1/sisweb/sisweb/techdoc/techdoc_print_page.jsp?returnurl=/sis... 2020/12/12
https://www.ebooklibonline.com Hello dear friend! Thank you very much for reading. Enter the link into your browser. The full manual is available for immediate download. https://www.ebooklibonline.com


