BSA Archery Range Master Training Manual

BSA ARCHERY RANGE
BSA ARCHERY RANGE
MASTER
MASTER
TRAINING
TRAINING
From BSA
National Shooting Sports Manual
(2011 Edition)
INTRODUCTION
INTRODUCTION
Welcome
Instructors
Facilities
Course
TRAINING
TRAINING
ARCHERY RANGE
ARCHERY RANGE
MASTERS
MASTERS
This presentation is from the BSA
National
Shooting Sports Manual.
A special Thanks
goes out to the Task Force and NRA for this
manual.
TRAINING
TRAINING
ARCHERY RANGE
ARCHERY RANGE
MASTERS
MASTERS
Class Notes
All of the course material is on the class CD.
Deviations from the manual are proceeded
by
NOTES
If you are an Instructor and wish to change
this Power Point presentation please use the
newest version software.
TRAINING
TRAINING
ARCHERY RANGE
ARCHERY RANGE
MASTERS
MASTERS
Section I (40 minutes)
A. A Brief History of Archery
B. Safety Guidelines
1. Sun Safety on the Shooting Range
TRAINING
TRAINING
ARCHERY RANGE
ARCHERY RANGE
MASTERS
MASTERS
Section I Continued
C. Equipment
1. Review bows, bowstrings, arrows, arm
guards, finger tabs, quivers, points of
aim, target butts, target faces, and
backstops.
2. Review how to string and unstring a
bow, and have the participants
demonstrate this.
3. Review how to maintain, store, and
care for equipment.
TRAINING
TRAINING
ARCHERY RANGE
ARCHERY RANGE
MASTERS
MASTERS
Section I Continued
D. Range Layout, page 79—This
procedure is to be taught on the archery
range. Review range layout, safety
fencing, backstop, entryway, range flag,
target spacing, waiting line, shooting
line, and bow racks and quivers.
E. Range Operation Rules
TRAINING
TRAINING
ARCHERY RANGE
ARCHERY RANGE
MASTERS
MASTERS
Archery Shooting
Basics
1. Eye Dominance
2. Stance
3. Nock the Arrow
4. Establish the Bow
Hold
5. Draw
6. Aim,
7. Anchor
8. Release or Loose
9. Follow Through
10. Retrieve Arrows
B
.
Targets and Scoring
1. Target Butts
2. Target Faces
3. Backstops
C. Know the Proper
Whistle Codes
D. Archery Practice
Fun
Section II (40 minutes)
TRAINING
TRAINING
ARCHERY RANGE
ARCHERY RANGE
MASTERS
MASTERS
Section III (20 minutes)
A. Training Cub Scouts
1. Teaching Tips
B. Shooting a Competitive Round
C. Archery Games and Activities
D. Tiger Cubs and Archery
E. Cub Scout Shooting Sports Award
F. Archery Belt Loop and Sports Pin
SECTION I
SECTION I
ARCHERY HISTORY
ARCHERY HISTORY
Spearheads - many thousands of years ago.
6000 B.C. Early bow of yew or elm.
Provided a much safer way to hunt and made life
easier.
3500 B.C. to 2800 B.C. Egyptians first battle use.
Composite bows - about this same time period.
1500 B.C. Assyrians developed a shorter recurve bow
that provided
more power and easier handling.
ARCHERY HISTORY
ARCHERY HISTORY
Crossbows were also used in ancient China.
About this same time, the Parthians became famous for
shooting backwards while riding a horse.
Around 1200 B.C. Egyptian pharaoh Rameses II put
archers on chariots.
This
mobility allowed the
Egyptians to defeat the Hittite
army.
Around 1000 A.D. Archery was adopted by native
Americans.
The British were famous for improving on the bow, which
eventually became known as the British longbow.
ARCHERY HISTORY
ARCHERY HISTORY
1346 Famous battle of the longbow at Crecy.
1500, crossbows were banned in England to
promote the use of the longbow.
1595, the army was ordered to replace all bows
with muskets.
Archery has remained a popular sport in
England. Some of the first archery clubs were
formed in England.. Competitions were part of
their way of life.
ARCHERY HISTORY
ARCHERY HISTORY
1879 the National Archery Association was
founded and the first national tournament was
held in White Stocking Park in Chicago.
1928 First US archery club, United Bowmen of
Philadelphia.
1900 archery became part of the Olympics and
dropped in 1920 because rules not standard.
1931 FITA was founded in Paris and standardized
the rules for international competition.
1972 Archery re joined the Olympic program.
SAFETY
SAFETY
GUIDELINES
GUIDELINES
Tiger Cubs with their adult partners, Cub Scouts, and
Webelos Scouts should learn these simple safety rules.
When training youth to shoot, be sure to have the proper
equipment, secure and safe ranges, and clear safety
instruction.
SAFETY
SAFETY
GUIDELINES
GUIDELINES
(CONT.)
(CONT.)
1. Observe all state and local laws on using a bow
and arrow.
2. Shoot only with proper range supervision.
3. Always check your equipment before shooting.
Break and discard all cracked or fractured arrows.
4. Be sure to include all of the safety guidelines and
the proper whistle codes.
5. Bows and arrows should be used only in places set
aside for their use.
6. Always keep your arrows pointed down or toward
the target.
SAFETY
SAFETY
GUIDELINES
GUIDELINES
(CONT.)
(CONT.)
7. Only release an arrow when you can see its full
clear path to the target.
8. Shoot only at the target in front of you.
9. Keep the arrows in the quiver until everyone is on
or behind the shooting line and the Range Master has
indicated that you may begin shooting.
10. Shoot with your feet behind the shooting (firing)
line.
11. Stop shooting immediately upon signal from the
Range Master or if anyone crosses in front of the
shooting line or in front of or behind the targets.
SAFETY
SAFETY
GUIDELINES
GUIDELINES
(CONT.)
(CONT.)
12. Use only arrows that have been measured for your
proper draw length. Arrows that are too short may cause
personal injury or damage to the bow and arrow.
13. Always wear an arm guard and finger tab or glove.
14. Always practice courtesy and good sportsmanship.
15. Always walk, never run, when on the archery range or
while carrying arrows.
16. On a target range, leave the bow standing against the
target face while you are looking for lost arrows.
17. Stay on marked paths. Travel the direction in which
the targets are marked.
SUN SAFETY
SUN SAFETY
Limit exposure to sun between 10 a.m. and 4 p.m.
when the sun’s rays are the strongest.
Generously apply sunscreen with a sun protection
factor (SPF) of at least 15 and reapply it every two
hours when outdoors, even on cloudy days.
Wear protective, tightly woven clothing, such as a
long sleeved shirt and pants.
Wear a hat with a wide, 4-inch brim and sunglasses
with UV protective lenses.
Stay in the shade whenever possible.
Avoid reflective surfaces, which can reflect up to 85
percent of the sun’s damaging rays.
EQUIPMENT
EQUIPMENT
TOPICS
Bows
Bowstrings
Arrows
Arm guards
Finger tabs,
Quivers,
Target butts,
Target faces
Backstops
EQUIPMENT
EQUIPMENT
Storage
W
hen not in use, archery equipment should be
kept in locked storage to protect it from weather,
rodents, and theft.
For instructions on how to build storage lockers
and other storage equipment see pages 103–106.
EQUIPMENT
EQUIPMENT
(CONT.)
(CONT.)
Archery Equipment for 100 Campers
• Six 48-inch target faces mounted on straw target butts and
tripods or on stacked, baled straw
• 10 bows—four 15-pound, four 20-pound, and two 25-pound
• 12 bowstrings
• 12 finger tabs
• 12 arm guards
• 60 arrows selected to fit bows
• 36 action archery arrows
• Two sets of field archery targets
• 60 plastic jugs (various sizes)
• 12 ground quivers (camp-made)
EQUIPMENT
EQUIPMENT
(CONT.)
(CONT.)
BOWS
In General -
Recurve preferred for beginners
easier to learn finger tension
lighter
wood, fiberglass or composite
Compound shorter, some adjustments
EQUIPMENT
EQUIPMENT
(CONT.)
(CONT.)
BOWS
In General –
Fiberglass
Lighter
Less expensive
Less care
EQUIPMENT
EQUIPMENT
(CONT.)
(CONT.)
EQUIPMENT
EQUIPMENT
(CONT.)
(CONT.)
EQUIPMENT
EQUIPMENT
(CONT.)
(CONT.)
EQUIPMENT
EQUIPMENT
(CONT.)
(CONT.)
Basic Bow Care
Never lay a bow on the ground.
Never stand a bow on end.
Store bows by laying them on pegs
that support the bow in the handle
riser section.
Although finishes are waterproof, it
is best to dry the bow if it gets wet.
EQUIPMENT
EQUIPMENT
(CONT.)
(CONT.)
Basic Bow Care Continued
Carry a bow unbraced in a bow case to
protect it from scratches and possible
damage.
Never leave a bow in an automobile
as the heat may cause damage.
Store bows unstrung and, if possible,
in a cool place with moderate
humidity.
EQUIPMENT
EQUIPMENT
(CONT.)
(CONT.)
BOWSTRINGS
Dacron
Serving of multi fillament nylon
Keep waxed
Inspect daily
Repair or replace
Order new string by pull and length
EQUIPMENT
EQUIPMENT
(CONT.)
(CONT.)
BOW STRINGER
Push Pull or Step Through can
damage recurves
Demonstration by Instructor
Store recurves unstrung
EQUIPMENT
EQUIPMENT
(CONT.)
(CONT.)
Arrows
Arrows of Port Orford cedar, pine,
birch, aluminum, or fiberglass are
suitable for beginners.
Wood arrows are the least expensive,
but aluminum and fiberglass arrows
are more durable and will last much
longer.
EQUIPMENT
EQUIPMENT
(CONT.)
(CONT.)
Arrow Measuring
Draw your bow using an extra long
arrow to your normal full draw.
Have someone mark the arrow shaft at
least one inch directly in front of the
spot where the arrow contacts the most
forward position of the arrow rest.
Beginners may want to add one to two
inches.
EQUIPMENT
EQUIPMENT
(CONT.)
(CONT.)
AVERAGE ARROW
Adult male uses a 28-inch arrow.
Adult female uses a 26-inch arrow.
Teenager uses a 26-inch arrow.
Youth 12 years old or younger uses a
24-inch arrow.
EQUIPMENT
EQUIPMENT
(CONT.)
(CONT.)
CARE OF ARROWS
If the feathers become wet, wipe them
dry and clean before storing.
Separate the arrows until they are dry
to allow the feathers to regain their
original shape.
Discard any fiberglass or wooden
arrows that have splinters or cracks in
the shaft.
EQUIPMENT
EQUIPMENT
(CONT.)
(CONT.)
CARE OF ARROWS Continued
The arrows can be kept in the quivers
during the season.
Long term storage in original boxes
with individual holes for each arrow.
This will preserve the feathers and
help prevent wooden arrows from
warping.
EQUIPMENT
EQUIPMENT
(CONT.)
(CONT.)
ARM GUARDS
The arm guard is either leather or
plastic with at least two elastic straps.
It is slipped over the forearm that
holds the bow and provides protection
from the slap of the bowstring after the
arrow is released.
Keep arm guards clean.
EQUIPMENT
EQUIPMENT
(CONT.)
(CONT.)
Finger Tabs
Finger tabs are preferable to gloves for group
instruction because they present fewer fitting
problems.
Made of smooth leather, finger tabs absorb the
friction of the bowstring across the fingertips.
Without them, painful blisters can develop.
Many designs are available, but for beginners the
simplest and most inexpensive type is satisfactory.
EQUIPMENT
EQUIPMENT
(CONT.)
(CONT.)
Quivers
For the young beginner, having a quiver to use when
returning arrows from the target to the shooting line
will improve safety procedures.
EQUIPMENT
EQUIPMENT
(CONT.)
(CONT.)
REVIEW
Review bows, bowstrings, arrows, arm guards, finger
tabs, quivers, points of aim, target butts, target faces,
and backstops.
Review how to string and unstring a bow.
Review how to maintain, store, and care for
equipment.
RANGE LAYOUT
RANGE LAYOUT
Safety is a primary concern when operating an
archery range, and the safety rules must be followed.
If at all possible, the range should be laid out so
shooting is done in a northerly direction.
To protect arrows, all outcropping rocks should be
removed. Keep grass cut close and raked clear.
Sandy soils need no ground cover.
Important! Arrange facilities so there is no
possibility of non-participants inadvertently walking
behind the targets while shooting is in progress!
RANGE LAYOUT
RANGE LAYOUT
TYPICAL RANGE
RANGE LAYOUT
RANGE LAYOUT
TYPICAL RANGE
NOTE
Know your equipment.
Know the range of your equipment and shots.
The arrows must be contained on the range.
RANGE OPERATION
RANGE OPERATION
RULES
RULES
Know the Proper Whistle Codes
Two blasts. Move up to the firing line.
One blast. Fire the proper number of arrows.
Three blasts. Cease firing. Move to the target.
Retrieve and score arrows.
Four or more blasts. Cease firing. Stay where you are.
This is an EMERGENCY. Officials will tell the
archers what action to take either verbally or by the
whistle code.
RANGE OPERATION
RANGE OPERATION
RULES
RULES
Know the Proper Whistle Codes
Remember there is only ONE command to shoot—
ONE blast of the whistle.
For any command of more than one blast, STOP
shooting. Watch and listen for further instructions.
RANGE
RANGE
OPERATIONS
OPERATIONS
RULES
RULES
Archery Range Rules
1.
This range may be opened only by a certified archery Range
Master.
2.
All commands issued by the Range Master must be obeyed
immediately.
3.
Stay behind the firing line. Do not straddle the firing line. Do not
reach for objects that fall beyond the firing line.
4.
Bows will be placed on ground quivers when shooting has ceased
or when retrieving arrows. No bows may be carried to the target
butts.
5.
Do not pick up a bow or nock an arrow unless told to by the
Range Master.
6.
Absolutely no running on the range. Belt quivers should be used
while retrieving arrows.
7.
No horseplay or unnecessary talking on the range.
8.
If in doubt about these rules, ask your leader or Range Master for
advice and help.
Sample Range Rules Poster
QUESTIONS ?
QUESTIONS ?
BREAK
BREAK
Ten Minutes
SECTION II
SECTION II
ARCHERY SHOOTING BASICS
ARCHERY SHOOTING BASICS
Archery Shooting Basics
The following instructions are written
for right-handed shooters. When
training left-handed shooters, reverse
the instructions as necessary.
ARCHERY SHOOTING BASICS
ARCHERY SHOOTING BASICS
1. Eye Dominance
2. Stance
3. Nock the Arrow
4. Establish the Bow Hold
5. Draw
6. Aim
7. Anchor
8. Release or Loose
9. Follow Through
10. Retrieve Arrows
ARCHERY SHOOTING BASICS
ARCHERY SHOOTING BASICS
Eye Dominance
Before shooting a bow, the participants should deter mine
which eye is dominant. Just as people are either right- or
left-handed, one eye is more dominant than the other.
Discovering which eye a shooter favors is important
because it could determine on which side the bow should
be held.
To find which eye is dominant, have participants extend
both arms in front of them and form a small hole with
their thumbs and index fingers. Instruct them to look at a
distant object through the opening and then pull their
hands back to their face. The eye that is in line with the
object is dominant.
Assign boys, leaders, and parents in pairs to assist each
other, then have them check with the Range Master.
ARCHERY SHOOTING BASICS
ARCHERY SHOOTING BASICS
STANCE
Have the archers turn sideways to the target, with
their left shoulder toward the target. (Left-handers
should stand with their right shoulder toward the
target.) Weight should be evenly distributed and feet
should be as wide apart as is comfortable
(approximately shoulder width). This is called the
square stance.
Another way to enter the square stance is to have
the archer lay down an arrow so that the arrow points
at the center of the target. The archer then places the
toes of both feet against the arrow. Straddle the
shooting line. Relax the knees—do not lock them
backward.
ARCHERY SHOOTING BASICS
ARCHERY SHOOTING BASICS
STANCE Continued
After archers are familiar with the square
stance, instruct them to move their right foot
forward, toward the person in front of them,
until the instep of their right foot lines up with
the toe of their left foot. Tell archers to rise up
on their toes and take a one-eighth turn toward
the target.
This is called the oblique stance. The oblique
stance allows beginners to use their back
muscles immediately, moves the string away
from the bow arm so there is less chance of
string slap, and provides a secure base.
ARCHERY SHOOTING BASICS
ARCHERY SHOOTING BASICS
STANCE Continued
Golf tees pushed into the ground make good foot
markers for consistency in placing the feet.
Once the feet are properly positioned, stand erect
without jutting the hip.
Position the head so vision is parallel with the
ground and so the chin is above the left shoulder.
ARCHERY SHOOTING BASICS
ARCHERY SHOOTING BASICS
NOCK
Each arrow is nocked so it is 90-degree to the string.
Whip the bowstring with bright colored thread above
nocking point. The nock locator enables each arrow to
be nocked in the same place for consistent shooting.
Lay the shaft of the arrow on the arrow rest. Fit the nock
on the string just below the string’s nocking point.
Odd-colored feather (cock) faces away from the bow.
Bow tip is tilted away from the body at a 20-degrees.
Place the index finger above the nock and the next two
fingers below the nock. “Hook” the bowstring with the
first joint of these three fingers with out curling them
and without applying pressure on the arrow nock.
ARCHERY SHOOTING BASICS
ARCHERY SHOOTING BASICS
NOCK
ARCHERY SHOOTING BASICS
ARCHERY SHOOTING BASICS
Bow Hold
Extend bow arm toward the target in
a “handshake” position.
Place the pivot point of the bow in
the “V” formed by the thumb and
forefinger.
Forefinger goes around bow with the
thumb resting on top of the
forefinger.
The other three fingers should be
pointing toward the target.
ARCHERY SHOOTING BASICS
ARCHERY SHOOTING BASICS
Bow Hold Continued
Inform archers that the pivot point should
touch only the meaty part of the thumb.
Extending the last three fingers toward the
target will help the students keep the palm
off the bow
The wrist should be straight but relaxed.
Have the student relax and hold the bow at
his side with the string up so the bow does
not interfere with students on either side.
Tell each student to raise his head, look at
the bull’s-eye, raise the bow arm to shoulder
height, and lower it again to the side.
ARCHERY SHOOTING BASICS
ARCHERY SHOOTING BASICS
Aim
Two aiming methods are used:
Bow-sight method. The bow-sight method of
aiming is often the most easily understood and is
the most useful for target shooting.
Point-of-aim method. The point of aim for a
given distance may be located once the sight
system is established.
ARCHERY SHOOTING BASICS
ARCHERY SHOOTING BASICS
AIM – Scouter Bow-sight
To establish sights, attach a wooden match with a small
rubber band to the back surface of the upper limb of the
bow about five inches above the handle. Loop one end of
the band around the head end of a match. Stretch the rubber
band around the face of the bow and attach its other loop
around the other end of the match. The match head now
forms a temporary sight that can be adjusted upward,
downward, to the right, or to the left.
Choose a small one-inch aiming spot on your target, 10
yards away. When the arrow is fully drawn and anchored,
raise or lower the bow so the match head is in line with the
eye and the aiming spot, and release the arrow. Shoot three
to six arrows in the same way and see where they group.
Adjust and calibrate.
ARCHERY SHOOTING BASICS
ARCHERY SHOOTING BASICS
Aim - Point-of-aim method
The point of aim for a given distance may be located
once the sight system is established. For example, to
find the point of aim at 40 yards, stand on the 40-yard
line with the arrow drawn and anchored with the sight
aimed on the center of the bull’s-eye. While holding this
position, glance down across the pile or shaft of the
arrow to a spot on the ground seen just above the pile.
Keeping the eyes glued on this spot, walk forward, and
place the point of aim on that spot. Conversely, if the
point of aim for a given distance is known, establish a
sight on the bow for it by placing the bow sight on the
bull’s eye when the pile of the arrow has been sighted
on the point of aim. The more experienced archer will
raise his bow and draw to anchor point in one smooth
flow of motion. The arrow at this point is not
immediately released. Several seconds are used to aim
before the fingers release the arrow.
ARCHERY SHOOTING BASICS
ARCHERY SHOOTING BASICS
Anchor
At the completion of the draw, the relaxed
thumb of the right hand finds an anchor spot
under the jawbone. If this is too difficult, rest
the forefinger along the side of the jaw.
Using the jawbone as an anchor, the
bowstring will touch the nose and the center
of the chin.
It is important that the anchor point be the
same for every shot. Therefore, through
practice, the most comfortable anchor point
should be established.
ARCHERY SHOOTING BASICS
ARCHERY SHOOTING BASICS
Release or Loose
Proper release of a well-aimed arrow makes the
difference between a good or poor shot. Hold the
bow with a relaxed grip. The hand is opened with
the fingers moving quickly and precisely off the
nock and the string at the same time. The action of
the back muscles will cause the right elbow to come
back as the shoulder blades come together. If
alignment is kept, the hand will pass along the side
of the neck. This is a natural reaction and not a
conscious motion if the back muscles are being
properly used. Keep the bow arm in the same
position as for a full draw. Relax the wrist. Keep
alignment. Avoid tension.
ARCHERY SHOOTING BASICS
ARCHERY SHOOTING BASICS
Follow Through
Keep aiming until the arrow hits the target.
Throwing the hand out from the shoulder after
the arrow is on its way invariably means that the
fingers have been jerked away from the string.
After release, the fingers should not be more than
an inch away from and behind the anchor point.
The bow should not drop immediately. If it does,
it usually means that it was jerked at release.
Hold the position until the arrow strikes the
target to make certain the whole process is
smooth. In a good follow-through, your right
hand will be at the back of your neck and your
arm will be lined up perfectly.
ARCHERY SHOOTING BASICS
ARCHERY SHOOTING BASICS
Retrieve Arrows
The Range Master will observe the archers and indicate
when all archers have completed shooting and it is safe
to retrieve arrows. At this time:
• Withdraw all arrows from the target.
• Retrieve all arrows that missed the target.
• Record scores.
Caution the archers to walk slowly to the target and
watch for arrows on the ground. Demonstrate that an
arrow buried under the grass should be withdrawn
point first and be completely clear of the grass before
the arrow is lifted.
No one may stand directly in front of the target while
arrows are being withdrawn.
ARCHERY SHOOTING BASICS
ARCHERY SHOOTING BASICS
Form
TARGETS AND SCORING
TARGETS AND SCORING
Target Butts
About 48 inches in diameter.
Made of straw bales or Ethafoam. Not plastic
foam.
Target butts on soft-pine tripods six inches off the
ground.
Targets low to aid retrieval and reduce missed
arrow travel.
Three to five bales of straw may be stacked and
tied back to a post to serve as target butts. Keep
the bales off the ground by stacking them on old
tires.
NOTE - Tires make skeeters!
TARGETS AND SCORING
TARGETS AND SCORING
Target Butts
TARGETS AND SCORING
TARGETS AND SCORING
Target Faces
The 48-inch standard target face is recommended
for use on outdoor ranges. These are printed on
several types of material, including heavy paper,
canvas, and oil cloth.
If you use paper targets, paste them to light
cardboard or they will not last long. Smaller
targets are made to be shot at from shorter
distances.
TARGETS AND SCORING
TARGETS AND SCORING
Target Faces and Scoring
The target is made up of five concentric color zones. Each
zone is divided by a thin line into two scoring zones of
equal width.
Inner gold = 10 points
Outer gold = 9 points
Inner red = 8 points
Outer red = 7 points
Inner blue = 6 points
Outer blue = 5 points
Inner black = 4 points
Outer black = 3 points
Inner white = 2 points
Outer white = 1 point
TARGETS AND SCORING
TARGETS AND SCORING
Target Faces and Scoring
TARGETS AND SCORING
TARGETS AND SCORING
Care of Target Faces
Target faces should be removed from mats
when the mats are being moistened.
Masking tape applied to the back of a target
face that is tearing from much use will help it
last longer.
Center patches that cover the gold and part of
the red scoring areas on the target face will
double the life of the target faces.
The patches must be carefully aligned so the
lines marking the scoring areas line up
exactly.
TARGETS AND SCORING
TARGETS AND SCORING
Backstops
Backstops for wild shots can be made from stacked
straw bales or hanging layered burlap, old canvas, or
rugs over a horizontal pole or plank.
An indoor backstop should be at least eight feet
high. The backstop should be hung two to three feet
from the wall and two to 10 feet behind the targets to
prevent arrows from hitting the wall.
If arrows may damage the floor in front of the
targets, rest the targets on rubber runners, canvas-
covered tumbling mats, or on a rug that extends six
to eight feet in front of the targets.
ARCHERY SHOOTING BASICS
ARCHERY SHOOTING BASICS
Archery Practice Fun
Any station set up for boys to practice skills is a
fun station for the Cub Scouts. Boys have
limited times to shoot arrows, so the
opportunity to practice at a council camp or
event is a great experience for them.
A practice station is a simple, basic archery
range, but a very fun one for the boys. Archery
stations could also be set up to practice
stringing bows or learning how to care for some
of the equipment. Helping with some of the
archery equipment could be a rainy day activity.
QUESTIONS ?
QUESTIONS ?
BREAK
BREAK
Ten Minutes
SECTION III
SECTION III
TRAINING CUB SCOUTS
TRAINING CUB SCOUTS
TRAINING CUB
TRAINING CUB
SCOUTS
SCOUTS
Learning Objectives
To teach Cub Scouts how to use archery
equipment safely.
To teach basic archery skills.
To have fun.
TRAINING CUB
TRAINING CUB
SCOUTS
SCOUTS
This instruction is designed for immediate
participation and success. For example, beginning
students tend to shoot high because they want to
look at the point of their arrows. By placing targets
on the ground at 10 yards, rather than at the
traditional 48-inch level at 25 yards, fewer arrows
miss the target. This means more class time can be
spent on shooting and less on looking for arrows.
TRAINING CUB
TRAINING CUB
SCOUTS
SCOUTS
Before handing out equipment, check each
participant’s eye dominance. Also, look for loose
objects on the participants such as pins, pencils,
loose sweaters, and watches that could get in the
way of shooting.
For the best learning experience, give each Cub
Scout a bow, an arm guard, a finger tab, a quiver,
and six arrows. If it is not possible for each to
have a bow, one bow might be shared by two or
more boys.
TRAINING CUB
TRAINING CUB
SCOUTS
SCOUTS
Instruction takes place at the shooting line.
Bows should already be strung at the first
session.
For beginning instruction, have left-handed
shooters grouped at the right end of the
shooting line to allow them a better view of the
Range Master as he or she demonstrates.
Explain the use of whistles.
TRAINING CUB
TRAINING CUB
SCOUTS
SCOUTS
Teaching Tips
The coach-pupil method is effective for all types of
skill training and is particularly effective in
shooting sports. To put this method into practice:
1. Put the bow in the Cub Scout’s hand as soon as
possible so he can understand the tool while the
basics are explained.
2. Group participants into pairs (boy and
parent/guardian would be ideal.) Check for loose
items on the bow side of the student that could
interfere with his shooting.
TRAINING CUB
TRAINING CUB
SCOUTS
SCOUTS
Teaching Tips Continued
3. The instructor demonstrates the activity or
action to be followed before the whole group.
When demonstrating techniques, be sure to do
them correctly. The instructor then circulates
among the pairs, giving a word of advice or
assistance, recognizing good work, correcting
errors, and determining how well the
participants understand the method.
TRAINING CUB
TRAINING CUB
SCOUTS
SCOUTS
Teaching Tips Continued
4. Check the student’s finger tab closely
before he shoots. Watch for four fingers
on the string. Look for cramped fingers
on the bowstring. Watch the thumb on
the drawing hand. If a student masters
the draw and anchor, stand behind him
and check the string path before
allowing him to shoot.
TRAINING CUB
TRAINING CUB
SCOUTS
SCOUTS
Teaching Tips Continued
5. The boy practices while the parent coaches. Let
Scouts shoot the first arrow as soon as possible,
even if the bow hand, anchor, draw, etc., are not
perfect.
6. At a predetermined signal, the positions are
reversed.
7. Progressively, participants are learning by
observing, by doing, and by coaching.
TRAINING CUB
TRAINING CUB
SCOUTS
SCOUTS
Teaching Tips Continued
8. Use a positive approach. Use praise sincerely.
Before making a correction, figure out the fault
to find the cause. Never correct a student after
spotting a fault on one arrow shot.
9. Avoid long discussions on learning the parts
of equipment used. Teach just enough so
participants will know how to safely use the
equipment.
10. Allow each boy to feel the satisfaction of
hitting the target as quickly as possible.
TRAINING CUB
TRAINING CUB
SCOUTS
SCOUTS
Cub Scout Archery Training - Youth
Section I (20 minutes)
A. Safety Guidelines
B. Equipment
1. Review bows, bowstrings, arrows, arm guards,
finger tabs, quivers, points of aim, target butts,
target faces, and backstops.
2. Review how to maintain, store, and care for
equipment.
3. Review how to string and unstring a bow.
(Optional.)
TRAINING CUB
TRAINING CUB
SCOUTS
SCOUTS
Cub Scout Archery Training - Youth
Section II (40 minutes)
A. Archery Shooting Basics
B. Practice, practice, practice
1. Eye Dominance
2. Stance, page
3. Nock the Arrow
4. Bow Hold
5. Draw
6. Aim
7. Anchor
8. Release or Loose
9. Follow Through
10. Retrieve Arrows
TRAINING CUB
TRAINING CUB
SCOUTS
SCOUTS
Cub Scout Archery Training - Youth
Section III (60 minutes) (optional activities)
A. Shooting a Competitive Round
B. Archery Games and Activities
C. Archery Belt Loop and Sports Pin
TRAINING CUB
TRAINING CUB
SCOUTS
SCOUTS
Archery Games and Activities
A variety of games or activities can be done
using archery skills. Different ranges could be
set up to play a particular game, or courses could
be set up where participants go from station to
station.
Archery games and alternate activities work well,
especially when youth are in camp for more than
one day or if a council sponsors a special archery
camp for Cub Scouts.
TRAINING CUB
TRAINING CUB
SCOUTS
SCOUTS
Archery Games and Activities
Remember, any place there is an archery range
and there is archery shooting, even when playing
a game or activity, a qualified archery Range
Master must be present.
Shooting games are designed to improve
shooting skills.
Remember, safety is a must.
TRAINING CUB
TRAINING CUB
SCOUTS
SCOUTS
Shooting a Competitive Round
Next are two rounds that can be adapted for
instructional use. When conducting a
competitive round or tournament, two practice
ends should be allowed before scoring begins.
The purpose of these rounds is to expose
students to the mechanics of a tournament.
The scores might be used as a part of the skill
evaluation.
TRAINING CUB
TRAINING CUB
SCOUTS
SCOUTS
Instructional Round 1
Distance: 20 yards
Target: 36-inch, four-color face
Total arrows: 60 (five arrows per end;
four ends per game; three games pre-
round)
Score: 5-4-3-2-1
Total Points: 300
TRAINING CUB
TRAINING CUB
SCOUTS
SCOUTS
Instructional Round 2
(American Archery Council Instruction Round) Modified
Chicago Round
Distance: 20 yards
Target: 36-inch, four-color face
Total arrows: 30 (five arrows per end; six ends
per game; one game pre-round)
Score: 5-4-3-2-1
Total points: 150
TRAINING CUB
TRAINING CUB
SCOUTS
SCOUTS
Modified Flint Round
Station 1: four arrows at 17 yards—18-inch black-and-white
face
Station 2: four arrows at 20 yards—12-inch black-and-white
face
Station 3: four arrows at 20 yards—18-inch face
Station 4: four arrows at 14 yards—12-inch face
Station 5: four arrows at 15 yards—18-inch face
Station 6: four arrows at 10 yards—12-inch face
Station 7: one arrow each at 20 yards, 17 yards, 15 yards, 14
yards, 10 yards, 20 feet—18-inch face
Total points: 300
TRAINING CUB
TRAINING CUB
SCOUTS
SCOUTS
Games
Tic Tac Toe
Place three rows of three balloons on a target mat.
Divide the group into two lines and have them stand
in a single file 20 feet from the target. At the signal to
shoot, each archer will shoot one arrow and step back.
The second and each succeeding person will shoot
one at a time. The first team to break three balloons
in any line is the winning team.
TRAINING CUB
TRAINING CUB
SCOUTS
SCOUTS
Games
Wand Shooting
Place a strip of 1-inch masking tape over the target
face from top to bottom. A point is scored when an
arrow hits the tape anywhere on the target. Divide the
group into two lines, and have them stand in a single
fi le 20 feet from the target. At the signal to shoot,
each archer will shoot one arrow and step back. The
second and each succeeding person will shoot one at
a time. The first team to get two points is the winning
team.
TRAINING CUB
TRAINING CUB
SCOUTS
SCOUTS
Games
Shoot the Monster
Participants shoot at a monster face attached or
painted on a one-gallon plastic bottle, suspended
with shock card within a tire. The object is to hit the
plastic bottle. This event can be scored individually
or by den or pack.
TRAINING CUB
TRAINING CUB
SCOUTS
SCOUTS
Games
Drop in the Barrel
Participants lob an arrow into a barrel that is placed
as the bull’s-eye of a horizontal target on the ground.
Outer rings may be formed with chalk, string, circles
of small pennants, etc., at five-foot intervals from the
barrel. Scoring may be kept by individual or by den
or pack.
TRAINING CUB
TRAINING CUB
SCOUTS
SCOUTS
Games
Spin the Insect
A picture of an insect is glued to a piece of plywood
12 inches square. The plywood is fastened so it will
pivot freely around a centered bar set from post to
post when struck with an arrow.
TRAINING CUB
TRAINING CUB
SCOUTS
SCOUTS
Games
Ring the Bell
Participants shoot at bells through the open end of
swinging tires. All tires are swung in unison with a
rope tied to the bottom of each tire and extended to an
area beyond the limits of firing on the side.
TRAINING CUB
TRAINING CUB
SCOUTS
SCOUTS
Games
Football Placekick
A scaled-down goalpost is erected behind a four-foot-
high canvas sheet. From the firing line the archer can
see only the top portion of the goalpost uprights. An
arrow shot between the uprights above the crossbar
scores as a field goal (three points), while an arrow
that passes over the canvas and under the crossbar
scores as a touchdown (six points). A raised platform
should be set up adjacent to the shooting positions so
an observer can determine the scoring since the archer
is not able to see the lower portion of the goalposts.
TRAINING CUB
TRAINING CUB
SCOUTS
SCOUTS
Games
Action Archery Course
An action archery course could be set up using
several of these games as different stations in the
course. A drawing of a sample action archery course
is found on page 108.
TRAINING CUB
TRAINING CUB
SCOUTS
SCOUTS
Tiger Cubs and Archery
Tiger Cubs and their adult partners may participate
in archery activities. Each Tiger Cub
must
be
paired with his adult partner before being allowed
to shoot. Keep in mind that boys of this age have
very short attention spans and tire easily. They
probably have little previous experience working
as a group and may require more time to
understand how the range operates.
Tiger Cubs may earn the Archery belt loop and
sports pin.
SHOOTING SPORTS
SHOOTING SPORTS
AWARDS
AWARDS
A Cub Scout Shooting Sports Award, No. 34216,
may be awarded to a boy whenever he achieves a
level of marksmanship or excellence. The
Archery Range Master, with other leaders of the
camp or event, may determine special
circumstances where a unique award might be
useful. The award might be given for proficiency
in shooting, best sportsmanship, or for some
other appropriate achievement.
The award is available from the National
Distribution Center in packages of 100.
BELT LOOP &
BELT LOOP &
SPORTS PIN ACTIVITIES
SPORTS PIN ACTIVITIES
Archery belt loops and sports pins may be earned only
through council- or district-sponsored programs. Quality
camp programs will offer an archery shooting program that
allows boys to meet the requirements for earning the
Archery belt loop. In a program where boys come for more
than one day, councils should offer activities that meet the
requirements for the Archery sports pin. Dens and packs
enjoy coming to council camps where they have an
opportunity to earn belt loops and sports pins that cannot be
earned at home.
See the sample certificates on page 100. Use these certificates
to show that boys have met the requirements for the loops
and pins. Their pack may then purchase the Archery belt
loops and sports pins at their local Scout shop.
Tiger Cubs complete requirements while working with their
parent or adult partner. Parents and partners do not earn
loops or pins. All requirements must be completed under the
supervision of a certified archery Range Master.
BELT LOOP &
BELT LOOP &
SPORTS PIN ACTIVITIES
SPORTS PIN ACTIVITIES
Belt Loop Requirements
Complete the following three requirements:
1. Explain the rules for safe archery that you have
learned in the district/council camp or activity
you are attending to your leader or adult partner.
2. Demonstrate to your leader or adult partner
good archery shooting techniques, including the
stance and how to nock the arrow, establish the
bow, draw, aim, release, follow through, and
retrieve arrows.
3. Practice shooting at your district or council
camp for the time allowed.
BELT LOOP &
BELT LOOP &
SPORTS PIN ACTIVITIES
SPORTS PIN ACTIVITIES
Sports Pin Requirements (1-5)
Earn the Archery belt loop and complete five of the following:
1. Explain the parts of a bow and demonstrate
how to string the bowstring in a proficient
manner.
2. Demonstrate how to properly use archery
equipment, including arm guards, finger tabs,
and quivers, and explain about proper clothing.
3. Develop proficient shooting techniques by
practicing for three hours.
4. Learn the correct scoring techniques for target
archery.
5. Make a poster that emphasizes the four whistle
codes.
BELT LOOP &
BELT LOOP &
SPORTS PIN ACTIVITIES
SPORTS PIN ACTIVITIES
Sports Pin Requirements (6-10)
6. Draw to scale or set up an archery range.
7. Shoot 30 arrows from a distance of 30 feet at a
target and score at least 50 points, or shoot 30
arrows from a distance of 90 feet and score at
least 30 points.
8. Help make a type of target for the camp
archery range.
9. Show how to put away and properly store
archery equipment.
10. Tell five facts about an archer in history or
literature.
QUESTIONS ?
QUESTIONS ?
BREAK
BREAK
Ten Minutes
EXTRA
EXTRA
WHAT DO I DO NOW?
WHAT DO I DO NOW?
WHAT DO I DO
WHAT DO I DO
NOW?
NOW?
NOTE –
Practice your range briefing!! Before you go to camp!!
Ask Campmaster / Ranger for special instructions or
requirements.
Allocate time at camp before range session to:
Discus your expectations with parents. Be very
detailed.
(1 hour)
Check the range and supplies.
(1/2 hour)
Find and check the equipment. Raccoons like to hide
equipment!
(1 to 2 hours)
EQUIPMENT
EQUIPMENT
(CONT.)
(CONT.)
NOTE - New Stuff
Genisis bows have constant pull, light
weight, short limbs. They were made
for beginners.
EQUIPMENT
EQUIPMENT
(CONT.)
(CONT.)
NOTE - New Stuff
No Gloves replace finger tabs. They
save fitting time and eliminate storage
issues.
WHAT DO I DO
WHAT DO I DO
NOW?
NOW?
NOTE - TIPS
DO NOT TEACH NEGATIVLY.
Excuse non compliant Scouts (and Parents).
Remind them to dress for the range.
Be wary of temporary ranges.
WHAT DO I DO
WHAT DO I DO
NOW?
NOW?
NOTE - Learn More
Become a USA Archery Instructor.
Visit the USA Archery web site.
Visit the NSSF web site.
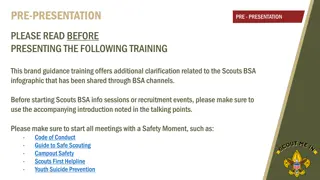
Explore the comprehensive BSA National Shooting Sports Manual for Archery Range Master Training. This manual covers a range of topics including the history of archery, safety guidelines, equipment review, range layout, shooting basics, targets, scoring, whistle codes, and more. Get insights into the essential skills and knowledge required to become a proficient archery range master. Enhance your understanding of archery practices and procedures with this detailed training resource.

Download Presentation

Please find below an Image/Link to download the presentation.
The content on the website is provided AS IS for your information and personal use only. It may not be sold, licensed, or shared on other websites without obtaining consent from the author.If you encounter any issues during the download, it is possible that the publisher has removed the file from their server.
You are allowed to download the files provided on this website for personal or commercial use, subject to the condition that they are used lawfully. All files are the property of their respective owners.
The content on the website is provided AS IS for your information and personal use only. It may not be sold, licensed, or shared on other websites without obtaining consent from the author.
E N D
Presentation Transcript
BSA ARCHERY RANGE MASTER TRAINING From BSA National Shooting Sports Manual (2011 Edition)
INTRODUCTION Welcome Instructors Facilities Course
TRAINING ARCHERY RANGE MASTERS This presentation is from the BSA National Shooting Sports Manual. A special Thanks goes out to the Task Force and NRA for this manual.
TRAINING ARCHERY RANGE MASTERS Class Notes All of the course material is on the class CD. Deviations from the manual are proceeded by NOTES If you are an Instructor and wish to change this Power Point presentation please use the newest version software.
TRAINING ARCHERY RANGE MASTERS Section I (40 minutes) A. A Brief History of Archery B. Safety Guidelines 1. Sun Safety on the Shooting Range
TRAINING ARCHERY RANGE MASTERS Section I Continued C. Equipment 1. Review bows, bowstrings, arrows, arm guards, finger tabs, quivers, points of aim, target butts, target faces, and backstops. 2. Review how to string and unstring a bow, and have the participants demonstrate this. 3. Review how to maintain, store, and care for equipment.
TRAINING ARCHERY RANGE MASTERS Section I Continued D. Range Layout, page 79 This procedure is to be taught on the archery range. Review range layout, safety fencing, backstop, entryway, range flag, target spacing, waiting line, shooting line, and bow racks and quivers. E. Range Operation Rules
TRAINING ARCHERY RANGE MASTERS Archery Shooting Basics 1. Eye Dominance 2. Stance 3. Nock the Arrow 4. Establish the Bow Hold 5. Draw 6. Aim, 7. Anchor 8. Release or Loose 9. Follow Through 10. Retrieve Arrows Section II (40 minutes) B. Targets and Scoring 1. Target Butts 2. Target Faces 3. Backstops C. Know the Proper Whistle Codes D. Archery Practice Fun
TRAINING ARCHERY RANGE MASTERS Section III (20 minutes) A. Training Cub Scouts 1. Teaching Tips B. Shooting a Competitive Round C. Archery Games and Activities D. Tiger Cubs and Archery E. Cub Scout Shooting Sports Award F. Archery Belt Loop and Sports Pin
ARCHERY HISTORY Spearheads - many thousands of years ago. 6000 B.C. Early bow of yew or elm. Provided a much safer way to hunt and made life easier. 3500 B.C. to 2800 B.C. Egyptians first battle use. Composite bows - about this same time period. 1500 B.C. Assyrians developed a shorter recurve bow that provided more power and easier handling.
ARCHERY HISTORY Crossbows were also used in ancient China. About this same time, the Parthians became famous for shooting backwards while riding a horse. Around 1200 B.C. Egyptian pharaoh Rameses II put archers on chariots. This mobility allowed the Egyptians to defeat the Hittite army. Around 1000 A.D. Archery was adopted by native Americans. The British were famous for improving on the bow, which eventually became known as the British longbow.
ARCHERY HISTORY 1346 Famous battle of the longbow at Crecy. 1500, crossbows were banned in England to promote the use of the longbow. 1595, the army was ordered to replace all bows with muskets. Archery has remained a popular sport in England. Some of the first archery clubs were formed in England.. Competitions were part of their way of life.
ARCHERY HISTORY 1879 the National Archery Association was founded and the first national tournament was held in White Stocking Park in Chicago. 1928 First US archery club, United Bowmen of Philadelphia. 1900 archery became part of the Olympics and dropped in 1920 because rules not standard. 1931 FITA was founded in Paris and standardized the rules for international competition. 1972 Archery re joined the Olympic program.
SAFETY GUIDELINES Tiger Cubs with their adult partners, Cub Scouts, and Webelos Scouts should learn these simple safety rules. When training youth to shoot, be sure to have the proper equipment, secure and safe ranges, and clear safety instruction.
SAFETY GUIDELINES (CONT.) 1. Observe all state and local laws on using a bow and arrow. 2. Shoot only with proper range supervision. 3. Always check your equipment before shooting. Break and discard all cracked or fractured arrows. 4. Be sure to include all of the safety guidelines and the proper whistle codes. 5. Bows and arrows should be used only in places set aside for their use. 6. Always keep your arrows pointed down or toward the target.
SAFETY GUIDELINES (CONT.) 7. Only release an arrow when you can see its full clear path to the target. 8. Shoot only at the target in front of you. 9. Keep the arrows in the quiver until everyone is on or behind the shooting line and the Range Master has indicated that you may begin shooting. 10. Shoot with your feet behind the shooting (firing) line. 11. Stop shooting immediately upon signal from the Range Master or if anyone crosses in front of the shooting line or in front of or behind the targets.
SAFETY GUIDELINES (CONT.) 12. Use only arrows that have been measured for your proper draw length. Arrows that are too short may cause personal injury or damage to the bow and arrow. 13. Always wear an arm guard and finger tab or glove. 14. Always practice courtesy and good sportsmanship. 15. Always walk, never run, when on the archery range or while carrying arrows. 16. On a target range, leave the bow standing against the target face while you are looking for lost arrows. 17. Stay on marked paths. Travel the direction in which the targets are marked.
SUN SAFETY Limit exposure to sun between 10 a.m. and 4 p.m. when the sun s rays are the strongest. Generously apply sunscreen with a sun protection factor (SPF) of at least 15 and reapply it every two hours when outdoors, even on cloudy days. Wear protective, tightly woven clothing, such as a long sleeved shirt and pants. Wear a hat with a wide, 4-inch brim and sunglasses with UV protective lenses. Stay in the shade whenever possible. Avoid reflective surfaces, which can reflect up to 85 percent of the sun s damaging rays.
EQUIPMENT TOPICS Bows Bowstrings Arrows Arm guards Finger tabs, Quivers, Target butts, Target faces Backstops
EQUIPMENT Storage When not in use, archery equipment should be kept in locked storage to protect it from weather, rodents, and theft. For instructions on how to build storage lockers and other storage equipment see pages 103 106.
EQUIPMENT (CONT.) Archery Equipment for 100 Campers Six 48-inch target faces mounted on straw target butts and tripods or on stacked, baled straw 10 bows four 15-pound, four 20-pound, and two 25-pound 12 bowstrings 12 finger tabs 12 arm guards 60 arrows selected to fit bows 36 action archery arrows Two sets of field archery targets 60 plastic jugs (various sizes) 12 ground quivers (camp-made)
EQUIPMENT (CONT.) BOWS In General - Recurve preferred for beginners easier to learn finger tension lighter wood, fiberglass or composite Compound shorter, some adjustments
EQUIPMENT (CONT.) BOWS In General Fiberglass Lighter Less expensive Less care
EQUIPMENT (CONT.) Basic Bow Care Never lay a bow on the ground. Never stand a bow on end. Store bows by laying them on pegs that support the bow in the handle riser section. Although finishes are waterproof, it is best to dry the bow if it gets wet.
EQUIPMENT (CONT.) Basic Bow Care Continued Carry a bow unbraced in a bow case to protect it from scratches and possible damage. Never leave a bow in an automobile as the heat may cause damage. Store bows unstrung and, if possible, in a cool place with moderate humidity.
EQUIPMENT (CONT.) BOWSTRINGS Dacron Serving of multi fillament nylon Keep waxed Inspect daily Repair or replace Order new string by pull and length
EQUIPMENT (CONT.) BOW STRINGER Push Pull or Step Through can damage recurves Demonstration by Instructor Store recurves unstrung
EQUIPMENT (CONT.) Arrows Arrows of Port Orford cedar, pine, birch, aluminum, or fiberglass are suitable for beginners. Wood arrows are the least expensive, but aluminum and fiberglass arrows are more durable and will last much longer.
EQUIPMENT (CONT.) Arrow Measuring Draw your bow using an extra long arrow to your normal full draw. Have someone mark the arrow shaft at least one inch directly in front of the spot where the arrow contacts the most forward position of the arrow rest. Beginners may want to add one to two inches.
EQUIPMENT (CONT.) AVERAGE ARROW Adult male uses a 28-inch arrow. Adult female uses a 26-inch arrow. Teenager uses a 26-inch arrow. Youth 12 years old or younger uses a 24-inch arrow.
EQUIPMENT (CONT.) CARE OF ARROWS If the feathers become wet, wipe them dry and clean before storing. Separate the arrows until they are dry to allow the feathers to regain their original shape. Discard any fiberglass or wooden arrows that have splinters or cracks in the shaft.
EQUIPMENT (CONT.) CARE OF ARROWS Continued The arrows can be kept in the quivers during the season. Long term storage in original boxes with individual holes for each arrow. This will preserve the feathers and help prevent wooden arrows from warping.
EQUIPMENT (CONT.) ARM GUARDS The arm guard is either leather or plastic with at least two elastic straps. It is slipped over the forearm that holds the bow and provides protection from the slap of the bowstring after the arrow is released. Keep arm guards clean.
EQUIPMENT (CONT.) Finger Tabs Finger tabs are preferable to gloves for group instruction because they present fewer fitting problems. Made of smooth leather, finger tabs absorb the friction of the bowstring across the fingertips. Without them, painful blisters can develop. Many designs are available, but for beginners the simplest and most inexpensive type is satisfactory.
EQUIPMENT (CONT.) Quivers For the young beginner, having a quiver to use when returning arrows from the target to the shooting line will improve safety procedures.
EQUIPMENT (CONT.) REVIEW Review bows, bowstrings, arrows, arm guards, finger tabs, quivers, points of aim, target butts, target faces, and backstops. Review how to string and unstring a bow. Review how to maintain, store, and care for equipment.
RANGE LAYOUT Safety is a primary concern when operating an archery range, and the safety rules must be followed. If at all possible, the range should be laid out so shooting is done in a northerly direction. To protect arrows, all outcropping rocks should be removed. Keep grass cut close and raked clear. Sandy soils need no ground cover. Important! Arrange facilities so there is no possibility of non-participants inadvertently walking behind the targets while shooting is in progress!
RANGE LAYOUT TYPICAL RANGE
RANGE LAYOUT TYPICAL RANGE NOTE Know your equipment. Know the range of your equipment and shots. The arrows must be contained on the range.
RANGE OPERATION RULES Know the Proper Whistle Codes Two blasts. Move up to the firing line. One blast. Fire the proper number of arrows. Three blasts. Cease firing. Move to the target. Retrieve and score arrows. Four or more blasts. Cease firing. Stay where you are. This is an EMERGENCY. Officials will tell the archers what action to take either verbally or by the whistle code.
RANGE OPERATION RULES Know the Proper Whistle Codes Remember there is only ONE command to shoot ONE blast of the whistle. For any command of more than one blast, STOP shooting. Watch and listen for further instructions.
RANGE OPERATIONS RULES Sample Range Rules Poster Archery Range Rules 1. This range may be opened only by a certified archery Range Master. All commands issued by the Range Master must be obeyed immediately. Stay behind the firing line. Do not straddle the firing line. Do not reach for objects that fall beyond the firing line. Bows will be placed on ground quivers when shooting has ceased or when retrieving arrows. No bows may be carried to the target butts. Do not pick up a bow or nock an arrow unless told to by the Range Master. Absolutely no running on the range. Belt quivers should be used while retrieving arrows. No horseplay or unnecessary talking on the range. If in doubt about these rules, ask your leader or Range Master for advice and help. 2. 3. 4. 5. 6. 7. 8.
BREAK Ten Minutes
ARCHERY SHOOTING BASICS Archery Shooting Basics The following instructions are written for right-handed shooters. When training left-handed shooters, reverse the instructions as necessary.


")
")
")
")
")
")
")
")
")
")
")
")
")
")
")
")
")
")
")