Guide to Creating a New Hospital Outpatient Visit (HOV) in Epic
Learn how to create a new Hospital Outpatient Visit (HOV) in Epic for scenarios such as different dates of service, locations, or when no office visit is recorded. Understand when to create a new HOV and when not to, along with step-by-step instructions on entering patient data, creating the HAR, and selecting visit types.
Download Presentation

Please find below an Image/Link to download the presentation.
The content on the website is provided AS IS for your information and personal use only. It may not be sold, licensed, or shared on other websites without obtaining consent from the author. Download presentation by click this link. If you encounter any issues during the download, it is possible that the publisher has removed the file from their server.
E N D
Presentation Transcript
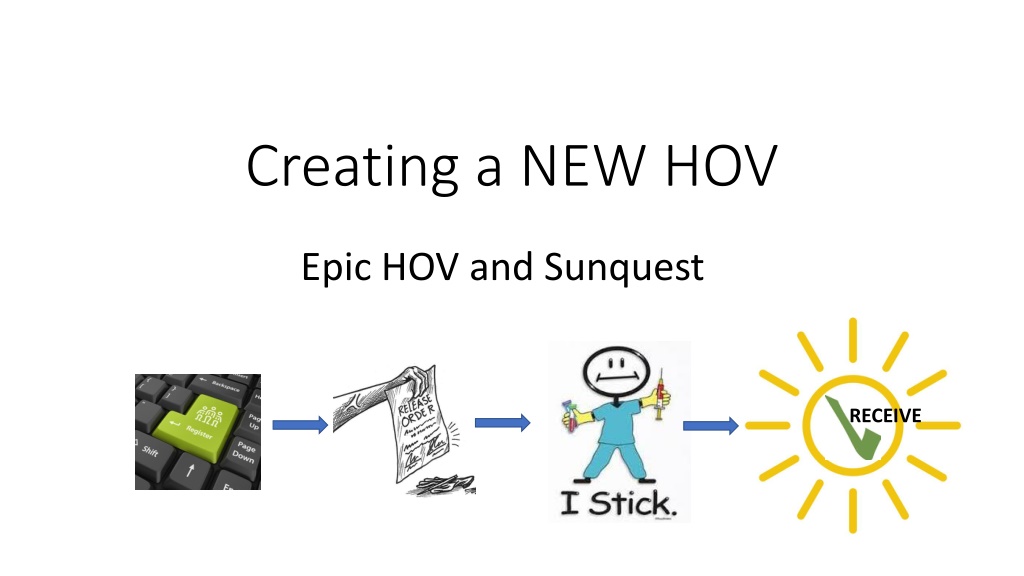
Creating a NEW HOV Epic HOV and Sunquest RECEIVE
What is an HOV An HOV is a Hospital Outpatient Visit in Epic This is similar to and encounter in Soarian.
When a NEW NEW HOV must be created: When a patient or specimen presents to the lab on a different date of service from that of his/her office visit. When a patient or specimen presents to a lab that is at a different location or entity from that of his/her office. (Ex:Mass Gen Doctor and they come to a WDH Lab) When a patient or specimen office visit does not have a Hospital Account Record (HAR). When a patient or specimen presents to the lab on the same day as office visit, but the office visit has been CLOSED by the Provider. When there is no office visit for the patient or specimen. (Orders only encounter has been created by the office)
Do NOT Do NOT create a new HOV when: The patient or specimen presents to the lab on the same date of service from that of his/her office visit. The patient or specimen presents to the lab that is at the same location as his/her same day office visit (WDH doctor, and WDH lab). The patient or specimen office visit has a HAR. The office visit has not been closed by the Provider for the same date of service.
How to create a NEW HOV Select Patient Station (top left beside EPIC) Enter the minimum data set for your patient (Full name, date of birth and sex). Click FIND PATIENT The patient select box will appear make sure the row is selected (blue) for the patient you would like and click SELECT If needed click on the box +/- 7 days and ALL filter at the top right to show you more visits. Check the dates of the visits to determine if the patient had a current day visit. If NO Click on NEW HOSPITAL OUTPT to create a new HOV (beside the Refresh button below date/time)
How to create a NEW HOV After clicking New Hospital Outpt the New HOV questionnaire will appear. Enter the date the patient is presenting (T Enter will automatically enter todays date) IF it is a specimen enter the date the specimen was COLLECTED Enter the correct Department (this will be a defined lab department) (Once the lab department field is defined you can use the = for a quick fill) Referring physician field is NOT needed and should be left BLANK Click NEW The Hospital Account form will appear. This is used to create the HAR. (Every HOV MUST have a HAR) Check the Patient Class box (toward the top middle of screen). Make sure that it is defaulted to Outpatient Guarantor Acct Type box will default to Personal/Family. This can be changed for Worker s comp or Third Party Liability if necessary.
The Yellow section of the screen toward the middle, the HAR Advisor will suggest what action you should take, such as Create New Hospital Account. Select Create New Account button. The HAR will be created. You will see additional folders (Outpatient pts last name ) in the Hospital Accounts form to the left of the screen. The Green folder is called the Hospital Account Information form. (HAR Summary) Click Check IN (bottom right of the screen ) This will bring you back to the Encounter Screen. Check the Status for the date you created the HOV, it should now appear as Conf HOV. You have now created a NEW HOV!!
Releasing Orders: Select the HOV for the current date that was just created. To Release order(s), Click on OPEN CHART tab (middle, right of screen) This will bring you right to the ORDER REVIEW screen. NOTE: Orders can be medications as well as procedure in Epic, several orders may make the screen look busy. Orders can be sorted to make the view easier and to reduce errors. Click on FILTER button Click on CLEAR ALL Select LAB Click Accept NOTE: When there are numerous lab orders you must select carefully looking at the expected date etc.. Select the intended labs by clicking on each. (Remember to not select tests for specimens that the patient must produce such as urine, stools, sputum etc until the patient has successfully collected.) Click RELEASE (located above labs) Once tests are released, the orders will transmit into Sunquest and the labels will print automatically shortly after releasing the orders. The orders will disappear from the Epic Order Review Screen. NOTE: if there are numerous orders for a patient, you must use caution when selecting the orders to release. ONCE AN ORDER IS RELEASED IT CAN NOT BE UNDONE! NOTE: DO NOT release orders for specimens that the patient must produce until after the specimen is received, such as urine, stool, sputum etc.. Follow the Releasing orders process (Visit requiring new HOV) for generating labels for the specimens after the patient has collected.
Closing out of the Patients chart After the orders are successfully released click on the X beside the double headed arrow in the Order Review box to close the patient s chart. Click on the X Icon next to the patient tab (patient s name) to close the Patient s Patient Station.
After labels have been released from Epic to Sunquest. (note this takes up to a minute) Retrieve labels Review labels for specimens needed Draw the patient (follow established policy and best practices) After the patient is drawn verify the patient s Name and DOB on the labels with the patient. Affix labels to the tubes. Log into Sunquest
Sunquest Username = Partner s log in ALL CAPS First time password must be reset Select a password that is 8-15 character. Enter password in ALL CAPS
All samples must be Received in Sunquest after the completion of a successful draw Select General Lab Icon Click on Orders drop down Select Order Receipt/Modify This will bring you to the Order Access Screen. NEVER use the RAPID RECEIPT tab (2). Make sure you are in the 1 Order Receipt tab before proceeding.
Order Access Screen Make sure your Access Option is Container CID Click in the box next to the Container CID to start receiving Scan the label affixed to the specimen Hit ENTER or click GET PATIENT Verify the information is correct Click on Display Orders button The Order Receipt/Modification screen will appear.
Order Receipt/Modification Enter the Receipt date and time Click or tab into the Scan CID field (middle box) Scan each specimen DO NOT click Receive ALL X will appear next to all specimens scanned indicating they are received and ready to be placed on the Batch list. (See batch list instructions) Click SAVE button once all of the specimen you have collected are Received By clicking Save you will be brought back to the Order Access Screen ready to scan your next patient after collection. Specimens are now ready for centrifuging or storing until they will be Batched for transport to the Main Lab. Place the specimens into the Centrifuge area or refrigerator for processing. Centrifuge and process according to specimen specification. Place all processed specimens in the designated area for Batching (See batch list instruction)
