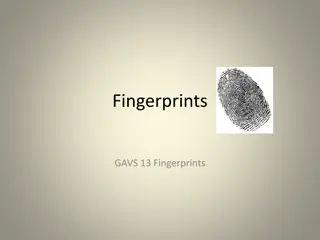
Forensic Science Lab: Fingerprint Collection and Classification

Engage in a hands-on forensic science lab to learn how to collect and classify inked fingerprints. In this lab, students will gather prints, use magnifying glasses, and categorize the prints according to specific patterns. Detailed steps and required equipment ensure a thorough understanding of the process. Additionally, students will learn how to handle unique situations such as amputations or deformities affecting fingerprinting. The assignment emphasizes accuracy and attention to detail, providing a comprehensive experience in forensic science techniques.

Download Presentation

Please find below an Image/Link to download the presentation.
The content on the website is provided AS IS for your information and personal use only. It may not be sold, licensed, or shared on other websites without obtaining consent from the author. Download presentation by click this link. If you encounter any issues during the download, it is possible that the publisher has removed the file from their server.
E N D
Presentation Transcript
OBJECTIVE Student will learn how to obtain inked fingerprints from classmates Student will classify each print
Equipment Needed Magnifying glasses 10X or greater 1. 2. Porelon pad or ink roller and slab 3. Ten card fingerprint holder
Supplies Needed Fingerprint card 1. 2. Fingerprint ink pad 3. Adhesive re-tabs 4. One gallon hand cleaner with pumice (to remove ink from fingers 5. Paper towels
Assignment Document each step of the following lab in your lab notebook. Be sure to include specific directions so you could repeat the experiment in its entity should the need arise.
Assignment Pick up two unused fingerprint cards, ten card fingerprint holder slab, inking materials, and a magnifying glass from your instructor. 2. Write your name (the person taking the prints) and the subjects name (the person whose prints you will take) on one fingerprint card, indicating which person is taking the prints and which person is the subject. 1.
Assignment 3. Collect the prints from the subject as demonstrated. a. Remember to stand to the left of the subject while rolling the prints. b. Have subject wash and dry fingers thoroughly. c. Roll fingers from nail to nail. Do not allow fingers to slip. d. Be sure impressions are recorded in correct order.
Assignment e. If an amputation or deformity exist, making it impossible to print a finger, make an notation to that effect in the corresponding fingerprint block on the print card. If a physical condition of the subject makes it impossible to obtain perfect impressions, attach a memo to the print card explaining the circumstances. f.
Assignment Clean the printing station and have the subject wash his/her hands. If ink is hard to get off use hand cleaner. 4. 5. Classify the prints according to the following: a. Whorls- plain, double, central pocket and accidental b. Loops- ulnar and radial c. Arches- plain and tented