CASE IH MAGNUM 190 Tractor with CVT Transmission Service Repair Manual Instant Download (from PIN ZARH06086)
Please open the website below to get the complete manualnn// n

Download Presentation

Please find below an Image/Link to download the presentation.
The content on the website is provided AS IS for your information and personal use only. It may not be sold, licensed, or shared on other websites without obtaining consent from the author. Download presentation by click this link. If you encounter any issues during the download, it is possible that the publisher has removed the file from their server.
E N D
Presentation Transcript
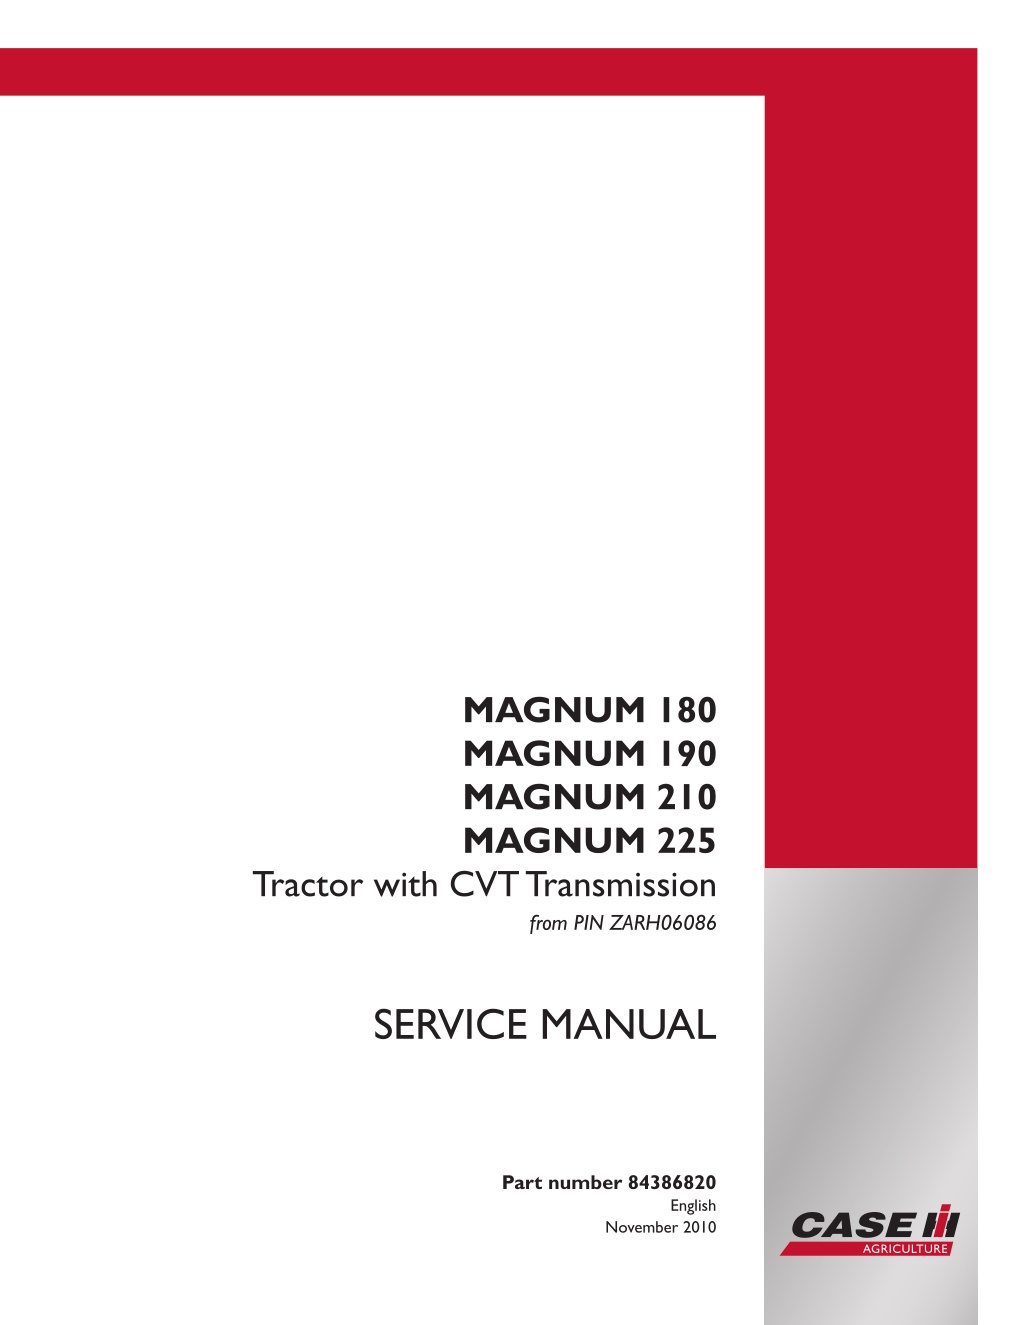
MAGNUM 180 MAGNUM 190 MAGNUM 210 MAGNUM 225 Tractor with CVT Transmission from PIN ZARH06086 SERVICE MANUAL Part number 84386820 Printed in U.S.A. English Copyright 2010 CNH America LLC. All Rights Reserved. Case is a registered trademark of CNH America LLC. Racine Wisconsin 53404 U.S.A. November 2010
SERVICE MANUAL Magnum 180 [ZARH06086 - ] Magnum 190 [ZARH06086 - ] Magnum 210 [ZARH06086 - ] Magnum 225 [ZARH06086 - ] 84386820 15/11/2010
Contents INTRODUCTION HYDRAULIC-PNEUMATIC-ELECTRICAL-ELECTRONICSYSTEMSA PRIMARY HYDRAULIC POWER SYSTEM............................................... A.10.A PRIMARY HYDRAULIC POWER SYSTEM Electro-hydraulic remote valve..............A.10.C ELECTRICAL POWER SYSTEM ......................................................... A.30.A ELECTRONIC SYSTEM .................................................................. A.50.A FAULT CODES ............................................................................ A.50.A ENGINE AND PTO IN....................................................................B ENGINE ................................................................................... B.10.A FUEL AND INJECTION SYSTEM......................................................... B.20.A AIR INTAKE SYSTEM..................................................................... B.30.A EXHAUST SYSTEM Emissions control ................................................... B.40.B ENGINE COOLANT SYSTEM ............................................................ B.50.A LUBRICATION SYSTEM .................................................................. B.60.A TRANSMISSION, DRIVE AND PTO OUT.........................................C POWER COUPLING Fixed coupling ......................................................C.10.B POWER COUPLING Drop box............................................................C.10.E ADDITIONAL REDUCERS Creeper...................................................... C.30.C REAR PTO Hydraulic..................................................................... C.40.C BAR AXLE.................................................................................C.60.A AXLES, BRAKES AND STEERING..................................................D FRONT AXLE .............................................................................D.10.A 2WD-4WD SYSTEM Hydraulic........................................................... D.14.C STEERING Hydraulic..................................................................... D.20.C SERVICE BRAKE Hydraulic.............................................................. D.30.C PARKING BRAKE Electronic............................................................. D.32.D BRAKE CONNECTION Hydraulic........................................................ D.34.C FRAME AND CAB .........................................................................E 84386820 15/11/2010
https://www.ebooklibonline.com Hello dear friend! Thank you very much for reading. Enter the link into your browser. The full manual is available for immediate download. https://www.ebooklibonline.com
SHIELD.................................................................................... E.20.A USER CONTROLS AND SEAT ........................................................... E.32.A USER CONTROLS AND SEAT Operator seat ............................................E.32.C USER PLATFORM ........................................................................ E.34.A ENVIRONMENT CONTROL Heating, ventilation and air-conditioning....................E.40.D FRAME POSITIONING ..................................................................F STABILISING Ballasting................................................................... F.20.B HITCH AND WORKING TOOL........................................................H HITCH Rear hitch......................................................................... H.10.C 84386820 15/11/2010
INTRODUCTION 84386820 15/11/2010 1
INTRODUCTION Torque Magnum 180, Magnum 190, Magnum 210 Decimal hardware Grade 5 bolts, nuts and studs Nm Size lb in/lb ft 12 - 15 Nm 23 - 28 Nm 48 - 57 Nm 73 - 87 Nm 109 - 130 Nm 149 - 179 Nm 203 - 244 Nm 366 - 439 Nm 542 - 651 Nm 787 - 944 Nm 1085 - 1193 Nm 1519 - 1681 Nm 1980 - 2278 Nm 2631 - 2983 Nm 108 - 132 lb in 204 - 252 lb in 420 - 504 lb in 54 - 64 lb ft 80 - 96 lb ft 110 - 132 lb ft 150 - 180 lb ft 270 - 324 lb ft 400 - 480 lb ft 580 - 696 lb ft 800 - 880 lb ft 1120 - 1240 lb ft 1460 - 1680 lb ft 1940 - 2200 lb ft 1/4 in 5/16 in 3/8 in 7/16 in 1/2 in 9/16 in 5/8 in 3/4 in 7/8 in 1 in 1-1/8 in 1-1/4 in 1-3/8 in 1-1/2 in Grade 8 bolts, nuts and studs Nm Size lb in/lb ft 16 - 20 Nm 33 - 39 Nm 61 - 73 Nm 95 - 114 Nm 149 - 179 Nm 217 - 260 Nm 298 - 358 Nm 515 - 618 Nm 814 - 976 Nm 1220 - 1465 Nm 1736 - 1953 Nm 2468 - 2712 Nm 3227 - 3688 Nm 4285 - 4827 Nm 144 - 180 lb in 288 - 348 lb in 540 - 648 lb in 70 - 84 lb ft 110 - 132 lb ft 160 - 192 lb ft 220 - 264 lb ft 380 - 456 lb ft 600 - 720 lb ft 900 - 1080 lb ft 1280 - 1440 lb ft 1820 - 2000 lb ft 2380 - 2720 lb ft 3160 - 3560 lb ft 1/4 in 5/16 in 3/8 in 7/16 in 1/2 in 9/16 in 5/8 in 3/4 in 7/8 in 1 in 1-1/8 in 1-1/4 in 1-3/8 in 1-1/2 in NOTE: Use thick nuts with Grade 8 bolts. Metric hardware Grade 8.8 bolts, nuts and studs Size 4 mm 5 mm 6 mm 8 mm 10 mm 12 mm 14 mm 16 mm 20 mm 24 mm 30 mm 36 mm Nm lb in/lb ft 3 - 4 Nm 7 - 8 Nm 11 - 12 Nm 26 - 31 Nm 52 - 61 Nm 90 - 107 Nm 144 - 172 Nm 217 - 271 Nm 434 - 515 Nm 675 - 815 Nm 1250 - 1500 Nm 2175 - 2600 Nm 24 - 36 lb in 60 - 72 lb in 96 - 108 lb in 228 - 276 lb in 456 - 540 lb in 66 - 79 lb ft 106 - 127 lb ft 160 - 200 lb ft 320 - 380 lb ft 500 - 600 lb ft 920 - 1100 lb ft 1600 - 1950 lb ft 84386820 15/11/2010 3
INTRODUCTION Grade 10.9 bolts, nuts and studs Size 4 mm 5 mm 6 mm 8 mm 10 mm 12 mm 14 mm 16 mm 20 mm 24 mm 30 mm 36 mm Nm lb in/lb ft 4 - 5 Nm 9 - 11 Nm 15 - 18 Nm 37 - 43 Nm 73 - 87 Nm 125 - 150 Nm 200 - 245 Nm 310 - 380 Nm 610 - 730 Nm 1050 - 1275 Nm 2000 - 2400 Nm 3500 - 4200 Nm 36 - 48 lb in 84 - 96 lb in 132 - 156 lb in 324 - 384 lb in 54 - 64 lb ft 93 - 112 lb ft 149 - 179 lb ft 230 - 280 lb ft 450 - 540 lb ft 780 - 940 lb ft 1470 - 1770 lb ft 2580 - 3090 lb ft Grade 12.9 bolts, nuts and studs Size Typically the torque values specified for grade 10.9 hardware can be used satisfactorily on grade 12.9 hardware. Nm lb in/lb ft Steel hydraulic fittings 37 flare fitting Tube outside diameter/Hose inside diameter inch 6.4 mm 7.9 mm 9.5 mm 12.7 mm 15.9 mm 19.0 mm 22.2 mm 25.4 mm 31.8 mm 38.1 mm Thread size Nm lb in/lb ft mm 8 - 16 Nm 11 - 22 Nm 14 - 34 Nm 20 - 57 Nm 34 - 79 Nm 54 - 108 Nm 81 - 135 Nm 102 - 158 Nm 169 - 223 Nm 285 - 338 Nm 72 - 144 lb in 96 - 192 lb in 120 - 300 lb in 180 - 504 lb in 300 - 696 lb in 40 - 80 lb ft 60 - 100 lb ft 75 - 117 lb ft 125 - 165 lb ft 210 - 250 lb ft 1/4 in 5/16 in 3/8 in 1/2 in 5/6 in 3/4 in 7/8 in 1 in 1-1/4 in 1-1/2 in 7/16-20 in 1/2-20 in 9/16-18 in 3/4-16 in 7/8-14 in 1-1/16-12 in 1-3/16-12 in 1-5/16-12 in 1-5/8-12 in 1-7/8-12 in Straight threads with O-ring Tube outside diameter/Hose inside diameter inch 6.4 mm 7.9 mm 9.5 mm 12.7 mm 15.9 mm 19.0 mm 22.2 mm 25.4 mm 31.8 mm 38.1 mm Thread size Nm lb in/lb ft mm 16 - 26 Nm 22 - 34 Nm 34 - 54 Nm 57 - 91 Nm 79 - 124 Nm 108 - 174 Nm 136 - 216 Nm 159 - 253 Nm 224 - 357 Nm 339 - 542 Nm 144 - 228 lb in 192 - 300 lb in 300 - 480 lb in 540 - 804 lb in 58 - 92 lb ft 80 - 128 lb ft 100 - 160 lb ft 117 - 187 lb ft 165 - 264 lb ft 250 - 400 lb ft 1/4 in 5/16 in 3/8 in 1/2 in 5/6 in 3/4 in 7/8 in 1 in 1-1/4 in 1-1/2 in 7/16-20 in 1/2-20 in 9/16-18 in 3/4-16 in 7/8-14 in 1-1/16-12 in 1-3/16-12 in 1-5/16-12 in 1-5/8-12 in 1-7/8-12 in Split flange mounting bolts Nm Size lb in/lb ft 20 - 27 Nm 27 - 34 Nm 47 - 61 Nm 74 - 88 Nm 190 - 203 Nm 180 - 240 lb in 240 - 300 lb in 420 - 540 lb in 55 - 65 lb ft 140 - 150 lb ft 5/16-18 in 3/8-16 in 7/16-14 in 1/2-13 in 5/8-11 in 84386820 15/11/2010 4
INTRODUCTION O-ring face seal end O-ring boss end fitting or lock nut Thread size Nm Nominal SAE dash size -4 Tube outside diameter mm Thread size Nm lb in/lb ft lb in/lb ft in 6.4 mm 14 - 16 Nm 120 - 144 23 - 27 Nm 204 - 240 1/4 in 9/16-18 in 7/16-20 in lb in lb in -6 9.5 mm 11/16-16 in 24 - 27 Nm 216 - 240 34 - 41 Nm 300 - 360 3/8 in 9/16-18 in lb in lb in -8 12.7 mm 13/16-16 in 43 - 54 Nm 384 - 480 61 - 68 Nm 540 - 600 1/2 in 3/4-16 in lb in lb in -10 15.9 mm 1-14 in 62 - 76 Nm 552 - 672 81 - 88 Nm 60 - 65 lb ft 5/8 in 7/8-14 in lb in 65 - 80 lb ft 1-1/16-12 -12 19.0 mm 90 - 110 Nm 90 - 110 Nm 125 - 140 Nm 170 - 190 Nm 200 - 254 Nm 115 - 122 Nm 129 - 136 Nm 156 - 169 Nm 3/4 in 1-3/16-12 in 1-3/16-12 in 1-7/16-12 in 1-11/16-12 in 2-12 in 85 - 90 lb ft in -14 22.2 mm 95 - 100 lb ft 115 - 125 lb ft 150 - 160 lb ft 190 - 200 lb ft 7/8 in 65 - 80 lb ft 1-13/16-12 in 1-5/16-12 in 1 -5/6-12 in 201 - 217 -16 25.41 mm 1.0 in 92 - 105 lb ft 125 - 140 lb ft 150 - 180 lb ft -20 31.8 mm 1-1/4 in Nm -24 38.1 mm 1-7/8-12 in 258 - 271 1-1/2 in Nm 84386820 15/11/2010 5
INTRODUCTION Capacities Magnum 180, 190, 210 and 225 System Engine Oil No filter change With filter change Cooling system Transmission/hydraulic system Full Powershift CVT Mechanical front drive (MFD) 4 pin 10 bolt axle* Differential Planetary (each) 4 pin 12 bolt axle* Differential Planetary (each) Fuel tank DEF/AdBlue tank MFD gearbox * Pin and bolt quantity are determined by observing the wheel ends. Metric Imperial U.S. 16 l 16.5 l 23.65 l 3.52 UK gal 3.63 UK gal 5.2 UK gal 4.23 US gal 4.36 US gal 6.25 US gal 85 l 100 l 18.7 UK gal 22.0 UK gal 22.5 US gal 26.4 US gal 12.3 l 1.4 l 21.6 UK pt 2.4 UK pt 13 US qt 3 US pt 11 l 2.3 l 446 l 56.8 l 275 ml 21.6 UK pt 2.0 UK qt 98.25 UK gal 56.8 l (12.5 UK gal) 9.7 UK fl oz 11.6 US qt 2.4 US qt 118 US gal 15 US gal 9.3 US fl oz 84386820 15/11/2010 6
SERVICE MANUAL HYDRAULIC - PNEUMATIC - ELECTRICAL - ELECTRONIC SYSTEMS Magnum 180 Magnum 190 Magnum 210 Magnum 225 84386820 15/11/2010 A
HYDRAULIC - PNEUMATIC - ELECTRICAL - ELECTRONIC SYSTEMS - PRIMARY HYDRAULIC POWER SYSTEM Charge pump - Pressure test Magnum 225 [ZARH06086 - ] CVT Transmission, Magnum 180, Magnum 190, Magnum 210 Special Tools: Use pressure adapter kit 380000464 and hydraulic pressure test kit 380000240 for this test. Use an appropriate low pressure gauge for the charge pressure reading. A flowmeter 380001806 and 19 mm (0.75 in) hoses with a minimum working pressure of 21000 kPa (3000 psi) are required for this test. NOTE: Make sure the proper maintenance schedule for the hydraulic system filters has been maintained, prior to running test. 1. To perform this test: Remove the charge pressure switch and adapter. Install the quick release coupler and the quick release fitting from kit. Install the low pressure gauge from kit. 1 RCPH09CCH013FAE 84386820 15/11/2010 A.10.A / 62
HYDRAULIC - PNEUMATIC - ELECTRICAL - ELECTRONIC SYSTEMS - PRIMARY HYDRAULIC POWER SYSTEM 2. Set up the remote loop: Set variable flow controls to the maximum flow position for the remote valves. Set the valve timer control to the maximum time position. Install the flowmeter into the first remote sec- tion. Place the remote valve control lever in the detent retract position. Set the flowmeter load valve at minimum pres- sure turned out counterclockwise. Start and run the engine at 1500 RPM. Use a piece of cardboard to block air flow across the oil cooler to help heat the oil to 49 C (120 F). 3. Maintain the engine speed at 1500 RPM. Move the remote lever between the retract and neutral po- sition. The charge pressure reading should maintain a minimum pressure of 160 kPa (23 psi). If the pres- sure reading falls below 160 kPa (23 psi), replace the hydraulic oil filters and check the main filter as- sembly 300 kPa (43 psi) and 80 kPa (12 psi) check valve assemblies on the main filter assembly. . The check valve assemblies are built into the main filter assembly. Make sure a check is not stuck open or damaged. After replacing filter and inspecting check valves retest the charge pressure. 84386820 15/11/2010 A.10.A / 63
HYDRAULIC - PNEUMATIC - ELECTRICAL - ELECTRONIC SYSTEMS - PRIMARY HYDRAULIC POWER SYSTEM 4. If after retest the charge pressure is still below spec- ification, inspect the maximum pressure lube relief valve (4). The maximum pressure lube relief valve is located on the underside of the transmission control valve (1) manifold plate (3). 2 RCIL09CCH001BAE 5. If the maximum pressure lube relief valve is stuck open or damaged, repair or replace as necessary. 6. If the maximum pressure lube relief valve is good and charge pressure remains low, disassemble and inspect charge pump. 84386820 15/11/2010 A.10.A / 64
HYDRAULIC - PNEUMATIC - ELECTRICAL - ELECTRONIC SYSTEMS - PRIMARY HYDRAULIC POWER SYSTEM Charge pump - Remove Magnum 225 [ZARH06086 - ] CVT Transmission, Magnum 180, Magnum 190, Magnum 210 Prior operation: Control valve Priority/Regulator valve - Remove (A.10.A) 1. Remove the external components from the charge pump: Remove the charge pump filter (1). Unplug the harness connectors (2) and move harness aside. Cut the tie strap and remove the locking clip (3). Disconnect the tube (4). Remove the two bolts (5). Remove the tube assembly. 1 RCPH09CCH040AAC 2. Remove the two bolts (1) for the oil suction pipe as shown. Remove the two top bolts (2) for the rear cover of the charge pump, and install two guide pins. 2 RCPH09CCH091AAC 3. Remove the two bottom bolts, and remove the charge pump from the high pressure pump. 3 RCPH09CCH092AAC Next operation: Charge pump - Install (A.10.A) 84386820 15/11/2010 A.10.A / 65
HYDRAULIC - PNEUMATIC - ELECTRICAL - ELECTRONIC SYSTEMS - PRIMARY HYDRAULIC POWER SYSTEM Charge pump - Install Magnum 225 [ZARH06086 - ] CVT Transmission, Magnum 180, Magnum 190, Magnum 210 Prior operation: Charge pump - Remove (A.10.A) 1. Lubricate a new O-ring with petroleum jelly, and in- stall the O-ring on the pump. NOTE: Be sure all surfaces are clean, free of any debris. 1 RCPH09CCH084AAC 2. Install two guide pins (1) and the coupling (2) on the high pressure pump. Remove the cap from the oil tube and check that the seal (3) is in place. 2 RCPH09CCH083AAC 3. Install the charge pump on the guide pins and high pressure pump. 3 RCPH09CCH085AAC 84386820 15/11/2010 A.10.A / 66
HYDRAULIC - PNEUMATIC - ELECTRICAL - ELECTRONIC SYSTEMS - PRIMARY HYDRAULIC POWER SYSTEM 4. Install the rotor housing in the charge pump housing. NOTE: When reassembling the pump, the punched dot markings on the rotor and rotor housing must face to the outside of the pump housing. 4 RCPH09CCH086AAC 5. Install the shaft (1) and key (2). NOTE: Be sure the spline end of the shaft is inserted into the coupling. 5 RCPH09CCH087AAC 6. Install the pump rotor on the shaft. NOTE: When reassembling the pump, the punched dot markings on the rotor and rotor housing must face to the outside of the pump housing. 6 RCPH09CCH088AAC 84386820 15/11/2010 A.10.A / 67
HYDRAULIC - PNEUMATIC - ELECTRICAL - ELECTRONIC SYSTEMS - PRIMARY HYDRAULIC POWER SYSTEM 7. Lubricate a new O-ring with petroleum jelly, and in- stall the O-ring on the end plate. . 7 RCPH09CCH089AAC 8. Instal the two lower bolts (1) to hold the charge pump in place. Remove the two guide pins (2) and install the two upper bolts. Torque the four bolts to 50 - 62 N m (36.9 - 45.7 lb ft). NOTE: The spline end of the shaft must be installed in the coupling before the bolts are tightened. 8 RCPH09CCH092AAC 9. Install the two bolts for the suction tube and tighten. 9 RCPH09CCH090AAC 84386820 15/11/2010 A.10.A / 68
HYDRAULIC - PNEUMATIC - ELECTRICAL - ELECTRONIC SYSTEMS - PRIMARY HYDRAULIC POWER SYSTEM 10. Attach tube to connector at the top (2) and secure with two bolts (1). Install the clip lock and secure with tie strap (2). Connect tube nut to the fitting (3), install the electrical harness and connect as marked during disassembly (4). Install the charge pump filter (5). 10 RCPH09CCH040AAC Next operation: Control valve Priority/Regulator valve - Install (A.10.A) 84386820 15/11/2010 A.10.A / 69
HYDRAULIC - PNEUMATIC - ELECTRICAL - ELECTRONIC SYSTEMS - PRIMARY HYDRAULIC POWER SYSTEM Compensator - Overhaul Magnum 225 [ZARH06086 - ] CVT Transmission, Magnum 180, Magnum 190, Magnum 210 1. Disconnect load sense line connection and remove pressure and flow compensating valve assembly. Remove the tamper proof caps, carefully unscrew each adjuster and remove the component parts. Refer to the exploded view for the compensator. To ensure correct reassembly keep the component parts for each valve separate. NOTICE: Due to extreme spring pressure within valves DO NOT remove rear plugs until the adjusters have been re- moved. 1 BSD2023A 2. Reassembly of the valves follows the removal proce- dure in reverse. On reassembly observe the follow- ing :- Wash all components in a suitable solvent. Examine all components for wear or damage. If the spools are damaged it is necessary to replace the complete valve assembly. Lubricate all parts with clean hydraulic oil. To aid reassembly of pressure and flow compensat- ing valves, the spools should be inserted into the rear of the housing. Tighten all plugs and locknuts to the correct torque as detailed in Specifications. 2 TIA35166 3. When installing valve on pump ensure all O ring seals are correctly installed. Pressure test the pump and adjust the pressure and flow compensating valves to the correct specifica- tion. 3 TIA35007 84386820 15/11/2010 A.10.A / 70
HYDRAULIC - PNEUMATIC - ELECTRICAL - ELECTRONIC SYSTEMS - PRIMARY HYDRAULIC POWER SYSTEM NOTE: If the damper screw (1) is removed for any reason it should be reinstalled in alignment with the three ports and should be fixed into position using a suitable thread lock and seal product. Failure to adjust this screw correctly could reduce the efficiency of the system. 4 BSF4760A 84386820 15/11/2010 A.10.A / 71
HYDRAULIC - PNEUMATIC - ELECTRICAL - ELECTRONIC SYSTEMS - PRIMARY HYDRAULIC POWER SYSTEM Filter - Remove - Transmission main filter Magnum 225, Magnum 180, Magnum 190, Magnum 210 1. Open the air bleed valve (1) three-quartere turn to allow air into the filter: most of the oil should drain back into the hydraulic system. 1 RCPH08CCH669AAB 2. Be prepared to collect some hydraulic fluid in a suit- able container. Wait a few minutes and then remove the 19 mm plug (1) from the filter casing. Drain the fluid into a suitable container. 2 RCPH08CCH671AAB 3. Using a 41 mm (1 5/8 in) socket or ring spanner, re- move the filter support plate by turning approximately 45 to the left. 3 RCPH08CCH672AAB 4. Remove the filter support plate. 4 RCPH08CCH673AAB 84386820 15/11/2010 A.10.A / 72
HYDRAULIC - PNEUMATIC - ELECTRICAL - ELECTRONIC SYSTEMS - PRIMARY HYDRAULIC POWER SYSTEM 5. Remove the filter cartridge and discard properly. 5 RCPH08CCH674AAB 6. Inspect the support cover seal. Replace as neces- sary. 6 RCPH08CCH676AAB Next operation: Filter - Install Transmission main filter (A.10.A) 84386820 15/11/2010 A.10.A / 73
HYDRAULIC - PNEUMATIC - ELECTRICAL - ELECTRONIC SYSTEMS - PRIMARY HYDRAULIC POWER SYSTEM Filter - Install Transmission main filter Magnum 225, Magnum 180, Magnum 190, Magnum 210 Prior operation: Filter - Remove - Transmission main filter (A.10.A) 1. Install the new filter cartridge in the canister. 1 RCPH08CCH674AAB 2. With the alignment arrows (1) about 45 apart, install the cover and turn clockwise by hand to tighten. 2 RCPH08CCH673AAB 3. Use a 41 mm (1 5/8 in) socket or ring spanner to tighten the support plate until the arrows (1) are aligned. 3 RCPH08CCH672AAB 84386820 15/11/2010 A.10.A / 74
HYDRAULIC - PNEUMATIC - ELECTRICAL - ELECTRONIC SYSTEMS - PRIMARY HYDRAULIC POWER SYSTEM 4. Reinstall the drain plug and tighten. NOTE: Do not over tighten. 4 RCPH08CCH671AAB 5. Start the engine and check the filter for any leaks. Shut off the engine and check transmission oil level. Add transmission oil AKCELA NEXPLORE (MAT 3525) as required. 84386820 15/11/2010 A.10.A / 75
HYDRAULIC - PNEUMATIC - ELECTRICAL - ELECTRONIC SYSTEMS - PRIMARY HYDRAULIC POWER SYSTEM Filter - Remove - Charge or vane pump filter Magnum 225, Magnum 180, Magnum 190, Magnum 210 On tractors with a Powershift transmission, there are two filters, the main filter (1) which has a replaceable cartridge, and the charge pump filter (2) which is a disposable type. The filters are located on the right side of the transmission. Before changing the charge filter (2) at 600 hours, clean the area around the mounting plate and filter. Turn the filter counterclockwise to remove it; dispose the filter properly. 1 RCPH08CCH668AAB On tractors with a CVT transmission, there are four filters: the main filter (1) (1200 hours) which has a replaceable cartridge, the charge pump filter (2) (600 hours) which is a disposable type, the vane pump filter (3) (600 hours) which is a disposable type, and the lubrication filter (not shown) which is serviced by the dealer at 1200 hours or two years. 2 RCPH09CCH500BAA 1. The filters are located on the right side of the trans- mission. Before changing the charge filter (2) and vane filter (3) at 600 hours, clean the area around the mounting plate and filter. Turn the filter counter- clockwise to remove it; dispose the filter properly. 3 RCPH09CCH500BAA Next operation: Filter - Install - Charge or vane pump filter (A.10.A) 84386820 15/11/2010 A.10.A / 76
HYDRAULIC - PNEUMATIC - ELECTRICAL - ELECTRONIC SYSTEMS - PRIMARY HYDRAULIC POWER SYSTEM Filter - Install - Charge or vane pump filter Magnum 225, Magnum 180, Magnum 190, Magnum 210 Prior operation: Filter - Remove - Charge or vane pump filter (A.10.A) 1. To install a new filter: A. Clean the filter mounting surface. B. Apply a thin coat of oil on the new filter seal, and install the filter. C. Tighten until the seal contacts the mounting surface, then tighten an additional three-quar- ter to one full turn. Do not overtighten. D. Start the engine and check the filter for any leaks. Shut off the engine and check transmis- sion oil level. Add transmission oil AKCELA NEXPLORE (MAT 3525) as required 84386820 15/11/2010 A.10.A / 77
HYDRAULIC - PNEUMATIC - ELECTRICAL - ELECTRONIC SYSTEMS - PRIMARY HYDRAULIC POWER SYSTEM Filter - Remove - Main filter assembly Magnum 225, Magnum 180, Magnum 190, Magnum 210 Prior operation: Filter - Remove - Transmission main filter (A.10.A) 1. On the left hand side of the filter assembly, discon- nect the hydraulic charge line (1). 2. Disconnect the harness connector (2) to the sensor. 1 RCPH09CCH430AAA 3. Disconnect the hydraulic pipe. 2 BAIL08CVT260AVA 4. Cut the tie straps from the three connectors on the right hand side of the filter assembly. 5. Remove the locking strap from each connector. 6. Separate the hydraulics lines at the connectors from the assembly. 3 RCPH09CCH434AAA 84386820 15/11/2010 A.10.A / 78
HYDRAULIC - PNEUMATIC - ELECTRICAL - ELECTRONIC SYSTEMS - PRIMARY HYDRAULIC POWER SYSTEM 7. Cut the tie straps securing the two connectors on the left hand side of the filter assembly. 8. Remove the locking strap from each connector. 9. Separate the hydraulics lines at the connectors from the assembly. 4 RCPH09CCH435AAA 10. Loosen the retaining bolts and remove the filter as- sembly. 5 RCPH09CCH437AAA Next operation: Filter - Install - Main filter assembly (A.10.A) 84386820 15/11/2010 A.10.A / 79
HYDRAULIC - PNEUMATIC - ELECTRICAL - ELECTRONIC SYSTEMS - PRIMARY HYDRAULIC POWER SYSTEM Filter - Install - Main filter assembly Magnum 225, Magnum 180, Magnum 190, Magnum 210 Prior operation: Filter - Remove - Main filter assembly (A.10.A) 1. Install the filter assembly on the axle housing with the bolts removed earlier. 2. Torque the bolts to 40 N m (30 lb ft). 1 RCPH09CCH437AAA 3. Connect the hydraulic lines to the connectors on the left hand side of the filter assembly. 4. Install the locking strap for each connector. 5. Install a new tie strap on each connector. 2 RCPH09CCH435AAA 6. Connect the hydraulic lines to the three connectors on the right hand side of the filter assembly. 7. Install the locking strap for each connector. 8. Install a new tie strap on each connector. 3 RCPH09CCH434AAA 84386820 15/11/2010 A.10.A / 80
HYDRAULIC - PNEUMATIC - ELECTRICAL - ELECTRONIC SYSTEMS - PRIMARY HYDRAULIC POWER SYSTEM 9. On the left hand side of the filter assembly, connect the hydraulic pipe. 4 BAIL08CVT260AVA 10. Connect the hydraulic charge line (1). 11. Connect the harness connector (2) to the sensor. 5 RCPH09CCH430AAA 84386820 15/11/2010 A.10.A / 81
HYDRAULIC - PNEUMATIC - ELECTRICAL - ELECTRONIC SYSTEMS - PRIMARY HYDRAULIC POWER SYSTEM Filter - Remove - Main hydraulic Magnum 225, Magnum 180, Magnum 190, Magnum 210 NOTE: Clean the hose connections thoroughly before disassembly. 1. Disconnect the harness connectors at locations (1), (2) and (3). Disconnect the ground wire (4). Move the harness out of the way. 1 RCPH10CCH211AAB 2. At the right hand side of the filter assembly, remove the tie straps (1). 2 RCPH10CCH212AAB 3. Remove the locking ring (1) from the upper hose as- sembly. 3 RCPH10CCH213AAB 4. Disconnect e the hose assembly (1) by pulling straight out. NOTE: A small screw driver or pry bar may be used to gently pry the hose assembly away from the filter housing. 4 RCPH10CCH214AAB 84386820 15/11/2010 A.10.A / 82
HYDRAULIC - PNEUMATIC - ELECTRICAL - ELECTRONIC SYSTEMS - PRIMARY HYDRAULIC POWER SYSTEM 5. Removethe bolts (1) securing the charge pump inlet hose adaptor. Loosen (but do not remove) the bolt (2). 5 RCPH10CCH215AAB 6. Removethelockingring(notshown). Disconnectthe hose assembly (1) from the filter housing. 6 RCPH10CCH216AAB 7. Remove the tie strap (1) from the top left hand hose assembly. 7 RCPH10CCH217AAB 8. With the aid of a small screw driver, dislodge the locking ring (1) from the center hose. Repeat for the bottom hose. 8 RCPH10CCH218AAB 84386820 15/11/2010 A.10.A / 83
HYDRAULIC - PNEUMATIC - ELECTRICAL - ELECTRONIC SYSTEMS - PRIMARY HYDRAULIC POWER SYSTEM 9. Remove the locking ring. hose. Repeat for the bottom 9 RCPH10CCH219AAB 10. Remove the left hand bolt (1) from the filter housing. Loosen (but do not remove) the right hand bolt (2). 10 RCPH10CCH216AAB 11. Pivot the filter housing and at the same time loosen the center and lower hose connections (1). Remove the upper hose locking ring (2) and dislodge the hose. Support the filter housing and remove the bolt (3). Remove the filter housing assembly. 11 RCPH10CCH220AAB Next operation: Filter - Install - Main hydraulic (A.10.A) 84386820 15/11/2010 A.10.A / 84
HYDRAULIC - PNEUMATIC - ELECTRICAL - ELECTRONIC SYSTEMS - PRIMARY HYDRAULIC POWER SYSTEM Filter - Install - Main hydraulic Magnum 180, Magnum 190, Magnum 210 Prior operation: Filter - Remove - Main hydraulic (A.10.A) 1. Align the filter housing with the hose fittings on the left side. Engage the hoses (1). Install the right hand bolt (2) removed earlier. 1 RCPH10CCH220AAB 2. Install the bolt (1) removed earlier. bolts. Tighten both 2 RCPH10CCH216AAB 3. Install the top hose locking ring (1). 3 RCPH10CCH216AAB 84386820 15/11/2010 A.10.A / 85
HYDRAULIC - PNEUMATIC - ELECTRICAL - ELECTRONIC SYSTEMS - PRIMARY HYDRAULIC POWER SYSTEM 4. Secure the locking ring with a plastic tie strap (1). 4 RCPH10CCH217AAB 5. Install the locking ring (1) for the center hose fitting and the lower hose locking ring. 5 RCPH10CCH219AAB 6. Connect the lower hose (1) (not shown) to the right sideofthefilterhousing. Installthelockingring. Con- nect the center hose (2). Install the locking ring. 6 RCPH10CCH216AAB 7. Connect the upper hose . 7 RCPH10CCH214AAB 84386820 15/11/2010 A.10.A / 86
Suggest: If the above button click is invalid. Please download this document first, and then click the above link to download the complete manual. Thank you so much for reading
HYDRAULIC - PNEUMATIC - ELECTRICAL - ELECTRONIC SYSTEMS - PRIMARY HYDRAULIC POWER SYSTEM 8. Install the locking ring (1). 8 RCPH10CCH213AAB 9. Using the bolts removed earlier (1), secure the inlet housing adaptor to the charge pump. Tighten the bolts. 9 RCPH10CCH215AAB 10. Install tie straps (1) to the locking rings on the right hand side (lower fitting not shown). NOTE: Tie straps prevent the locking rings from disengag- ing. 10 RCPH10CCH212AAB 11. Connect the harness connectors (1) and the ground wire connectors (2). 11 RCPH10CCH211AAB 84386820 15/11/2010 A.10.A / 87
https://www.ebooklibonline.com Hello dear friend! Thank you very much for reading. Enter the link into your browser. The full manual is available for immediate download. https://www.ebooklibonline.com