Motion in Computer Games: Lecture #11 Movement
Explore the fundamentals of motion in computer games through Lecture #11 Movement. Delve into concepts like Newton's Laws, vectors, motion terms, and handling various forces to enhance your grasp on gaming physics. Discover how to apply basic rules of motion, obtain continuous input from keyboards, fire missiles, calculate distances and angles, and handle gravity within game development.

Download Presentation

Please find below an Image/Link to download the presentation.
The content on the website is provided AS IS for your information and personal use only. It may not be sold, licensed, or shared on other websites without obtaining consent from the author.If you encounter any issues during the download, it is possible that the publisher has removed the file from their server.
You are allowed to download the files provided on this website for personal or commercial use, subject to the condition that they are used lawfully. All files are the property of their respective owners.
The content on the website is provided AS IS for your information and personal use only. It may not be sold, licensed, or shared on other websites without obtaining consent from the author.
E N D
Presentation Transcript
L Computer Games Lecture #11 Movement
Objectives Understanding basic rules of motion Getting continuous input from the keyboard Firing missiles from sprites Using vector projection Calculating the distance and angle between points Lecture #11 Movement
Objectives (cont.) Following the mouse Handling basic gravity Building a vehicle model with power, turning rate, and drag Modeling spacecraft motion Handling orbital physics Lecture #11 Movement
Gaming and Physics Games are about things moving around. To get motion right, you must understand how motion works in the real world. Basic physics describes these phenomena. You should take a more formal physics course. Lecture #11 Movement
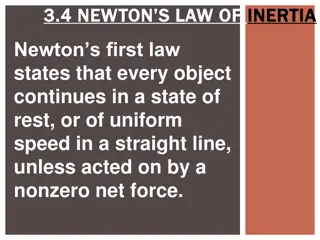
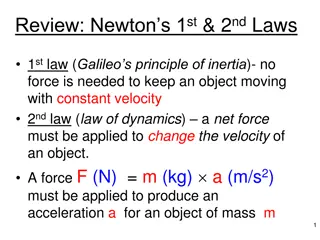
Newton's Laws These Laws describe how things move. The three primary Laws: An object at rest stays at rest. Force = mass * acceleration. Every action has an equal and opposite reaction. Understanding these principles gives you the ability to model motion. Lecture #11 Movement
Vectors Vector: Has direction and magnitude. Object motion is a vector because the magnitude is the speed and the direction is an angle. Vector components: A vector can also be described in dx/dy terms. Converting from speed/direction to dx/dy is called vector projection. Lecture #11 Movement
Motion Terms Position: The current position of an object, usually an (x, y) coordinate pair. Velocity: A change in position during a time frame. Often determined as a vector and converted to dx/dy components for convenience. Measured in pixels per frame (ppf). Acceleration: A change in velocity. A vector often changed to ddx/ddy. Sometimes called a force vector. Lecture #11 Movement
Multiple Force Vectors Motion is a combination of various forces. A balloon has weight pulling it down. Helium adds a buoyant force pulling it up. Wind adds a sideways force. How will the balloon move? Lecture #11 Movement
Adding Force Vectors It's easy to calculate multiple force vectors. Convert each force into dx/dy components. Add all dx values to get a total dx. Add all dy values to get a total dy. Lecture #11 Movement
Force Vector Example Force X Component Y Component Gravity 0 1 Buoyancy 0 -3 Wind 4 0 Total 4 2 Lecture #11 Movement
Getting Continuous Keyboard Input So far, keyboard input has been one event per key press. Sometimes, you want continuous action as long as a key is pressed down. This uses a technique called hardware polling. Lecture #11 Movement
Advantages of Hardware Polling A sprite can handle its own key presses. Keyboard input can be continuous. Motion appears much smoother. Hardware polling is pretty easy to implement. See turret.py. Continuous keyboard input Very smooth rotation Lecture #11 Movement
Building a Rotating Turret def __init__(self): pygame.sprite.Sprite.__init__(self) self.imageMaster = pygame.image.load("turret.gif") self.imageMaster = self.imageMaster.convert() self.rect = self.imageMaster.get_rect() self.rect.center = (320, 240) self.turnRate = 10 self.dir = 0 def update(self): self.checkKeys() self.rotate() Lecture #11 Movement
Notes on the Turret Class To preserve quality when rotating, load the image into a master image. Keep the turret in the center of the screen. Set up the turnRate constant. Smaller is slower and smoother. Set a dir constant. Update involves Checking keyboard Rotating turret Lecture #11 Movement
Checking the Keyboard Done in the turret's checkKeys() method def checkKeys(self): keys = pygame.key.get_pressed() if keys[pygame.K_LEFT]: self.dir += self.turnRate if self.dir > 360: self.dir = self.turnRate if keys[pygame.K_RIGHT]: self.dir -= self.turnRate if self.dir < 0: self.dir = 360 - self.turnRate Lecture #11 Movement
How Checking the Keyboard Works Store pygame.keyPressed() in a variable. It s a tuple of binary values, one for each key on the keyboard. Use a keyboard constant to check a particular key. Checking for left arrow: keys = pygame.key.get_pressed() if keys[pygame.K_LEFT]: Lecture #11 Movement
Rotating the Turret The steps are just like Lecture #10 (Chapter 8): Save center. Transform the new image from imgMaster. Place back in center. def rotate(self): oldCenter = self.rect.center self.image = pygame.transform.rotate(self.imageMaster, self.dir) self.rect = self.image.get_rect() self.rect.center = oldCenter Lecture #11 Movement
Building the Main Loop No keyboard handling! Note: You still need the event.get() mechanism. keepGoing = True while keepGoing: clock.tick(30) for event in pygame.event.get(): if event.type == pygame.QUIT: keepGoing = False allSprites.clear(screen, background) allSprites.update() allSprites.draw(screen) pygame.display.flip() Lecture #11 Movement
Vector Projection Chapter 8 (Lecture #10) projects a vector in eight directions. What if you want any direction, any speed? You should be able to convert any vector into its dx/dy components. This process is vector projection. Lecture #11 Movement
Looking at the Problem Lecture #11 Movement
Building a Triangle Lecture #11 Movement
Using Trig Terms Lecture #11 Movement
Solving for dy and dx Lecture #11 Movement
Dealing with Radians Lecture #11 Movement
How vecProj.py Works Written in text mode for simplicity Imports math module to get trig functions Begins a loop Inputs values for angle and distance Converts angle to radians Calculates dx and dy Inverts dy (in math, y increases upward) Outputs value Asks user if he or she wants to repeat Lecture #11 Movement
The vecProj.py Program """ vecProj given any angle and distance, converts to dx and dy No GUI. """ import math def main(): keepGoing = True while keepGoing: print print "Give me an angle and distance," print "and I'll convert to dx and dy values" print r = float(raw_input("distance: ")) degrees = float(raw_input("angle (degrees): ")) Lecture #11 Movement
The vecProj.py Program (Contd) theta = degrees * math.pi / 180 dx = r * math.cos(theta) dy = r * math.sin(theta) # compensate for inverted y axis dy *= -1 print "dx: %f, dy: %f" % (dx, dy) response = raw_input("Again? (Y/N)") if response.upper() != "Y": keepGoing = False Lecture #11 Movement
Making the Turret Fire With vector projection, you can make the turret fire a projectile. The bullet gets dx and dy by projecting the turret's direction. A label is added to output direction and charge. See turretFire.py. Lecture #11 Movement
Adding a Label Class class Label(pygame.sprite.Sprite): """ Label Class (simplest version) Properties: font: any pygame font object text: text to display center: desired position of label center (x, y) """ def __init__(self): pygame.sprite.Sprite.__init__(self) self.font = pygame.font.SysFont("None", 30) self.text = "" self.center = (320, 240) def update(self): self.image = self.font.render(self.text, 1, (0, 0, 0)) self.rect = self.image.get_rect() self.rect.center = self.center Lecture #11 Movement
Updating the Shell Class The turret instance needs to know about the shell instance. Pass the shell as a parameter to the turret constructor. Store the shell as an attribute of the turret. class Turret(pygame.sprite.Sprite): def __init__(self, shell): self.shell = shell # other init code here Lecture #11 Movement
Add a charge Property to the Turret The turret doesn't move, so it isn't correct to call it speed. The charge indicates the speed of the shell when it s fired. Add a charge attribute in the turret constructor. class Turret(pygame.sprite.Sprite): def __init__(self, shell): # other init code here self.charge = 5 Lecture #11 Movement
Modify the checkKeys() Method The up and down keys change the charge. if keys[pygame.K_UP]: self.charge += 1 if self.charge > 20: self.charge = 20 if keys[pygame.K_DOWN]: self.charge -= 1 if self.charge < 0: self.charge = 0 The spacebar fires a shell. if keys[pygame.K_SPACE]: self.shell.x = self.rect.centerx self.shell.y = self.rect.centery self.shell.speed = self.charge self.shell.dir = self.dir Lecture #11 Movement
Firing the Shell Set the shell's position equal to the turret's position so that the shell seems to be coming from the turret. Set the shell's speed to the turret's charge. Set the shell's direction to the turret's direction. Lecture #11 Movement
Creating the Shell Class The shell itself is very ordinary. I drew a circle instead of importing an image. It hides offstage (-100, -100) when not needed. It doesn't really get created by the turret it's always around, just offstage. This kind of illusion is very common. Lecture #11 Movement
Calculating the Shell's Vector def calcVector(self): radians = self.dir * math.pi / 180 self.dx = self.speed * math.cos(radians) self.dy = self.speed * math.sin(radians) self.dy *= -1 Use trig functions to determine dx and dy. Don't forget to invert dy to compensate for y increasing downward. Lecture #11 Movement
Resetting the Shell def reset(self): """ move off stage and stop""" self.x = -100 self.y = -100 self.speed = 0 Move the shell offstage. Set the speed to 0 so the shell doesn't wander back. Lecture #11 Movement
Modifying the Main Code Create all three sprites. shell = Shell(screen) turret = Turret(shell) lblOutput = Label() lblOutput.center = (100, 20) allSprites = pygame.sprite.Group(shell, turret, lblOutput) Update the label in the main loop. lblOutput.text = "dir: %d speed %d" % (turret.dir, turret.charge) allSprites.clear(screen, background) allSprites.update() allSprites.draw(screen) pygame.display.flip() Lecture #11 Movement
Following the Mouse Vector projection converts angle and distance to dx/dy. Sometimes, you have dx/dy and want angle and distance. More often, you have two points and want the angle and distance between them. See followMouse.py. Lecture #11 Movement
Converting Components Back to Vectors Lecture #11 Movement
Modifying the Turret Class The turret class no longer reads the keyboard, so now its update calls a followMouse() method. def update(self): self.followMouse() self.rotate() Lecture #11 Movement
Making a Turret Point towards the Mouse Compare the turret position with the mouse position. Subtract x values for dx. Subtract y values for dy. Use the atan() function to find the inverse tangent. Convert to degrees. Rotate the turret. Lecture #11 Movement
Following the Mouse def followMouse(self): (mouseX, mouseY) = pygame.mouse.get_pos() dx = self.rect.centerx - mouseX dy = self.rect.centery - mouseY dy *= -1 radians = math.atan2(dy, dx) self.dir = radians * 180 / math.pi self.dir += 180 #calculate distance self.distance = math.sqrt((dx * dx) + (dy * dy)) Lecture #11 Movement
How followMouse() Works Subtract positions to get dx, dy. Compensate for the inverted y axis. Calculate the angle between the turret and the mouse. (The atan2() function works even when dy is 0.) Convert the radian result to degrees. Offset by 180. (The result of atan2() is between - 180 and 180.) Calculate the distance by using the Pythagorean theorem. Lecture #11 Movement
Basic Gravity Concepts Trajectories normally (near a planet) follow parabolic paths. The horizontal speed of a projectile stays nearly constant (at least, in the game). The vertical velocity decreases. The object appears to pause at the top of the arc. It hits the ground at the same speed it left the cannon. Lecture #11 Movement
Simulating Basic Gravity See turretGrav.py. The turret is now viewed from the side. The shell follows a realistic arc. The arc is drawn on the screen as the shell moves. Lecture #11 Movement
Adding Gravity to the Shell Class Add a gravitational constant to the shell. self.gravity = .5 Set the initial dx and dy when the shell is fired. Add a call to calcPos() in update(). def update(self): self.calcPos() self.checkBounds() self.rect.center = (self.x, self.y) Lecture #11 Movement
Adding the Gravitational Force Compensate for gravity in calcPos(). def calcPos(self): #compensate for gravity self.dy += self.gravity Draw the shell's path. #get old position for drawing oldx = self.x oldy = self.y self.x += self.dx self.y += self.dy pygame.draw.line(self.background, (0,0,0), (oldx, oldy), (self.x, self.y)) Lecture #11 Movement
Drawing on the Background Drawing on the screen is temporary. To keep the drawings, draw on the background instead. Pass the background to the shell as a parameter. The shell draws its path on the background. To erase the drawing, refill the background surface. Lecture #11 Movement
Building a Vector-Based Vehicle Vector projection can add realism to vehicle models. Write sprite code like in Lecture #10 (Chapter 8). Change the calcVector() method to incorporate vector projection. See carVec.py. Lecture #11 Movement
Creating a Vector-Based Car Sprite Add turnRate and accel properties to the car in its init() method. self.turnRate = 3 self.accel = .1 self.x = 320 self.y = 240 Design an update() method to pass control around. def update(self): self.checkKeys() self.rotate() self.calcVector() self.checkBounds() self.rect.center = (self.x, self.y) Lecture #11 Movement


")


")


 Works")