Micro/Homestead Gardening for Improved Livelihood in Northeast Nigeria
The conflict in northeast Nigeria has led to internal displacements, prompting FAO to implement a micro/backyard/homestead gardening program. This initiative aims to enhance food security, nutrition, and income for vulnerable households with limited land access. Micro/homestead gardening offers diversified nutritious vegetables, crucial for health and economic empowerment, particularly benefiting IDPs, returnees, and host communities in Borno, Adamawa, and Yobe states.
Download Presentation

Please find below an Image/Link to download the presentation.
The content on the website is provided AS IS for your information and personal use only. It may not be sold, licensed, or shared on other websites without obtaining consent from the author.If you encounter any issues during the download, it is possible that the publisher has removed the file from their server.
You are allowed to download the files provided on this website for personal or commercial use, subject to the condition that they are used lawfully. All files are the property of their respective owners.
The content on the website is provided AS IS for your information and personal use only. It may not be sold, licensed, or shared on other websites without obtaining consent from the author.
E N D
Presentation Transcript
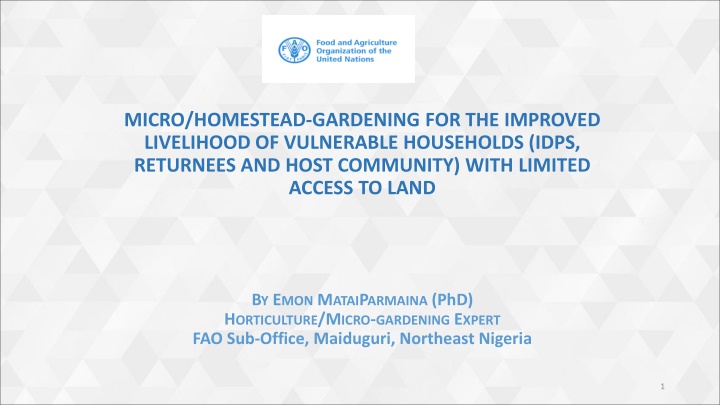
MICRO/HOMESTEAD-GARDENING FOR THE IMPROVED LIVELIHOOD OF VULNERABLE HOUSEHOLDS (IDPS, RETURNEES AND HOST COMMUNITY) WITH LIMITED ACCESS TO LAND BY EMON MATAIPARMAINA (PhD) HORTICULTURE/MICRO-GARDENING EXPERT FAO Sub-Office, Maiduguri, Northeast Nigeria 1
Introduction Introduction The more than a decade-long conflict in northeast Nigeria of has triggered large internal displacements of people and most of them have been living in camps and in host communities in Borno, Adamawa and Yobe (BAY) states. FAO s response to the humanitarian crisis in BAY states include improvement of household food and nutrition security in locations with limited access to land through micro/backyard/homestead gardening programme. The micro/backyard/homestead gardening programme aims at empowering beneficiaries to diversify their diets, through production and consumption of nutrient-dense vegetables and income generation from sales of harvested crops to improve household income. The assistance largely targeted IDPs, Returnees and host communities who have limited access to land but with access to water for the gardening. 2`
Importance of Micro/Homestead Gardening Importance of Micro/Homestead Gardening Micro/homestead gardening is a source of diversified nutritious vegetables. Vegetables are a rich source of folate, a B vitamin that helps your body make new red blood cells. Vegetables are an important source of minerals, vitamins and micronutrients and the establishment of healthy eating patterns such as adequate vegetable consumption is necessary for proper growth, boosting immunity against infectious diseases and prevention of non-communicable diseases. It s key to addressing hidden hunger. Indeed, vegetables are an integral food group in dietary guidelines. Vegetable production is of great economic importance in the agricultural sector. Its value chain can provide income and reduces poverty and unemployment among different societies. Developing the vegetable production to meet the increasing demands for proper dieting in the country, and outside; and for food and nutritional security and poverty eradication is crucial. 3
Micro/Homestead Gardening Concept Micro/Homestead gardens is the practice of intensively growing vegetables and herbs on well prepared plant beds or in containers and well designed, small urban/rural spaces. Micro/Homestead gardens are designed to be highly productive; energy and space efficient; sustainable and affordable; and grown in healthy living soil. Micro/Homestead gardens, however, include a variety of edible immature greens, harvested in a short period of time after germination. The stem, root, cotyledons (or seed leaves) and first set of true leaves are all edible.
What are the key features of micro/Homestead gardens? Grow plants using 100% biological and organic strategies. Maximize small spaces using permaculture design practices and principles. These include container gardens, polyculture, inter- planting perennial edibles and multi-functional plants. Plant health centers around a closedloop nutrient-cycling system. Kitchen waste organic matter is recycled to feed the garden. This in turn, produces food for the gardener s plate. Sustainable closed-loop cycles provide the majority of the garden s supplies. These include mulch, seeds, new plants and soil food. 5
Key features of micro/Homestead- gardening Cont. Micro/Homestead gardening key consideration focuses on soil health. Local organic materials are used to create soil and plant food. Mutually beneficial relationships between plants, insects, birds, microbes, animals and people. Minimal time, energy and money inputs as your garden matures. Efficient use of available resources. Regular observation. 6
Key features of micro/Homestead- gardening Cont. Micro/Homestead-gardens don t require heavy labor, expensive equipment or materials. They are cheap to establish and maintain. They are easy to access and help you grow good health. Health benefits of fresh ingredients in your diet. 7
How to raise micro/Homestead gardens Make your own soil and plant food. Re-mineralize and balance soil pH. Build healthy soil and choose the right mulch. Use efficient water management practices e.g. drip irrigation, bottle irrigation and wicking beds. Cycle nutrients to maximize plant health and minimize waste. Utilize space wisely. Consider portable options for temporary gardens and to optimize sun and shade. Rotate food crops in containers and raised beds. Plant diversity to improve pollination. Choose an appropriate, available, affordable materials for the establishment of the gardens 8
Types of Micro-gardens: Bag Gardens Step 1: Necessary Materials. A woven burlap or plastic bag, such as a used food aid sack. A 1m3 bag will provide around 5m2 of accessible, farmable surface area. Enough soil or dirt mixed with compost or animal manure to fill the bag. Enough small stones to fill about a quarter to one third of the bag. Seedlings of whatever plant life is desired. Common choices include Tomatoes, Onions, Spinach, Squash, Pepper, Roselle, Cucumber, Cabbage, Okra, Basil, Sweet melon, Water melon, Garlic, Ginger, Carrot, etc. A knife or other device capable of cutting through the bag. Enough water to water the bag garden every day.
Bag Garden Cont. Step 2: Create the Base. Fill the bottom of the bag or sack with soil. Place the hollow can in the middle of the soil and then fill it with rocks this is used as the watering system for the bag garden. Water is poured over the rocks and it slowly filters through the stones, gradually watering the vegetables without flooding them. Step 3: Build Up. Fill the area around the can with soil up to about the top lip of the can. The can should now be pulled up, letting the stones fall out of the bottom so that the stones are in the middle of the dirt. Keep the can on top of the rock center and refill it again.
Bag Garden Cont. Step 4: Fill the Bag. Repeat step 3 until the bag has been filled. The bag should now contain an uninterrupted core of rocks surrounded by earth all the way to the top. Step 5: Cut Sites of Plant Growth. Make a number of holes in the side of the bag at an even distance apart. These holes are where most if not all of the seedlings are going to be transplanted to.
Bag Garden Cont. Step 6: Transplant Seedlings. Transplant seedlings into the holes on the sides. Step 7: Plant on the Top. oEither plant seeds or transplant more seedlings into the open top of the bag. Since this is the only horizontal surface for growth on the bag, consider using the top for tubers. Step 8: Use. Maintain water, care for, and harvest; as necessary. Always water from above to utilize the rock irrigation channel.
Bag Garden Cont. Step 9: Recycling. Bag gardens can be used to grow plants during one growing season. After the plants die, the dead plants and roots should be taken out of the dirt. Once the growing season is over, the bag should be emptied, with the stones and any dead roots taken out of the dirt. The bag garden can be made again for the next growing season using the same instructions and materials, though the old dirt should be mixed with new manure, compost, or fertilizer.
GROWING VEGETABLES IN CONTAINERS Step 1: Observe the micro-climates in your backyard Step 2: Assess the horizontal and vertical space available Step 3: Check to see how your plant variety is sensitive to drying out. Step 4: Consider what size container you require. Step 5:See if you can find a container to re-use or repurpose
