Keyence VK-X3000 3D Surface Profiler User Guide
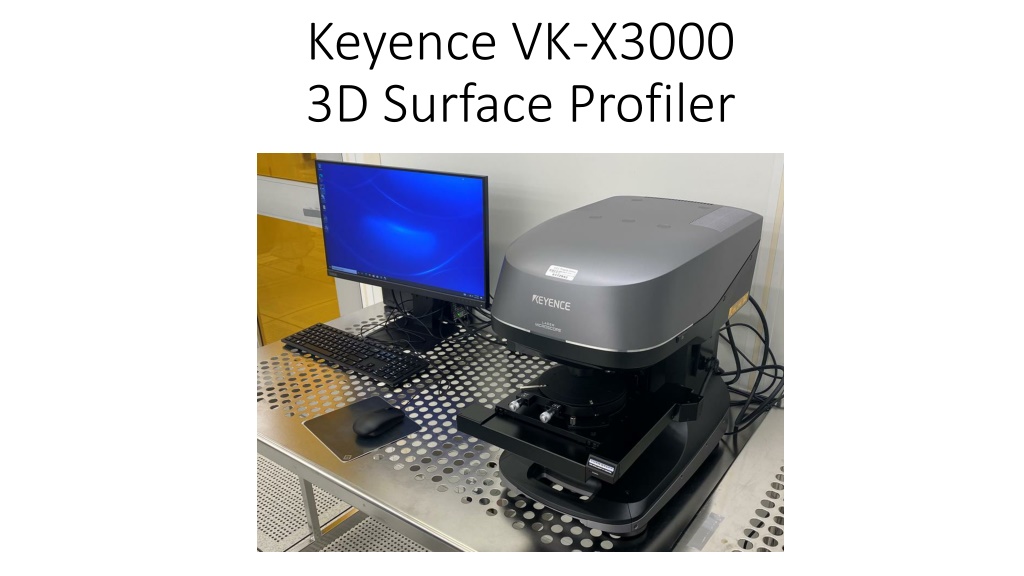
Keyence VK-X3000
3D Surface Profiler
Sample Measurement
1.
Start the Viewer Application and turn on the power switch
2.
Return the stage to the origin
3.
Load sample
4.
Perform initial focus of sample using the focusing handles
5.
Use Viewer Application to increase magnification and measure the sample
6.
Perform filtering on measured sample
7.
Perform desired measurement techniques on measured sample
8.
Perform another measurement or shut down the profiler
1. Start the Viewer Application and turn on the power switch
1.
Open the application first
2.
Once the application is open, press the
power button. You can not turn on power
unless the application is open.
1
2
2. Return stage to the origin
•
Once the power is on, you will
be prompted to rehome the
origin, select ‘Yes’
•
The light will also illuminate
once the power is on
3. Load Sample
•
Verify that the 2.5X Objective lens is
selected
•
Ensure that sample can be loaded
safely without touching the lens
•
If the distance from the state to the
lens needs to be increased to safely
load a sample, use manual stage
height adjust to increase the
distance. Place the selector in the
unlocked position to manually turn
the wheel.
•
The XY stage can accommodate
samples up to 70mm in height and
3.0kg in weight.
4. Perform initial focus of sample using the focusing handles
•
With the focusing lock still in the
unlocked position, use the Coarse
and Fine adjustment knobs to bring
the sample into focus using the 2.5X
lens.
•
Once the sample is in focus, move
the locking mechanism to the locked
position
•
Press the Auto Focus button to allow
the system to optimize focus.
Locked position
5. Use Application to increase magnification and measure the sample
•
Increase the objective lens one by
one performing an auto focus with
each lens
•
You can create a navigation image
which will stitch together multiple
images to aid in driving to an area of
interest.
•
Press the “Register Navigation
Image” to start this, you can let
if complete or stop it once you
are satisfied with the area
sampled.
•
Once the 50X lens is selected, and
your desired area is in focus, press
the “Start Measurement” button.
•
Once the “Start Measurement”
button is pressed, do not vibrate the
table. When complete the Analyzer
software will automatically launch.
6. Perform filtering on measured sample
•
When the analyzer software launches, you will see several images displayed in the main data folder
•
Press the “Perform filtering as needed” button to level out the sample
6. Perform filtering on measured sample (continued)
•
In this example any area has
been selected to level out
the sample and the initial
screen is displayed here
•
I know that the two surfaces
highlighted with red arrows
are level with each other, so I
will specify an area in one of
these sections and verify
that the displayed yellow line
is flat with the blue profile in
these areas
6. Perform filtering on measured sample (continued)
•
Area selected to perform
leveling
6. Perform filtering on measured sample (continued)
•
Result of leveling based on
the area selected. Note that
the yellow line is aligned to
the blue profile in these two
areas.
•
Depending on sample, may
need to try other options to
level best fit for your needs
•
Once satisfied with the level
press “OK” and then “OK”
again.
6. Perform filtering on measured sample (continued)
•
Now when you return to the Main screen, the measurement should be filtered
6. Perform filtering on measured sample (continued)
•
You can double click on the images and reorient and change the settings as desired.
7. Perform desired measurement techniques on measured sample
•
Press the “Analyze Data” button from Main screen, or select the measurement type
across the top off the screen, two options to get to the same place. In the next slide
I’ve selected the Profile tool.
7. Perform desired measurement techniques on measured sample (cont)
•
For this Profile
measurement example, I
selected “2 Points” to define
the where I want the profile
measurement taken
•
Once your line is selected
use the lower
“Measurement tool” screen
to define where you want to
measure the data (next
slide)
7. Perform desired measurement techniques on measured sample (cont)
•
The measurement tool
selected here is “Ln-Ln”.
When pressed you will
define the start and end
point for each line to be
compared.
•
When complete the
measured step height is
displayed.
•
Press “OK” when complete
to get to the next screen.
8. Perform another measurement or shut down the profiler
•
To perform a measurement
on another area of interests,
minimize the analysis
window to return to the
measurement window.
•
Press the back button
8. Perform another measurement or shut down the profiler (cont)
•
Once back in the measurement
window, you can drive to
another area with the arrow
keys and repeat the steps to
take a measurement.
•
If complete and ready to
remove sample, change back
the 2.5X Lens First.
•
Unlock the manual focus
control level to lower the stage
to remove sample.
•
If done with profiler:
•
Close out the viewer
application by pressing
the x in the upper right
corner
•
Turn off the power on the
right side of the profiler.
The blue light in the front
of the profiler should
extinguish.
Learn how to operate the Keyence VK-X3000 3D Surface Profiler with step-by-step instructions, including starting the Viewer Application, performing measurements, focusing samples, and more. Follow the guide to ensure accurate and efficient sample analysis.

Download Presentation

Please find below an Image/Link to download the presentation.
The content on the website is provided AS IS for your information and personal use only. It may not be sold, licensed, or shared on other websites without obtaining consent from the author.If you encounter any issues during the download, it is possible that the publisher has removed the file from their server.
You are allowed to download the files provided on this website for personal or commercial use, subject to the condition that they are used lawfully. All files are the property of their respective owners.
The content on the website is provided AS IS for your information and personal use only. It may not be sold, licensed, or shared on other websites without obtaining consent from the author.
E N D
Presentation Transcript
Keyence VK-X3000 3D Surface Profiler
Sample Measurement 1. Start the Viewer Application and turn on the power switch 2. Return the stage to the origin 3. Load sample 4. Perform initial focus of sample using the focusing handles 5. Use Viewer Application to increase magnification and measure the sample 6. Perform filtering on measured sample 7. Perform desired measurement techniques on measured sample 8. Perform another measurement or shut down the profiler
1. Start the Viewer Application and turn on the power switch 2 1 1. Open the application first 2. Once the application is open, press the power button. You can not turn on power unless the application is open.
2. Return stage to the origin Once the power is on, you will be prompted to rehome the origin, select Yes The light will also illuminate once the power is on
3. Load Sample Verify that the 2.5X Objective lens is selected Ensure that sample can be loaded safely without touching the lens If the distance from the state to the lens needs to be increased to safely load a sample, use manual stage height adjust to increase the distance. Place the selector in the unlocked position to manually turn the wheel. The XY stage can accommodate samples up to 70mm in height and 3.0kg in weight. Coarse Fine Unlocked Position
4. Perform initial focus of sample using the focusing handles With the focusing lock still in the unlocked position, use the Coarse and Fine adjustment knobs to bring the sample into focus using the 2.5X lens. Once the sample is in focus, move the locking mechanism to the locked position Press the Auto Focus button to allow the system to optimize focus. Coarse Fine Unlocked Position Locked position
5. Use Application to increase magnification and measure the sample Increase the objective lens one by one performing an auto focus with each lens You can create a navigation image which will stitch together multiple images to aid in driving to an area of interest. Press the Register Navigation Image to start this, you can let if complete or stop it once you are satisfied with the area sampled. Once the 50X lens is selected, and your desired area is in focus, press the Start Measurement button. Once the Start Measurement button is pressed, do not vibrate the table. When complete the Analyzer software will automatically launch.
6. Perform filtering on measured sample When the analyzer software launches, you will see several images displayed in the main data folder Press the Perform filtering as needed button to level out the sample
6. Perform filtering on measured sample (continued) In this example any area has been selected to level out the sample and the initial screen is displayed here I know that the two surfaces highlighted with red arrows are level with each other, so I will specify an area in one of these sections and verify that the displayed yellow line is flat with the blue profile in these areas
6. Perform filtering on measured sample (continued) Area selected to perform leveling
6. Perform filtering on measured sample (continued) Result of leveling based on the area selected. Note that the yellow line is aligned to the blue profile in these two areas. Depending on sample, may need to try other options to level best fit for your needs Once satisfied with the level press OK and then OK again.
6. Perform filtering on measured sample (continued) Now when you return to the Main screen, the measurement should be filtered
6. Perform filtering on measured sample (continued) You can double click on the images and reorient and change the settings as desired.
7. Perform desired measurement techniques on measured sample Press the Analyze Data button from Main screen, or select the measurement type across the top off the screen, two options to get to the same place. In the next slide I ve selected the Profile tool.
7. Perform desired measurement techniques on measured sample (cont) For this Profile measurement example, I selected 2 Points to define the where I want the profile measurement taken Once your line is selected use the lower Measurement tool screen to define where you want to measure the data (next slide)
7. Perform desired measurement techniques on measured sample (cont) The measurement tool selected here is Ln-Ln . When pressed you will define the start and end point for each line to be compared. When complete the measured step height is displayed. Press OK when complete to get to the next screen.
8. Perform another measurement or shut down the profiler To perform a measurement on another area of interests, minimize the analysis window to return to the measurement window. Press the back button
8. Perform another measurement or shut down the profiler (cont) Once back in the measurement window, you can drive to another area with the arrow keys and repeat the steps to take a measurement. If complete and ready to remove sample, change back the 2.5X Lens First. Unlock the manual focus control level to lower the stage to remove sample. If done with profiler: Close out the viewer application by pressing the x in the upper right corner Turn off the power on the right side of the profiler. The blue light in the front of the profiler should extinguish.


")
")
")
")
")