John Deere Z435 EZtrak Residential Mower (SN.100001 and up) Service Repair Manual Instant Download (TM113019)
Please open the website below to get the complete manualnn// n
Download Presentation

Please find below an Image/Link to download the presentation.
The content on the website is provided AS IS for your information and personal use only. It may not be sold, licensed, or shared on other websites without obtaining consent from the author. Download presentation by click this link. If you encounter any issues during the download, it is possible that the publisher has removed the file from their server.
E N D
Presentation Transcript
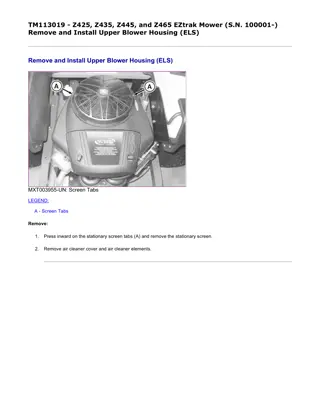
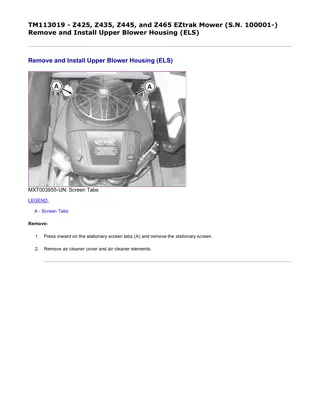
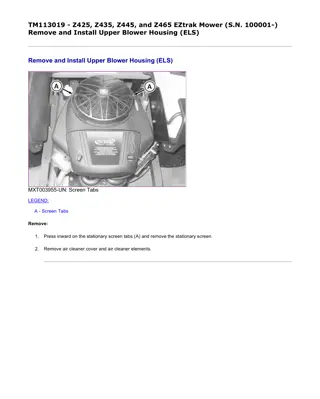
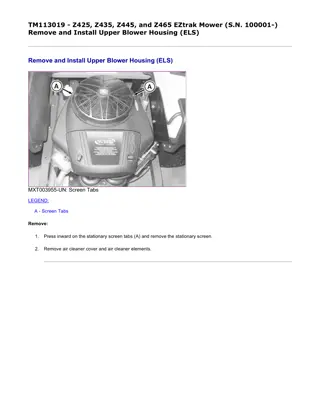
w 1/2(W) TM113019 - Z425, Z435, Z445, and Z465 EZtrak Mower (S.N. 100001-) Remove and Install Upper Blower Housing (ELS) Remove and Install Upper Blower Housing (ELS) MXT003955-UN: Screen Tabs LEGEND: A - Screen Tabs Remove: 1. Press inward on the stationary screen tabs (A) and remove the stationary screen. 2. Remove air cleaner cover and air cleaner elements. file://C:\ProgramData\Service ADVISOR\Temp\TM113019_09001faa81be7c0d.html 11/18/2019
w 2/2(W) 3. MXT003956-UN: Engine guards removed for clarity. LEGEND: B - Screw C - Screw D - Screw Remove 4 screws (B) securing the rotating screen to the fan. 4. Remove 2 screws (C) holding the upper blower housing to the air intake. 5. Loosen the 6 screws (D) (3 on each side) holding the upper blower housing to the engine block. 6. Remove upper blower housing. Install: 1. IMPORTANT: Upper blower housing must be assembled so that the slot in the blower housing aligns with the ridge in the air intake. Failure to assemble correctly will prevent the air filter from sealing and cause engine damage. Install in reverse order of removal. 2. Tighten screws to specification. Item Measurement Specification Blower Housing Screws Torque 9 N m (80 lb.-in.) OUMX258,000037C-19-20120815 file://C:\ProgramData\Service ADVISOR\Temp\TM113019_09001faa81be7c0d.html 11/18/2019
w 1/3(W) TM113019 - Z425, Z435, Z445, and Z465 EZtrak Mower (S.N. 100001-) Remove and Install Upper Blower Housing (Cyclonic) Remove and Install Upper Blower Housing (Cyclonic) MXT005056-UN: Stationary Screen LEGEND: A - Screws B - Screws Remove: 1. Remove four screws (A) holding the stationary screen and remove screen. 2. Loosen the six screws (B) (three on each side) holding the upper blower housing to the engine block. file://C:\ProgramData\Service ADVISOR\Temp\TM113019_09001faa81ceada1.html 11/18/2019
https://www.ebooklibonline.com Hello dear friend! Thank you very much for reading. Enter the link into your browser. The full manual is available for immediate download. https://www.ebooklibonline.com
w 2/3(W) 3. MXT005057-UN: Rotating Screen LEGEND: C - Screws Remove four torx head screws (C) and remove the rotating screen. 4. Remove air cleaner cover and air cleaner element. 5. Remove oil cooler from blower housing. 6. Remove fuel pump from blower housing. 7. Remove two screws holding the upper blower housing to the air intake. 8. Remove upper blower housing. Install: IMPORTANT: Avoid Damage! Upper blower housing must be assembled so that the slot in the blower housing aligns with the ridge in the air intake. Failure to assemble correctly will prevent the air filter from sealing and cause engine damage. 1. Install in reverse order of removal. 2. Tighten screws to specification. Item Measurement Specification Blower Housing Screws Torque 9 N m (80 lb.-in.) file://C:\ProgramData\Service ADVISOR\Temp\TM113019_09001faa81ceada1.html 11/18/2019
w 1/4(W) TM113019 - Z425, Z435, Z445, and Z465 EZtrak Mower (S.N. 100001-) Remove Two Barrel Carburetor Remove Two Barrel Carburetor MXT003957-UN: Fuel Shutoff Solenoid LEGEND: A - Fuel Shutoff Solenoid B - Choke Link C - Throttle Link 1. NOTE: Cyclonic carburetor shown. ELS carburetor similar. Remove upper blower housing. 2. Disconnect fuel shutoff solenoid (A) and choke link (B). Throttle link (C) can be unhooked when carburetor and intake manifold are being removed. 3. CAUTION: Fuel vapors are explosive and flammable: Do not smoke while handling fuel. Keep fuel away from flames or sparks. Shut off engine before servicing. Cool engine before servicing. file://C:\ProgramData\Service ADVISOR\Temp\TM113019_09001faa81b64990.html 11/18/2019
w 2/4(W) Work in a well-ventilated area. Clean up spilled fuel immediately. MXT003958-UN: Fuel Inlet Line LEGEND: D - Fuel Inlet Line E - Breather Hose F - Vapor Hose G - Screw Disconnect and plug the fuel inlet line (D). 4. Disconnect breather hose (E) and fuel vapor hose (F) from carburetor inlet elbow. 5. Remove 4 cap screws (G) from intake manifold flanges. 6. Disconnect the throttle link from the governor arm while carefully pulling the carburetor and manifold assembly away from the engine. file://C:\ProgramData\Service ADVISOR\Temp\TM113019_09001faa81b64990.html 11/18/2019
w 3/4(W) 7. MXT003959-UN: Air Cleaner Elbow LEGEND: H - Nut Remove 4 nuts (H) holding the air cleaner elbow to the carburetor. 8. MXT003960-UN: Carburetor Studs LEGEND: I - Stud Remove four special studs (I) holding the carburetor and gaskets to the intake manifold. file://C:\ProgramData\Service ADVISOR\Temp\TM113019_09001faa81b64990.html 11/18/2019
w 1/1(W) TM113019 - Z425, Z435, Z445, and Z465 EZtrak Mower (S.N. 100001-) Install Two Barrel Carburetor Install Two Barrel Carburetor 1. NOTE: Cyclonic carburetor shown. ELS carburetor similar. Connect choke link while assembling spacer, gaskets and carburetor to intake manifold. 2. Secure carburetor to intake using mounting studs. Tighten to specification. Item Measurement Specification Carburetor to Intake Manifold Studs Torque 7 N m (65 lb.-in.) 3. Install air cleaner elbow. Tighten 4 nuts to specification. Item Measurement Specification Air Cleaner Elbow to Carburetor Torque 7 N m (65 lb.-in.) 4. Connect throttle link to throttle lever. 5. Install new gaskets on intake manifold. Install manifold and carburetor assembly to cylinder block with four cap screws. Tighten to specification. Item Measurement Specification Intake Manifold Cap Screws Torque 9 N m (80 lb.-in.) 6. Connect and adjust throttle and choke cable. (See Adjust Throttle and Choke Cable, V-Twin .) 7. Connect fuel line. 8. Install blower housing. OUMX258,000037D-19-20120803 file://C:\ProgramData\Service ADVISOR\Temp\TM113019_09001faa81be7c0e.html 11/18/2019
w 1/7(W) TM113019 - Z425, Z435, Z445, and Z465 EZtrak Mower (S.N. 100001-) Repair Two Barrel Carburetor Repair Two Barrel Carburetor MXT004002-UN: Cyclonic Carburetor Shown. ELS Similar LEGEND: A - Fuel Bowl B - Fuel Shutoff Solenoid C - Choke Shaft D - Choke Return Spring E - Foam Seal F - Choke Valve G - Carburetor Body H - Top Plate I - Gasket J - Discharge Nozzle K - Gasket L - Throttle Shaft M - Foam Seal N - Throttle Valve Plates O - Emulsion Tube Gasket P - Emulsion Tube Body Q - Main Jets R - Inlet Valve S - Float Pin T - Float U - Float Bowl O-Ring Components Disassemble file://C:\ProgramData\Service ADVISOR\Temp\TM113019_09001faa81b64992.html 11/18/2019
w 2/7(W) MXT003961-UN: Fuel Bowl LEGEND: A - Screw B - Fuel Shutoff Solenoid 1. NOTE: Cyclonic carburetor shown. ELS similar. Remove 2 screws (A) holding the fuel bowl to the carburetor body. Remove fuel bowl and drain the remaining gasoline into a suitable container. 2. Remove fuel shutoff solenoid (B). 3. Mark choke valve so it can be installed in its original position. 4. MXT003962-UN: Choke Valve/Shaft LEGEND: C - Choke Valve D - Choke Shaft E - Foam Seal Remove 2 screws securing the choke valve (C) to the choke shaft (D). Pull choke shaft and foam seal (E) out of carburetor body. 5. Mark the throttle valves so they can be installed in their original position. file://C:\ProgramData\Service ADVISOR\Temp\TM113019_09001faa81b64992.html 11/18/2019
w 3/7(W) 6. MXT003963-UN: Thottle Valve LEGEND: F - Throttle Valves G - Throttle Shaft H - Screw Remove 4 screws securing the throttle valves (F) to the throttle shaft (G). Pull throttle shaft and foam seal out of carburetor body. 7. Remove 3 screws (H) securing the cover plate and gasket to the carburetor body. 8. MXT003964-UN: Cover Plate and Gasket LEGEND: I - Cover Plate J - Gasket file://C:\ProgramData\Service ADVISOR\Temp\TM113019_09001faa81b64992.html 11/18/2019
w 4/7(W) Remove the cover plate (I) and gasket (J). 9. MXT003965-UN: Float Hinge Pin LEGEND: K - Float Hinge Pin With a small punch, push out float hinge pin (K). 10. MXT003966-UN: Float and Fuel Inlet Valve LEGEND: L - Float M - Fuel Inlet Valve Remove float (L) and fuel inlet valve (M) as an assembly. file://C:\ProgramData\Service ADVISOR\Temp\TM113019_09001faa81b64992.html 11/18/2019
w 5/7(W) 11. MXT003967-UN: Discharge Nozzle LEGEND: N - Screw O - Discharge Nozzle Remove the screw (N) holding the discharge nozzle (O) into the carburetor body. 12. Remove the discharge nozzle and the rubber gasket. 13. MXT003968-UN: Emulsion Tube Body LEGEND: P - Screw Q - Emulsion Tube Body Marks Remove 2 screws (P) and emulsion tube body (Q). file://C:\ProgramData\Service ADVISOR\Temp\TM113019_09001faa81b64992.html 11/18/2019
Suggest: If the above button click is invalid. Please download this document first, and then click the above link to download the complete manual. Thank you so much for reading
w 6/7(W) 14. MXT003969-UN: Emulsion Tube Body LEGEND: R - Emulsion Tube Body Mark one jet and the emulsion tube body (R) so it may be installed in the same location during assembly. 15. MXT003970-UN: Main Jets Use a small punch or similar tool and push main jets out of emulsion tube body. 16. CAUTION: Be sure to wear eye protection when cleaning parts with compressed air. Clean metal parts with carburetor cleaner and blow out passages with compressed air. 17. Inspect moving parts for wear, nicks, and burrs. Inspect float for leaks or damage. Inspect mating surfaces for nicks, burrs, foreign material, and cracks. Replace parts that are worn or damaged. file://C:\ProgramData\Service ADVISOR\Temp\TM113019_09001faa81b64992.html 11/18/2019
https://www.ebooklibonline.com Hello dear friend! Thank you very much for reading. Enter the link into your browser. The full manual is available for immediate download. https://www.ebooklibonline.com


