John Deere XUV 825i Gator Utility Vehicle Service Repair Manual Instant Download (TM107119)
Please open the website below to get the complete manualnn//
Download Presentation

Please find below an Image/Link to download the presentation.
The content on the website is provided AS IS for your information and personal use only. It may not be sold, licensed, or shared on other websites without obtaining consent from the author. Download presentation by click this link. If you encounter any issues during the download, it is possible that the publisher has removed the file from their server.
E N D
Presentation Transcript
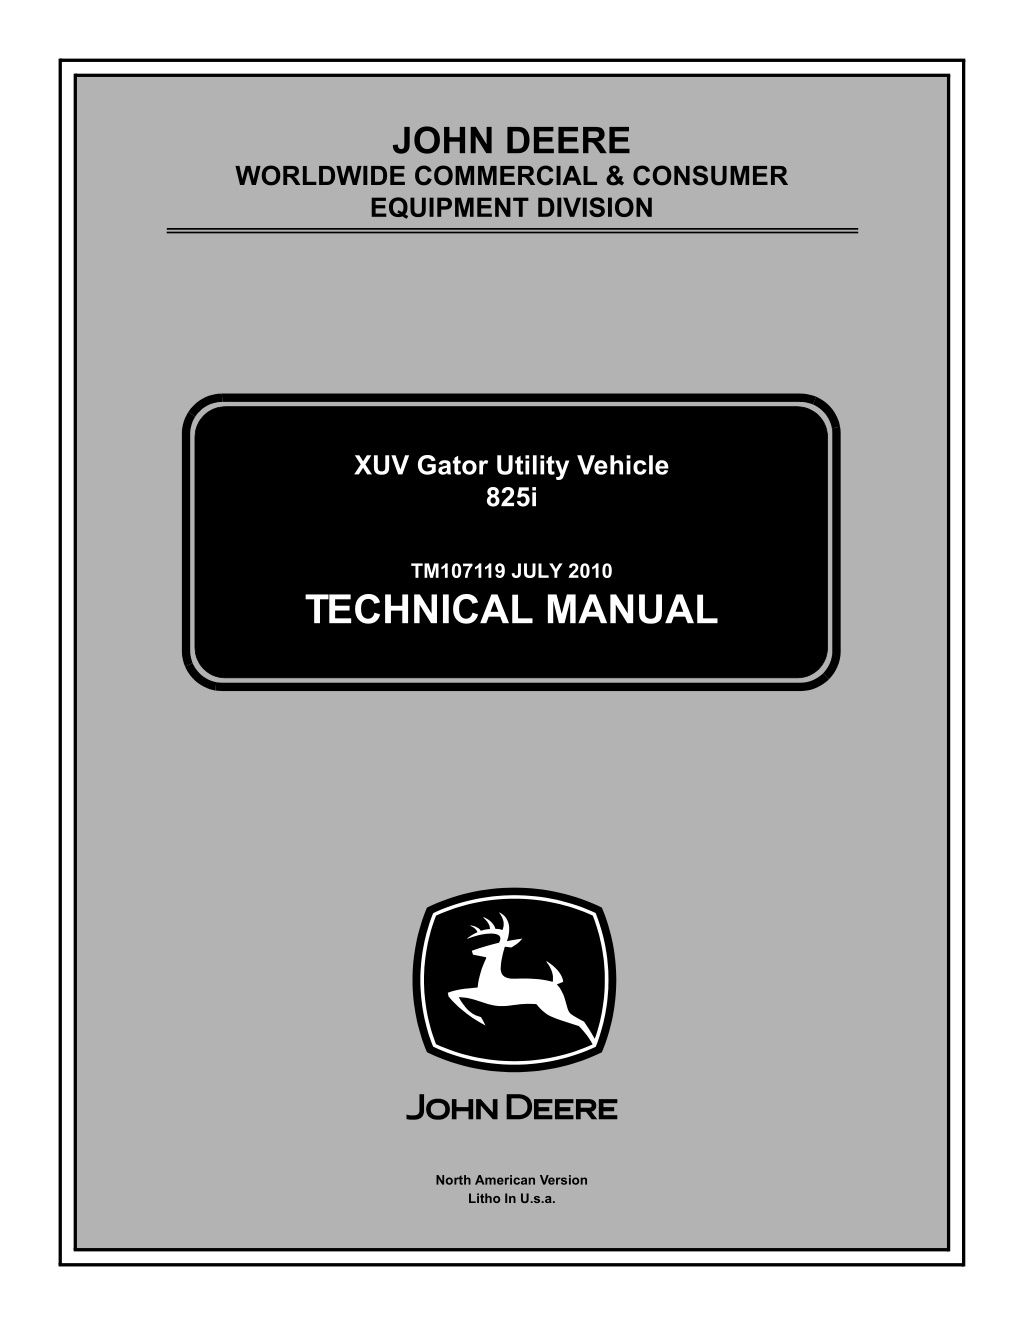
JOHN DEERE WORLDWIDE COMMERCIAL & CONSUMER EQUIPMENT DIVISION XUV Gator Utility Vehicle 825i July 2010 TM107119 JULY 2010 TECHNICAL MANUAL North American Version Litho In U.s.a.
INTRODUCTION Manual Description Safety This technical manual is written for an experienced technician and contains sections that are specifically for this product. It is a part of a total product support program. Specifications and Information The manual is organized so that all the information on a particular system is kept together. The order of grouping is as follows: Engine Table of Contents Specifications and Information Identification Numbers Electrical Tools and Materials Component Location Schematics and Harnesses Power Train Theory of Operation Operation and Diagnostics Steering Diagnostics Tests and Adjustments Repair Brakes Other Note: Depending on the particular section or system being covered, not all of the above groups may be used. Miscellaneous The bleed tabs for the pages of each section will align with the sections listed on this page. Page numbering is consecutive from the beginning of the Safety section through the last section. We appreciate your input on this manual. If you find any errors or want to comment on the layout of the manual please contact us. All information, illustrations and specifications in this manual are based on the latest information at the time of publication. The right is reserved to make changes at any time without notice. COPYRIGHT 2010 Deere & Co. John Deere Worldwide Commercial and Consumer Equipment Division All rights reserved Previous Editions COPYRIGHT Introduction
SAFETY Safety Recognize Safety Information MIF heaters or other fire hazards. When you work around fuel, do not smoke or work near incinerate or puncture pressurized containers. Store flammable fluids away from fire hazards. Do not MIF This is the safety-alert symbol. When you see this symbol on your machine or in this manual, be alert to the potential for personal injury. debris. Make sure machine is clean of trash, grease, and spontaneously. Do not store oily rags; they can ignite and burn Follow recommended precautions and safe servicing practices. Be prepared if a fire starts. Keep a first aid kit and fire extinguisher handy. Understand Signal Words service, hospital, and fire department near your telephone. Keep emergency numbers for doctors, ambulance A signal word - DANGER, WARNING, or CAUTION - is used with the safety-alert symbol. DANGER identifies the most serious hazards. Use Care In Handling And Servicing Batteries DANGER or WARNING safety signs are located near specific hazards. General precautions are listed on CAUTION safety signs. CAUTION also calls attention to safety messages in this manual. Replace Safety Signs MIF Prevent Battery Explosions from the top of battery. Battery gas can explode. Keep sparks, lighted matches, and open flame away MIF across the posts. Use a volt-meter or hydrometer. Never check battery charge by placing a metal object Replace missing or damaged safety signs. See the machine operator s manual for correct safety sign placement. battery to 16 C (60 F). Do not charge a frozen battery; it may explode. Warm Handle Fluids Safely - Avoid Fires Prevent Acid Burns Be Prepared For Emergencies strong enough to burn skin, eat holes in clothing, and cause blindness if splashed into eyes. Sulfuric acid in battery electrolyte is poisonous. It is Avoid acid burns by: 1. Filling batteries in a well-ventilated area. 2. Wearing eye protection and rubber gloves. Safety - 1
https://www.ebooklibonline.com Hello dear friend! Thank you very much for reading. Enter the link into your browser. The full manual is available for immediate download. https://www.ebooklibonline.com
SAFETY 3. Avoiding breathing fumes when electrolyte is added. Avoid injury from escaping fluid under pressure by stopping the engine and relieving pressure in the system before disconnecting or connecting hydraulic or other lines. Tighten all connections before applying pressure. 4. Avoiding spilling or dripping electrolyte. 5. Use proper jump start procedure. Search for leaks with a piece of cardboard. Protect hands and body from high pressure fluids. If you spill acid on yourself: 1. Flush your skin with water. If an accident occurs, see a doctor immediately. Any fluid injected into the skin must be surgically removed within a few hours or gangrene may result. Doctors unfamiliar with this type of injury should reference a knowledgeable medical source. Such information is available from Deere & Company Medical Department in Moline, Illinois, U.S.A. 2. Apply baking soda or lime to help neutralize the acid. 3. Flush your eyes with water for 10 - 15 minutes. 4. Get medical attention immediately. If acid is swallowed: 1. Drink large amounts of water or milk. Avoid Heating Near Pressurized Fluid Lines 2. Then drink milk of magnesia, beaten eggs, or vegetable oil. 3. Get medical attention immediately. Wear Protective Clothing MIF Flammable spray can be generated by heating near pressurized fluid lines, resulting in severe burns to yourself and bystanders. Do not heat by welding, soldering, or using a torch near pressurized fluid lines or other flammable materials. Pressurized lines can be accidentally cut when heat goes beyond the immediate flame area. MIF Service Machines Safely Wear close fitting clothing and safety equipment appropriate to the job. Prolonged exposure to loud noise can cause impairment or loss of hearing. Wear a suitable hearing protective device such as earmuffs or earplugs to protect against objectionable or uncomfortable loud noises. Operating equipment safely requires the full attention of the operator. Do not wear radio or music headphones while operating machine. MIF Use Care Around High-pressure Fluid Lines Tie long hair behind your head. Do not wear a necktie, scarf, loose clothing, or necklace when you work near machine tools or moving parts. If these items were to get caught, severe injury could result. Avoid High-Pressure Fluids Remove rings and other jewelry to prevent electrical shorts and entanglement in moving parts. MIF Escaping fluid under pressure can penetrate the skin causing serious injury. Safety - 2
SAFETY Support Machine Properly and Use Proper Lifting Equipment Work In Ventilated Area MIF Engine exhaust fumes can cause sickness or death. If it is necessary to run an engine in an enclosed area, remove the exhaust fumes from the area with an exhaust pipe extension. MIF If you must work on a lifted machine or attachment, securely support the machine or attachment. Do not support the machine on cinder blocks, hollow tiles, or props that may crumble under continuous load. Do not work under a machine that is supported solely by a jack. Follow recommended procedures in this manual. If you do not have an exhaust pipe extension, open the doors and get outside air into the area. Service Tires Safely Lifting heavy components incorrectly can cause severe injury or machine damage. Follow recommended procedure for removal and installation of components in the manual. Work In Clean Area Before starting a job: 1. Clean work area and machine. MIF 2. Make sure you have all necessary tools to do your job. Explosive separation of a tire and rim parts can cause serious injury or death. 3. Have the right parts on hand. 4. Read all instructions thoroughly; do not attempt shortcuts. Do not attempt to mount a tire unless you have the proper equipment and experience to perform the job. Always maintain the correct tire pressure. Do not inflate the tires above the recommended pressure. Never weld or heat a wheel and tire assembly. The heat can cause an increase in air pressure resulting in a tire explosion. Welding can structurally weaken or deform the wheel. Using High Pressure Washers Directing pressurized water at electronic/electrical components or connectors, bearings, hydraulic seals, fuel injection pumps or other sensitive parts and components may cause product malfunctions. Reduce pressure and spray at a 45 to 90 degree angle. When inflating tires, use a clip-on chuck and extension hose long enough to allow you to stand to one side and NOT in front of or over the tire assembly. Use a safety cage if available. Illuminate Work Area Safely Check wheels for low pressure, cuts, bubbles, damaged rims or missing lug bolts and nuts. Illuminate your work area adequately but safely. Use a portable safety light for working inside or under the machine. Make sure the bulb is enclosed by a wire cage. The hot filament of an accidentally broken bulb can ignite spilled fuel or oil. Safety - 3
SAFETY Avoid Injury From Rotating Blades, Augers And PTO Shafts Check the MSDS before you start any job using a hazardous chemical. That way you will know exactly what the risks are and how to do the job safely. Then follow procedures and recommended equipment. Dispose of Waste Properly Improperly disposing of waste can threaten the environment and ecology. Potentially harmful waste used with John Deere equipment include such items as oil, fuel, coolant, brake fluid, filters, and batteries. Use leakproof containers when draining fluids. Do not use food or beverage containers that may mislead someone into drinking from them. Do not pour waste onto the ground, down a drain, or into any water source. Inquire on the proper way to recycle or dispose of waste from your local environmental or recycling center, or from your John Deere dealer. MIF Keep hands and feet away while machine is running. Shut off power to service, lubricate or remove mower blades, augers or PTO shafts. Service Cooling System Safely Park Machine Safely MIF MIF Explosive release of fluids from pressurized cooling system can cause serious burns. Before working on the machine: 1. Lower all equipment to the ground. Shut off machine. Only remove filler cap when cool enough to touch with bare hands. Slowly loosen cap to first stop to relieve pressure before removing completely. 2. Stop the engine and remove the key. 3. Lock the park brake. 4. Disconnect the battery ground strap. Handle Chemical Products Safely 5. Hang a DO NOT OPERATE tag in operator station. Live With Safety MIF Direct exposure to hazardous chemicals can cause serious injury. Potentially hazardous chemicals used with John Deere equipment include such items as lubricants, coolants, paints, and adhesives. MIF Before returning machine to customer, make sure machine is functioning properly, especially the safety systems. Install all guards and shields. A Material Safety Data Sheet (MSDS) provides specific details on chemical products: physical and health hazards, safety procedures, and emergency response techniques. Safety - 4
POWER TRAIN TESTS AND ADJUSTMENTS Tests and Adjustments c. Tighten jam nuts on ferrule. Results: Differential Lock Adjustment 1. Move differential lock and park brake operator control levers to engaged and released position several times. Purpose: see if control cables place slight tension on the cable- end springs, with no movement of differential lock arm. With both controls in the released position, check to To insure differential shift lever fully engages and disengages differential lock. To insure differential lock works with park brake. position, check that the differential lock arm moves to engaged position. (It may be necessary to push the machine a short distance with the steering wheel turned until the differential lock engages.) With either control lever moved to the engaged Procedure: 1. Park machine safely. See "Parking Safely" in the Safety section. 2. Raise and lock cargo box. Transmission Shift Adjustment 3. Block wheels to prevent machine from rolling. 4. Unlock park brake. The transmission should shift fully into each selected gear or neutral position with the shift control in the appropriate segment of the shift quadrant. There should be clearance between the gear shift control and the end of the selector quadrant slot with the transmission shifted to reverse or forward low range. If the shift control contacts the end of the quadrant slot without fully shifting into either gear position, the shifter should be adjusted. Note: Setting the park brake engages the differential lock and locks the rear wheels together before the park brake is engaged. A B 1. Park machine safely. See Park Machine Safely in the Safety section. C Note: It may be necessary to rock the machine to shift the transmission fully into gear. MX46039 5. Check differential control cable length, and adjust if needed. Cable length should be adjusted so that cable places slight tension on cable-end spring, but does not move transaxle lever (A). A a. Loosen jam nuts (B) on differential lock control cable ferrule. b. Adjust position of jam nuts on ferrule to remove slack in control cable. MX45389 2. Check for clearance (A) between shift control and end of shift quadrant slot with transmission shifted fully into reverse and forward low range. c. Tighten jam nuts on ferrule. 6. Check park brake differential control cable length, and adjust if needed. Cable length should be adjusted so that cable places slight tension on cable-end spring, but does not move transaxle control lever. a. Loosen jam nuts (C) on park brake differential lock control cable ferrule. b. Adjust position of jam nuts on ferrule to remove slack in control cable. Power Train Tests and Adjustments - 255
POWER TRAIN REPAIR Repair Changing Transmission Oil 1. Operate machine to warm transmission oil. 2. Park machine safely. See "Park Machine Safely" in the Safety section. B 3. Lock park brake. 4. Raise and secure cargo box. Important: Avoid Damage! Dirt and debris in oil may cause damage to the transmission. Clean area around opening before removing plug or dipstick. MX45336 3. Check to see that transmission shift control is within neutral segment (B) of shift quadrant with transmission shifted fully into neutral. 4. Adjust shift rod position at transmission shift arm if shift control clearance or position is not correct. a. Raise and secure cargo box. c Caution: Avoid Injury! Touching hot surfaces can burn skin. The engine, components, and fluids will be hot if the engine has been running. Keep hands and body away from hot surfaces when servicing or working near the engine and components. Allow engine to cool. A MX38608 5. Position drain pan under transmission drain plug (A). 6. Plug vent tube on top of transmission. 7. Remove drain plug. Small amount of oil will start to drain. Slowly loosen dipstick until desired amount of oil flow is achieved. C D 8. Check O-ring on drain plug. Replace if missing or in poor condition. 9. Install and tighten drain plug to 44 - 54 N m (32.5 - 39.9 lb-ft). MX44716 10.Remove plug from transmission vent tube. b. Loosen hex nut (C) securing shift rod (D) to transmission shift arm. c. Move shift rod to properly locate shift control within shift quadrant. B d. Tighten hex nut (C). e. Recheck shift control clearance to quadrant slots. 5. Shift transaxle to neutral and check engine start. MX45281 Power Train Repair - 256
POWER TRAIN REPAIR 11.Remove dipstick (B) located on top of transmission housing. Wipe dipstick clean. Specifications: Front Differential Oil . . . . . . . . . . . . . . . . . . . . . . . . J20C Front Differential Oil Quantity (approx) . 580mL (19 oz) 12.Add approximately 3.8 L (4.0 qt) of J20C or J20D (See temperature chart in owners manual) HY-GARD oil. Torque Specifications: 13.Check oil level by setting dipstick on threads in transmission case, then removing and checking oil level. Front Differential Drain Plug. . . . . . . 12 N m (106 lb-in.) Front Differential Fill Plug. . . . . . . 13.5 N m (119 lb-in.) 14.Wait for two minutes then check oil level. Add oil if necessary. Cleaning Primary Drive Clutch 15.Install dipstick and tighten. 16.Lower the cargo box. Important: Avoid Damage! Never lubricate any part of the primary drive clutch. Changing EMFWD Front Differential Oil 1. Park machine safely. See "Park Machine Safely" in the Safety section. 1. Operate machine to warm front differential oil. 2. Park machine safely. See "Park Machine Safely" in the Safety section. 2. Raise and secure cargo box. 3. Remove clutch enclosure. See Clutch Housing Removal on page 258. 3. Lock park brake. Important: Avoid Damage! Dirt and debris in oil may cause damage to the MFWD differential. Clean area around opening before removing plug. A B A MX44820 4. Remove bolt and washer (A) securing fan. Remove fan. 5. Use compressed air to blow dust and debris out of clutch. MX44533 6. Install fan and tighten screws (A). Shown without skid plates. 4. Place a drain pan under front differential and remove drain plug (A). 5. Remove fill plug (B) located on left side of front differential just above and behind inner CV joint. 6. Allow oil to drain. 7. Clean drain plug and install with new nylon sealing washer. Tighten to specification. 8. Fill gear case with approximately 580 ml (19 oz) of J20C HY-GARD oil or until the level is even with the bottom of the fill port. 9. Install fill plug and tighten to specification. Power Train Repair - 257
POWER TRAIN REPAIR Clutch Removal and Installation Important: Avoid Damage! Place a small amount of grease on the contact tip of clutch removal tool JDG61641 before use. Failure to lubricate the clutch removal tool may result in damage to the engine output shaft or tool contact surface. Required Tool: JDG61641 Clutch Removal Tool Clutch Housing Removal A B F MX45406 MX45404 9. Install clutch removal tool JDG61641 (F) and separate primary clutch from engine crankshaft. 1. Loosen hose clamp (A) and remove cooling air intake tube from clutch housing and frame bracket. 10.Remove primary clutch assembly. 2. Remove air intake filter from tube. Clean filter to remove any dirt or debris. Set filter aside to dry. G 3. Remove 11 M6 hex bolts (B) securing outer housing to inner housing. Remove outer housing. D H MX45407 E C 11.Remove 3 M8x12 bolts (G) securing inner housing to transmission bracket. MX45405 12.Remove nine remaining M6x12 hex bolts (H) and bushings. 4. Insert a short wood block between drive belt (C) and secondary clutch (or use an impact wrench) to loosen secondary clutch M10 center bolt (D). 13.Remove inner housing. 5. Slide driven clutch out from the transmission and roll the drive belt over the clutch and remove the belt. 6. Remove center bolt and washer securing secondary clutch to transmission input shaft. 7. Remove secondary clutch assembly. 8. Remove M8 center bolt (E) and washer securing primary clutch to engine output shaft. Power Train Repair - 258
POWER TRAIN REPAIR Clutch Housing Installation A C B F MX45409 7. Install drive belt (F) to primary and secondary clutch sheaves. MX45407 1. Install inner clutch housing over engine and transmission shafts. Loosely install 3 M8x12 bolts (A) to secure inner housing to transmission bracket. 2. Install nine M6 hex bolts (B) with bushings through housing seal to secure housing and tighten to specification. 3. Tighten 3 M8x12 bolts (A) securing housing to transmission bracket. 4. Ensure that engine crankshaft taper (C) and mating primary clutch socket are clean. G E D MX45410 8. Insert a short wood block (G) between drive belt and secondary clutch, and tighten secondary clutch center bolt to specification. MX45408 G 5. Install primary clutch assembly to crankshaft taper, and secure with M8x150 hex bolt (D) and washer. Tighten bolt to specification. 6. Install secondary clutch to transmission input shaft, and secure with M10x80 hex bolt (E) and washer. MX45013 9. Install outer clutch housing to inner housing, and secure with 11 M6 bolts (G). Power Train Repair - 259
POWER TRAIN REPAIR B I C H D MX45411 10.I Install filter (H) to air intake tube. Press filter into tube until 3-5 mm of filter remains exposed. MX46051 2. Remove cover and spring (B). 11.Install cooling air intake tube through frame support and to clutch housing inlet. Tighten hose clamp (I) to secure intake to housing inlet. 3. Check center shaft (C) for wear or damage. 4. Slide moveable sheave section (D) up and down center shaft to check for freedom of movement. Torque Specifications: Clutch Housing Bolt. . . . . . . . . . . . . . . 11 N m (97 lb-in.) Clutch Housing to Transmission Shoulder Bolt . . . . . . . . . . . . . . . . . . . . . . . . . . . . . . . . 32 N m (24 lb-ft) Drive Clutch to Crankshaft Bolt . . . . . 37 N m (26 lb-ft) Driven Clutch to Transmission Bolt . . 73 N m (52 lb-ft) H E F Primary Drive Clutch Repair Disassembly: c Caution: Avoid Injury! Components are installed under spring tension. Wear eye protection and use proper tools when installing and removing components with spring tension. G MX46052 5. Check contact surfaces of three flyweights (E) and rollers (F) for wear or damage. 6. Check flyweights for freedom of movement. Replace weights and pivot bolts (G) if weights are damaged or do not move smoothly. 7. Check belt contact surfaces (H) of sheaves for wear or damage. A 8. Replace worn or damaged clutch or components. Assembly: Primary clutch assembly is the reverse of disassembly. Ensure that alignment marks X on the clutch cover and flyweight are aligned. c Caution: Avoid Injury! Components are installed under spring tension. Wear eye protection and use proper tools when installing and removing components with spring tension. MX46050 1. Evenly loosen six 1/4-20 x1 1/4 in. clutch cover bolts (A) in sequence. Power Train Repair - 260
POWER TRAIN REPAIR Torque Specifications: A Clutch Cover Bolt. . . . . . 12 - 13.5 N m (105 - 120 lb-in.) Flyweight Pivot Bolt Nut . . . . 8 - 9.5 N m (72 - 84 lb-in.) Driven Clutch Disassembly and Assembly B Disassembly: c Caution: Avoid Injury! Components are installed under spring tension. Wear eye protection and use proper tools when installing and removing components with spring tension. MX46051 1. Ensure that clutch center shaft (A) is clean. 2. Install spring (B) to seat in clutch spider. A B A C D C MX46044 1. Compress clutch spring and collar, and remove snap ring (A). Remove collar and spring. MX46053 3. Install clutch cover, aligning X match marks (C) on clutch cover and flyweight. 2. Inspect spring for damage. Replace if needed. 3. Separate moveable clutch section from stationary section. C B D MX46050 4. Align cover with center shaft. Raise moveable sheave (D), and press down on cover to start an opposing pair of cover bolts. MX46048 4. Inspect belt contact surface (B) of stationary sheave section. Ensure that surface is smooth. 5. Start remaining cover bolts. Tighten bolts evenly to prevent binding between cover and center shaft. 5. Inspect condition of rollers (C). Ensure that rollers are not damaged and rotate freely. 6. Tighten bolts to specification. Power Train Repair - 261
POWER TRAIN REPAIR E C F D MX46047 3. With moveable sheave fully inserted in fixed sheave, X alignment marks (C) should be opposed. c Caution: Avoid Injury! Components are installed under spring tension. Wear eye protection and use proper tools when installing and removing components with spring tension. MX46049 6. Inspect condition of belt contact surface (D), ramps (E) and helical slots (F) in moveable sheave section. Ensure that all surfaces are smooth and free of damage. Assembly: Secondary clutch assembly is the reverse of disassembly. Ensure that alignment marks X are opposed when the moveable and stationary sheaves are assembled. F E D A MX46044 4. Install spring (D) and spring collar (E) to moveable sheave. MX46048 1. Ensure that spacer (A) is in place in well of stationary clutch section. 5. Compress spring, and install snap ring (F). Ensure that snap ring is fully installed to groove. Transmission Removal 1. Park machine safely. See "Park Machine Safely" in the Safety section. 2. Block front wheels to prevent machine from rolling. 3. Remove cargo box from machine. 4. Jack up rear of machine and safely support machine on stands. B 5. Remove rear wheels. 6. Drain oil from transmission. MX46045 2. Install movable sheave to fixed sheave by aligning helical slots to rollers (B). Power Train Repair - 262
POWER TRAIN REPAIR A H C B I MX45290 D 12.Remove the three cap screws (H) and remove the cable mounting bracket from the transmission. MX45396 7. Remove the spring clip (A) and disconnect the shift rod from the transmission. 13.Remove coupler (I) if still on shaft. 14.Remove clutch cover, drive belt and driven clutch. See Clutch Removal and Installation on page 258. 8. Disconnect transmission neutral switch (B) and remove harness restrainer (C) from bracket. Note: When prying axles to release them from transmission use built up wide area on transmission as a leverage spot to avoid damage to bearing housing. Built up areas are located at approximately 4 and 10 o clock positions. Note: Note or mark hole on differential lock shift lever that connections are made to. 9. Disconnect park brake and differential lock cable springs (D) from the differential shift lever. F G MX45291 Note pry bar location. MX45791 15.Release axle from transmission. Care taken not to damage seal area. 10.Remove bolt from front drive shaft coupler (F) and slide coupler onto driveshaft. 16.Repeat axle release from transmission for second axle. 11.Remove five bolts (G) securing right angle drive to transmission. Remove right angle drive and support it to avoid strain on park brake cable. Power Train Repair - 263
POWER TRAIN REPAIR K I H M L MX45293 21.Remove three bolts (K) securing plate to transmission. MX45266 22.Remove bolts (L) and flange nuts securing plate to engine back plate. 17.Remove left and right brake calipers (H). Support calipers and brake lines. 23.Remove plate being careful to keep pin (M) with plate. 18.Support lower A-arm. Remove lock nut and bolt (I) securing upper A-arms to suspension uprights. 24.Support transmission assembly with a hoist. N J P MX45397 25.Right-Hand Side: Remove eight bolts (N) from transmission mount. 26.Disconnect speed sensor connector from wiring harness. MX45269 19..Hold lower A-arm and remove support. Slowly lower A- arm and halfshaft while guiding bearing housing and shaft (J) out of transmission. Make sure brake lines are not getting pinched, kinked, or stretched. 20. Repeat on procedure on other side of machine. O P MX45292 27.Left-Hand Side: Remove five bolts to engine mount. Power Train Repair - 264
POWER TRAIN REPAIR 28.Remove center mount bolt (O) and shim(s) (P). A Q MX45398 Shown from top MX45303 29.Remove the left-hand rear transmission mounting bolt (Q) and isolator. 1. Install new gasket on inner left side bearing housing. Install bearing housing to transmission using eight bolts. Tighten bolts to 73 N m (54 lb-ft). Important: Avoid Damage! Do not pry on mating surfaces. 2. Install new seal (A). Grease inside of seal to aid axle installation. 3. If removed, install right-hand bearing holder side plate. B R MX45295 MX45294 Shown from top 30.Carefully separate transmission from bearing holder side plate. Adjust hoist during separation to keep transmission parallel to side plate and from binding on alignment pins (R). a. Install rear isolator. Tighten bolt (B) to 109 N m (80 lb-ft). 31.When alignment pins are free, tilt transmission slightly and lift it out from the machine with the hoist. Transmission Installation Installation: Installation is performed in a specific sequence. Note: Make sure the side plate is clean and dry, and has all old gasket material removed. C If necessary when installing side plate, use built up wide area on plate to tap with soft mallet to seat plate to transmission. Built up areas are located at approximately 4 and 10 o clock positions. MX45296 b. Install center bolt, shim(s) and four outer bolts. Install shims and center bolt (C) and tighten to 25 Power Train Repair - 265
POWER TRAIN REPAIR N m (18 lb-ft). Install four outer bolts. F 4. Remove old gasket material from transmission and inner axle bearing housing. 5. Check that alignment pins are in place in the transmission housing. E MX45698 D 9. Right-hand Side: Seat isolator (F) between side plate and frame. Install spacer through isolator to frame. G MX45697 6. Carefully lower transmission into machine. Place new gasket on pins.Ensure that the gasket stays in place and the alignment pins (D) start to seat in right-hand bearing holder side plate. MX45398 7. Right-hand Side: Install two or more bolts (E) through side plate to transmission. Alternately tighten bolts to pull transmission to side plate. 10.Install the second isolator, washer, bolt (G) and nut. Tighten to 109 N m (80 lb-ft). Note: Transmission may need to be rotated slightly up or down to insert center mount bolt. Do not install shim(s) at this time. E O MX45397 8. Install remaining bolts (E). Tighten all bolts to 73 N m (54 lb-ft). MX45292 11.Install center mount bolt (O); start bolt into threads, do not tighten. Power Train Repair - 266
Suggest: If the above button click is invalid. Please download this document first, and then click the above link to download the complete manual. Thank you so much for reading
POWER TRAIN REPAIR R W V Q R V MX45701 19.Right-hand Side: Remove four bolts (V). Check shim (W) clearance. Two shims (+/- 1) should slide into place. MX45700 12.Left-Hand Side: Install wave washer and center shoulder bolt (Q), do not tighten bolt. 20.Install shim(s) and four bolts (V). Tighten bolts to 73 N m (54 lb-ft). 13.Install four bolts (R), do not tighten. 14.Tighten center shoulder bolt (Q) to 25 N m (18 lb-ft). U O X S T MX45702 21.Left-hand Side: Remove center mount bolt (O). Install the same number of shims (X) as installed in previous step. MX45293 22.Install and tighten center mount bolt (O) to 109 N m (80 lb-ft). 15.Install plate on transmission bearing holder and seat locating pin (S) into engine backplate. 16.Install two bolts (T) and flange nuts. Tighten nuts to 73 N m (54 lb-ft). 17.Install three bolts (U) securing plate to transmission. Tighten bolts to 73 N m (54 lb-ft). R Y R MX45703 23. Lightly grease the transmissions seals. Carefully install inner half shafts (Y) to transmission to protect the seal surfaces. MX45700 18.Tighten four bolts (R) to 73 N m (54 lb-ft). Power Train Repair - 267
https://www.ebooklibonline.com Hello dear friend! Thank you very much for reading. Enter the link into your browser. The full manual is available for immediate download. https://www.ebooklibonline.com


