John Deere 27Czts and 35Czts Compact Excavator Service Repair Manual Instant Download (TM2053)
Please open the website below to get the complete manualnn// n
Download Presentation

Please find below an Image/Link to download the presentation.
The content on the website is provided AS IS for your information and personal use only. It may not be sold, licensed, or shared on other websites without obtaining consent from the author. Download presentation by click this link. If you encounter any issues during the download, it is possible that the publisher has removed the file from their server.
E N D
Presentation Transcript
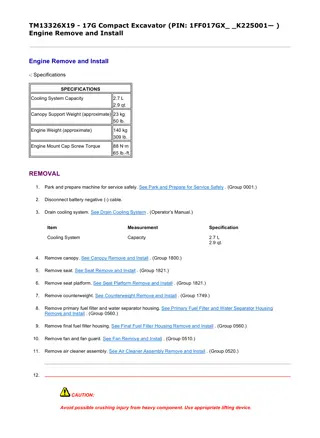
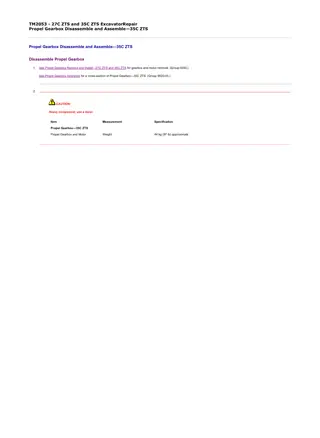
1/6 TM2053 - 27C ZTS and 35C ZTS ExcavatorRepair Propel Gearbox Disassemble and Assemble 35C ZTS Propel Gearbox Disassemble and Assemble 35C ZTS Disassemble Propel Gearbox 1. See Propel Gearbox Remove and Install 27C ZTS and 35C ZTS for gearbox and motor removal. (Group 0250.) See Propel Gearbox Operation for a cross-section of Propel Gearbox 35C ZTS. (Group 9020-05.) 2. CAUTION: Heavy component; use a hoist. Item Measurement Specification Propel Gearbox 35C ZTS Propel Gearbox and Motor Weight 44 kg (97 lb) approximate file:///C:/ProgramData/Service%20ADVISOR/Temp/TM2053_09001faa8028... 2019/11/18
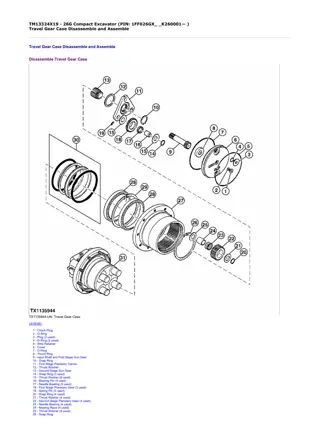
2/6 T156462-UN: Propel Gearbox Exploded View 35C ZTS LEGEND: 1 - Propel Gearbox 2 - Metal Face Seal 3 - Bearing 4 - Bearing Nut (Retainer) 5 - Plug 6 - Ring Gear (Housing) 7 - Steel Ball (132 used) 8 - Pipe Plug (2 used) 9 - Second Planet Gear (4 used) 10 - Needle Bearing (4 used) 11 - Bearing Race (4 used) 12 - Thrust Washer (4 used) 13 - Thrust Washer 14 - Cap Screw 15 - Second Planet Sun Gear 16 - Snap Ring 17 - First Planet Carrier 18 - First Planet Gear (3 used) 19 - Needle Bearing (3 used) 20 - Bearing Race (3 used) 21 - Not Used 22 - Input Shaft and First Planet Sun Gear file:///C:/ProgramData/Service%20ADVISOR/Temp/TM2053_09001faa8028... 2019/11/18
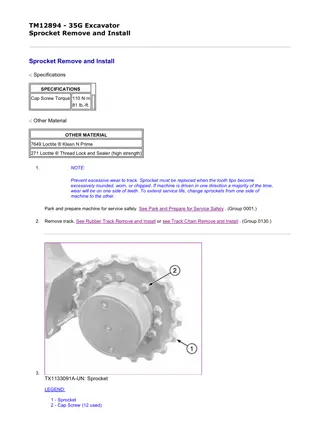
3/6 23 - Thrust Washer 24 - Cover 25 - O-Ring 26 - Wire (Retainer) 27 - Plug (3 used) 28 - O-Ring 29 - Propel Motor Housing and Second Planet Carrier Remove plugs (27) and O-rings (28) to drain oil. Approximate capacity is 0.5 L (0.5 qt). 3. Remove pipe plug (8) located on the side of ring gear at cover end. 4. T163455-UN: Cover-to-Ring Gear Wire (Retainer) LEGEND: 24 - Cover 25 - O-Ring 26 - Wire (Retainer) 30 - Fitting (2 used) Install fittings (30) into holes. 5. Turn cover (24) until the end of wire (26) is visible through hole. Continue turning the cover, pulling the wire out through the hole. 6. Remove cover and O-ring (25). 7. Remove thrust plate (23). 8. CAUTION: Planet gears can turn. Keep fingers away from gears. T6639GK-UN: Keep Fingers Away From Gears Remove input shaft (22). Remove parts for first planet carrier and gears (17 20), second planet sun gear (15), and second planet gears (9 14). Keep parts for each planet gear together. 9. Remove the sprocket. 10. Remove pipe plug (8) located on the side of ring gear adjacent to the sprocket mounting flange. Remove the 132 steel balls (7) through the hole. 11. Push the housing (29) and bearing (3) out of ring gear using a shop press or three M12 x 1.75 cap screws installed in the sprocket mounting flange and tighten against the housing. To protect the housing, use steel plates between the end of cap screws and housing. 12. IMPORTANT: Metal face seals can be reused if they are not worn or damaged. A used seal must be kept together as a set because of wear patterns on seal ring face. Remove the metal face seals (2) from ring gear and housing. Keep seal rings together as a matched set with a piece of clean cardboard between them to protect the seal ring face. See Inspect Metal Face Seals to determine if seals can be reused. (Group 0130.) 13. Remove plugs (5). Remove bearing nut (4) using a spanner wrench or ST3313 Special Tool. 14. Remove bearing (3) from housing for replacement only. Bearing is a press fit. file:///C:/ProgramData/Service%20ADVISOR/Temp/TM2053_09001faa8028... 2019/11/18
https://www.ebooklibonline.com Hello dear friend! Thank you very much for reading. Enter the link into your browser. The full manual is available for immediate download. https://www.ebooklibonline.com
4/6 NOTE: A new bearing should be installed if removed. 15. See Propel Motor Disassemble and Assemble 35C ZTS for motor disassembly. (Group 0260.) Assemble Propel Gearbox 1. See Propel Gearbox Operation for a cross-section of Propel Gearbox 35C ZTS. (Group 9020-05.) See Propel Motor Disassemble and Assemble 35C ZTS for motor assembly. (Group 0260.) 2. T156462-UN: Propel Gearbox Exploded View 35C ZTS LEGEND: 1 - Propel Gearbox 2 - Metal Face Seal 3 - Bearing 4 - Bearing Nut (Retainer) 5 - Plug file:///C:/ProgramData/Service%20ADVISOR/Temp/TM2053_09001faa8028... 2019/11/18
5/6 6 - Ring Gear (Housing) 7 - Steel Ball (132 used) 8 - Pipe Plug (2 used) 9 - Second Planet Gear (4 used) 10 - Needle Bearing (4 used) 11 - Bearing Race (4 used) 12 - Thrust Washer (4 used) 13 - Thrust Washer 14 - Cap Screw 15 - Second Planet Sun Gear 16 - Snap Ring 17 - First Planet Carrier 18 - First Planet Gear (3 used) 19 - Needle Bearing (3 used) 20 - Bearing Race (3 used) 21 - Not Used 22 - Input Shaft and First Planet Sun Gear 23 - Thrust Washer 24 - Cover 25 - O-Ring 26 - Wire (Retainer) 27 - Plug (3 used) 28 - O-Ring 29 - Propel Motor Housing and Second Planet Carrier Install bearing (3) so the thicker edge of outer race is towards the threaded end of housing (29). 3. Tighten bearing nut (4) to specifications using spanner wrench or ST3313 Special Tool. Item Measurement Specification Propel Gearbox 35C ZTS Bearing-to-Housing Bearing Nut Torque 196 10 N m (144 7.2 lb-ft) 4. Tighten plug (5) to specification. Item Measurement Specification Propel Gearbox 35C ZTS Bearing Nut-to-Housing Plug Torque 14.7 N m (132 lb-in.) 5. IMPORTANT: The metal face seal O-rings and their seat surfaces must be clean, dry, and oil free so the O-rings do not slip. Thoroughly clean O-rings, seat surfaces in housing (29), ring gear (6), and seal rings using volatile, non-petroleum base solvent and lint-free tissues. 6. Install O-rings on seal rings. Check that O-ring is not twisted. 7. NOTE: A volatile, non-petroleum base solvent or talcum powder can be used as a lubricant. Solvent must not damage the O-ring or leave an oil residue. Apply equal pressure with fingers at four equally spaced points on seal ring face. Seal must pop down into place so O-ring is tight against seal bore and seal ring is installed squarely. 8. Wipe finger prints and foreign material off seal ring face using clean oil and lint-free tissues. 9. Apply a thin film of clean oil on each seal ring face. 10. Install ring gear onto bearing and housing. Tap around the top edge of ring gear using a soft-faced hammer to seat the ring gear on bearing. 11. Install the 132 steel balls (7) through hole and into the groove in bearing and ring gear. 12. Apply pipe sealant to threads of pipe plug (8). Tighten plug to specification. Item Measurement Specification Propel Gearbox 35C ZTS Pipe Plug to Ring Gear Torque 7.9 N m (70 lb-in.) 13. Install thrust plates (12), races (11), needle bearings (10), and second planet gears (9) onto pins. 14. Install thrust washer (13). Apply thread lock and sealer (low strength) to threads of cap screw (14). Tighten cap screws to specifications. Item Measurement Specification Propel Gearbox 35C ZTS Thrust Washer-to-Housing Cap Screw Torque 6.1 N m (54 lb-in.) 15. Install snap ring (16) on second planet sun gear (15). Install sun gear. 16. Install races (20) and needle bearings (19). 17. Install first planet gears (18) so the flat side is against machined surface of first planet carrier (17). 18. Install input shaft (22). 19. Install thrust plate (23). 20. Install O-ring (25) on cover (24). Apply grease to O-ring. file:///C:/ProgramData/Service%20ADVISOR/Temp/TM2053_09001faa8028... 2019/11/18
6/6 21. T163455-UN: Cover-to-Ring Gear Wire (Retainer) LEGEND: 24 - Cover 25 - O-Ring 26 - Wire (Retainer) 30 - Fitting (2 used) Install cover. Install fittings (30). 22. Bend end of wire (26) to 90 approximately 6 mm (0.24 in.) from end. 23. Push wire through hole and into groove in cover and ring gear. 24. Turn cover to pull remaining wire into the groove. 25. Apply pipe sealant to threads of pipe plug (8). Tighten plug. Item Measurement Specification Propel Gearbox 35C ZTS Pipe Plug to Ring Gear Torque 7.9 N m (70 lb-in.) 26. Remove fittings. 27. Add approximately 0.5 L (0.5 qt) of gear oil to gearbox. See Propel Gearbox Oil for specification. (Operator's Manual.) See Check Propel Gearbox Oil Level after plugs and O-rings (27 and 28) are installed. (Operator's Manual.) 28. Tighten plugs to specification. Item Measurement Specification Propel Gearbox 35C ZTS Plug to Cover Torque 34 N m (25 lb-ft) LOCTITE is a trademark of Loctite Corp. OUT3035,0000341-19-20030106 file:///C:/ProgramData/Service%20ADVISOR/Temp/TM2053_09001faa8028... 2019/11/18
1/7 TM2053 - 27C ZTS and 35C ZTS ExcavatorRepair Propel Motor Disassemble and Assemble 27C ZTS Propel Motor Disassemble and Assemble 27C ZTS Disassemble Propel Motor 1. CAUTION: Heavy component; use a hoist. Item Measurement Specification Propel Motor 27C ZTS Propel Gearbox and Motor Weight 44 kg (97 lb) approximate See Propel Gearbox Remove and Install 27C ZTS and 35C ZTS for gearbox and motor removal. (Group 0250.) See Propel Gearbox Disassemble and Assemble 27C ZTS for gearbox disassembly. (Group 0250.) See Propel Motor and Brake Valve Housing Operation for a cross-section of Propel Motor and Brake Valve Housing 27C ZTS. (Group 9025-05.) 2. CAUTION: Brake valve housing contains springs under load. Prevent injury from sudden release by loosing cap screws evenly. file:///C:/ProgramData/Service%20ADVISOR/Temp/TM2053_09001faa8028... 2019/11/18
2/7 T163627-UN: Propel Motor Exploded View 27C ZTS LEGEND: 1 - Housing Kit 2 - Propel Motor Housing and Second Planet Carrier 3 - Control Piston 4 - Oil Seal 5 - Ball Bearing 6 - Drive Shaft 7 - Pivot Ball (2 used) 8 - Swash Plate 9 - Rotary Group Kit 10 - Piston and Shoe (9 used) 11 - Retainer (Holder) 12 - Ball Guide (Holder) 13 - Pin (3 used) 14 - Cylinder Block 15 - Retainer (2 used) 16 - Spring 17 - Snap Ring 18 - Valve Plate 19 - Spacer 20 - Plate (2 used) 21 - Disk 22 - Backup Ring file:///C:/ProgramData/Service%20ADVISOR/Temp/TM2053_09001faa8028... 2019/11/18
3/7 23 - O-Ring 24 - Park Brake Piston 25 - O-Ring 26 - Backup Ring 27 - O-Ring 28 - Brake Valve Housing Kit 29 - Ball Bearing 30 - Spring Pin 31 - Brake Valve Housing 32 - Dowel Pin 33 - O-Ring (2 used) 34 - Park Brake Spring (8 used) 35 - Cap Screw (7 used) Loosen cap screws (35) evenly to release force of park brake springs (34). 3. Before removing the brake valve housing (31), measure and record the distance between it and motor housings as a reference for assembly. 4. IMPORTANT: Valve plate can stick to the brake valve housing. Dropping the valve plate can damage the highly machined surfaces. Use care when removing the brake valve housing. Remove brake valve housing being careful not to drop the valve plate (18). Protect machined surfaces of valve plate from damage. 5. Remove ball bearing (29) from brake valve housing only if replacement is necessary. Bearing is press fit. If removed, install new bearings. 6. Remove park brake piston (24). 7. Hold the housing in a horizontal position and then slid the rotary group (10 17) out of housing and off the drive shaft. 8. CAUTION: Cylinder block contains a springs under load. Prevent injury from sudden release by using a press to compress the spring before removing snap ring. Disassemble rotary group for inspection and cleaning only. Rotary group is serviced as an assembly. Compress spring (16) using a press before removing the snap ring (21). 9. T164706-UN: Piston-To-Shoe Clearance T164714-UN: Piston-To-Cylinder Block Bore Clearance Check the clearance between piston and shoe. Item Measurement Specification Propel Motor 27C ZTS Piston to Shoe Clearance 0.4 mm (0.0157 in.) or less 10. Substract piston diameter from cylinder block bore diameter to check for wear. Item Measurement Specification file:///C:/ProgramData/Service%20ADVISOR/Temp/TM2053_09001faa8028... 2019/11/18
4/7 Propel Motor 27C ZTS Piston to Cylinder Block Bore Clearance 0.04 mm (0.00157 in.) or less 11. T163669-UN: Brake Valve Housing Exploded View 27C ZTS LEGEND: 31 - Brake Valve Housing 38 - Plug (2 used) 39 - O-Ring (2 used) 40 - Spring (2 used) 41 - Washer (2 used) 42 - Guide (2 used) 43 - O-Ring (2 used) 44 - Spring (2 used) 45 - Check Valve (2 used) 46 - Counterbalance Valve Spool 47 - Plug (2 used) 48 - O-Ring (2 used) 49 - Spring 50 - Propel Speed Change Valve Spool 51 - Plug (2 used) 52 - O-Ring (2 used) 53 - Shuttle Valve Spool 54 - Counterbalance Valve Orifice (4 used) Brake valve housing (31) is serviced as an assembly except the O-rings (39, 43, 48, and 52) and springs (8 and 9). Disassemble for inspection and cleaning only. 12. Apply clean hydraulic oil to all machined surfaces after cleaning. Assemble Propel Motor 1. See Propel Motor and Brake Valve Housing Operation for a cross-section of Propel Motor and Brake Valve Housing 27C ZTS. (Group 9025-05.) See Propel Gearbox Disassemble and Assemble 27C ZTS for gearbox assembly. (Group 0250.) file:///C:/ProgramData/Service%20ADVISOR/Temp/TM2053_09001faa8028... 2019/11/18
5/7 2. T163669-UN: Brake Valve Housing Exploded View 27C ZTS LEGEND: 31 - Brake Valve Housing 38 - Plug (2 used) 39 - O-Ring (2 used) 40 - Spring (2 used) 41 - Washer (2 used) 42 - Guide (2 used) 43 - O-Ring (2 used) 44 - Spring (2 used) 45 - Check Valve (2 used) 46 - Counterbalance Valve Spool 47 - Plug (2 used) 48 - O-Ring (2 used) 49 - Spring 50 - Propel Speed Change Valve Spool 51 - Plug (2 used) 52 - O-Ring (2 used) 53 - Shuttle Valve Spool 54 - Counterbalance Valve Orifice (4 used) Apply clean hydraulic oil to all parts before installing. 3. Tighten plugs (38, 47, and 51) to specification. Item Measurement Specification Propel Motor 27C ZTS Shuttle Valve-to-Housing Plug Torque 11.8 21.5 N m (104 190 lb-in.) Speed Change Valve-to-Housing Plug Torque 46 51 N m (34 38 lb-ft) Counterbalance Valve-to-Housing Plug Torque 167 196 N m (123 145 lb-ft) file:///C:/ProgramData/Service%20ADVISOR/Temp/TM2053_09001faa8028... 2019/11/18
6/7 4. T163627-UN: Propel Motor Exploded View 27C ZTS LEGEND: 1 - Housing Kit 2 - Propel Motor Housing and Second Planet Carrier 3 - Control Piston 4 - Oil Seal 5 - Ball Bearing 6 - Drive Shaft 7 - Pivot Ball (2 used) 8 - Swash Plate 9 - Rotary Group Kit 10 - Piston and Shoe (9 used) 11 - Retainer (Holder) 12 - Ball Guide (Holder) 13 - Pin (3 used) 14 - Cylinder Block 15 - Retainer (2 used) 16 - Spring 17 - Snap Ring 18 - Valve Plate 19 - Spacer 20 - Plate (2 used) 21 - Disk 22 - Backup Ring file:///C:/ProgramData/Service%20ADVISOR/Temp/TM2053_09001faa8028... 2019/11/18
7/7 23 - O-Ring 24 - Park Brake Piston 25 - O-Ring 26 - Backup Ring 27 - O-Ring 28 - Brake Valve Housing Kit 29 - Ball Bearing 30 - Spring Pin 31 - Brake Valve Housing 32 - Dowel Pin 33 - O-Ring (2 used) 34 - Park Brake Spring (8 used) 35 - Cap Screw (7 used) Install oil seal (4) so the sealing lip (spring side) is towards ball bearing (5). Push to the bottom of bore. Apply petroleum jelly to lip of oil seal 5. Apply clean hydraulic oil to components before installing. As needed, apply petroleum jelly to help hold components in place. 6. Install a new ball bearing tight against shoulder on drive shaft (6). Install shaft into housing so bearing is to the bottom of bore. 7. Install control piston (3) so large diameter end is to the bottom of piston bore. 8. Install swash plate (8) making sure the pivot balls (7) are seated in the holes in housing and swash plate. 9. Assemble the rotary group (10 17). 10. Hold the propel motor housing (2) in a horizontal position. Carefully install the rotary group aligning the splines in ball guide (12) and cylinder block (14) with the splines on drive shaft. NOTE: The valve plate (18) is installed on the brake valve housing. 11. Install spacer (19). Starting with a plate (20), alternately install two plates and one disk (21). 12. Install O-rings (23 and 25) and backup rings (22 and 26) into grooves of park brake piston (24) making sure the backup rings are to outer edges. 13. Push park brake piston into housing against the plate. 14. Add approximately 0.2 L (0.2 qt) of hydraulic oil to housing. 15. Push the new ball bearing (29) to bottom of bore in brake valve housing (31). 16. Install valve plate (18), springs (34) and O-rings (27 and 33) to brake valve housing. Use petroleum jelly to hold parts in place while installing brake valve housing. 17. Install brake valve housing (2) being careful that the valve plate does not drop off. 18. Measure the distance between the two housings and compare to measurement made at disassembly. If not the same, disassemble and check for correct assembly. 19. Tighten cap screws (35) in steps to pull housing down evenly against the springs. Tighten cap screws to specification in a diagonal pattern. Item Measurement Specification Propel Motor 27C ZTS Brake Valve Housing-to-Housing Cap Screw Torque 51 65 N m (38 48 lb-ft) 20. See Propel Gearbox Remove and Install 27C ZTS and 35C ZTS for gearbox and motor installation. (Group 0250.) OUT3035,0000343-19-20030108 file:///C:/ProgramData/Service%20ADVISOR/Temp/TM2053_09001faa8028... 2019/11/18
1/7 TM2053 - 27C ZTS and 35C ZTS ExcavatorRepair Propel Motor Disassemble and Assemble 35C ZTS Propel Motor Disassemble and Assemble 35C ZTS Disassemble Propel Motor 1. CAUTION: Heavy component; use a hoist. Item Measurement Specification Propel Motor 35C ZTS Propel Gearbox and Motor Weight 44 kg (97 lb) approximate See Propel Gearbox Remove and Install 27C ZTS and 35C ZTS for gearbox and motor removal. (Group 0250.) See Propel Gearbox Disassemble and Assemble 35C ZTS for gearbox disassembly. (Group 0250.) See Propel Motor and Brake Valve Housing Operation for a cross-section of Propel Motor and Brake Valve Housing 35C ZTS. (Group 9025-05.) 2. T163830-UN: Propel Motor Flow Control Valve 35C ZTS LEGEND: 43 - Plug (2 used) 44 - O-Ring (2 used) 69 - Spring (2 used) 70 - Spring Seat (2 used) 71 - Flow Control Valve Spool 72 - Housing 73 - Cap Screw (3 used) 74 - O-Ring (3 used) Check the flow control valve spool (71) moves freely in housing bore. 3. CAUTION: Brake valve housing contains springs under load. Prevent injury from sudden release by loosing cap screws evenly. file:///C:/ProgramData/Service%20ADVISOR/Temp/TM2053_09001faa8028... 2019/11/18
2/7 T156461-UN: Propel Motor And Park Brake Exploded View 35C ZTS LEGEND: 0 - Propel Motor and Brake Valve Housing 1 - Plug 2 - Drive Shaft 3 - Ball Bearing 4 - Oil Seal 5 - Swash Plate 6 - Pivot Ball (2 used) 7 - Cylinder Block 8 - Washer 9 - Spring 10 - Washer 11 - Snap Ring 12 - Pin (3 used) 13 - Ball Guide (Holder) 14 - Retainer (Plate) 15 - Piston and Shoe (9 used) 16 - Park Brake Disk 17 - Park Brake Piston 18 - Park Brake Spring (8 used) 19 - Control Piston (2 used) 20 - Spring (2 used) 21 - O-Ring file:///C:/ProgramData/Service%20ADVISOR/Temp/TM2053_09001faa8028... 2019/11/18
Suggest: If the above button click is invalid. Please download this document first, and then click the above link to download the complete manual. Thank you so much for reading
3/7 23 - O-Ring 25 - Valve Plate 26 - Dowel Pin 27 - Ball Bearing 28 - O-Ring 29 - Packing (4 used) 30 - Brake Valve Housing 31 - Counterbalance Valve 31A - Counterbalance Valve Spool 31B - Check Valve (2 used) 31C - Spring (2 used) 31D - Plug (2 used) 31E - O-Ring (2 used) 36 - Spring Seat (2 used) 37 - Spring (2 used) 38 - Plug (2 used) 39 - O-Ring (2 used) 40 - Orifice (4 used) 41 - Propel Speed Change Valve Spool 42 - Spring 43 - Pipe Plug 44 - O-Ring (2 used) 45 - Pipe Plug (3 used) 46 - Dowel Pin (2 used) 47 - Orifice (4 used) 48 - Cap Screw (6 used) 49 - Dowel Pin (2 used) 53 - Plug (2 used) 55 - Plug (2 used) 56 - Packing (2 used) 58 - Plug (2 used) 59 - Plug (2 used) 60 - O-Ring (2 used) 61 - Plug 63 - Cap 64 - Orifice (2 used) 65 - Seal Kit 66 - Brake Valve Housing Kit 67 - Cylinder Block Kit Loosen cap screws (48) evenly to release force of park brake springs (18). 4. Before removing the brake valve housing (30), measure and record the distance between it and motor housings as a reference for assembly. 5. IMPORTANT: Valve plate can stick to the brake valve housing. Dropping the valve plate can damage the highly machined surfaces. Use care when removing the brake valve housing. Remove brake valve housing being careful not to drop the valve plate (14). Protect machined surfaces of valve plate from damage. 6. Remove ball bearings (3 and 27) from drive shaft (2) and brake valve housing only if replacement is necessary. Bearings are press fit. New bearings should be installed if removed. 7. T163857-UN: Park Brake Piston Oil Passage LEGEND: 17 - Park Brake Piston 28 - O-Ring 29 - Oil Passage 68 - Park Brake Oil Passage Before removing park brake piston (17), take notice of its position with respect to motor housing. Piston must be installed so dowel pin holes and springs align with dowel pins and holes in brake valve housing. 8. Hold the housing in a horizontal position then slid the rotary group (7 15) out of housing and off the drive shaft. 9. CAUTION: Cylinder block contains a springs under load. Prevent injury from sudden release by using a press to compress the spring before removing snap ring. Disassemble rotary group for inspection and cleaning only. Rotary group is serviced as an assembly. Compress spring (9) using a press before removing the snap ring (11). file:///C:/ProgramData/Service%20ADVISOR/Temp/TM2053_09001faa8028... 2019/11/18
https://www.ebooklibonline.com Hello dear friend! Thank you very much for reading. Enter the link into your browser. The full manual is available for immediate download. https://www.ebooklibonline.com

