John Deere 1620 Mower Service Repair Manual Instant Download (TM1682)
Please open the website below to get the complete manualnn// n
Download Presentation

Please find below an Image/Link to download the presentation.
The content on the website is provided AS IS for your information and personal use only. It may not be sold, licensed, or shared on other websites without obtaining consent from the author. Download presentation by click this link. If you encounter any issues during the download, it is possible that the publisher has removed the file from their server.
E N D
Presentation Transcript
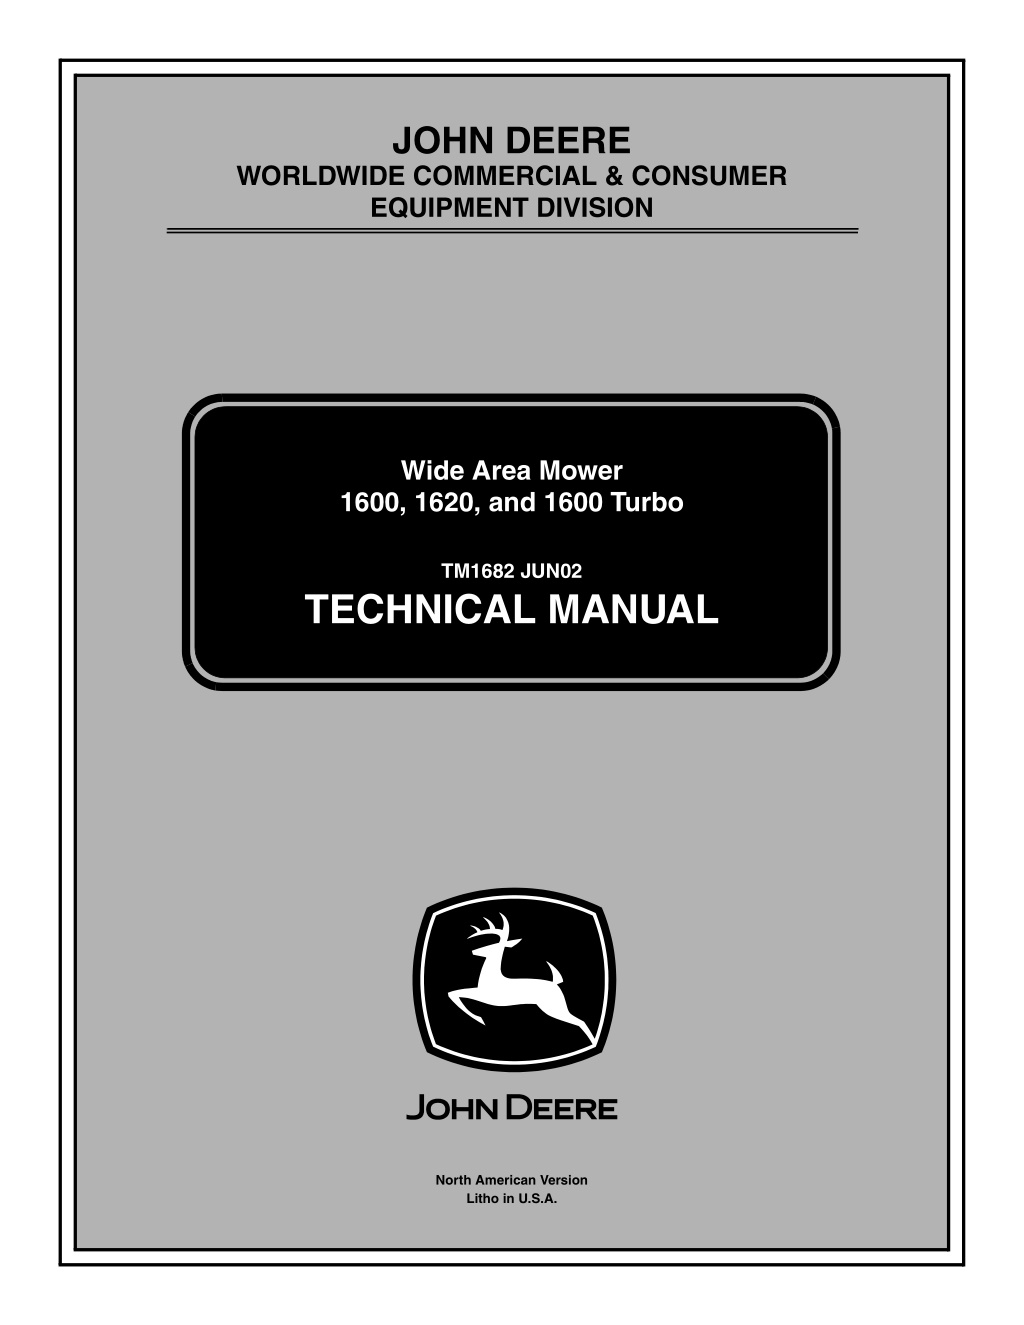
JOHN DEERE WORLDWIDE COMMERCIAL & CONSUMER EQUIPMENT DIVISION 1682 Jun02 Wide Area Mower 1600, 1620, and 1600 Turbo TM1682 JUN02 TECHNICAL MANUAL North American Version Litho in U.S.A.
INTRODUCTION Introduction Safety Manual Description This technical manual is written for an experienced technician and contains sections that are specifically for this product. It is a part of a total product support program. Specifications and Information The manual is organized so that all the information on a particular system is kept together. The order of grouping is as follows: Diesel Engine Table of Contents Specifications Electrical General Information Identification Numbers Tools and Materials Hydrostatic Power Train Component Location Schematics and Harnesses Hydraulics Theory of Operation Operation and Diagnostics Diagnostics Steering Tests and Adjustments Repair Other Brakes NOTE: Depending on the particular section or system being covered, not all of the above groups may be used. Attachments The bleed tabs for the pages of each section will align with the sections listed on this page. Page numbering is consecutive from the beginning of the Safety section through the last section. Miscellaneous We appreciate your input on this manual. If you find any errors or want to comment on the layout of the manual please contact us. All information, illustrations and specifications in this manual are based on the latest information at the time of publication. The right is reserved to make changes at any time without notice. COPYRIGHT 2002 Deere & Co. John Deere Worldwide Commercial and Consumer Equipment Division All rights reserved Previous Editions COPYRIGHT Introduction
SAFETY Be Prepared for Emergencies Safety Recognize Safety Information MIF When you work around fuel, do not smoke or work near heaters or other fire hazards. MIF This is the safety-alert symbol. When you see this symbol on your machine or in this manual, be alert to the potential for personal injury. Store flammable fluids away from fire hazards. Do not incinerate or puncture pressurized containers. Make sure machine is clean of trash, grease, and debris. Follow recommended precautions and safe servicing practices. Do not store oily rags; they can ignite and burn spontaneously. Understand Signal Words A signal word - DANGER, WARNING, or CAUTION - is used with the safety-alert symbol. DANGER identifies the most serious hazards. DANGER or WARNING safety signs are located near specific hazards. General precautions are listed on CAUTION safety signs. CAUTION also calls attention to safety messages in this manual. Replace Safety Signs MIF Be prepared if a fire starts. Keep a first aid kit and fire extinguisher handy. Keep emergency numbers for doctors, ambulance service, hospital, and fire department near your telephone. MIF Replace missing or damaged safety signs. See the machine operator s manual for correct safety sign placement. Safety - 1
https://www.ebooklibonline.com Hello dear friend! Thank you very much for reading. Enter the link into your browser. The full manual is available for immediate download. https://www.ebooklibonline.com
SAFETY Use Care in Handling and Servicing Batteries Use Care Around High-Pressure Fluid Lines Avoid High-Pressure Fluids MIF Prevent Battery Explosions MIF Escaping fluid under pressure can penetrate the skin causing serious injury. from the top of battery. Battery gas can explode. Keep sparks, lighted matches, and open flame away Avoid injury from escaping fluid under pressure by stopping the engine and relieving pressure in the system before disconnecting or connecting hydraulic or other lines. Tighten all connections before applying pressure. across the posts. Use a voltmeter or hydrometer. Never check battery charge by placing a metal object battery to 16 C (60 F). Do not charge a frozen battery; it may explode. Warm Search for leaks with a piece of cardboard. Protect hands and body from high pressure fluids. Prevent Acid Burns Sulfuric acid in battery electrolyte is poisonous. It is strong enough to burn skin, eat holes in clothing, and cause blindness if splashed into eyes. If an accident occurs, see a doctor immediately. Any fluid injected into the skin must be surgically removed within a few hours or gangrene may result. Doctors unfamiliar with this type of injury should reference a knowledgeable medical source. Such information is available from Deere & Company Medical Department in Moline, Illinois, U.S.A. Avoid acid burns by: 1. Filling batteries in a well-ventilated area. 2. Wearing eye protection and rubber gloves. 3. Avoiding breathing fumes when electrolyte is added. 4. Avoiding spilling or dripping electrolyte. 5. Using proper jump start procedure. If you spill acid on yourself: 1. Flush your skin with water. 2. Apply baking soda or lime to help neutralize the acid. 3. Flush your eyes with water for 10-15 minutes. 4. Get medical attention immediately. If acid is swallowed: 1. Drink large amounts of water or milk. 2. Then drink milk of magnesia, beaten eggs, or vegetable oil. 3. Get medical attention immediately. Safety - 2
SAFETY Avoid Heating Near Pressurized Fluid Lines Service Machines Safely MIF MIF Flammable spray can be generated by heating near pressurized fluid lines, resulting in severe burns to yourself and bystanders. Do not heat by welding, soldering, or using a torch near pressurized fluid lines or other flammable materials. Pressurized lines can be accidentally cut when heat goes beyond the immediate flame area. Tie long hair behind your head. Do not wear a necktie, scarf, loose clothing, or necklace when you work near machine tools or moving parts. If these items were to get caught, severe injury could result. Remove rings and other jewelry to prevent electrical shorts and entanglement in moving parts. Use Proper Tools Use Safe Service Procedures Use tools appropriate to the work. Makeshift tools and procedures can create safety hazards. Use power tools only to loosen threaded parts and fasteners. For loosening and tightening hardware, use the correct size tools. DO NOT use U.S. measurement tools on metric fasteners. Avoid bodily injury caused by slipping wrenches. Use only service parts meeting John Deere specifications. Wear Protective Clothing Park Machine Safely MIF Wear close fitting clothing and safety equipment appropriate to the job. Prolonged exposure to loud noise can cause impairment or loss of hearing. Wear a suitable hearing protective device such as earmuffs or earplugs to protect against objectionable or uncomfortable loud noises. MIF Operating equipment safely requires the full attention of the operator. Do not wear radio or music headphones while operating machine. Before working on the machine: 1. Lower all equipment to the ground. 2. Stop the engine and remove the key. 3. Disconnect the battery ground strap. 4. Hang a DO NOT OPERATE tag in operator station. Safety - 3
SAFETY Support Machine Properly and Use Proper Lifting Equipment Work in Ventilated Area MIF MIF Engine exhaust fumes can cause sickness or death. If it is necessary to run an engine in an enclosed area, remove the exhaust fumes from the area with an exhaust pipe extension. If you must work on a lifted machine or attachment, securely support the machine or attachment. Do not support the machine on cinder blocks, hollow tiles, or props that may crumble under continuous load. Do not work under a machine that is supported solely by a jack. Follow recommended procedures in this manual. If you do not have an exhaust pipe extension, open the doors and get outside air into the area. WARNING: California Proposition 65 Warning Lifting heavy components incorrectly can cause severe injury or machine damage. Follow recommended procedure for removal and installation of components in the manual. Diesel engine exhaust and some of its constituents are known to the State of California to cause cancer, birth defects, and other reproductive harm. Gasoline engine exhaust from this product contains chemicals known to the State of California to cause cancer, birth defects, or other reproductive harm. Work in Clean Area Before starting a job: Remove Paint before Welding or Heating 1. Clean work area and machine. 2. Make sure you have all necessary tools to do your job. Avoid potentially toxic fumes and dust. Hazardous fumes can be generated when paint is heated by welding, soldering, or using a torch. Do all work outside or in a well-ventilated area. Dispose of paint and solvent properly. Remove paint before welding or heating. If you sand or grind paint, avoid breathing the dust. Wear an approved respirator. If you use solvent or paint stripper, remove stripper with soap and water before welding. Remove solvent or paint stripper containers and other flammable material from area. Allow fumes to disperse at least 15 minutes before welding or heating. 3. Have the right parts on hand. 4. Read all instructions thoroughly; do not attempt shortcuts. Using High Pressure Washers Directing pressurized water at electronic/electrical components or connectors, bearings, hydraulic seals, fuel injection pumps or other sensitive parts and components may cause product malfunctions. Reduce pressure and spray at a 45 to 90 degree angle. Avoid Harmful Asbestos Dust Avoid breathing dust that may be generated when handling components containing asbestos fibers. Inhaled asbestos fibers may cause lung cancer. Illuminate Work Area Safely Illuminate your work area adequately but safely. Use a portable safety light for working inside or under the machine. Make sure the bulb is enclosed by a wire cage. The hot filament of an accidentally broken bulb can ignite spilled fuel or oil. Components in products that may contain asbestos fibers are brake pads, brake band and lining assemblies, clutch plates, and some gaskets. The asbestos used in these components is usually found in a resin or sealed in some way. Normal handling is not hazardous as long as airborne dust containing asbestos is not generated. Safety - 4
SAFETY Avoid Injury from Rotating Blades, Augers and PTO Shafts Avoid creating dust. Never use compressed air for cleaning. Avoid brushing or grinding material containing asbestos. When servicing, wear an approved respirator. A special vacuum cleaner is recommended to clean asbestos. If not available, apply a mist of oil or water on the material containing asbestos. Keep bystanders away from the area. Service Tires Safely MIF Keep hands and feet away while machine is running. Shut off power to service, lubricate or remove mower blades, augers or PTO shafts. Service Cooling System Safely MIF Explosive separation of a tire and rim parts can cause serious injury or death. Do not attempt to mount a tire unless you have the proper equipment and experience to perform the job. Always maintain the correct tire pressure. Do not inflate the tires above the recommended pressure. Never weld or heat a wheel and tire assembly. The heat can cause an increase in air pressure resulting in a tire explosion. Welding can structurally weaken or deform the wheel. When inflating tires, use a clip-on chuck and extension hose long enough to allow you to stand to one side and NOT in front of or over the tire assembly. Use a safety cage if available. MIF Explosive release of fluids from pressurized cooling system can cause serious burns. Check wheels for low pressure, cuts, bubbles, damaged rims or missing lug bolts and nuts. Shut off machine. Remove filler cap only when cool enough to touch with bare hands. Slowly loosen cap to first stop to relieve pressure before removing completely. Safety - 5
ENGINE CHECKS, TESTS, AND ADJUSTMENTS Valve Clearance Adjustment Adjustment Procedure Reason To obtain correct rocker arm-to-valve stem clearance, to ensure proper opening and closing of the intake and exhaust valves. A Required Tools Tool Name Tool No. Tool Use Feeler Gauge (Blade Type) NA Used to measure valve clearance. Procedure 1. Park machine safely. (See Park Machine Safely on page 3.) MX2261 1. Disconnect red wire (A) from alternator. 2. Allow machine to cool. 3. Raise hood. 4. Remove rocker arm cover. B NOTE: Top Dead Center (TDC) is the piston at its highest point. C A D MX2271 2. Loosen top cap screw (B), mounting bracket cap screw (C), and lower cap screw (D). MX2387 3. Apply force to the alternator housing until tension is correct. 5. Turn the crankshaft pulley clockwise until the number 1 cylinder TDC mark (A) on the flywheel aligns with the index mark on the flywheel housing or plate. 4. Tighten cap screws. NOTE: Number 1 cylinder is the closest to the flywheel. Specifications Fan/Alternator Drive Belt Deflection at 98 N (22 lb- force) . . . . . . . . . . . . . . . . 10-15 mm (0.400-0.600 in.) 6. Try to move both number 1 cylinder rocker arms or push rods. NOTE: If rocker arm push rods are not loose, rotate flywheel one revolution (360 ). If both rocker arm push rods are loose, the piston is at TDC on compression stroke. Engine Checks, Tests, and Adjustments - 35
ENGINE CHECKS, TESTS, AND ADJUSTMENTS A A 2 1 3 4 2 1 3 4 E E E I I I E E I E E I I I E I B B C C T6479AB T6479AB A - Cylinders B - Fan End C - Flywheel End A - Cylinders B - Fan End C - Flywheel End 7. Measure and adjust valve clearance on the valves (arrows) with number 1 piston at TDC. 10.Measure and adjust valve clearance on the valves (arrows) with number 2 and 4 pistons at TDC. Specifications Valve Clearance. . . . . 0.15-0.25 mm (0.006-0.010 in.) Valve Lift Check Reason To check for wear on the cam lobes, followers, and/or push rods. Required Tools Tool Name Tool No. Tool Use Dial Indicator NA Used to measure valve lift. T1605BF Procedure 8. To adjust valves, loosen nut and turn adjusting screw until clearance is to specification. Hold screw while tightening nut. 1. Remove rocker arm cover. 2. Adjust valve clearance. 9. Turn crankshaft pulley one revolution (360 ). This puts the piston in number 4 cylinder at TDC compression stroke. Engine Checks, Tests, and Adjustments - 36
ENGINE CHECKS, TESTS, AND ADJUSTMENTS Procedure 1. Park machine safely. (See Park Machine Safely on page 3.) 2. Run engine for five minutes to bring to operating temperature. A 3. Turn key switch to STOP position. 4. Raise hood. 5. Move fuel shutoff valve on fuel filter to OFF position. 6. Disconnect the fuel shutoff solenoid wiring connector. T6333DT 7. Remove fuel injection nozzles. 3. Fasten the dial indicator (A) to the engine, and position the indicator tip on the valve retainer. The valve must be fully closed and the rocker arm must move freely. 4. Zero the dial indicator. A 5. Manually turn the crankshaft clockwise (as viewed from the fan end). 6. Observe the dial indicator as the valve is moved to the full open position. 7. Repeat for each valve. B Results T6333EU or more valves show less lift than the others, remove and inspect the camshaft, followers, and push rods. The valve lift should be the same for all valves. If one 8. Install the TEFLON heat protector in the injector port. 9. Install JDG560 Adapter (A) and JT01682 Compression Gauge Assembly (B) in injector port. specification, remove and inspect the cylinder head. If the camshaft, followers, and push rods are within IMPORTANT: Avoid damage! DO NOT run starting motor for more than ten seconds at a time. Cylinder Compression Pressure Test Reason 10.Crank engine for five seconds with starting motor. To determine the condition of the pistons, rings, cylinder walls, and valves. 11.Record pressure reading for each cylinder. Results Required Tools Tool Name Tool No. Tool Use NOTE: Pressure listed is for 300 m (1000 ft) above sea level. For naturally aspirated engines, reduce specification an additional 4% for each 300 m (1000 ft) of altitude. Compression Gauge Assembly JT01682 Used to measure pressure in cylinders. approximately two teaspoons of clean engine oil into cylinders through injector ports and repeat test. If pressure reading is below specification, squirt Adapter JDG560 Used to attach compression gauge assembly to cylinders. rings, and cylinder walls for wear or damage. If pressure increases significantly, check piston, retest, check for leaking valves, valve seats, or cylinder head gasket. If pressure does not increase significantly after Engine Checks, Tests, and Adjustments - 37
ENGINE CHECKS, TESTS, AND ADJUSTMENTS Specifications IMPORTANT: Avoid damage! If oil pressure reading is below 58 kPa (8.5 psi), STOP ENGINE IMMEDIATELY and determine cause. Cylinder Compression Models 1600/1620 (Min) . . . . . . . . 2744 kPa (398 psi) Model 1600 Turbo (Min) . . . . . . . . 2447 kPa (355 psi) Difference between Cylinders (Max) 296 kPa (43 psi) 6. Monitor oil pressure while cranking engine. If no oil pressure is present, discontinue cranking engine. Determine and correct cause before running engine. 7. Start engine and run engine at SLOW idle (700 rpm) for approximately five minutes to heat oil. Engine Oil Pressure Test Reason 8. Run engine at FAST idle (3200 rpm) and check oil pressure. Gauge should read a minimum oil pressure to specification. To determine if the engine bearings or lubrication system components are worn. Results Required Tools If oil pressure is not within specification, inspect oil pump and oil pressure regulating valve for wear or damage. Replace parts as needed. Tool Name Tool No. Tool Use Hose Assembly JT03017 Used to connect pressure gauge to connector. Specifications Pressure Gauge 700 kPa (100 psi) JT07034 Used to measure oil pressure. Engine Oil Pressure at 3200 RPM 344 48 kPa (50 7 psi) Connector JT03349 Used to connect hose assembly to oil pressure switch. Air Intake System Leakage Test Reason To check for leaks in the air intake system. Procedure 1. Park machine safely. (See Park Machine Safely on page 3.) Required Tools Tool Name Tool No. Tool Use 2. Raise hood. Air Pressure Regulator NA Used to regulate air pressure from manifold. Test Fitting NA Used to connect air hose to manifold. Procedure 1. Park machine safely. (See Park Machine Safely on page 3.) 2. Raise hood. A MX2302 3. Remove oil pressure switch (A). 4. Install JT03349 Connector. 5. Connect JT03017 Hose Assembly and JT05577 Pressure Gauge. Engine Checks, Tests, and Adjustments - 38
ENGINE CHECKS, TESTS, AND ADJUSTMENTS Extending Turbocharger Life - Model 1600 Turbo Turbochargers are designed to last the life of the engine, but, because they operate at such high speeds (100,000 rpm or more), a moment s carelessness can cause them to fail in seconds. A The major causes of turbocharger failure are: Lack of lube oil (quick starts and hot shutdowns) Oil contamination Ingestion of foreign objects Restricted oil drainage MX2232 Low oil level 3. Remove air filter restriction indicator (A) and install test fitting to pressurize air intake system. Operation on excessive side slopes 4. Connect air pressure regulator to manifold using hose and fitting from air cleaner. Abnormally high exhaust temperatures Lack of Lube Oil Oil not only lubricates the turbocharger s spinning shaft and bearings, it also carries away heat. When oil flow stops or is reduced, heat is immediately transferred from the hot turbine wheel to the bearings, which are also heating up because of the increased friction due to the lack of oil. This combination causes the turbocharger shaft temperature to increase rapidly. If oil flow does not increase and the process continues, bearings will fail. Once the bearings fail (which can happen in just seconds) seals, shaft, turbine and compressor wheels can also be damaged. M82124 The principle causes of turbocharger bearing lubrication problems are low pressure; a bent, plugged, or undersized oil lube supply line; plugged or resticted oil galleries in the turbocharger; or improper machine start- up and shutdown procedure. 5. Remove air cleaner cover and both filter elements. 6. Put small plastic bag over end of small filter element. Install small filter element into air cleaner housing. 7. Pressurize air intake system to specification. If air intake system cannot be pressurized, turn engine slightly to close valves. Oil levels and pressure should always be closely monitored and all worn hoses and lines should be replaced. The turbocharger oil supply line should be checked frequently to make sure it is not kinked or bent and it should always be replaced with a line of equal size, length, and strength. 8. Spray soap solution over all connections from air cleaner to intake manifold and check for leaks. Results The easiest way to damage a turbocharger is through improper start-up and shutdown procedures. Always idle the engine for at least 30 seconds (no load) after start- up and before shutdown. Warming the engine up before applying a load allows oil pressure to build up and lines to fill with oil. Find leaks and repair or replace parts as necessary. Specifications Air Intake System Pressure . . . . 34-69 kPa (5-10 psi) Engine Checks, Tests, and Adjustments - 39
ENGINE CHECKS, TESTS, AND ADJUSTMENTS Restricted Oil Drainage Idling the engine before shutdown allows the engine and turbocharger to cool. Hot shutdowns can cause the turbocharger to fail because after high-speed operation the turbocharger will continue to rotate long after the engine has been shut off and oil pressure has dropped to zero. This will cause heat to build up and possible bearing damage. It can also cause carbon and varnish deposits to form. A fourth cause of turbocharger damage is restricted lube oil drainage. The lubricating oil carries away heat generated by friction of the bearings and from the hot exhaust gases. If drainage back to the sump is impeded, the bearings will overheat with damage that will ultimately lead to failure. There are two primary reasons for restricted drainage: Oil Contamination buildup of sludged oil. A blocked drain tube, due to either damage or a A second cause of turbocharger failures is contaminated oil. It can be caused by a worn or damaged oil filter or not changing the lube oil at recommended intervals. Expecting the oil filter to remove dirt, sand, metal chips, etc., from the oil before they reach the engine or turbocharger can be a costly mistake because contaminated oil may completely bypass the engine oil filter if the oil filter or oil cooler is clogged, if the filter element is improperly installed, or if the oil is thick during cold weather. crankcase breather or excessive engine blow-by. High crankcase pressure, due to restricted Periodically check both the turbocharger oil drain tube and engine breather tube for damage or restriction. Correction of these conditions leads to longer turbocharger life. Low Oil Level Check engine oil level periodically according to your operator s manual. Proper oil level will prevent turbocharger failure. Four good ways of avoiding oil contamination are: overhaul. Look especially for any sludge or debris left in lube oil galleries. Always inspect the engine thoroughly during major Operation on Excessive Side Slopes of oil samples at filter change periods can help identify potentially harmful contaminants in the oil. Change lube oil at recommended intervals. Analysis Operating equipment on excessive side slopes will prevent oil from being transferred up to the turbocharger, causing overheating wear of moving parts. oil. Clean the area around the oil fill cap before adding Abnormally High Exhaust Temperatures A fifth cause of turbocharger damage is abnormally high exhaust temperatures. This can cause coking of oil which can lead to bearing failure. Extreme over- temperature operation can cause wheel burst. Use a clean container when adding oil. Ingestion of Foreign Objects The third cause of turbocharger damage is the ingestion of foreign objects. Foreign objects or particles can be ingested and cause damage to the turbocharger on both compressor and turbine sides. This is easy to avoid. There are two basic causes of over-temperature: Resticted air flow Overpowering the engine On the compressor side, foreign objects usually take the form of dust, sand, or shreds of air cleaner element that enter through improperly installed air cleaner elements. Leaky air inlet piping (loose clamps or torn rubber joints) or torn pleats in dry-type air cleaner elements also create problems. In either case, the engine has more fuel than available air for proper combustion. This overfueled condition leads to elevated exhaust temperatures. Causes of restricted air flow can include: Damaged inlet piping The result is erosion of compressor blades that can cause the delicately balanced wheel to whobble. Clogged air filters Excessive exhaust restriction IMPORTANT: Avoid damage! Whenever an internal engine failure (valve, valve seat, piston) occurs, a thorough inspection of the turbocharger MUST BE performed before returning engine to service. Operation at extreme altitudes Overpowering generally is due to improper fuel delivery or injection timing. If over-temperature operation has been identified, an inspection of the air inlet and exhaust systems should be performed. Also, check the fuel delivery and timing. Engine Checks, Tests, and Adjustments - 40
ENGINE CHECKS, TESTS, AND ADJUSTMENTS Turbocharger Seven-Step Inspection - Model 1600 Turbo Compressor Housing Inlet and Compressor Wheel NOTE: Foreign object damage may be extensive or minor. In either case, the source of the foreign object must be found and corrected to eliminate future damages. The following inspection procedure is recommended for systematic failure analysis of a suspected failed turbocharger. This procedure will help to identify when a turbocharger has failed, and why it has failed, so the primary cause of failure can be corrected. Use a good light source for this check. Proper diagnosis of a non-failed turbocharger is important for two reasons. A 1. Identification of a non-failed turbocharger will lead to further investigation and repair of the cause of a performance complaint. 2. Proper diagnosis eliminates the unnecessary expense incurred when a non-failed turbocharger is replaced. NOTE: To enhance the turbocharger inspection, use an inspection sheet (Form No. DS-2280 available from Distribution Service Center) to list the inspection steps in the proper order and show potential failure modes for each step. Check off each step of the inspection and record any details or problems obtained during inspection. Retain this with the work order for future reference. MX14541 1. Check compressor inlet and blade (A) for foreign object damage. 2. Check compressor inlet for wheel rub on the housing. Look very closely for any score marks on the housing itself and check the tips of the compressor wheel blades for damage. The seven recommended inspection steps, which are explained in detail on the following pages, are: Compressor Housing Inlet and Compressor Wheel Compressor Housing Outlet 3. Mark findings on your checklist and continue the inspection. Turbine Housing Inlet Turbine Housing Outlet and Turbine Wheel Compressor Housing Outlet External Center Housing and Joints Internal Center Housing Turbo Bench Test A MX14539 1. Check compressor housing outlet (A). The outlet should be clean and free of dirt or oil. 2. Mark the checklist if dirt or oil is found and continue the inspection. Engine Checks, Tests, and Adjustments - 41
ENGINE CHECKS, TESTS, AND ADJUSTMENTS Turbine Housing Inlet External Center Housing and Joints A A MX14540 Check the turbine housing inlet port (A) for oil in housing, excessive carbon deposit, or erosion of walls. MX14564 Visually check the outside of the center housing (A), all connections to the compressor housing, and turbine housing for oil. NOTE: If the inlet is wet with oil or has excessive carbon deposits, an engine problem is likely. Wall erosion (cracking or missing pieces) indicates excessive exhaust temperature. NOTE: If oil is present, make sure it is not coming from a leak at the oil supply or return line. Turbine Housing Outlet and Turbine Wheel Internal Center Housing A A B MX14540 Using a flashlight, look through the oil return hole (A) to check the condition of the shaft and/or bearings. There should not be excess carbon deposits on the shaft or in the housing. MX14541 1. Use a flashlight to look up inside the turbine housing outlet (A) and check blades (B) for foreign object damage. 2. Inspect the wheel blades and housing for evidence of wheel rub. Wheel rub can bend the tips of the blades with the housing showing wear or damage. Engine Checks, Tests, and Adjustments - 42
ENGINE CHECKS, TESTS, AND ADJUSTMENTS Turbo Bench Test MX14564 4. Check shaft end play by moving the shaft back and forth while rotating. There will be some end play, but not to the extent that the wheels contact the housing. MX14564 1. Mount the turbocharger in a vise. 2. Rotate the shaft, using both hands, to check rotation and clearance. The shaft should turn freely, however, there may be a slight amount of drag. IMPORTANT: Avoid damage! Before you finalize your conclusion that the turbocharger has not failed, it is strongly recommended to check rotor shaft axial and radial play. (See procedures later in this group.) These procedures are not required if a failure mode has already been identified. NOTE: These diagnostic procedures will allow you to determine the condition of the turbocharger. If the turbocharger has failed, analysis of your inspection notes should direct you to the specific areas of the engine to correct the problems causing the turbocharger failure. It is not unusual to find that a turbocharger has not failed. If your turbocharger passes all the inspections, the problem lies somewhere else. MX14564 3. Pull up on the compressor end of the shaft and press down on the turbine end while rotating shaft. Neither the compressor wheel not the turbine wheel should contact the housing at any point. NOTE: There will be some play because the bearings inside the center housing are free floating. Engine Checks, Tests, and Adjustments - 43
ENGINE CHECKS, TESTS, AND ADJUSTMENTS Check Turbocharger Rotor Shaft Axial Play - Model 1600 Turbo Check Turbocharger Rotor Shaft Radial Play - Model 1600 Turbo This test will give an indication of the condition of the axial bearing within the center housing and rotating assembly. This test will give an indication of the condition of the radial bearing within the center housing and rotation assembly. NOTE: Prelube center housing bearing prior to performing radial play test. (See Prelube Turbocharger - Model 1600 Turbo on page 122.) C D 1. Purchase an extended indicator tip from a local supplier with the following approximate dimensions: B E Length: 76 mm (3.0 in.) Diameter: 5.0 mm (0.197 in.) A D B A E C MX14542 A - Shaft End B - Dial Indicator C - Magnetic Base D - Turbine Housing E - Axial Direction G J I H F MX14531 1. Mount magnetic base (C) so that indicator tip rests on end of shaft (A). Preload indicator tip and zero dial on indicator (B). A - M2.6, P0.45 B - Radius: 10 mm (0.3937 in.) C - Radius: 5 mm (0.1968 in.) D - Diameter: 5 mm (0.1968 in.) E - Distance: 7 mm (0.2755 in.) F - Length: 8 mm (0.3149 in.) G - Length: 1 mm (0.0393 in.) H - Length: 40 mm (1.5748 in.) I - Length: 10 mm (0.3937 in.) J - Length: 15 mm (0.5905 in.) 2. Move shaft axially back and forth by hand. 3. Observe and record total dial indicator movement. If axial play is not within specification, replace turbocharger. Specifications Rotor Shaft Axial Play Standard . . . . . . . . 0.03-0.06 mm (0.0012-0.0024 in.) Wear Limit . . . . . . . . . . . . . . . . . . 0.09 mm (0.0035 in.) 2. Heat and bend to size as shown. Engine Checks, Tests, and Adjustments - 44
ENGINE CHECKS, TESTS, AND ADJUSTMENTS Fuel Pump Supply Pressure Test D E Reason C F To determine supply pump operating pressure. B Required Tools A G Tool Name Tool No. Tool Use Hose Fitting JT03274 Used to connect gauge to supply pump-to-filter filter hose. I I Female Quick Coupler JT01609 Used to connect hose fitting to gauge. Gauge w/ Male Quick Coupler (0-150 psi) JT03115 Used to measure pressure. H MX14530 A - Compressor Wheel B - Oil Return Cavity C - Extension Adapter D - Dial Indicator E - Magnetic Base F - Turbocharger Mounting Flange G - Turbine Wheel H - Oil Inlet I - Radial Direction Procedure 1. Park machine safely. (See Park Machine Safely on page 3.) 2. Raise hood. E D 3. Position dial indicator (D) with extension adapter (C) onto turbocharger mounting flange (F), so that tip rests on shaft by extending through oil return cavity (B). B C 4. Grasp rotation shaft at both ends and move the shaft toward the indicator then away from the indicator (arrows) by applying moderate force. A 5. Observe and record total indicator movement. 6. If total indicator reading is not within specification, replace turbocharger. M82145A Specifications 3. Disconnect supply pump-to-filter hose (A) at fuel filter (B). Rotor Shaft Radial Play Standard . . . . . . . . 0.08-0.13 mm (0.0031-0.0051 in.) Wear Limit . . . . . . . . . . . . . . . . . 0.17 mm (0.0067 in.) 4. Assemble JT03274 Hose Fitting (C), JT01609 Female Quick Coupler (D), and JT03115 Gauge (E). 5. Connect gauge/fitting assembly to supply pump-to- filter hose (A). 6. Disconnect wire connector to fuel shutoff solenoid. IMPORTANT: Avoid damage! DO NOT run starting motor for more than ten seconds at a time. 7. Crank engine using the starting motor. Gauge should read more than specification. Engine Checks, Tests, and Adjustments - 45
MORE MANUALS: https://www.ebooklibonline.com/ Suggest: If the above button click is invalid. Please download this document first, and then click the above link to download the complete manual. Thank you so much for reading
ENGINE CHECKS, TESTS, AND ADJUSTMENTS Results c CAUTION: Avoid injury! DO NOT apply more than 103 kPa (15 psi) air pressure to the fuel system. Damage to the injection pump or personal injury may result. If pressure is below specification, replace fuel supply pump. Specifications Fuel Supply Pump Pressure (Min) . . 29 kPa (4.3 psi) 6. Apply specified air pressure to fuel supply hose until all fuel is drained from the system. Fuel System Leakage Test 7. Plug end of fuel return hose. Reason 8. Apply specified air pressure to fuel system at fuel supply line. DO NOT exceed maximum specified pressure. To check for leaks in the fuel system. Procedure 9. Apply liquid soap and water solution to all joints and connections in the fuel system and inspect for leaks. 1. Park machine safely. (See Park Machine Safely on page 3.) Results 2. Raise hood. Find leaks and repair or replace parts as necessary. NOTE: Fuel tank capacity for Models 1600/1620 is approximately 57 L (15 gal). Tank capacity for the 1600 Turbo model is approximately 83 L (22 gal). Specifications Fuel System Leakage Test Pressure 34-69 kPa (5-10 psi) Fuel System Leakage Test Pressure (Max) . 103 kPa (15 psi) Fuel System Bleeding Procedure Reason A Any time the fuel system has been opened up for service (lines disconnected or filter removed), it will be necessary to bleed air from the system. Procedure MX2300 NOTE: The engine is equipped with an automatic air venting system, which makes the fuel system self- bleeding. 3. Disconnect fuel line (A) and cap fitting, or drain fuel into a properly marked container. 1. Park machine safely. (See Park Machine Safely on page 3.) B 2. Raise hood. 3. Verify that all fuel line connections are tight. 4. Turn fuel filter shutoff valve to OPEN position. 5. Fill fuel tank. 6. Operate hand primer lever on the fuel supply pump for approximately one minute to bleed most of the air back to the tank through the fuel return lines. MX2427 4. Disconnect fuel return line (B) at the fuel tank. 5. Place fuel return line into a suitable container to catch drained fuel. Engine Checks, Tests, and Adjustments - 46
ENGINE CHECKS, TESTS, AND ADJUSTMENTS Slow Idle Speed Adjustment Fast Idle Speed Adjustment Reason IMPORTANT: Avoid damage! The FAST idle adjustment is pre-set by the engine manufacturer to comply with strict California Air Resources Board/Environmental Protection Agency (CARB/EPA) emissions requirements and is NOT adjustable. Tampering with the FAST idle adjustment may result in severe fine or penalties. To achieve proper slow idle rpm setting. Provides adequate rpm to keep engine running smoothly without stalling. Required Tools Tool Name Tool No. Tool Use Hand Held Digital Tachometer JT05719 Used to check engine speed at crankshaft pulley. IMPORTANT: Avoid damage! DO NOT attempt to adjust the FAST idle setting. It is NOT adjustable. If it is determined that either the fuel injection pump or governor assembly are in need of repair, they must be replaced ONLY as complete assemblies. Only an authorized factory trained technician is allowed to remove and install these assemblies. If replacement is necessary, remove and install the fuel injection pump and/or governor assembly as complete, individual assemblies. Procedure 1. Park machine safely. (See Park Machine Safely on page 3.) 2. Start engine and run for five minutes, to bring machine to operating temperature. 3. Raise hood. 4. Move throttle lever to SLOW idle position. Because the FAST idle speed is NOT adjustable, the throttle cable adjustment becomes very critical to proper engine operation. Therefore, first MAKE SURE that the throttle cable obtains its full range of motion, stop-to- stop, before performing any diagnostic procedures. 5. Use JT05719 Hand Held Digital Tachometer to check engine speed at crankshaft pulley. Torque Capsule Adjustment NOTE: The torque capsule adjustment is pre-set by the engine manufacturer to comply with strict California Air Resources Board/Environmental Protection Agency (CARB/EPA) emissions requirements and is NOT adjustable. Tampering with the torque adjustment may result in severe fines or penalties. B C IMPORTANT: Avoid damage! DO NOT attempt to adjust the torque capsule. It is NOT adjustable. A If it is determined that either the fuel injection pump or governor assembly are in need of repair, they must be replaced ONLY as complete assemblies. Only an authorized factory trained technician is allowed to remove and install these assemblies. If replacement is necessary, remove and install the fuel injection pump and/or governor assembly as complete, individual assemblies. MIF (M91893) 6. Visually check that the injection pump throttle lever (A) is against the slow idle stop screw. Check slow idle speed. Slow idle speed should be to specification. If slow idle rpm does not meet specifications, loosen jam nut (B) and turn screw (C). After adjustment, tighten jam nut. 7. After slow idle speed adjustment, adjust throttle cable. Because the torque capsule is NOT adjustable, the throttle cable adjustment becomes very critical to proper engine operation. Therefore, first MAKE SURE the throttle cable obtains its full range of motion, stop-to- stop, before performing any diagnostic procedures. Specifications Slow Idle Speed . . . . . . . . . . . . . . . . . . . . . . . 700 rpm Engine Checks, Tests, and Adjustments - 47
https://www.ebooklibonline.com Hello dear friend! Thank you very much for reading. Enter the link into your browser. The full manual is available for immediate download. https://www.ebooklibonline.com

