How to Make a Diya for Diwali Celebration
Learn how to create a traditional Diya for Diwali by shaping air-drying clay into a beautiful oil lamp. Discover the significance of Diyas in representing light over darkness and follow the steps to design and finish your Diya for a festive touch.
Download Presentation

Please find below an Image/Link to download the presentation.
The content on the website is provided AS IS for your information and personal use only. It may not be sold, licensed, or shared on other websites without obtaining consent from the author.If you encounter any issues during the download, it is possible that the publisher has removed the file from their server.
You are allowed to download the files provided on this website for personal or commercial use, subject to the condition that they are used lawfully. All files are the property of their respective owners.
The content on the website is provided AS IS for your information and personal use only. It may not be sold, licensed, or shared on other websites without obtaining consent from the author.
E N D
Presentation Transcript
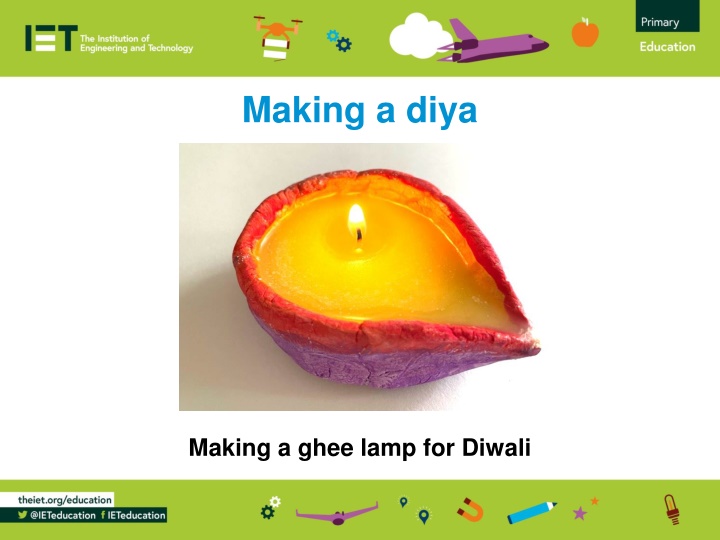
Making a diya Making a ghee lamp for Diwali
Stay safe Whether you are a scientist researching a new medicine or an engineer solving climate change, safety always comes first. An adult must always be around and supervising when doing this activity. You are responsible for: ensuring that any equipment used for this activity is in good working condition behaving sensibly and following any safety instructions so as not to hurt or injure yourself or others Please note that in the absence of any negligence or other breach of duty by us, this activity is carried out at your own risk. It is important to take extra care at the stages marked with this symbol:
What is a diya? A diya is an oil lamp Diyas represent the triumph of light over dark, and good over evil The warm, bright glow from a diya is considered to bring good fortune They are traditionally made from clay or mud, with a cotton wick dipped in ghee
Make a pinch pot Break off a lump of air-drying clay Roll into a large ball Use your thumb to create a well in the clay
Shape your pinch pot into a diya Using your fingers, carefully shape the sides of your pot Create a spout, forming your pot into a tear shape Create a design around the top of your pot by using the tip of a paint brush or pen
Finish your diya Allow your pot to dry Add colour - use bright colors that contrast dramatically Add a design to the centre of the pot with a pen
Using your Diya With adult supervision - use a tea light to create your lamp or fill the diya with melted ghee and use a wick from a tea light to create your lamp
Extension Create different designs using coloured clay
