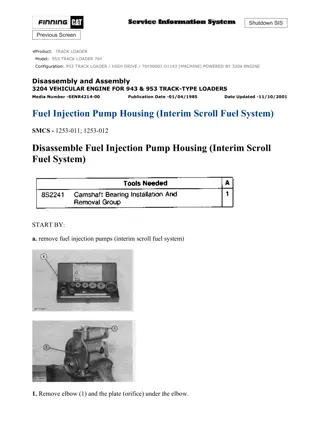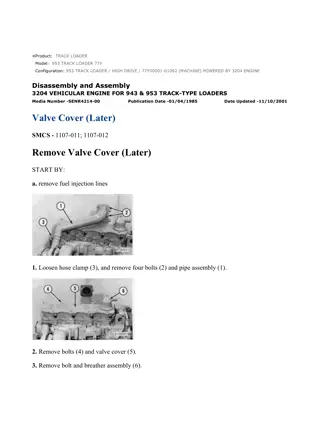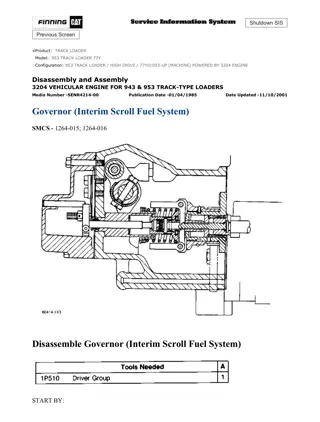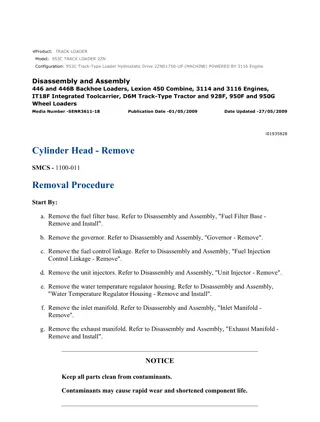
Caterpillar Cat 933C Hystat Track Loader (Prefix 4MS) Service Repair Manual Instant Download
Please open the website below to get the complete manualnn// n
Download Presentation

Please find below an Image/Link to download the presentation.
The content on the website is provided AS IS for your information and personal use only. It may not be sold, licensed, or shared on other websites without obtaining consent from the author. Download presentation by click this link. If you encounter any issues during the download, it is possible that the publisher has removed the file from their server.
E N D
Presentation Transcript
Service Repair Manual Models 933C and933C LGP HystatTrackLoader
933C & 933C LGP Hystat Track Loader 4MS00001-UP (MACHINE) POWERED BY... 1/3 Shutdown SIS Previous Screen Product: TRACK LOADER Model: 933C TRACK LOADER 4MS Configuration: 933C & 933C LGP Hystat Track Loader 4MS00001-UP (MACHINE) POWERED BY 3046 Engine Disassembly and Assembly 3046 Engine For Caterpillar Built Machines Media Number -SENR6458-05 Publication Date -01/04/2004 Date Updated -22/04/2004 i01020755 Air Inlet Manifold - Install SMCS - 1058-012 Installation Procedure NOTICE Keep all parts clean from contaminants. Contaminants may cause rapid wear and shortened component life. Illustration 1 g00523540 Note: Check condition of the inlet manifold gasket. If the gasket is damaged, use a new part for replacement. https://127.0.0.1/sisweb/sisweb/techdoc/techdoc_print_page.jsp?returnurl=/sis... 2020/6/16
933C & 933C LGP Hystat Track Loader 4MS00001-UP (MACHINE) POWERED BY... 2/3 1. Install the gasket and air inlet manifold (11) . 2. Install washers and twenty-four bolts (12) onto air inlet manifold (11) . Illustration 2 g00557896 Note: Check condition of the elbow gasket. If the gasket is damaged, use a new part for replacement. 3. Install the gasket and elbow (10) onto air inlet manifold (11) . 4. Install washers and four bolts (9) onto air inlet manifold (11) . 5. Install bolt (8) and the washer onto fuel injection lines. 6. Install two bolts (7) onto air inlet manifold (11) . Illustration 3 g00523535 7. If necessary, reposition two hoses (6) onto air inlet manifold (11) . 8. Install the washer and bolt (5) onto air inlet manifold (11) . https://127.0.0.1/sisweb/sisweb/techdoc/techdoc_print_page.jsp?returnurl=/sis... 2020/6/16
https://www.ebooklibonline.com Hello dear friend! Thank you very much for reading. Enter the link into your browser. The full manual is available for immediate download. https://www.ebooklibonline.com
933C & 933C LGP Hystat Track Loader 4MS00001-UP (MACHINE) POWERED BY... 3/3 Illustration 4 g00523533 9. Reposition the fuel filter and fuel filter base (3) onto the mounting bracket of air inlet manifold (11) . 10. Install washers and bolts (4) onto the mounting bracket of air inlet manifold (11) . Illustration 5 g00523531 11. Install hose (2) onto air inlet manifold (11) and the turbocharger. 12. Tighten two hose clamps (1) on hose (2) . Copyright 1993 - 2020 Caterpillar Inc. Tue Jun 16 17:04:43 UTC+0800 2020 All Rights Reserved. Private Network For SIS Licensees. https://127.0.0.1/sisweb/sisweb/techdoc/techdoc_print_page.jsp?returnurl=/sis... 2020/6/16
933C & 933C LGP Hystat Track Loader 4MS00001-UP (MACHINE) POWERED BY... 1/5 Shutdown SIS Previous Screen Product: TRACK LOADER Model: 933C TRACK LOADER 4MS Configuration: 933C & 933C LGP Hystat Track Loader 4MS00001-UP (MACHINE) POWERED BY 3046 Engine Disassembly and Assembly 3046 Engine For Caterpillar Built Machines Media Number -SENR6458-05 Publication Date -01/04/2004 Date Updated -22/04/2004 i01646184 Inlet and Exhaust Valve Springs - Remove and Install SMCS - 1108-010 Removal Procedure Table 1 Required Tools Tool Part Number Part Description Qty A 5S-1322 Valve Keeper Installer 1 B 9U-6145 Air Connector (1) 1 9U-6144 Adapter 1 7F-4292 Valve Spring Compressor 1 C 6V-5223 Bolt 1 8T-4121 Washer 1 6V-5218 Bolt 1 D 8S-2263 Spring Tester 1 ( 1 ) The 9U-6145 Air Connector is part of the 9U-6274 Compression Test Kit. The 9U-6145 Air Connector can be ordered separately. Start By: A. Remove the rocker shaft assembly and the pushrods. Refer to Disassembly and Assembly, "Rocker Shaft and Pushrod - Remove". B. Remove the fuel injection nozzles. Refer to Disassembly and Assembly, "Fuel Injection Nozzles - Remove". https://127.0.0.1/sisweb/sisweb/techdoc/techdoc_print_page.jsp?returnurl=/sis... 2020/6/16
933C & 933C LGP Hystat Track Loader 4MS00001-UP (MACHINE) POWERED BY... 2/5 NOTICE Care must be taken to ensure that fluids are contained during performance of inspection, maintenance, testing, adjusting and repair of the product. Be prepared to collect the fluid with suitable containers before opening any compartment or disassembling any component containing fluids. Refer to Special Publication, NENG2500, "Caterpillar Tools and Shop Products Guide" for tools and supplies suitable to collect and contain fluids on Caterpillar products. Dispose of all fluids according to local regulations and mandates. NOTICE Keep all parts clean from contaminants. Contaminants may cause rapid wear and shortened component life. Note: The following procedure is for the removal of the inlet valve springs and the exhaust valve springs without removing the cylinder head. Illustration 1 g00539579 1. Install Tool (B). Attach an air hose to Tool (B) in order to force air pressure into the cylinder. This will hold the valves in position while the inlet and exhaust valve springs are removed and installed. Note: Maintain air pressure in each cylinder until both of the valve springs are removed and installed. 2. Use Tool (C) to compress the valve spring (3) . https://127.0.0.1/sisweb/sisweb/techdoc/techdoc_print_page.jsp?returnurl=/sis... 2020/6/16
933C & 933C LGP Hystat Track Loader 4MS00001-UP (MACHINE) POWERED BY... 3/5 Note: Compress the valve spring evenly in order to avoid damage to the valve stem. 3. Use the magnetic end of Tool (A) to remove cap (1) and the valve keepers. 4. Slowly release the tension on Tool (C) . 5. Remove retainer (2), and spring (3) . Note: Repeat Steps 1 through 5 in order to remove the remaining valve spring of the same cylinder. Illustration 2 g00525271 6. Check the valve spring force with Tool (D). Refer to Specifications, "Cylinder Head Valves" for information on the valve springs. 7. Perform Steps 1 through 6 for the removal and installation of the remaining inlet and exhaust valve springs. Installation Procedure Table 2 Required Tools Tool Part Number Part Description Qty A 5S-1322 Valve Keeper Installer 1 B 9U-6145 Air Connector 1 9U-6144 Adapter 1 7F-4292 Valve Spring Compressor 1 C 6V-5223 Bolt 1 8T-4121 Washer 1 6V-5218 Bolt 1 https://127.0.0.1/sisweb/sisweb/techdoc/techdoc_print_page.jsp?returnurl=/sis... 2020/6/16
933C & 933C LGP Hystat Track Loader 4MS00001-UP (MACHINE) POWERED BY... 4/5 NOTICE Keep all parts clean from contaminants. Contaminants may cause rapid wear and shortened component life. Illustration 3 g00539579 1. Keep an air hose connected to Tool (B) in order to force air pressure into the cylinder. This will hold the valves in position while the inlet and exhaust valve springs are removed and installed. 2. Position valve spring (3) and retainer (2) over the valve stem. 3. Use Tool (C) to compress valve spring (2) . Note: Compress the valve spring evenly in order to avoid damage to the valve stem. 4. Install the valve keepers. Note: Tool (A) may be used to install valve keepers. The valve keepers can be thrown from the valve when the valve spring compressor is released. Ensure that the valve keepers are properly installed on the valve stem. To help prevent personal injury, keep away from the front of the valve keepers and valve springs during the installation of the valves. https://127.0.0.1/sisweb/sisweb/techdoc/techdoc_print_page.jsp?returnurl=/sis... 2020/6/16
933C & 933C LGP Hystat Track Loader 4MS00001-UP (MACHINE) POWERED BY... 5/5 5. Install cap (1) and slowly release the tension on Tool (C). Tap the top of valve with a soft faced hammer in order to ensure that the valve keepers are properly installed. Note: Repeat Steps 1 through 5 in order to install the remaining valve spring of the same cylinder. 6. Remove air hose and Tool (B) . 7. Perform Steps 1 through 6 for the installation of the remaining inlet and exhaust valve springs. End By: a. Install the fuel injection nozzles. Refer to Disassembly and Assembly, "Fuel Injection Nozzles - Remove". b. Install the rocker shaft assembly and the pushrods. Refer to Disassembly and Assembly, "Rocker Shaft and Pushrod - Remove". Copyright 1993 - 2020 Caterpillar Inc. Tue Jun 16 17:05:40 UTC+0800 2020 All Rights Reserved. Private Network For SIS Licensees. https://127.0.0.1/sisweb/sisweb/techdoc/techdoc_print_page.jsp?returnurl=/sis... 2020/6/16
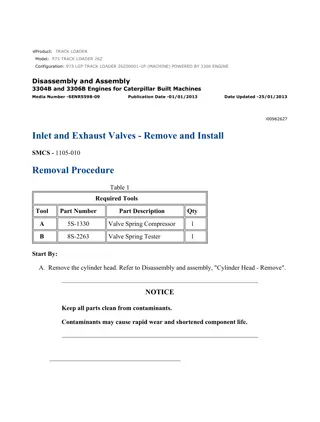
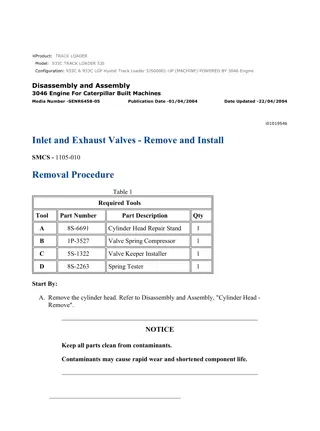
933C & 933C LGP Hystat Track Loader 4MS00001-UP (MACHINE) POWERED BY... 1/4 Shutdown SIS Previous Screen Product: TRACK LOADER Model: 933C TRACK LOADER 4MS Configuration: 933C & 933C LGP Hystat Track Loader 4MS00001-UP (MACHINE) POWERED BY 3046 Engine Disassembly and Assembly 3046 Engine For Caterpillar Built Machines Media Number -SENR6458-05 Publication Date -01/04/2004 Date Updated -22/04/2004 i01019546 Inlet and Exhaust Valves - Remove and Install SMCS - 1105-010 Removal Procedure Table 1 Required Tools Tool Part Number Part Description Qty A 8S-6691 Cylinder Head Repair Stand 1 B 1P-3527 Valve Spring Compressor 1 C 5S-1322 Valve Keeper Installer 1 D 8S-2263 Spring Tester 1 Start By: A. Remove the cylinder head. Refer to Disassembly and Assembly, "Cylinder Head - Remove". NOTICE Keep all parts clean from contaminants. Contaminants may cause rapid wear and shortened component life. https://127.0.0.1/sisweb/sisweb/techdoc/techdoc_print_page.jsp?returnurl=/sis... 2020/6/16
933C & 933C LGP Hystat Track Loader 4MS00001-UP (MACHINE) POWERED BY... 2/4 Illustration 1 g00558252 1. Support cylinder head assembly (1) on Tool (A) . Illustration 2 g00558255 Illustration 3 g00558260 2. Use tool (B) to compress valve spring (5) . https://127.0.0.1/sisweb/sisweb/techdoc/techdoc_print_page.jsp?returnurl=/sis... 2020/6/16
933C & 933C LGP Hystat Track Loader 4MS00001-UP (MACHINE) POWERED BY... 3/4 3. Use the magnetic end of tool (C) to remove cap (2) and valve keepers (3). Slowly release the pressure on tool (B) and remove tool (B) . 4. Remove retainer (4) and remove spring (5) . Illustration 4 g00525271 5. Check the valve spring force with Tool (D). Refer to the Specifications Module, "Cylinder Head Valves" for information on the valve springs. 6. Remove exhaust valve (6) and inlet valve (7) through the bottom of the cylinder head assembly. Put identification marks on the valves for installation purposes. 7. Perform Steps 2 through 6 for the removal of the remaining inlet and exhaust valves from the cylinder head assembly. Installation Procedure Table 2 Required Tools Tool Part Number Part Description Qty A 8S-6691 Cylinder Head Repair Stand 1 B 1P-3527 Valve Spring Compressor 1 C 5S-1322 Valve Keeper Installer 1 NOTICE Keep all parts clean from contaminants. Contaminants may cause rapid wear and shortened component life. https://127.0.0.1/sisweb/sisweb/techdoc/techdoc_print_page.jsp?returnurl=/sis... 2020/6/16
933C & 933C LGP Hystat Track Loader 4MS00001-UP (MACHINE) POWERED BY... 4/4 1. Support cylinder head assembly on Tool (A). Lubricate the inlet and exhaust valves with clean engine oil. Install the inlet and exhaust valves in the original location in the cylinder head. Illustration 5 g00558255 2. Install spring (5) and retainer (4) . 3. Use Tool (B) to compress spring (5). Install valve keepers (3) and cap (2) on the valve stem with Tool (C) . The valve keepers can be thrown from the valve when the valve spring compressor is released. Ensure that the valve keepers are properly installed on the valve stem. To help prevent personal injury, keep away from the front of the valve keepers and valve springs during the installation of the valves. 4. Carefully remove Tool (B). Tap the top of exhaust valve (6) or inlet valve (7) with a soft faced hammer in order to ensure that the valve keepers are properly installed. 5. Repeat Steps 2 through 4 for the installation of the remaining inlet and exhaust valves. End By: Install the cylinder head. Refer to Disassembly and Assembly, "Cylinder Head - Remove and Install". Copyright 1993 - 2020 Caterpillar Inc. Tue Jun 16 17:06:37 UTC+0800 2020 All Rights Reserved. Private Network For SIS Licensees. https://127.0.0.1/sisweb/sisweb/techdoc/techdoc_print_page.jsp?returnurl=/sis... 2020/6/16
933C & 933C LGP Hystat Track Loader 4MS00001-UP (MACHINE) POWERED BY... 1/3 Shutdown SIS Previous Screen Product: TRACK LOADER Model: 933C TRACK LOADER 4MS Configuration: 933C & 933C LGP Hystat Track Loader 4MS00001-UP (MACHINE) POWERED BY 3046 Engine Disassembly and Assembly 3046 Engine For Caterpillar Built Machines Media Number -SENR6458-05 Publication Date -01/04/2004 Date Updated -22/04/2004 i01573613 Inlet and Exhaust Valve Guides - Remove and Install SMCS - 1104-010 Removal Procedure Table 1 Required Tools Tool Part Number Part Description Qty A 4C-6366 Valve Guide Driver 1 Start By: A. Remove the inlet and exhaust valves. Refer to Disassembly and Assembly, "Inlet and Exhaust Valves - Remove and Install". NOTICE Keep all parts clean from contaminants. Contaminants may cause rapid wear and shortened component life. https://127.0.0.1/sisweb/sisweb/techdoc/techdoc_print_page.jsp?returnurl=/sis... 2020/6/16
933C & 933C LGP Hystat Track Loader 4MS00001-UP (MACHINE) POWERED BY... 2/3 Illustration 1 g00523738 1. Use Tool (A) to remove the inlet and exhaust valve guides (1) from the cylinder head. 2. Repeat Step 1 in order to remove the remaining inlet and exhaust valve guides. Installation Procedure Table 2 Required Tools Tool Part Number Part Description Qty A 4C-6366 Valve Guide Driver 1 B 4C-6370 Valve Guide Collar 1 NOTICE Keep all parts clean from contaminants. Contaminants may cause rapid wear and shortened component life. 1. Put clean engine oil on the outside diameter of the valve guide. Install the valve guide with Tool (A) and Tool (B). The valve guide is driven from the top of the cylinder head. https://127.0.0.1/sisweb/sisweb/techdoc/techdoc_print_page.jsp?returnurl=/sis... 2020/6/16
933C & 933C LGP Hystat Track Loader 4MS00001-UP (MACHINE) POWERED BY... 3/3 Illustration 2 g00508601 Typical Example 2. The counterbore in Tool (B) installs the valve guide to the correct height. Height (X) from the top of the valve guide to the cylinder head must be 14.00 0.10 mm (0.551 0.004 inch). For more information on the inlet and exhaust valve guides, refer to the Specifications Module, "Cylinder Head Valves". Note: In order to help prevent damage to the valve guides, Tool (B) must be used during installation. 3. Repeat Steps 1 and 2 for the remaining inlet and exhaust valve guides. End By: Install the inlet and exhaust valves. Refer to Disassembly and Assembly, "Inlet and Exhaust Valves - Remove and Install". Copyright 1993 - 2020 Caterpillar Inc. Tue Jun 16 17:07:33 UTC+0800 2020 All Rights Reserved. Private Network For SIS Licensees. https://127.0.0.1/sisweb/sisweb/techdoc/techdoc_print_page.jsp?returnurl=/sis... 2020/6/16
933C & 933C LGP Hystat Track Loader 4MS00001-UP (MACHINE) POWERED BY... 1/4 Shutdown SIS Previous Screen Product: TRACK LOADER Model: 933C TRACK LOADER 4MS Configuration: 933C & 933C LGP Hystat Track Loader 4MS00001-UP (MACHINE) POWERED BY 3046 Engine Disassembly and Assembly 3046 Engine For Caterpillar Built Machines Media Number -SENR6458-05 Publication Date -01/04/2004 Date Updated -22/04/2004 i02063397 Inlet and Exhaust Valve Seat Inserts - Remove and Install SMCS - 1103-010 Removal Procedure Table 1 Required Tools Tool Part Number Part Description Qty A 166-7441 Valve Seat Extractor Tool 1 Start By: A. Remove the inlet and exhaust valves. Refer to Disassembly and Assembly, "Inlet and Exhaust Valves - Remove and Install". NOTICE Keep all parts clean from contaminants. Contaminants may cause rapid wear and shortened component life. https://127.0.0.1/sisweb/sisweb/techdoc/techdoc_print_page.jsp?returnurl=/sis... 2020/6/16
933C & 933C LGP Hystat Track Loader 4MS00001-UP (MACHINE) POWERED BY... 2/4 Illustration 1 g00524540 Typical Example 1. Use the valve seat grinder of Tool (A) in order to notch the valve seat. Note: For more information on the use of Tool (A), refer to Special Instruction, SMHS7935. Illustration 2 g00524545 Typical Example 2. Use the valve seat extractor of Tool (A) to remove the inlet and exhaust valve seats. 3. Clean the valve seat in the cylinder head. Remove any rough areas from the valve seat in the cylinder head. 4. Repeat Steps 1 through 3 for the remaining inlet valve seat inserts and exhaust valve seat inserts. Installation Procedure Table 2 https://127.0.0.1/sisweb/sisweb/techdoc/techdoc_print_page.jsp?returnurl=/sis... 2020/6/16
933C & 933C LGP Hystat Track Loader 4MS00001-UP (MACHINE) POWERED BY... 3/4 Required Tools Tool Part Number Part Description Qty B 4C-6371 Inlet Valve Seat Driver 1 C 4C-6372 Exhaust Valve Seat Driver 1 NOTICE Keep all parts clean from contaminants. Contaminants may cause rapid wear and shortened component life. Illustration 3 g00524547 1. Lower the temperature of the new inlet valve seat inserts. Use Tool (B) to install the new inlet valve seat insert in the cylinder head. Illustration 4 g00524548 https://127.0.0.1/sisweb/sisweb/techdoc/techdoc_print_page.jsp?returnurl=/sis... 2020/6/16
933C & 933C LGP Hystat Track Loader 4MS00001-UP (MACHINE) POWERED BY... 4/4 2. Lower the temperature of the new exhaust valve seat inserts. Use Tool (C) to install the new exhaust valve seat insert in the cylinder head. 3. Repeat Step 1 and 2 for the remaining inlet valve seat inserts and exhaust valve seat inserts. End By: Install the inlet and exhaust valves. Refer to Disassembly and Assembly, "Inlet and Exhaust Valves - Remove and Install". Copyright 1993 - 2020 Caterpillar Inc. Tue Jun 16 17:08:30 UTC+0800 2020 All Rights Reserved. Private Network For SIS Licensees. https://127.0.0.1/sisweb/sisweb/techdoc/techdoc_print_page.jsp?returnurl=/sis... 2020/6/16
933C & 933C LGP Hystat Track Loader 4MS00001-UP (MACHINE) POWERED BY... 1/3 Shutdown SIS Previous Screen Product: TRACK LOADER Model: 933C TRACK LOADER 4MS Configuration: 933C & 933C LGP Hystat Track Loader 4MS00001-UP (MACHINE) POWERED BY 3046 Engine Disassembly and Assembly 3046 Engine For Caterpillar Built Machines Media Number -SENR6458-05 Publication Date -01/04/2004 Date Updated -22/04/2004 i01021908 Inlet and Exhaust Valve Seals - Remove and Install SMCS - 1104-010 Removal Procedure Table 1 Required Tools Tool Part Number Part Description Qty A 1U-7600 Slide Hammer Puller 1 B 4C-8134 Seal Remover 1 Start By: A. Remove the inlet and exhaust valves. Refer to Disassembly and Assembly, "Inlet and Exhaust Valves - Remove and Install". NOTICE Keep all parts clean from contaminants. Contaminants may cause rapid wear and shortened component life. https://127.0.0.1/sisweb/sisweb/techdoc/techdoc_print_page.jsp?returnurl=/sis... 2020/6/16
933C & 933C LGP Hystat Track Loader 4MS00001-UP (MACHINE) POWERED BY... 2/3 Illustration 1 g00524665 1. Use Tool (A) and Tool (B) to remove valve stem seal (1) . Installation Procedure Table 2 Required Tools Tool Part Number Part Description Qty C 4C-6366 Valve Guide Driver 1 D 4C-6373 Valve Seal Installer 1 NOTICE Keep all parts clean from contaminants. Contaminants may cause rapid wear and shortened component life. https://127.0.0.1/sisweb/sisweb/techdoc/techdoc_print_page.jsp?returnurl=/sis... 2020/6/16
933C & 933C LGP Hystat Track Loader 4MS00001-UP (MACHINE) POWERED BY... 3/3 Illustration 2 g00524649 1. Place the new valve stem seal in position on the valve guide. 2. Use Tool (C) and Tool (D) to install the new valve stem seal. End By: Install the inlet and exhaust valves. Refer to Disassembly and Assembly, "Inlet and Exhaust Valves - Remove and Install". Copyright 1993 - 2020 Caterpillar Inc. Tue Jun 16 17:09:27 UTC+0800 2020 All Rights Reserved. Private Network For SIS Licensees. https://127.0.0.1/sisweb/sisweb/techdoc/techdoc_print_page.jsp?returnurl=/sis... 2020/6/16
933C & 933C LGP Hystat Track Loader 4MS00001-UP (MACHINE) POWERED BY... 1/3 Shutdown SIS Previous Screen Product: TRACK LOADER Model: 933C TRACK LOADER 4MS Configuration: 933C & 933C LGP Hystat Track Loader 4MS00001-UP (MACHINE) POWERED BY 3046 Engine Disassembly and Assembly 3046 Engine For Caterpillar Built Machines Media Number -SENR6458-05 Publication Date -01/04/2004 Date Updated -22/04/2004 i01646267 Engine Oil Filter Base - Remove SMCS - 1306-011 Removal Procedure Table 1 Required Tools Tool Part Number Part Description Qty A 185-3630 Strap Wrench Assembly 1 NOTICE Keep all parts clean from contaminants. Contaminants may cause rapid wear and shortened component life. NOTICE Care must be taken to ensure that fluids are contained during performance of inspection, maintenance, testing, adjusting and repair of the product. Be prepared to collect the fluid with suitable containers before opening any compartment or disassembling any component containing fluids. Refer to Special Publication, NENG2500, "Caterpillar Tools and Shop Products Guide" for tools and supplies suitable to collect and contain fluids on Caterpillar products. https://127.0.0.1/sisweb/sisweb/techdoc/techdoc_print_page.jsp?returnurl=/sis... 2020/6/16
933C & 933C LGP Hystat Track Loader 4MS00001-UP (MACHINE) POWERED BY... 2/3 Dispose of all fluids according to local regulations and mandates. Note: A remote mounted engine oil filter base is used in some excavator models. Illustration 1 g00525348 Raised type of base for engine oil filter Illustration 2 g00558715 1. Use Tool (A) and remove oil filter (1) . 2. Remove bolt (2) from the cylinder block. 3. Remove bolt (3) . 4. Remove engine oil filter base (1) . https://127.0.0.1/sisweb/sisweb/techdoc/techdoc_print_page.jsp?returnurl=/sis... 2020/6/16
MORE MANUALS: https://www.ebooklibonline.com/ Suggest: If the above button click is invalid. Please download this document first, and then click the above link to download the complete manual. Thank you so much for reading
933C & 933C LGP Hystat Track Loader 4MS00001-UP (MACHINE) POWERED BY... 3/3 Illustration 3 g00525453 Raised type of base for engine oil filter Illustration 4 g00558949 5. Check the condition of O-ring seals (5) and (6). Replace the O-ring seals, if necessary. Copyright 1993 - 2020 Caterpillar Inc. Tue Jun 16 17:10:24 UTC+0800 2020 All Rights Reserved. Private Network For SIS Licensees. https://127.0.0.1/sisweb/sisweb/techdoc/techdoc_print_page.jsp?returnurl=/sis... 2020/6/16
https://www.ebooklibonline.com Hello dear friend! Thank you very much for reading. Enter the link into your browser. The full manual is available for immediate download. https://www.ebooklibonline.com

