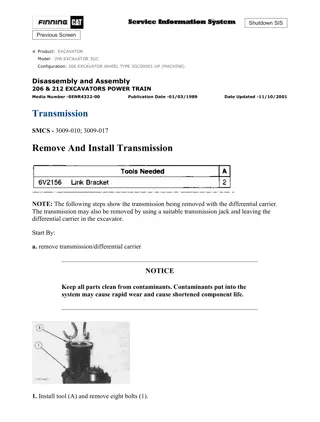
Caterpillar Cat 313B and 313B CR EXCAVATOR (Prefix BAS) Service Repair Manual Instant Download
Please open the website below to get the complete manualnn//
Download Presentation

Please find below an Image/Link to download the presentation.
The content on the website is provided AS IS for your information and personal use only. It may not be sold, licensed, or shared on other websites without obtaining consent from the author. Download presentation by click this link. If you encounter any issues during the download, it is possible that the publisher has removed the file from their server.
E N D
Presentation Transcript
Service Repair Manual Models 313B and313B CR EXCAVATOR
313B CR EXCAVATOR BAS00001-UP (MACHINE)(SEBP2869 - 33) - Documentat... 1/22 Shutdown SIS Previous Screen Product: EXCAVATOR Model: 313B EXCAVATOR BAS Configuration: 313B CR EXCAVATOR BAS00001-UP (MACHINE) Disassembly and Assembly 313B Excavator Machine Systems Media Number -RENR4003-02 Publication Date -01/01/2004 Date Updated -23/01/2004 i01220993 Final Drive and Travel Motor - Disassemble SMCS - 4050-015; 4351-015 Disassembly Procedure Table 1 Required Tools Tool Part Number Part Description Qty (A) 1P-2420 Transmission Repair Stand 2 8B-7548 Push-Puller Tool Group 1 (B) 3H-0465 Push-Puller Plate 2 (C) 138-7573 Link Bracket 3 Disassembly Procedure of the Travel Brake Valve https://127.0.0.1/sisweb/sisweb/techdoc/techdoc_print_page.jsp?returnurl=/sis... 2020/6/14
313B CR EXCAVATOR BAS00001-UP (MACHINE)(SEBP2869 - 33) - Documentat... 2/22 Illustration 1 g00653127 1. Fasten the final drive and the travel Motor to Tooling (A), as shown. 2. Remove bolts (1) in order to remove travel brake valve (2) . Illustration 2 g00653141 3. Place travel brake valve (2) on wood blocks, as shown. 4. Remove relief valve (3) . Illustration 3 g00653151 5. Remove backup rings (5). Remove O-ring seal (7) . 6. Remove backup ring (4). Remove O-ring seal (6) . https://127.0.0.1/sisweb/sisweb/techdoc/techdoc_print_page.jsp?returnurl=/sis... 2020/6/14
https://www.ebooklibonline.com Hello dear friend! Thank you very much for reading. Enter the link into your browser. The full manual is available for immediate download. https://www.ebooklibonline.com
313B CR EXCAVATOR BAS00001-UP (MACHINE)(SEBP2869 - 33) - Documentat... 3/22 Illustration 4 g00653155 Sudden release of spring force can cause injury. To prevent the possibility of injury, follow the procedure to relieve the spring pressure. 7. Remove two mounting bolts (8) that are diagonal to each other. 8. Alternate between the two remaining bolts. Slowly remove the bolts until the spring pressure is released. 9. Remove cap (9) from the travel brake valve. Illustration 5 g00653165 Note: Spool assembly (10) should not be disassembled. Spool assembly (10) is not serviced. 10. Remove spring (12), washer (11), and spool (10) from the travel brake valve. https://127.0.0.1/sisweb/sisweb/techdoc/techdoc_print_page.jsp?returnurl=/sis... 2020/6/14
313B CR EXCAVATOR BAS00001-UP (MACHINE)(SEBP2869 - 33) - Documentat... 4/22 Illustration 6 g00653171 11. Remove plug (13). Remove the O-ring seal from the plug. 12. Remove O-ring seal (14) . Illustration 7 g00653176 13. Remove plunger (16) and spring (15) that is located behind plug (13) . https://127.0.0.1/sisweb/sisweb/techdoc/techdoc_print_page.jsp?returnurl=/sis... 2020/6/14
313B CR EXCAVATOR BAS00001-UP (MACHINE)(SEBP2869 - 33) - Documentat... 5/22 Illustration 8 g00653189 14. Remove plugs (17) from the travel brake valve. Illustration 9 g00653187 15. Remove ball (19) that is located behind each plug (17) . 16. Remove O-ring seal (18) from each plug. Illustration 10 g00653246 17. Remove hydraulic fitting (20). Remove the O-ring seal from the hydraulic fitting. 18. Remove hydraulic fittings (21). Remove the O-ring seals from the hydraulic fitting. https://127.0.0.1/sisweb/sisweb/techdoc/techdoc_print_page.jsp?returnurl=/sis... 2020/6/14
313B CR EXCAVATOR BAS00001-UP (MACHINE)(SEBP2869 - 33) - Documentat... 6/22 Illustration 11 g00653249 19. Remove plug (22). Remove the O-ring seal from the plug. Illustration 12 g00653252 20. Remove hydraulic fitting (25). Remove the O-ring seal from the hydraulic fitting. 21. Remove bolts (23). Remove cap (24) . Illustration 13 g00653253 https://127.0.0.1/sisweb/sisweb/techdoc/techdoc_print_page.jsp?returnurl=/sis... 2020/6/14
313B CR EXCAVATOR BAS00001-UP (MACHINE)(SEBP2869 - 33) - Documentat... 7/22 22. Remove spring (26) and washer (27). Remove O-ring seal (28) . Illustration 14 g00653257 23. Remove relief valve (29) . Illustration 15 g00653261 24. Remove backup rings (31). Remove O-ring seal (33) . 25. Remove backup ring (30). Remove O-ring seal (32) . https://127.0.0.1/sisweb/sisweb/techdoc/techdoc_print_page.jsp?returnurl=/sis... 2020/6/14
313B CR EXCAVATOR BAS00001-UP (MACHINE)(SEBP2869 - 33) - Documentat... 8/22 Illustration 16 g00653269 26. Remove plate (34) . Illustration 17 g00653279 27. Remove roller bearing (35) . 28. Remove location pin (36) . Disassembly Procedure of the Travel Motor https://127.0.0.1/sisweb/sisweb/techdoc/techdoc_print_page.jsp?returnurl=/sis... 2020/6/14
313B CR EXCAVATOR BAS00001-UP (MACHINE)(SEBP2869 - 33) - Documentat... 9/22 Illustration 18 g00653313 1. Remove O-ring seal (37) . 2. Remove washer set (38) . Illustration 19 g00653373 3. Remove shims (39) . Illustration 20 g00653377 https://127.0.0.1/sisweb/sisweb/techdoc/techdoc_print_page.jsp?returnurl=/sis... 2020/6/14
313B CR EXCAVATOR BAS00001-UP (MACHINE)(SEBP2869 - 33) - Documen... 10/22 4. Install Tooling (B), as shown. Note: Use the following steps to release the brake pressure and remove the brake piston. a. While you retain brake piston (39) with Tooling (B), apply shop air pressure of approximately 517 kPa (75 psi) to brake release port (Y) . Note: The brake piston will move out of the travel motor body. b. Remove brake piston (39) . Illustration 21 g00653385 5. Remove backup ring (42). Remove O-ring seal (41) . 6. Remove backup ring (44). Remove O-ring seal (43) . Illustration 22 g00653393 7. Remove friction plates and steel plates (45) . https://127.0.0.1/sisweb/sisweb/techdoc/techdoc_print_page.jsp?returnurl=/sis... 2020/6/14
313B CR EXCAVATOR BAS00001-UP (MACHINE)(SEBP2869 - 33) - Documen... 11/22 Illustration 23 g00653395 Note: Do not allow the components of the barrel assembly to come apart while you remove the barrel assembly. The components of the barrel assembly must be reinstalled into the original positions. 8. Fasten Tooling (C), lifting straps, and a hoist to the final drive. Position the final drive, as shown. 9. Remove barrel assembly (46) . Illustration 24 g00653402 Note: The shoe retainer and piston shoes are not serviced separately. Mark the location of the piston shoes in the barrel and mark the location of the piston shoes in the retainer. The piston shoes must be installed into the original locations. 10. Remove shoe retainer (49) and piston shoes (47) from barrel (48) . 11. Remove piston shoes (47) from retainer (49) . https://127.0.0.1/sisweb/sisweb/techdoc/techdoc_print_page.jsp?returnurl=/sis... 2020/6/14
313B CR EXCAVATOR BAS00001-UP (MACHINE)(SEBP2869 - 33) - Documen... 12/22 Illustration 25 g00653411 12. Remove bushing (50) . Illustration 26 g00653417 13. Remove pins (51) . Illustration 27 g00653423 https://127.0.0.1/sisweb/sisweb/techdoc/techdoc_print_page.jsp?returnurl=/sis... 2020/6/14
313B CR EXCAVATOR BAS00001-UP (MACHINE)(SEBP2869 - 33) - Documen... 13/22 Illustration 28 g00653434 Sudden release of spring force can cause injury. To prevent the possibility of injury, follow the procedure to relieve the spring pressure. 14. Use a press to apply pressure on washer (55) . 15. Remove retaining ring (52) . 16. Slowly release the pressure of the press. 17. Remove washer (55), spring (54), and washer (53) . Illustration 29 g00653455 18. Remove cam plate (56) . https://127.0.0.1/sisweb/sisweb/techdoc/techdoc_print_page.jsp?returnurl=/sis... 2020/6/14
313B CR EXCAVATOR BAS00001-UP (MACHINE)(SEBP2869 - 33) - Documen... 14/22 Illustration 30 g00653461 Note: Mark the location of each ball and mark the location of the piston for assembly purposes. 19. Remove piston (57) . 20. Remove balls (58) . Disassembly Procedure of the Final Drive Illustration 31 g00653465 1. Fasten the final drive to Tooling (A), as shown. 2. Remove bolts (60) and the washers. 3. Use a soft faced hammer to break the seal between ring gear (59) and cover (61). Remove cover (61) . https://127.0.0.1/sisweb/sisweb/techdoc/techdoc_print_page.jsp?returnurl=/sis... 2020/6/14
313B CR EXCAVATOR BAS00001-UP (MACHINE)(SEBP2869 - 33) - Documen... 15/22 Illustration 32 g00653472 4. Remove washer (62) . 5. Remove bolts (63) . 6. Remove plate (64) . Illustration 33 g00653483 7. Remove sun gear (65) . https://127.0.0.1/sisweb/sisweb/techdoc/techdoc_print_page.jsp?returnurl=/sis... 2020/6/14
313B CR EXCAVATOR BAS00001-UP (MACHINE)(SEBP2869 - 33) - Documen... 16/22 Illustration 34 g00653484 8. Remove carrier assembly (66) . Illustration 35 g00653488 9. Remove planetary gear (67) and bearing (68) . 10. Remove race (69) . Illustration 36 g00653503 11. Remove sun gear (71) from carrier assembly (70) . https://127.0.0.1/sisweb/sisweb/techdoc/techdoc_print_page.jsp?returnurl=/sis... 2020/6/14
313B CR EXCAVATOR BAS00001-UP (MACHINE)(SEBP2869 - 33) - Documen... 17/22 Illustration 37 g00653511 12. Remove retaining ring (72) from sun gear (71) . Illustration 38 g00653514 13. Remove bolts (73). Remove plate (74) . Illustration 39 g00653518 https://127.0.0.1/sisweb/sisweb/techdoc/techdoc_print_page.jsp?returnurl=/sis... 2020/6/14
313B CR EXCAVATOR BAS00001-UP (MACHINE)(SEBP2869 - 33) - Documen... 18/22 14. Remove planetary gear (75), bearing (76), race (77), and washer (78) from the carrier assembly. 15. Repeat Step 14 in order to remove the other planetary gears. Illustration 40 g00653575 16. Remove bolt (79) from the planetary carrier. Illustration 41 g00653581 17. Use a magnet in order to remove pin (80) . https://127.0.0.1/sisweb/sisweb/techdoc/techdoc_print_page.jsp?returnurl=/sis... 2020/6/14
313B CR EXCAVATOR BAS00001-UP (MACHINE)(SEBP2869 - 33) - Documen... 19/22 Illustration 42 g00653585 18. Remove nut (81) from the final drive housing. Illustration 43 g00653590 19. Fasten Tooling (C), lifting straps, and a hoist to ring gear (59) . 20. Remove ring gear (59) . Illustration 44 g00653612 https://127.0.0.1/sisweb/sisweb/techdoc/techdoc_print_page.jsp?returnurl=/sis... 2020/6/14
313B CR EXCAVATOR BAS00001-UP (MACHINE)(SEBP2869 - 33) - Documen... 20/22 21. Remove bearing (82) . Illustration 45 g00653616 22. Remove bearing race (83) . Illustration 46 g00653619 23. Reposition the ring gear, as shown. 24. Remove bearing race (84) . https://127.0.0.1/sisweb/sisweb/techdoc/techdoc_print_page.jsp?returnurl=/sis... 2020/6/14
313B CR EXCAVATOR BAS00001-UP (MACHINE)(SEBP2869 - 33) - Documen... 21/22 Illustration 47 g00653623 25. Remove duo-cone seal (85) . Illustration 48 g00653627 26. Remove bearing (86) . Illustration 49 g00653630 27. Remove duo-cone seal (87) . https://127.0.0.1/sisweb/sisweb/techdoc/techdoc_print_page.jsp?returnurl=/sis... 2020/6/14
313B CR EXCAVATOR BAS00001-UP (MACHINE)(SEBP2869 - 33) - Documen... 22/22 Illustration 50 g00653634 28. Remove shaft (88) . 29. Remove bearing (89) from the shaft. Copyright 1993 - 2020 Caterpillar Inc. Sun Jun 14 23:22:09 UTC+0800 2020 All Rights Reserved. Private Network For SIS Licensees. https://127.0.0.1/sisweb/sisweb/techdoc/techdoc_print_page.jsp?returnurl=/sis... 2020/6/14
313B CR EXCAVATOR BAS00001-UP (MACHINE)(SEBP2869 - 33) - Documentat... 1/24 Shutdown SIS Previous Screen Product: EXCAVATOR Model: 313B EXCAVATOR BAS Configuration: 313B CR EXCAVATOR BAS00001-UP (MACHINE) Disassembly and Assembly 313B Excavator Machine Systems Media Number -RENR4003-02 Publication Date -01/01/2004 Date Updated -23/01/2004 i01223357 Final Drive and Travel Motor - Assemble SMCS - 4050-016; 4351-016 Assembly Procedure Table 1 Required Tools Tool Part Number Part Description Qty (A) 1P-2420 Transmission Repair Stand 2 (B) 1U-7084 1-1/2 inch 12pt Socket 1 (C) 138-7573 Link Bracket 3 (D) 1U-6434 Duo-Cone Seal Installer 1 Assembly Procedure of the Travel Motor https://127.0.0.1/sisweb/sisweb/techdoc/techdoc_print_page.jsp?returnurl=/sis... 2020/6/14
313B CR EXCAVATOR BAS00001-UP (MACHINE)(SEBP2869 - 33) - Documentat... 2/24 Illustration 1 g00653634 1. Install bearing (89) on the shaft. 2. Install shaft (88) . Illustration 2 g00653692 Note: Refer to Disassembly and Assembly, "Duo-Cone Conventional Seal - Install" in this manual. Note: The rubber seals and all surfaces that contact the seals must be clean and dry. After installation of the seals, apply clean SAE 30 oil on the contact surfaces of the metal seals. 3. Use Tooling (D) in order to install duo-cone seal (87) . Illustration 3 g00653627 4. Install bearing (86) . https://127.0.0.1/sisweb/sisweb/techdoc/techdoc_print_page.jsp?returnurl=/sis... 2020/6/14
Thank you so much for reading. Please click the Buy Now! button below to download the complete manual. After you pay. You can download the most perfect and complete manual in the world immediately. Our support email: ebooklibonline@outlook.com
313B CR EXCAVATOR BAS00001-UP (MACHINE)(SEBP2869 - 33) - Documentat... 3/24 Illustration 4 g00653619 5. Install bearing race (84) . Illustration 5 g00653616 6. Reposition the ring gear, as shown. 7. Install bearing race (83) . Illustration 6 g00653612 https://127.0.0.1/sisweb/sisweb/techdoc/techdoc_print_page.jsp?returnurl=/sis... 2020/6/14
https://www.ebooklibonline.com Hello dear friend! Thank you very much for reading. Enter the link into your browser. The full manual is available for immediate download. https://www.ebooklibonline.com


