CASE 650L Tier3 Crawler Dozer Service Repair Manual Instant Download
Please open the website below to get the complete manualnn// n
Download Presentation

Please find below an Image/Link to download the presentation.
The content on the website is provided AS IS for your information and personal use only. It may not be sold, licensed, or shared on other websites without obtaining consent from the author. Download presentation by click this link. If you encounter any issues during the download, it is possible that the publisher has removed the file from their server.
E N D
Presentation Transcript
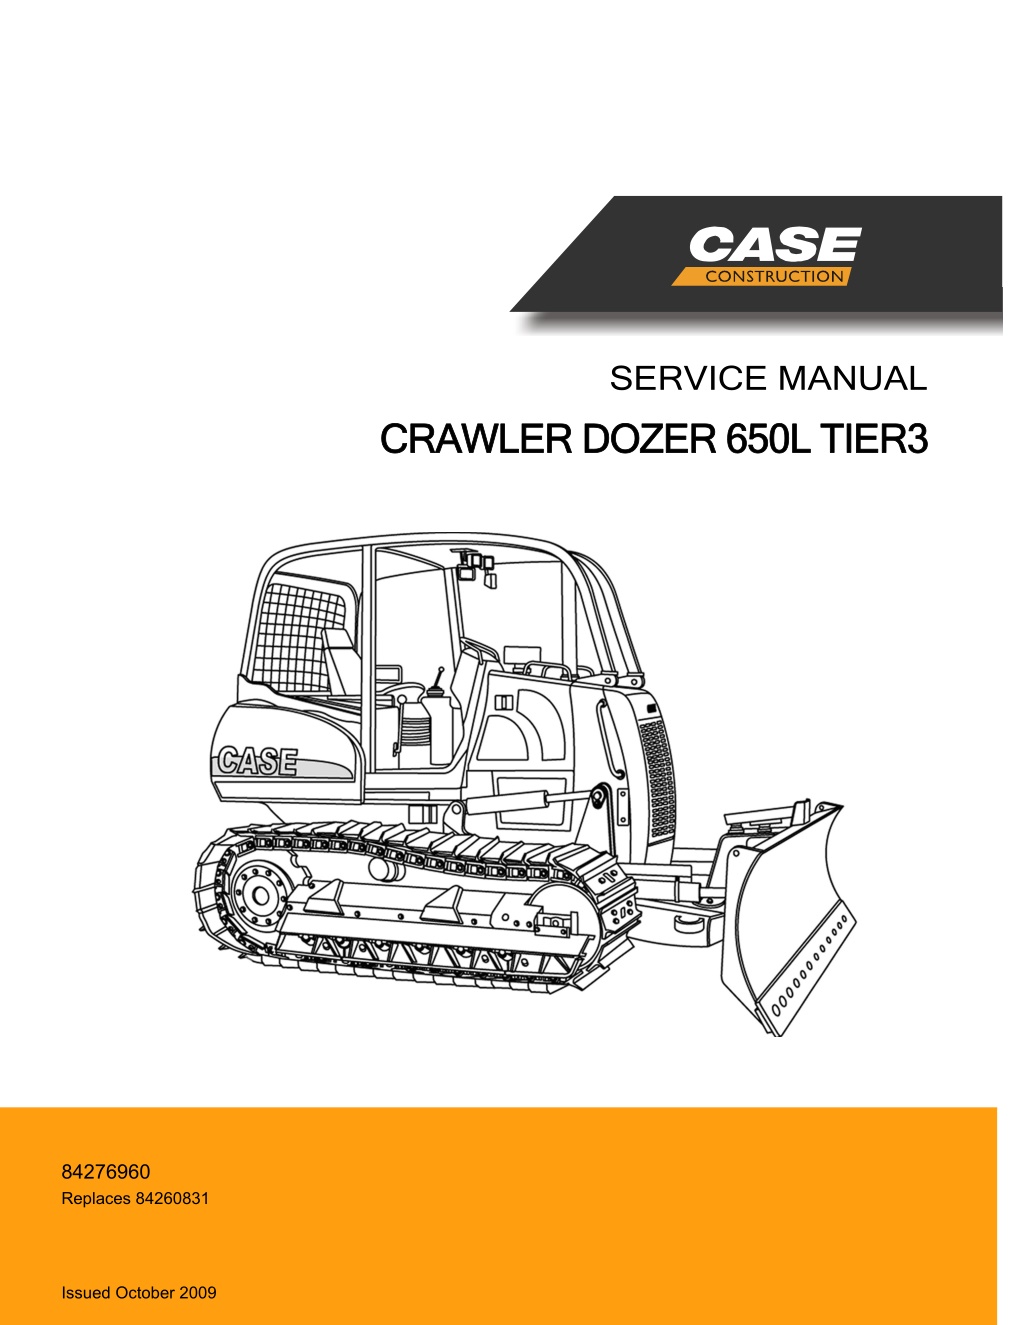
SERVICE MANUAL CRAWLER DOZER 650L TIER3 CRAWLER DOZER 650L TIER3 84276960 Replaces 84260831 North American English Part Number 84276960 Printed in U.S.A. Rac CNH AMERICA LLC 700 STATE STREET RACINE, WI 53404 U.S.A. 2009 CNH America LLC. All Rights Reserved. Case is a registered trademark of CNH America Issued October 2009
Contents INTRODUCTION DISTRIBUTION SYSTEMS.............................................................A PRIMARY HYDRAULIC POWER SYSTEM............................................... A.10.A SECONDARY HYDRAULIC POWER SYSTEM........................................... A.12.A ELECTRICAL POWER SYSTEM ......................................................... A.30.A LIGHTING SYSTEM....................................................................... A.40.A FAULT CODES ............................................................................ A.50.A POWER PRODUCTION.................................................................B ENGINE ................................................................................... B.10.A FUEL AND INJECTION SYSTEM......................................................... B.20.A AIR INTAKE SYSTEM..................................................................... B.30.A LUBRICATION SYSTEM .................................................................. B.60.A POWER TRAIN.............................................................................C TRANSMISSION Hydrostatic.............................................................. C.20.F TRAVELLING................................................................................D Final drive .................................................................................D.15.A SERVICE BRAKE Hydraulic.............................................................. D.30.C WHEELS AND TRACKS Tracks ..........................................................D.50.B BODY AND STRUCTURE ..............................................................E USER CONTROLS AND SEAT ........................................................... E.32.A USER CONTROLS AND SEAT Operator seat ............................................E.32.C USER PLATFORM ........................................................................ E.34.A ENVIRONMENT CONTROL Heating system ............................................. E.40.B ENVIRONMENT CONTROL Air-conditioning system.....................................E.40.C ENVIRONMENT CONTROL Heating, ventilation and air-conditioning....................E.40.D SAFETY SECURITY ACCESSORIES Safety............................................. E.50.B TOOL POSITIONING.................................................................... G LIFTING .................................................................................. G.10.A 84260831 21/08/2009
TILTING .................................................................................. G.20.A SWINGING ............................................................................... G.40.A TOOLS AND COUPLERS............................................................... J DIGGING Non-articulated digging tools ................................................... J.20.B LANDSCAPING Dozer blade.............................................................. J.40.F 84260831 21/08/2009
https://www.ebooklibonline.com Hello dear friend! Thank you very much for reading. Enter the link into your browser. The full manual is available for immediate download. https://www.ebooklibonline.com
INTRODUCTION 84260831 21/08/2009 1
INTRODUCTION Basic instructions Technical Information This manual has been produced by a new technical information system. This new system is designed to deliver technical information electronically through CDROM and in paper manuals. A coding system called ICE has been developed to link the technical information to other Product Support functions e.g. Warranty. Technical information is written to support the maintenance and service of the functions or systems on a customers machine. When a customer has a concern on his machine it is usually because a function or system on his machine is not working at all, is not working efficiently, or is not responding correctly to his commands. When you refer to the technical information in this manual to resolve that customers concern, you will find all the information classified using the new ICE coding, according to the functions or systems on that machine. Once you have located the technical information for that function or system then you will find all the mechanical, electrical or hydraulic devices, compo- nents, assemblies and sub-assemblies for that function or system. You will also find all the types of information that have been written for that function or system, the technical data (specifications), the functional data (how it works), the diagnostic data (fault codes and troubleshooting) and the service data (remove, install adjust, etc.). By integrating this new ICE coding into technical information , you will be able to search and retrieve just the right piece of technical information you need to resolve that customers concern on his machine. This is made possible by attaching 3 categories to each piece of technical information during the authoring process. The first category is the Location, the second category is the Information Type and the third category is the Product: LOCATION - is the component or function on the machine, that the piece of technical information is going to describe e.g. Fuel tank. INFORMATION TYPE - is the piece of technical information that has been written for a particular component or function on the machine e.g. Capacity would be a type of Technical Data that would describe the amount of fuel held by the Fuel tank. PRODUCT - is the model that the piece of technical information is written for. Every piece of technical information will have those 3 categories attached to it. You will be able to use any combination of those categories to find the right piece of technical information you need to resolve that customers concern on his machine. That information could be: the description of how to remove the cylinder head a table of specifications for a hydraulic pump a fault code a troubleshooting table a special tool How to Use this Manual This manual is divided into Sections. Each Section is then divided into Chapters. Contents pages are included at the beginning of the manual, then inside every Section and inside every Chapter. An alphabetical Index is included at the end of a Chapter. Page number references are included for every piece of technical information listed in the Chapter Contents or Chapter Index. Each Chapter is divided into four Information types: (D) Technical Data (specifications) for all the mechanical, electrical or hydraulic devices, components and, assem- blies. (C) Functional Data (how it works) for all the mechanical, electrical or hydraulic devices, components and assem- blies. (G) Diagnostic Data (fault codes, electrical and hydraulic troubleshooting) for all the mechanical, electrical or hy- draulic devices, components and assemblies. (F) Service data (remove disassembly, assemble, install) for all the mechanical, electrical or hydraulic devices, components and assemblies. 84260831 21/08/2009 3
INTRODUCTION Sections Sections are grouped according to the main functions or a systems on the machine. Each Section is identified by a letter A, B, C etc. The amount of Sections included in the manual will depend on the type and function of the machine that the manual is written for. Each Section has a Contents page listed in alphabetic/numeric order. This table illustrates which Sections could be included in a manual for a particular product. SECTION A - Distribution Systems B - Power Production C - Power Train D - Travelling E - Body and Structure F - Frame Positioning G - Tool Positioning H - Working Arm J - Tools and Couplers K - Crop Processing L - Field Processing PRODUCT Tractors Vehicles with working arms: backhoes, excavators, skid steers, ..... Combines, forage harvesters, balers, .... Seeding, planting, floating, spraying equipment, .... Mounted equipment and tools, ..... X X X X X X X X X X X X X X X X X X X X X X X X X X X X X X X X X X X X X X X X Chapters Each Chapter is identified by a letter and number combination e.g. Engine B.10.A The first letter is identical to the Section letter i.e. Chapter B.10 is inside Section B, Power Production. CONTENTS The Chapter Contents lists all the (D) technical data (specifications), (C) functional data (how it works), (F) service data (remove, install adjust, etc.) and (G) diagnostic data (fault codes and troubleshooting) that have been written in that Chapter for that function or system on the machine. Contents POWER PRODUCTION ENGINE _ 10.A TECHNICAL DATA ENGINE - General specification (B.10.A - D.40.A.10) FUNCTIONAL DATA 3 4 ENGINE - Dynamic description (B.10.A - C.30.A.10) SERVICE ENGINE - Remove (B.10.A - F.10.A.10) DIAGNOSTIC ENGINE - Troubleshooting (B.10.A - G.40.A.10) 5 6 84260831 21/08/2009 4
INTRODUCTION INDEX The Chapter Index lists in alphabetical order all the types of information (called Information Units) that have been written in that Chapter for that function or system on the machine. Index POWER PRODUCTION - B ENGINE 4 3 5 6 ENGINE - Dynamic description (B.10.A - C.30.A.10) ENGINE - General specification (B.10.A - D.40.A.10) ENGINE - Remove (B.10.A - F.10.A.10) ENGINE - Troubleshooting (B.10.A - G.40.A.10) Information Units and Information Search Each chapter is composed of information units. Each information unit has the ICE code shown in parentheses which indicates the function and the type of information written in that information unit. Each information unit has a page ref- erence within that Chapter. The information units provide a quick and easy way to find just the right piece of technical information you are looking for. example information unit Information Unit ICE code ICE code classification Stack valve - Sectional View (A.10.A.18 - C.10.A.30) A 10.A Distribution systems hydraulic power 18 Stack valve 10.A.30 Sectional view C Functional data Primary 1 CRIL03J033E01 Navigate to the correct information unit you are searching for by identifying the function and information type from the ICE code. (1) Function and (2) Information type. (A) corresponds to the sections of the repair manual. (B) corresponds to the chapters of the repair manual. (C) corresponds to the type of information listed in the chapter contents, (D), Technical data, (C), Functional Data, (G), Diagnostic, and (F), Service. (A) and (B) are also shown in the page numbering on the page footer. THE REST OF THE CODING IS NOT LISTED IN ALPHA-NUMERIC ORDER IN THIS MANUAL. You will find a table of contents at the beginning and end of each section and chapter. You will find an alphabetical index at the end of each chapter. By referring to (A), (B) and (C) of the coding, you can follow the contents or index (page numbers) and quickly find the information you are looking for. 84260831 21/08/2009 5
INTRODUCTION Page Header and Footer The page header will contain the following references: Section and Chapter description The page footer will contain the following references: Publication number for that Manual, Section or Chapter. Version reference for that publication. Publication date Section, chapter and page reference e.g. A.10.A / 9 84260831 21/08/2009 6
SERVICE MANUAL DISTRIBUTION SYSTEMS 650L 84260831 21/08/2009 A
DISTRIBUTION SYSTEMS - PRIMARY HYDRAULIC POWER SYSTEM PRIMARY HYDRAULIC POWER SYSTEM - Special tools 1 RCPH09CWL005AAD CAS1804 Hydraulic pressure fitting kit 2 RCPH09CWL006AAD CAS1808 Flowmeter fitting kit 3 RCPH09CWL004AAD CAS10090 Hand pump 84260831 21/08/2009 A.10.A / 4
DISTRIBUTION SYSTEMS - PRIMARY HYDRAULIC POWER SYSTEM 4 RCPH09CWL339AAD CAS10280 Flowmeter PRIMARY HYDRAULIC POWER SYSTEM - General specification Type of oil CASE AKCELA AW68 HYD FLUID MAT 3508 Temperature of hydraulic oil when testing Neutral system pressure Main relief valve pressure All models at 2000 RPM Circuit relief valves A and B ports ripper/auxiliary section Dozer blade lift speed Dozer blade lift time (measure from ground level to full height) 52 - 79 C (125 - 175 F) 12 - 15 bar (180 - 220 psi) at 2000 RPM 203 - 214 bar (2950 - 3100 psi) 214 - 227 bar (3100 - 3300 psi) with hand pump 457 mm second (18 in second) 2 seconds 84260831 21/08/2009 A.10.A / 5
DISTRIBUTION SYSTEMS - PRIMARY HYDRAULIC POWER SYSTEM Stack valve - Torque Nm lb Special torques 39 - 47 Nm Bolts and nuts that fasten the sections together Relief valves and load check valves Allen head screws Centering spring screw 28.7 - 34.6 lb ft 24 - 30 Nm 12 - 15 Nm 13 - 16 Nm 17.7 - 22 lb ft 106 - 133 lb in 115 - 142 lb in Stack valve - Special tools 1 RCPH09CWL075AAD Centering spring compression tool Stack valve - Calibration bar psi Relief Valves 203 - 214 bar 214 - 227 bar 2950 - 3100 psi 3100 - 3300 psi Main relief valve Circuit relief valves tested with hand pump Stack valve - General specification MM Inch Spool travel 7.9 mm 0.31 in Neutral to pressure - lift, tilt and auxiliary Neutral to pressure - angle section Neutral to float - lift 6.6 mm 13.5 mm 0.26 in 0.53 in 84260831 21/08/2009 A.10.A / 6
DISTRIBUTION SYSTEMS - PRIMARY HYDRAULIC POWER SYSTEM Hydraulic pump - General specification Rotation Hydraulic pump output Clockwise as seen from end of shaft 72 l at 207 bar at 2000 RPM 19 US gpm at 3000 psi at 2000 RPM 84260831 21/08/2009 A.10.A / 7
DISTRIBUTION SYSTEMS - PRIMARY HYDRAULIC POWER SYSTEM Relief valve - Exploded view 1 BS99M034 (1) Cap (2) Lock nut (3) Spacer (4) Adjusting screw (5) O-ring (6) Spring (7) Plunger (8) Body (9) Backup ring (10) Poppet (11) Housing 84260831 21/08/2009 A.10.A / 8
DISTRIBUTION SYSTEMS - PRIMARY HYDRAULIC POWER SYSTEM Relief valve - Sectional view 1 BS00A057 (1) Inlet port passage (2) Return port passage (3) Main relief poppet (4) Pilot passage poppet (5) Jam nut (6) Pressure adjusting screw 84260831 21/08/2009 A.10.A / 9
DISTRIBUTION SYSTEMS - PRIMARY HYDRAULIC POWER SYSTEM Stack valve - Exploded view 1 BC02J007 (1) Main relief valve (2) Inlet secton (3) Dozer lift section (4) Dozer tilt section (5) Dozer angle section (6) Ripper/auxiliary section (7) Outlet section 84260831 21/08/2009 A.10.A / 10
DISTRIBUTION SYSTEMS - PRIMARY HYDRAULIC POWER SYSTEM PRIMARY HYDRAULIC POWER SYSTEM - Cleaning 1. Contamination in the hydraulic system is a major cause of the malfunction of hydraulic components. Contamination is any foreign material in the hydraulic oil. Contamination can enter the hydraulic system in several ways. (A) When you drain the oil or disconnect any line. (B) When you disassemble a component. (C) From normal wear of the hydraulic components. (D) From damaged or worn seals. (E) From a damaged component in the hydraulic sys- tem. 2. All hydraulic systems operate with some contami- nation. The design of the components in this hy- draulicsystempermitsefficientoperationwithasmall amount of contamination. An increase in this amount ofcontaminationcancauseproblemsinthehydraulic system. The following list includes some of these problems. (A) Cylinder rod seals leak. (B) Control valve spools do not return to neutral. (C) Movement of control valve spools is difficult. (D) Hydraulic oil becomes too hot. (E) Pump gears, housing, and other parts wear rapidly. (F) Relief valves or check valves held open by dirt. (G) Quick failure of components that have been re- paired. (H) Cycle times are slow; machine does not have enough power. 3. If your machine has any of these problems, check the hydraulic oil for contamination. See types of con- tamination below. If you find contamination, use the Portable Filter to clean the hydraulic system. NOTE: There are two types of contamination, microscopic and visible. 4. Microscopic contamination occurs when very fine particles of foreign material are in suspension in the hydraulic oil. 5. These particles are too small to see or feel. Micro- scopic contamination can be found by identification of the following problems or by testing in a laboratory. Examples of the problems: (A) Cylinder rod seal leak. (B) Control valve spools do not return to NEUTRAL. (C) The hydraulic system has a high operating tem- perature. 84260831 21/08/2009 A.10.A / 11
DISTRIBUTION SYSTEMS - PRIMARY HYDRAULIC POWER SYSTEM 6. Visible contamination is foreign material that can be found by sight, touch, or odor. Visible contamination can cause a sudden failure of components. Exam- ples of visible contamination: (A) Particles of metal or dirt in the oil. (B) Air in the oil. (C) The oil is dark and thick. (D)The oil has an odor of burned oil. (E) Water in the oil. NOTE: The hydrostatic system uses a third port bypass filter system. If the filter becomes plugged it bypasses back to the reservoir to stop contamination from entering the hydrostatic system. Upon completion of cleaning the hydraulic system replace the hydrostatic system filter. 84260831 21/08/2009 A.10.A / 12
DISTRIBUTION SYSTEMS - PRIMARY HYDRAULIC POWER SYSTEM PRIMARY HYDRAULIC POWER SYSTEM - Decontaminating CAS10162A CAS10508 CAS10192 1. Prepare the portable filter CAS10162A by doing the following steps: (A) Remove all the hydraulic oil from the inlet and outlet hoses for the portable filter. (B) Remove the filter element from the portable filter. (C) Remove all hydraulic oil from the portable filter. (D) Clean the inside of the housing for the filter ele- ment. 2. You must know whether the contamination is micro- scopic or visible. Refer to PRIMARY HYDRAULIC POWER SYSTEM - Cleaning (A.10.A). 3. If the contamination is microscopic: (A) Check the maintenance schedule for the ma- chine to learn if the hydraulic oil must be changed. If needed, change the hydraulic oil. Change the hy- draulic filter. (B) Do steps 6 through 35. 4. If the contamination is visible: (A) Change the hydraulic oil and hydraulic filter. (B) Do steps 5 through 35. 5. Check the amount of contamination in the hydraulic system by doing the following steps: (A) Disassemble one cylinder in two different circuits. Check for damage to seals, scoring of the cylinder wall, etc. Repair the cylinders as necessary. (B) If, in your judgment, the damage to the cylinders was caused by sever contamination and is not the re- sult of normal wear, it is necessary to remove, clean and repair valves, pump, lines, cylinders, hydraulic reservoir, etc. in the hydraulic system. 6. Remove the breather from the reservoir and connect the vacuum pump to the opening. Start the vacuum pump. 7. Loosen and remove the drain plug from the reservoir. 8. Using the fitting kit CAS10508, install the valve in the hole for the drain plug. Make sure that the valve is closed. 9. Stop the vacuum pump. 10. Connect the inlet hose for the portable filter to the valve that is installed in the hole for the drain plug. 11. Disconnect the vacuum pump from the hydraulic reservoir air breather hose. Remove the filler cap. 12. Install the outlet hose for the portable filter in the hy- draulic reservoir filler neck. 13. Open the valve that is installed in the hole for the drain plug. 14. Move the switch for the portable filter to the ON po- sition. Start and run the engine at 1500 rpm (r/min). 15. Run the portable filter for 10 minutes. 84260831 21/08/2009 A.10.A / 13
DISTRIBUTION SYSTEMS - PRIMARY HYDRAULIC POWER SYSTEM 16. Continue to run the portable filter. Increase the en- gine speed to full throttle. Heat the oil to operating temperature by doing the following steps: (A) Hold the blade control lever in the TILT position for five seconds. (B) Return the blade control lever in the NEUTRAL position for five seconds. (C) Repeat steps A and B until the oil in the hydraulic system is at operating temperature. 17. Continue to run the engine at full throttle. Continue to run the portable filter. 18. Operate each hydraulic circuit to completely extend and retract the cylinders. Continue to operate each hydraulic circuit two times, one after the other for 45 minutes. 19. Decrease the engine speed to low idle. 20. Continue to run the portable filter for 10 minutes. 21. Stop the portable filter 22. Stop the engine. 23. Remove the hose from the hydraulic reservoir. 24. Close the valve that is installed in the hole for the drain plug. 25. Disconnect the inlet hose for the portable filter from the valve. Remove the outlet hose from the reservoir filter neck and replace filler cap. 26. Connect a vacuum pump to the breather hose of the hydraulic reservoir. 27. Start the vacuum pump. 28. Remove the valve from the hole for the drain plug. 29. Install the drain plug. 30. Stop the vacuum pump. pump from the opening in the reservoir and install the breather. Disconnect the vacuum 31. Remove the hydraulic and hydrostatic filter elements from the machine. 32. Install new hydraulic and hydrostatic filter elements on the machine. 33. Start the engine. Check for oil leakage around the new hydraulic and hydrostatic filters. 34. Stop the engine. 35. Check the oil level in the hydraulic reservoir. Add oil as required. NOTE: THE FOLLOWING PROCEDURES ARE FOR FLUSHING WATER FROM THE HYDRAULIC SYSTEM 36. Start and run the engine at 1500 rpm (r/min). 84260831 21/08/2009 A.10.A / 14
DISTRIBUTION SYSTEMS - PRIMARY HYDRAULIC POWER SYSTEM 37. Completely retract the cylinders of all attachments on the machine. Angle the blade to the right, the right cylinder will be fully retracted and the left will be fully extended. Stop the engine. WARNING If retracting the cylinder rods causes the attachment to be raised, block the attachment in place before pro- ceeding to the next step. 39-4 38. Move each control lever in both directions to release pressure in the hydraulic circuits. 39. Loosen and remove the filler cap from the reservoir. 40. Drain the hydraulic oil from the reservoir. (A) The reservoir holds approximately 75.5 l (20 US gal) of hydraulic oil. (B)Haveavailableacceptableequipmenttodrainthe hydraulic oil. (C) Remove the drain plug from the bottom of the reservoir. 41. Remove the hydraulic and hydrostatic filter elements from the machine. 42. Install new hydraulic and hydrostatic filter elements on the machine. 43. Install the drain plug in the bottom of the reservoir. 44. Fill the hydraulic reservoir with lubricant, refer to Ca- pacities for proper quantities and type. 45. Disconnect the line from the OPEN end and CLOSED end of each cylinder. 46. Be sure all control levers are in the NEUTRAL posi- tion. 47. Start and run the engine at low idle. IMPORTANT: Check the oil level in the hydraulic reservoir frequently while doing step 48. Have another person hold a container under the hydraulic lines while you do step 48. 48. Slowly move each control lever in both directions un- til oil begins to flow from the open line. Hold the con- trol lever in place until clean oil flows from the open line. 49. Stop the engine. 50. Connect the system line to the CLOSED end of each cylinder. 51. Connect a suitable drain line to the OPEN end of each cylinder and place the other end in an accept- able container for contaminated oil. 52. Start the engine and run the engine at low idle. 53. Slowly and completely extend all cylinders. As the piston rod comes in/out of the cylinder, oil will be pushed out of the OPEN end of the cylinders. IMPORTANT: Any attachment or part of an attachment that is raised must be supported with acceptable equipment to prevent the attachment from falling. 84260831 21/08/2009 A.10.A / 15
DISTRIBUTION SYSTEMS - PRIMARY HYDRAULIC POWER SYSTEM 54. Support any attachments that will be in the RAISED position. 55. Stop the engine. 56. Disconnect the drain lines and connect the system lines to the cylinders. 57. Check the oil level in the hydraulic reservoir. Add oil as required. 58. Install the filler cap on the reservoir. 59. Remove the hydraulic and hydrostatic filter elements from the machine. 60. Install new hydraulic and hydrostatic filter elements on the machine. 61. Start and run the engine at 1500 rpm (r/min), oper- ate each hydraulic circuit to completely extend and retract the cylinders. 62. Stop the engine and check for leaks. Check the oil level in the hydraulic reservoir. Add oil as required. 84260831 21/08/2009 A.10.A / 16
DISTRIBUTION SYSTEMS - PRIMARY HYDRAULIC POWER SYSTEM Relief valve - Pressure setting 1. Remove the cover from the main relief valve and loosen the lock nut on the adjusting screw. 2. Turn the adjusting screw into the main relief valve to increase the pressure or out of the main relief valve to decrease the pressure. 3. Refer to Relief valve - Pressure test (A.10.A) and check the pressure setting. Adjust the main relief valve again as necessary. 4. When the pressure setting is correct, prevent the ad- justing screw from turning while the lock nut is tight- ened. Install the cover on the main relief valve. 84260831 21/08/2009 A.10.A / 17
DISTRIBUTION SYSTEMS - PRIMARY HYDRAULIC POWER SYSTEM Relief valve - Disassemble Prior operation: Stack valve Inlet section - Disassemble (A.10.A) 1. Fasten the main relief valve in a vise with soft jaws. Remove the cap. 1 RCPH09CWL193AAD 2. Hold the adjusting screw in position while you loosen the lock nut. 2 RCPH09CWL192AAD 3. Remove the adjusting screw. Make sure that you count the number of turns required to remove the adjusting screw so that you can install the adjusting screw correctly during Assembly. 3 RCPH09CWL191AAD 4. Remove the spring. 4 RCPH09CWL444AAD 84260831 21/08/2009 A.10.A / 18
DISTRIBUTION SYSTEMS - PRIMARY HYDRAULIC POWER SYSTEM 5. Remove the plunger. 5 RCPH09CWL190AAD 6. Remove the body from the housing. 7. Remove the spring. 6 RCPH09CWL189AAD 8. Replace the O-ring and the backup ring in the hous- ing. 7 RCPH09CWL188AAD 9. Tap the main relief valve lightly against a solid sur- face so that the poppet can be removed from the housing. 8 RCPH09CWL187AAD 84260831 21/08/2009 A.10.A / 19
Suggest: If the above button click is invalid. Please download this document first, and then click the above link to download the complete manual. Thank you so much for reading
DISTRIBUTION SYSTEMS - PRIMARY HYDRAULIC POWER SYSTEM 10. Replace the O-ring on the body. 9 RCPH09CWL117AAD 11. Replace the O-ring on the adjusting screw. 10 RCPH09CWL116AAD 12. Replace the O-ring and the backup ring on the pop- pet. 11 RCPH09CWL083AAD Next operation: Relief valve - Visual inspection (A.10.A) 84260831 21/08/2009 A.10.A / 20
https://www.ebooklibonline.com Hello dear friend! Thank you very much for reading. Enter the link into your browser. The full manual is available for immediate download. https://www.ebooklibonline.com


