Beginner Yoga Poses for Building Foundations
Explore a pack of beginner yoga poses that focus on standing, strengthening, hip-opening, seated, and restorative postures to establish a strong foundation for your practice. From Mountain Pose to Chair Pose and Lord of the Dance, these poses help improve strength, stability, and posture while engaging various muscle groups. Begin your yoga journey with these foundational poses for a safe and effective practice.
Download Presentation

Please find below an Image/Link to download the presentation.
The content on the website is provided AS IS for your information and personal use only. It may not be sold, licensed, or shared on other websites without obtaining consent from the author.If you encounter any issues during the download, it is possible that the publisher has removed the file from their server.
You are allowed to download the files provided on this website for personal or commercial use, subject to the condition that they are used lawfully. All files are the property of their respective owners.
The content on the website is provided AS IS for your information and personal use only. It may not be sold, licensed, or shared on other websites without obtaining consent from the author.
E N D
Presentation Transcript
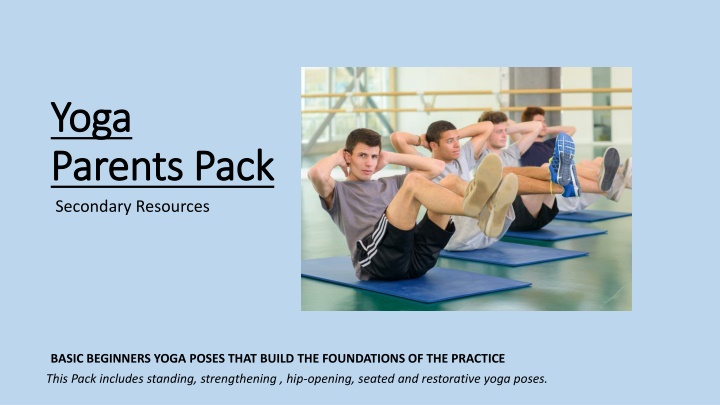
Yoga Yoga Parents Pack Parents Pack Secondary Resources BASIC BEGINNERS YOGA POSES THAT BUILD THE FOUNDATIONS OF THE PRACTICE This Pack includes standing, strengthening , hip-opening, seated and restorative yoga poses.
Standing Yoga Poses: Standing Yoga Poses: Build strength and stability in order to set the foundation for a safe yoga practice.
Tadasana Tadasana (Mountain Pose) (Mountain Pose): The foundation of all standing poses, Mountain Pose makes a great a starting position, resting pose, or tool to improve posture. Step 1 Stand with the bases of your big toes touching, heels slightly apart (so that your second toes are parallel). Lift and spread your toes and the balls of your feet, then lay them softly down on the floor. Rock back and forth and side to side. Gradually reduce this swaying to a standstill, with your weight balanced evenly on the feet. Step 2 Firm your thigh muscles and lift the knee caps, without hardening your lower belly. Lift the inner ankles to strengthen the inner arches, then imagine a line of energy all the way up along your inner thighs to your groins, and from there through the core of your torso, neck, and head, and out through the crown of your head. Turn the upper thighs slightly inward. Lengthen your tailbone toward the floor and lift the pubis toward the navel. Step 3 Press your shoulder blades into your back, then widen them across and release them down your back. Without pushing your lower front ribs forward, lift the top of your sternum straight toward the ceiling. Widen your collarbones. Hang your arms beside the torso. Step 4 Balance the crown of your head directly over the centre of your pelvis, with the underside of your chin parallel to the floor, throat soft, and the tongue wide and flat on the floor of your mouth. Soften your eyes.
Chair Pose: Chair Pose: Chair Pose clearly works the muscles of the arms and legs, but it also stimulates the diaphragm and heart. Step 1 Begin by standing in Mountain Pose. Inhale and raise your arms perpendicular to the floor. Either keep the arms parallel, palms facing inward, or join the palms. Step 2 Exhale and bend your knees, trying to take the thighs as nearly parallel to the floor as possible. The knees will project out over the feet, and the torso will lean slightly forward over the thighs until the front torso forms approximately a right angle with the tops of the thighs. Keep the inner thighs parallel to each other and press the heads of the thigh bones down toward the heels. Step 3 Firm your shoulder blades against the back. Take your tailbone down toward the floor and in toward your pubis to keep the lower back long.
Lord of the Dance Lord of the Dance Pose Pose Step 1 Stand in Mountain Pose. Inhale, shift your weight onto your right foot, and lift your left heel toward your left buttock as you bend the knee. Press the head of your right thigh bone back, deep into the hip joint, and pull the knee cap up to keep the standing leg straight and strong. Step 2 Keep your torso relatively upright. The first is to reach back with your left hand and grasp the outside of your left foot or ankle. To avoid compression in your lower back, actively lift your pubis toward your navel, and at the same time, press your tailbone toward the floor. Step 3 Begin to lift your left foot up, away from the floor, and back, away from your torso. Extend the left thigh behind you and parallel to the floor. Stretch your right arm forward, in front of your torso, parallel to the floor.
Strengthening Yoga Poses: Strengthening Yoga Poses: Work and tone your entire body with strengthening yoga poses.
Locust Pose: Locust Pose: effectively arms. arms. effectively preps beginners for deeper backbends, strengthening the back of the torso, legs, and preps beginners for deeper backbends, strengthening the back of the torso, legs, and Step 1 Lie on your belly with your arms along the sides of your torso, palms up, forehead resting on the floor. Turn your big toes toward each other to inwardly rotate your thighs, and firm your buttocks so your coccyx presses toward your pubis. Step 2 Exhale and lift your head, upper torso, arms, and legs away from the floor. You ll be resting on your lower ribs, belly, and front pelvis. Firm your buttocks and reach strongly through your legs, first through the heels to lengthen the back legs, then through the bases of the big toes. Keep the big toes turned toward each other. Step 3 Raise your arms parallel to the floor and stretch back actively through your fingertips. Imagine there s a weight pressing down on the backs of the upper arms, and push up toward the ceiling against this resistance. Step 4 Gaze forward or slightly upward, being careful not to jut your chin forward and crunch the back of your neck. Keep the base of the skull lifted and the back of the neck long.
Plank Pose: Plank Pose: t the he perfect perfect foundation foundation to more challenging arm balances. to more challenging arm balances. Step 1 Inhale and draw your torso forward until the arms are perpendicular to the floor and the shoulders directly over the wrists, torso parallel to the floor. Step 2 Press your outer arms inward and firm the bases of your index fingers into the floor. Firm your shoulder blades against your back, then spread them away from the spine. Also spread your collarbones away from the sternum. Step 3 Press your front thighs up toward the ceiling, but resist your tailbone toward the floor as you lengthen it toward the heels. Lift the base of the skull away from the back of the neck and look straight down at the floor, keeping the throat and eyes soft.
Step 1 With an exhalation, step or lightly jump your feet 3 1/2 to 4 feet apart. Raise your arms parallel to the floor and reach them actively out to the sides, shoulder blades wide, palms down. Triangle Triangle pose pose Step 2 Turn your left foot in slightly to the right and your right foot out to the right 90 degrees. Align the right heel with the left heel. Firm your thighs and turn your right thigh outward, so that the centre of the right knee cap is in line with the centre of the right ankle. Step 3 Exhale and extend your torso to the right directly over the plane of the right leg, bending from the hip joint, not the waist. Anchor this movement by strengthening the left leg and pressing the outer heel firmly to the floor. Rotate the torso to the left, keeping the two sides equally long. Let the left hip come slightly forward and lengthen the tailbone toward the back heel. Step 4 Rest your right hand on your shin, ankle, or the floor outside your right foot, whatever is possible without distorting the sides of the torso. Stretch your left arm toward the ceiling, in line with the tops of your shoulders. Keep your head in a neutral position or turn it to the left, eyes gazing softly at the left thumb.
Hip Hip- -opening Yoga Poses: opening Yoga Poses: Improve your range of motion and circulation, alleviate back pain & more.
Wide Wide- -Angle Seated Forward Angle Seated Forward Bend: seated forward bends, twists, and the wide seated forward bends, twists, and the wide- -leg standing poses Bend: is is good preparation for most of the good preparation for most of the leg standing poses. . Step 1: lean your torso back slightly on your hands and lift and open your legs to an angle of about 90 degrees Press your hands against the floor and slide your buttocks forward, widening the legs another 10 to 20 degrees. Step 2: Rotate your thighs outwardly, pinning the outer thighs against the floor, so that the knee caps point straight up toward the ceiling. Reach out through your heels and stretch your soles, pressing though the balls of the feet. Step 3: With your thigh bones pressed heavily into the floor and your knee caps pointing up at the ceiling, walk your hands forward between your legs. Keep your arms long. As with all forward bends, the emphasis is on moving from the hip joints and maintaining the length of the front torso. As soon as you find yourself bending from the waist, stop, re-establish the length from the pubis to the navel, and continue forward if possible.
Fire Log Pose: Fire Log Pose: stretches stretches the outer hips the outer hips intensely intensely. . Step 1 Slide your left foot under your right leg to the outside of your right hip, and lay the outer leg on the floor. Then, stack your right leg on top of the left. Be sure the right ankle is outside the left knee. Step 2 Press through your heels and spread your toes. Keeping your front torso long, exhale and fold forward from your groins. Be sure not to round forward from your belly: Keep the space between your pubis and navel long. Lay your hands on the floor in front of your shins.
Hand Hand- -to to- -Big Big- -Toe Toe Pose Pose Step 1: From standing (Mountain Pose), bring your left knee toward your belly. Step 2: Reach your left arm inside the thigh, cross it over the front ankle, and hold the outside of your left foot. Step 3: Firm the front thigh muscles of the standing leg, and press the outer thigh inward. Step 4: Extend the left leg forward. Straighten the knee as much as possible.
Seated Yoga Poses: Seated Yoga Poses: Tone the belly, massage your internal organs, and relieve lower back pain in these seated yoga poses.
Step 1: From sitting, bend your knees and put your feet on the floor. Slide your left foot under the right knee to the outside of the right hip. Then cross your right leg over the left, stacking the right knee on top of the left, and bring the right foot to the outside of the left hip. Sit evenly on the sitting bones. Cow Face Pose Cow Face Pose Step 2: Inhale and stretch your right arm straight out to the right, parallel to the floor. Rotate your arm inwardly; the thumb will turn first toward the floor, then point toward the wall behind you, with the palm facing the ceiling. This movement will roll your right shoulder slightly up and forward, and round your upper back. With a full exhalation, sweep the arm behind your torso and tuck the forearm in the hollow of your lower back, parallel to your waist, with the right elbow against the right side of your torso. Roll the shoulder back and down, then work the forearm up your back until it is parallel to your spine. The back of your hand will be between your shoulder blades. See that your right elbow doesn't slip away from the right side of your torso. Step 3: Lift the left elbow toward the ceiling and, from the back armpit, descend the right elbow toward the floor. Firm your shoulder blades against your back ribs and lift your chest. Try to keep the left arm right beside the left side of your head.
Hero Pose Hero Pose Step 1 Kneel on the floor, with your thighs perpendicular to the floor, and touch your inner knees together. Slide your feet apart, slightly wider than your hips, with the tops of the feet flat on the floor. Angle your big toes slightly in toward each other and press the top of each foot evenly on the floor. Step 2 Exhale and sit back halfway, with your torso leaning slightly forward. Wedge your thumbs into the backs of your knees and draw the skin and flesh of the calf muscles toward the heels. Then sit down between your feet. Step 3 If your buttocks don't comfortably rest on the floor, raise them on a block or thick book placed between the feet. Make sure both sitting bones are evenly supported. Allow a thumb's-width space between the inner heels and the outer hips. Turn your thighs inward and press the heads of the thigh bones into the floor with the bases of your palms. Then lay your hands in your lap, one on the other, palms up, or on your thighs, palms down.
Seated Forward Bend Seated Forward Bend Step 1 Sit on the floor with your buttocks with your legs straight in front of you. Press actively through your heels. Turn the top thighs in slightly and press them down into the floor. Press through your palms or finger tips on the floor beside your hips and lift the top of the sternum toward the ceiling as the top thighs descend. Step 2 Draw the inner groins deep into the pelvis. Inhale, and keeping the front torso long, lean forward from the hip joints, not the waist. Lengthen the tailbone away from the back of your pelvis. If possible take the sides of the feet with your hands, thumbs on the soles, elbows fully extended; if this isn't possible, loop a strap around the foot soles, and hold the strap firmly. Be sure your elbows are straight, not bent.
Restorative Yoga Poses: Restorative Yoga Poses: Help to calm and reset your entire body and mind to prepare you for ultimate relaxation in Corpse Pose.
Step 1 Kneel on the floor. Touch your big toes together and sit on your heels, then separate your knees about as wide as your hips. Child s Pose Child s Pose Step 2 Exhale and lay your torso down between your thighs. Broaden your sacrum across the back of your pelvis and narrow your hip points toward the navel, so that they nestle down onto the inner thighs. Lengthen your tailbone away from the back of the pelvis while you lift the base of your skull away from the back of your neck. Step 3 Lay your hands on the floor alongside your torso, palms up, and release the fronts of your shoulders toward the floor. Feel how the weight of the front shoulders pulls the shoulder blades wide across your back.
Happy Baby Pose Happy Baby Pose Step 1 Lie on your back. With an exhale, bend your knees into your belly. Step 2 Inhale, grip the outsides of your feet with your hands (if you have difficulty holding the feet directly with your hands, hold onto a belt looped over each sole.) Open your knees slightly wider than your torso, then bring them up toward your armpits.# Step 3 Position each ankle directly over the knee, so your shins are perpendicular to the floor. Flex through the heels. Gently push your feet up into your hands (or the belts) as you pull your hands down to create a resistance.
Internet link for interactive sessions: Boys of yoga: http://www.boysofyoga.com/
