Guide to EVM and VVPAT Components, Connections, and Preparation for Poll

This comprehensive guide covers the components of Electronic Voting Machines (EVM) and Voter Verifiable Paper Audit Trail (VVPAT) systems, including protocols for setting up, connection processes for mock and actual polls, and instructions for masking/unmasking ballot buttons on the Balloting Unit (BU). It also details the necessary steps to follow during dispersal and provides insight into switching on and preparing EVMs for polling activities.

Download Presentation

Please find below an Image/Link to download the presentation.
The content on the website is provided AS IS for your information and personal use only. It may not be sold, licensed, or shared on other websites without obtaining consent from the author. Download presentation by click this link. If you encounter any issues during the download, it is possible that the publisher has removed the file from their server.
E N D
Presentation Transcript
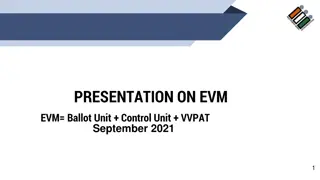
EVM & VVPAT Components, Connections & Preparation for Mock Poll/Actual Poll P K Sahoo (O.A.S) - NLMT
Session Outline Components of EVM & VVPAT Protocols to be followed for setting up EVM & VVPAT Connection process Mock Poll Process Process after Mock Poll Sealing before Actual Poll
Components of EVM & VVPAT EVM Control Unit (CU) Balloting Unit (BU) VVPAT VVPAT Printer, Display and drop box unit
Protocols to be followed ( During Dispersal) Ensure that Serial Number of CU, BU, VVPAT matches with serial number printed on respective carrying cases. Switch ON the CU and ensure that No. of Candidate and Battery status are OK. Ensure that Batteries are installed in CU & VVPAT Straighten all cables Check that cables are not damaged or cut anywhere Check VVPAT externally without exposing it to high voltage lights (directly under Sun / Halogen light etc.). Ambient light is preferable Ensure that Paper roll is installed in VVPAT
Connection Process (During Mock Poll) For Mock Poll - the EVM units can be placed at appropriate places ,and no need to further disturb the units before Actual Poll Remember-There is no direct connection between BU &CU any more ..After introduction of VVPAT Earlier there were BU & CU. Now VVPAT has come in between. First pick up VVPAT Unit and observe its points of Connections (1) At BU Interface of VVPAT - Connect fixed cable of BU (2) The Fixed Cable of VVPAT To Connect with CU In case of 02 or more BUs- Fixed Cable of 2nd Ballot Unit will be connected to the 1stBU ( at appropriate point down side of the body of BU) While connecting-Remember to hold the cable from the center of the Plug While Disconnecting Hold and press from both sides of the Plug and pull from the Adaptor
Masking/Unmasking of BU Buttons Ensure that in the BU, only those number of ballot buttons are unmasked as the total number of candidates + NOTA If total number of candidates shown in CU is 08 ( including NOTA ) then only first 08 ballot buttons to be unmasked : Remaining Buttons ( 9 16 ) are to be masked In case number of unmasked button is more than the candidates set and voter is pressing a button which is having number more than the last candidate number then system will hang
Switching On.Getting the EVMs Ready before every Mock Poll & Actual Poll ( After all connections are over, before switching on the CU) VVPAT - Keep the Paper Roll Knob at Vertical position Switch on the CU - Look at CU displays and note down displays that appear VVPAT - ( Simultaneously) Observe the Test Slips getting Printed and cutting down through the Display section of VVPAT ( Incl. 8-Point Test Slip) If all connections are OK then 7 paper slips will be generated from VVPAT Check those slips. These slips are not to be counted as vote One of the Slip will have check reports on different aspects of functionality of the VVPAT. Pl. ensure that the same is printed with no abnormality Press TOTAL button to ensure that there is no votes stored in CU s Memory. If pressing Total button shows Result other than zero It indicates some votes which are casted earlier are present in CU memory. Press CLOSE button in Result section and wait till closing activities are finished Press RESULT button and wait till results are shown. Press CLEAR button and wait till clearing activities are completed. Press Total Button again to ensure there is no votes in the memory of CU.
Mock Poll Process Press Ballot button of Ballot section of CU Red light on the Top right side of CU will glow (Busy Lamp), This indicatesVote can be casted on BU. Simultaneously Green light on top of the BU will glow indicating it s readiness to accept casting of vote byVoters. Press the ballot button of the choice candidate, on the BU. Red Light besides of the BU-Button will glow. On the VVPAT, the Paper Slip pertaining to that particular Candidate will be shown for 7 seconds. A long beep sound will follow the above. After few seconds,the busy lamp on CU will go off and one cycle is thus complete Now CU is ready for allowing another vote. Continue this process for at least 7-10 times during training session. During actual Mock Poll at least 50 votes to be casted
Process after Mock Poll Counting Mock Poll Result Press Close button. Wait and observe activities on display section till CU completes its closing process. Then press Result Button. Note down manually, the result count of each candidate Take out the VVPAT slips, separate the Test Slips First. Segregate the Voted slips candidate-wise . Check the VVPAT Slip counts manually with recorded result of CU. If both CU and VVPAT slip count matches then it indicates EVM and VVPAT are ready for use in actual Poll. Show it to Polling Agents. Now press CLEAR button of CU. Switch Off the CU. Complete the sealing of Result section of CU with Green paper seal + Special Tag + Address Tag. Seal the VVPAT Empty chamber with Address Tag. Furnish your Mock Poll Reporting as per Latest Format (August,2021) prescribed by Commission etc. Remember - Use of Outer Strip (A.B.C.D) Seal has been done away with.
Process after Mock Poll Sealing ofVVPAT slips and Ballot Compartment EachVVPAT slip to be stamped in the back with Mock Poll Slip TheVVPAT slips to be sealed & kept in prescribed Black Envelop The Envelope should be sealed and stamped with VVPAT PAPER SLIPS OF MOCK POLL The sealed Black Cover then to be kept in a plastic box and sealed with Pink paper seal Seal the Drop Box ofVVPAT with CommonAddress tag. Positioning of CU,BU,VVPAT for actual poll Keep CU with designated Polling officer Keep BU andVVPAT in Secret Voting Compartment. Ensure that - connections are proper - Wires are not hanging putting pressure over the latches of the Units Ensure that wires connecting various units are not concealed. Switch on CU for actual Poll
Process of Conducting Mock Poll Result count in CU VVPAT Slip Count Total Seal Ballot Close Clear S/W off


")
")


 Seal")