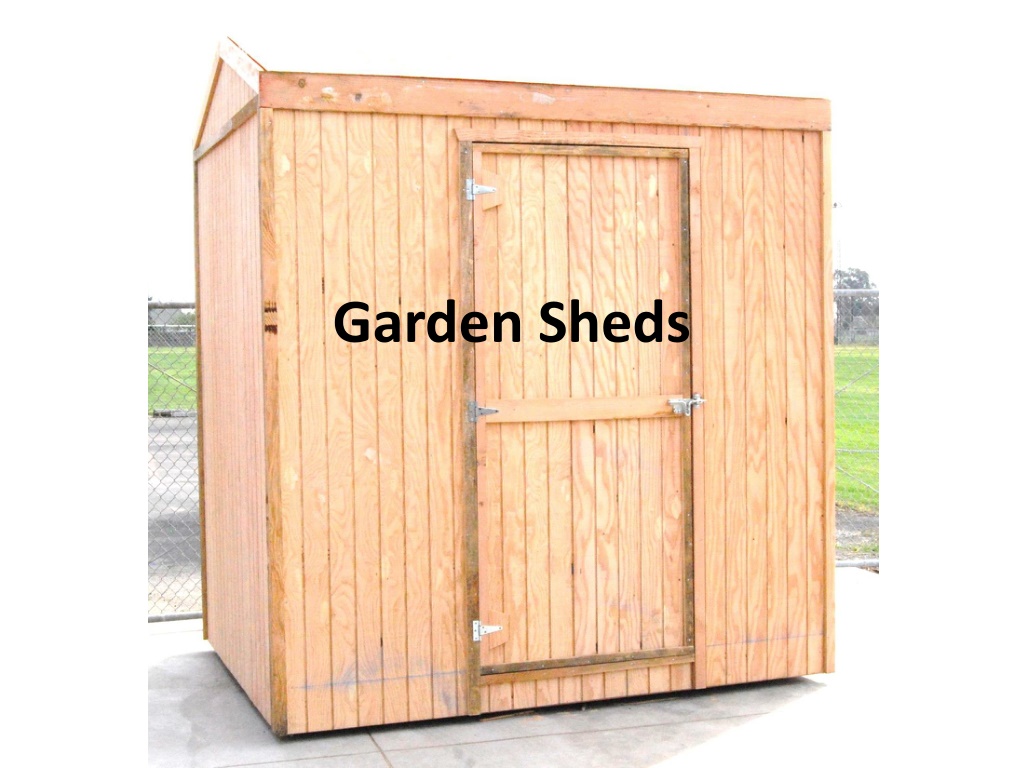
Comprehensive Guide to Teaching Construction Skills with Garden Shed Project
Explore a detailed agenda for teaching construction skills through a hands-on garden shed project. From orientation to plans and tools to learning outcomes, this guide covers everything needed to educate on construction basics. Engage students with activities like tool requirements, building process plans, and student learning outcomes to enhance their understanding of wood frame construction.
Download Presentation

Please find below an Image/Link to download the presentation.
The content on the website is provided AS IS for your information and personal use only. It may not be sold, licensed, or shared on other websites without obtaining consent from the author. Download presentation by click this link. If you encounter any issues during the download, it is possible that the publisher has removed the file from their server.
E N D
Presentation Transcript
Agenda Overview Next level good example to teach construction skills Includes layout skills transferable to other projects Orientation to plans Tools Learning Outcomes Cutting Lists Bills of Materials Construction Tips Customize the Shed Resources
Quiz Key 1. 2. What is a sinker? A vinyl cement coated nail. A roof slope is described as 4/12 meaning it rises 4 for every 12 of run . The actual size of 2 x 4 surfaced lumber is: 1 x 3 . A rafter supports the roof of the building. A 2 x6 x12 board contains 12 board feet. Lumber used for framing commonly comes from fir, hemlock, or spruce trees. The horizontal framing member at the top of a wall is called a plate. Galvanized coating on nails is used to prevent rusting. The material used under composition shingles is called roofing felt or tar paper. 10. OSB or plywood is commonly used as sheeting to cover walls or the roof framing. 3. 4. 5. 6. 7. 8. 9.
Activity #1 - What Tools Are Required? Make your list required/optional Required Steel Tape Framing Square Circular Saw Hammer Utility Knife Screwdriver Optional Power Miter Saw Hammer Tacker Cat s Paw Power screw driver Level And .
Building Process Plans & drawings Cutting Lists And Knowledge Bill of Materials Of Materials Layout Plan reading Measuring Construction Tool selection & use Construction Methods
Activity #2 Student Learning Outcomes Review the plan. What SLOs will students learn by completing the project? 10 min & share
Student Learning Outcomes Students will: Read and interpret plans common to wood framed buildings Identify common parts of a building by name (e.g.; header, cripple) Create a cut list using the plans Create a bill of materials and estimate the cost of the building Identify common fasteners and materials used in wood frame construction Identify common tools used in wood frame construction Cut lumber based on a cut list Layout floor joists Build a framed floor with joists and sheeting Square a framed floor or wall section
Student Learning Outcomes Layout wall plates Assemble a wall with window and door openings Cut and apply siding to a wall Install windows Determine the roof angle and layout with a square Cut a rafter Layout rafter locations Frame a roof Cut and apply roof sheeting Install a roofing system such as composition roofing of steel. Cut and install trim
Plate Header Cripple Stud Trimmer
Activity #2 Create a cutting list for the walls using the plan 15 minutes Common lumber sizes: 2x4x8 , 2x4x10 , 2x4x12 , 2x4x14 , 2x4x16 No siding or window. Framing Only
Review cut list and process Qty Material Dimension(s) Notes 12 4 2 1 1 1 1 2 2 2 #2 or BTR S4S Fir #2 or BTR S4S Fir #2 or BTR S4S Fir #2 or BTR S4S Fir #2 or BTR S4S Fir #2 or BTR S4S Fir #2 or BTR S4S Fir #2 or BTR S4S Fir #2 or BTR S4S Fir #2 or BTR S4S Fir 2x4x86 3/4" 2x4x120" 2x4x113" 4x4x27" 4x4x41 1/2" 2x4x27" 2x4x56 3/4" 2x4x56 3/4" 2x4x81" 2x4x24" Studs Plate Plate Window Header Door Header Sill Cripple Window Trimmer Door Trimmer Window Trimmer
Review the Process for Bill of Materials Layout is important Utilization Standard sizes Combine similar materials Use published prices
Activity #3 Create a bill of materials based on the cut list. 20 minutes (need handout form and pricelist) (Make a key)
BOM Key How close did you get? Material Units Qty Price Total Notes 2x4x8 ea 17 2.75 46.75 Studs, door trimmers, cripple 2x4x10 ea 6 3.64 21.84 Plates, window trimmer 4x4x8 ea 1 8.55 8.55 Window trimmer, sill Header TOTAL 77.14
Uses/Materials SAE student or a small team can build and sell Class project Custom build Team building activity Lumber yards vs. Home Improvement Stores Contractor's discounts
Team building activity Pre-cut lumber Bundle by use (floors, walls) Mark layout
Tips Use jigs when possible Check square multiple times Install siding flat On some designs you can build roof on the ground. Think ahead on the attachment. Look for ways to conserve materials. Layout plates/joists in pairs. Check before assembly
Transportation Build complete or in flat sections Use peelers as rollers Tiltbed trailers are useful
Transportation Build complete or in flat sections
Customizations Changing the design Trim options Roof metal or comp Shelves Workbench Wiring note likely a code violation use caution
Resources www.agedweb.org/sheds Books CAD AutoCAD educational version Free 2D programs
