Create Your Own Crown: Fit for a King!
Design and assemble a regal crown using colored card, paper, and other craft supplies. Follow the step-by-step instructions to make a crown suitable for the coronation of King Charles III. Be creative and add decorative touches to make your crown truly magnificent. Take on this royal DIY project and feel like royalty!

Download Presentation

Please find below an Image/Link to download the presentation.
The content on the website is provided AS IS for your information and personal use only. It may not be sold, licensed, or shared on other websites without obtaining consent from the author. Download presentation by click this link. If you encounter any issues during the download, it is possible that the publisher has removed the file from their server.
E N D
Presentation Transcript
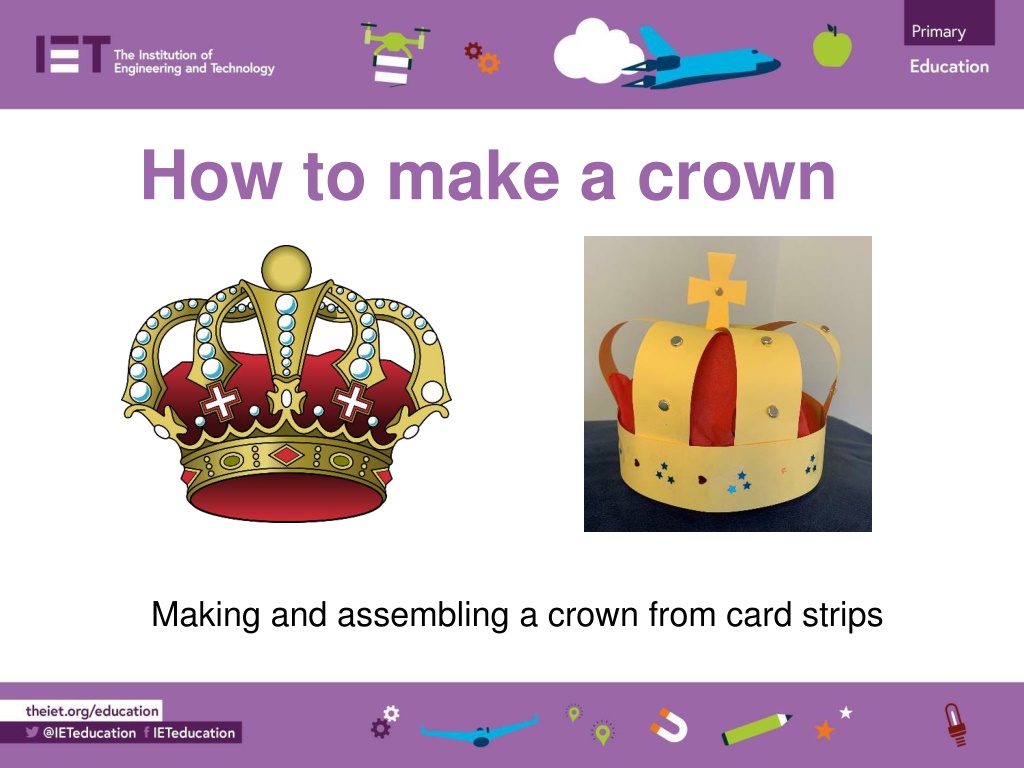
How to make a crown Making and assembling a crown from card strips
Stay safe Whether you are a scientist researching a new medicine or an engineer solving climate change, safety always comes first. An adult must always be around and supervising when doing this activity. You are responsible for: ensuring that any equipment used for this activity is in good working condition behaving sensibly and following any safety instructions so as not to hurt or injure yourself or others Please note that in the absence of any negligence or other breach of duty by us, this activity is carried out at your own risk. It is important to take extra care at the stages marked with this symbol:
Design brief The coronation of King Charles III will take place on Saturday 6 May 2023 There will be a bank holiday on Monday 8 May Lots of public events will take place to celebrate this historic event Your task: Design and make a crown that is fit for a king!
Equipment and resources Coloured card Coloured crepe paper Scissors Glue stick Sticky tape Sticky tack Sharp pencil Paper fastener Decorative items!
Step 1 Headband Using coloured card Carefully cut out a 40 mm wide strip Check that the strip is long enough to go around your head, with a small overlap Glue the ends to form a circle Add sticky tape to reinforce the join
Step 2 Cutting the head straps Cut out the shapes on the crown activity sheet On black card, draw around the head strap template Cut out two head straps
Step 3 Head straps Glue the first strap across the headband Try on the crown and adjust to fit Glue the second strap into place Add sticky tape to secure the straps to the headband
Step 4 Cutting the crown straps On card draw around the crown strap template Cut out six straps Make a hole in each strap using sticky tack and a sharp pencil Make a hole at the centre of the head straps
Step 5 Crown straps Glue the six crown straps in place at the following positions: 12, 2, 4, 6, 8 and 10o clock
Step 6 Cutting the lining Cut out the crown lining shape from the crown activity sheet 2 On red crepe paper, draw around the crown lining template Cut out 4 shapes Glue them onto the black head straps to form a dome shape
Step 7 Cross Draw around the cross template on folded card Cut out the cross Fold the tabs and punch a hole in one tab using a sharp pencil and sticky tack Glue the cross together Place a paper fastener into the hole
Step 8 Crown straps Insert the cross paper fastener through the holes on the crown straps Push the fastener through the paper lining and head straps Split and fix the paper fastener in place Put stick tape over the ends of the fastener for safety
Step 9 Decorate the crown! Decorate the crown using: Paper fasteners Beads Glitter glue Sequins Tinsel paper Gem-style stickers Paint