Complete Guide on Adding Digital Signature Certificate (DSC) on NSWS National Single Window System
Learn how to add a Digital Signature Certificate (DSC) on the NSWS portal step-by-step, including installing the necessary software, identifying and adding the DSC, filling out DSC fields, and successfully registering the DSC for authorized signatories. Follow the detailed instructions provided to ensure a seamless process.
Download Presentation

Please find below an Image/Link to download the presentation.
The content on the website is provided AS IS for your information and personal use only. It may not be sold, licensed, or shared on other websites without obtaining consent from the author. Download presentation by click this link. If you encounter any issues during the download, it is possible that the publisher has removed the file from their server.
E N D
Presentation Transcript
User Guide: How to add Digital Signature Certificate (DSC) on NSWS National Single Window System (https://www.nsws.gov.in/)
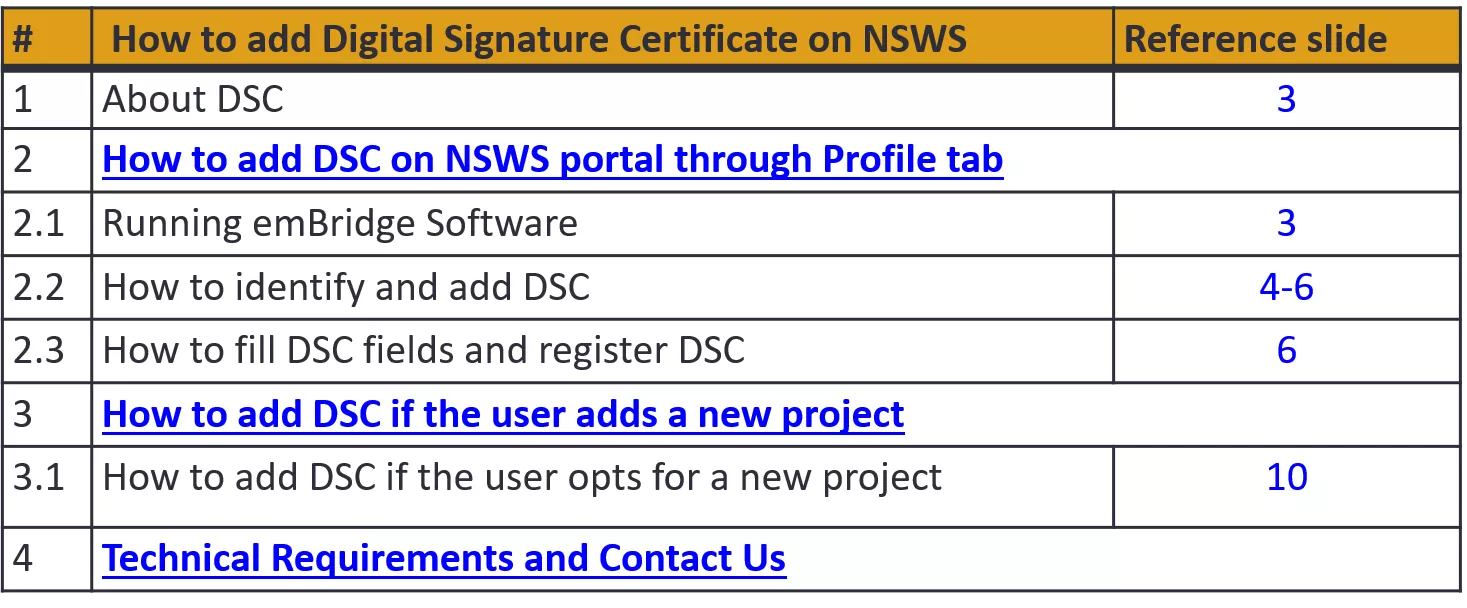
Table of Contents # 1 2 How to add Digital Signature Certificate on NSWS About DSC How to add DSC on NSWS portal through Profile tab Reference slide 3 2.1 Running emBridge Software 3 2.2 How to identify and add DSC 4-6 2.3 How to fill DSC fields and register DSC 6 3 How to add DSC if the user adds a new project 3.1 How to add DSC if the user opts for a new project 10 4 Technical Requirements and Contact Us National Single Window System (https://www.nsws.gov.in/)
About DSC 1 The user needs to have emBridgesoftware installed in their systems which serves as a connecting link/driver between NSWS portal and DSC The NSWS Portal does not facilitate the creation of DSC The users must get their DSC s registered from eMudhra only How to run emBridge software The user must run emBridge software of eMudhra and have encrypted device (Pen Drive) plugged in their systems while adding DSC on NSWS Portal. To download the emBridge software user can visit the link: https://embridge.emudh ra.com/ National Single Window System (https://www.nsws.gov.in/)
2 How to identify and add DSC After logging on NSWS portal, go to the Dashboard and click on the Profile tab. Go to the Authorised Signatory Details section and click on Add New. Enter the Authorized Signatory's PAN number. Their Name would be auto- filled through NSDL. The user can add the DSC of the authorised signatory by clicking on Add Digital Signature Certificate National Single Window System (https://www.nsws.gov.in/)
2 How to identify and add DSC After filling all the details, click on the Add Digital Signature Certificate toggle. You will be redirected to the DSC registration screen as shown in the next slide. National Single Window System (https://www.nsws.gov.in/)
3 How to fill DSC fields and register DSC Clicking on the Certificate field will generate a list of DSC s either installed in the local system/plugged-in encrypted device. Select the certificate from the drop-down list Select the desired Provider from the dropdown Each DSC has a separate Token Password for each user, enter your token password 5 An error message will appear if the user does not have the emBridge software in their local system PAN number will be auto-populated here based on previous inputs After filling all the information, Click on Register DSC National Single Window System (https://www.nsws.gov.in/)
3 How to fill DSC fields and register DSC After successful DSC registration, the Authorized Signatory details would be saved and be visible in the profile page with DSC registered displayed in green. 5 National Single Window System (https://www.nsws.gov.in/)
4 How to add DSC if the user opts for a new project Click on Add New Project to add a new project. Once the project is created go to the Profile page and follow steps mentioned in Slide 4. After entering the Authorized Signatory's details for the newly added project, select the Project Name from the Project dropdown menu and then click on Add Digital Signature Certificate and follow the steps mentioned in Slide 6. National Single Window System (https://www.nsws.gov.in/)
What are the technical Requirements for NSWS System Requirements for National Single Window Portal Windows OS (XP or higher) MAC OS (X 10.9 or higher with latest updates) View/ Download Pdf: Download the pdf reader to view and download the pdf files from the link: https://get.adobe.com/reader/) Platform requires a minimum screen size of 976px wide , but using 1024px or higher is recommended Digital Signature Certificate (DSC): Latest version of emBridge software need to be installed in the system which acts a connecting link/driver between the NSWS and DSC Web browsers best suited for National Single Window System Google Chrome Mozilla Firefox Apple Safari Have any further questions? Please submit your queries and feedback on: https://www.nsws.gov.in/contact-us Email: contactus-nsws@investindia.org.in Ph: 1800 102 5841 (Monday - Saturday, 9am - 6pm) Last Updated on 12 September 2023 National Single Window System (https://www.nsws.gov.in/)
