Understanding Respiratory Rate and Ventilation in Nursing Practice
This lecture focuses on the vital signs related to respiratory rate, emphasizing the three processes of respiration: ventilation, diffusion, and perfusion. Nurses assess ventilation by observing the rate, depth, and rhythm of respiratory movement, crucial in recognizing normal thoracic and abdominal movements. The mechanisms of inspiration and expiration are detailed, along with normal ranges of respiratory rates and alterations in breathing patterns like bradypnea, tachypnea, and hyperpnea.
Download Presentation

Please find below an Image/Link to download the presentation.
The content on the website is provided AS IS for your information and personal use only. It may not be sold, licensed, or shared on other websites without obtaining consent from the author. Download presentation by click this link. If you encounter any issues during the download, it is possible that the publisher has removed the file from their server.
E N D
Presentation Transcript
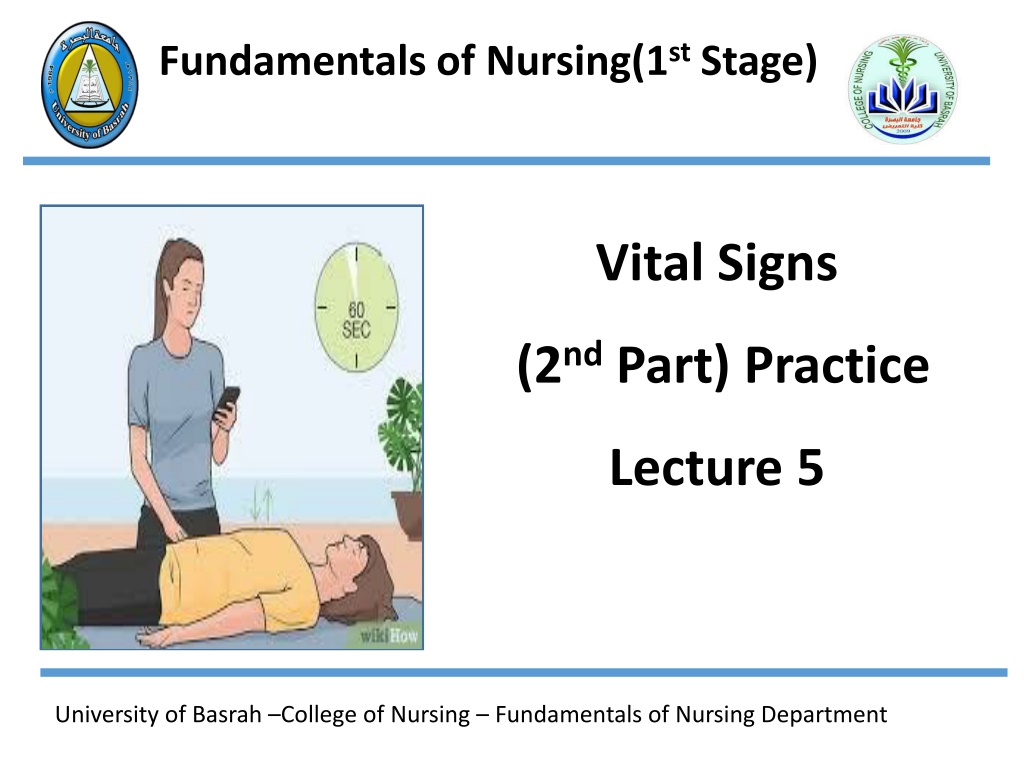
Fundamentals of Nursing(1stStage) Vital Signs (2ndPart) Practice Lecture 5 University of Basrah College of Nursing Fundamentals of Nursing Department
3- Respiratory Rate Introduction The mechanism of respiration exchanges oxygen (O2) and carbon dioxide (CO2) between cells of the body and atmosphere.
Three processes are involve in respiration: 1- Ventilation: mechanical movement of gases into and out of the lungs. 2- Diffusion: movement of O2 and CO2 between the alveoli and RBCs. 3- Perfusion: distribution of RBCs to and from the pulmonary capillaries.
The nurse directly assesses ventilation by observing: 1. Rate 2. Depth 3. Rhythm of respiratory movement. accurate assessment of respiration depends on recognizing normal thoracic and abdominal movement.
On inspiration diaphragm contracts, causing abdominal organs to move downward and forward, thereby increasing vertical size of the chest cavity. And the same time the ribs lift upward and outward and the sternum lifts outward to aid the transverse expansion of the lungs.
On expiration the diaphragm relaxes upward, the ribs and sternum return to their relaxed position, and the abdominal organs return to their original position.
Normal Range of respiratory rate (12-20) breath per minute or cycle per minute
Alterations in breathing pattern Alteration Description Rate of breathing is regular but abnormally slow(less than 12 breaths per minute). Bradypnea Rate of breathing is regular but abnormally rapid(greater than 20 breaths per minute). Tachypnea Respiration are increased in depth. Occurs normally during exercise. Hyperpnea
Hyperventilation Rate and depth of respirations increase. Respiratory rate is abnormally low, depth of ventilation may be depressed Hypoventilation Respiration cease for several seconds. persistent cessation results in respiratory arrest. Apnea Kussmaul s respiration Respirations are abnormally deep but regular. Common in diabetic ketoacidosis.
EQUIPMENTS 1-Wrist watch 2-Pen, Vital signs flow sheet.
Assessment 1- Assess risk factors of respiratory alterations: Fever Pain and anxiety Diseases of chest wall or muscles Presence of abdominal incisions Respiratory infection Head injury with damage to brainstem Anemia
2- Assess for signs and symptoms of respiratory alterations such as : Bluish or cyanotic appearance of nail beds, lips, mucous membranes, and skin Restlessness, irritability, confusion, reduced level of consciousness Pain during inspiration Use of accessory muscles Inability to breathe spontaneously Sputum production
3- Assess for factors that influence the character of respirations: Exercise Anxiety Acute pain Smoking Medication Body position
Nursing Diagnosis 1. Ineffective airway clearance 2. Ineffective breathing pattern 3. Impaired gas exchange 4. Impaired spontaneous ventilation 5. Activity intolerance
Planning Expected outcomes following completion of procedure: Respiratory rate is within acceptable range Respirations are regular and of normal depth
Implementation 1- Draw curtain around bed and/or close door. 2- Perform hand hygiene. 3- Be sure that patient in lying position with the head of the bed elevated to 45 degrees and chest is visible. If necessary, move bed linen or gown. 4- Place patient s arm in relaxed position across abdomen or lower chest or place your hand directly over patient s upper abdomen. 5- Observe complete respiratory cycle (one inspiration and one expiration).
6- After observing cycle, look at second hand of watch and begin to count rate. 7- If rhythm is regular, count number of respirations in 30 seconds and multiply by 2. If rhythm is irregular, less than 12, or greater than 20, count for 1 full minute. 8- Note depth of respirations by observing degree of chest wall movement while counting rate. 9- Replace bed linen and patient s gown 10- Perform hand hygiene.
Evaluation Compare respirations with patient s previous baseline and usual rate, rhythm, and depth.
4- Measuring Body Temperature Body temperature: is the difference between the amount of heat produced by the body processes and the amount of heat lost to the external environment.
1-The core temperature, or temperature of the deep body tissues is under control of the hypothalamus and is maintained within a narrow range. 2-Skin or body surface temperature rises and falls as the temperature of the surrounding environment changes and can fluctuate dramatically.
Core site Surface site 1-Rectum 2- Tympanic membrane 3- Esophagus 4- Pulmonary artery 5- Urinary bladder 1-Skin 2- Oral cavity 3- Axillary
Normal range of body temperature (36 - 38 ) centegrade or celsius
Fever or Pyrexia: Body temperature more than 38c. Hyperpyrexia: Body temperature more than 40c. Hypothermia: Body temperature less than 36c.
Notes Notes 1. Person with normal body temperature called Afebrile 2. Person with High body temperature called Febrile. 3. Rectal temperatures are usually 0.5 c higher than oral temperatures. 4. Axillary and Tympanic temperatures are usually 5. 0.5 c lower than oral temperatures. 6. Sites reflecting core temperature are more reliable indicators of body temperature than sites reflecting surface temperature.
Advantages and limitations of select temperature measurement site. 1-Oral Advantages 1. Easily accessible, requires no position change. 2. Comfortable for client. 3. Provide accurate surface temperature reading. 4. Reflect rapid change in core temperature. 5. Shown to be reliable route to measure temperature in intubated client.
Limitations Limitations 1. Caused delay in measurement if client recently ingested hot, cold fluids or foods, smoked, or receive oxygen. 2. Risk of body fluid exposure 3. Should not be used for( contraindication): Clients who have had oral surgery Trauma in mouth History of epilepsy Infants, small children Confused, unconscious or uncooperative clients Vomiting Severe cough Mouth breathing
2 2- -Axilla Axilla Advantages Safe and inexpensive , can be used with newborns and unconscious clients Limitations 1. Long measurement time. 2. Requires continuous positioning by nurse. 3. Requires exposure of thorax , which can result in temperature loss especially in newborns. 4. Not recommended to detect fever in infants and young children.
3-Rectal Advantages Argued to be more reliable when oral temperature cannot be obtained. Limitations 1. Requires positioning and may be source of client embarrassment and anxiety. 2. Risk of body fluid exposure. 3. Requires lubrication. 4. Should not be used for clients with diarrhea, bleeding, rectal surgery, rectal disorder.
4-Tympanic membrane Advantages 1. Easily accessible site. 2. Can be used for clients with tachypnea without affecting breathing. 3. Very rapid measurement (2-5sec.) 4. Unaffected by oral intake or food or fluid or smoke. 5. Can be used in newborns to reduce infant handling and heat loss.
Limitations 1. Requires removal of hearing aids before measurement. 2. Does not accurately measure core temperature changes during and after exercise. 3. Should not be used with clients who have had surgery of the ear or tympanic membrane.
5- Skin Advantages Advantages 1- Inexpensive 2- Provides continuous reading 3- Safe and non invasive 4- Used for neonates Limitations Limitations 1- Measurement lags behind other sites during temperature changes especially during hyperthermia. 2- Impaired adhesion from diaphoresis or sweat. 3- Affected by environmental temperature. 4- Cannot be used for patients with allergy to adhesive.
1-Appropriate thermometer. 2- Soft tissue. 3- Lubricant ( For rectal measurements only ). 4- Pen, vital signs flow sheet or record form. 5- Disposable gloves, plastic thermometer sleeves.
Nursing Diagnosis 1. Hyperthermia 2. Hypothermia 3. Ineffective thermoregulation 4. Risk for imbalanced body temperature
Procedure Oral temperature hand hygiene, applying clean gloves. Ask patient to open mouth; gently place thermometer probe under tongue in posterior sublingual pocket lateral to center of lower jaw Ask patient to hold thermometer probe with lips closed Leave thermometer probe in place until audible signal indicates completion and patient s temperature appears on digital display, remove thermometer probe from under patient s tongue. Push ejection button on thermometer probe stem to discard plastic probe cover into appropriate receptacle. Remove gloves and dispose in appropriate receptacle and perform hand hygiene. 1. 1. Perform Perform hand hygiene, applying clean gloves. 2. 3. 4. 5. 6. 7.
Rectal temperature 1- Draw curtain around bed and/or close room door. 2- Assist patient to side-lying or Sims position with upper leg flexed. Move aside bed linen to expose only anal area. Keep patient s upper body and lower extremities covered with sheet or blanket. 3- Perform hand hygiene and apply clean gloves. Cleanse anal region when feces and/or secretions are present. Remove soiled gloves and reapply clean gloves. 4- Remove thermometer pack from charging unit. Attach rectal thermometer probe stem (red tip) to thermometer unit. Grasp top of probe stem, being careful not to apply pressure on ejection button. 5- Using a single use package, squeeze a liberal amount of lubricant on tissue. Dip probe cover of thermometer, blunt end, into lubricant, covering 2.5 to 3.5 cm for adult.
6- With non dominant hand separate patients buttocks to expose anus. Ask patient to breathe slowly and relax. 7- Gently insert thermometer into anus in direction of umbilicus 3.5 cm for adult. Do not force thermometer. 8- If you feel resistance during insertion, withdraw immediately. Never force thermometer. 9-hold thermometer probe in place until audible signal indicates completion and patient s temperature appears on digital display; remove thermometer probe from anus. 10- Assist patient in assuming a comfortable position, Remove and dispose of gloves in appropriate receptacle. Perform hand hygiene.
Axillary temperature 1- Draw curtain around bed and/or close room door. 2- Assist patient to supine or sitting position. Move clothing or gown away from shoulder and arm. 3- Raise patient s arm away from torso. Inspect for skin lesions and excessive perspiration; if needed, dry axilla. 4- Insert thermometer probe into center of axilla, lower arm over probe, and place arm across patient s chest.
5 5- - Once Once thermometer probe is positioned, hold it in place thermometer probe is positioned, hold it in place until audible signal indicates completion and patient until audible signal indicates completion and patient s s temperature appears on digital display; remove temperature appears on digital display; remove thermometer probe from thermometer probe from axilla. axilla. 6- Assist patient in assuming comfortable position, replacing linen or gown. 7- Perform hand hygiene.
Tympanic membrane temperature 1. Assist patient in assuming comfortable position with head turned toward side, away from you. If patient has been lying on one side, use upper ear. Obtain temperature from patient s right ear if you are right- handed. Obtain temperature from patient s left ear if you are left- handed. 2. Note if there is an obvious presence of cerumen (earwax) in patient s ear canal. 3. Fit speculum tip snug in canal, pointing toward the nose. 4. Once thermometer positioned, press scan button on handheld unit. Leave speculum in place until audible signal indicates completion and patient s temperature appears on digital display. 5. Help patient assume a comfortable position. 6. Perform hand hygiene.
