Case IH McCormick International 634 Tractors Operator’s Manual Instant Download (Publication No.1092584RI)
Please open the website below to get the complete manualnn//

Download Presentation

Please find below an Image/Link to download the presentation.
The content on the website is provided AS IS for your information and personal use only. It may not be sold, licensed, or shared on other websites without obtaining consent from the author. Download presentation by click this link. If you encounter any issues during the download, it is possible that the publisher has removed the file from their server.
E N D
Presentation Transcript
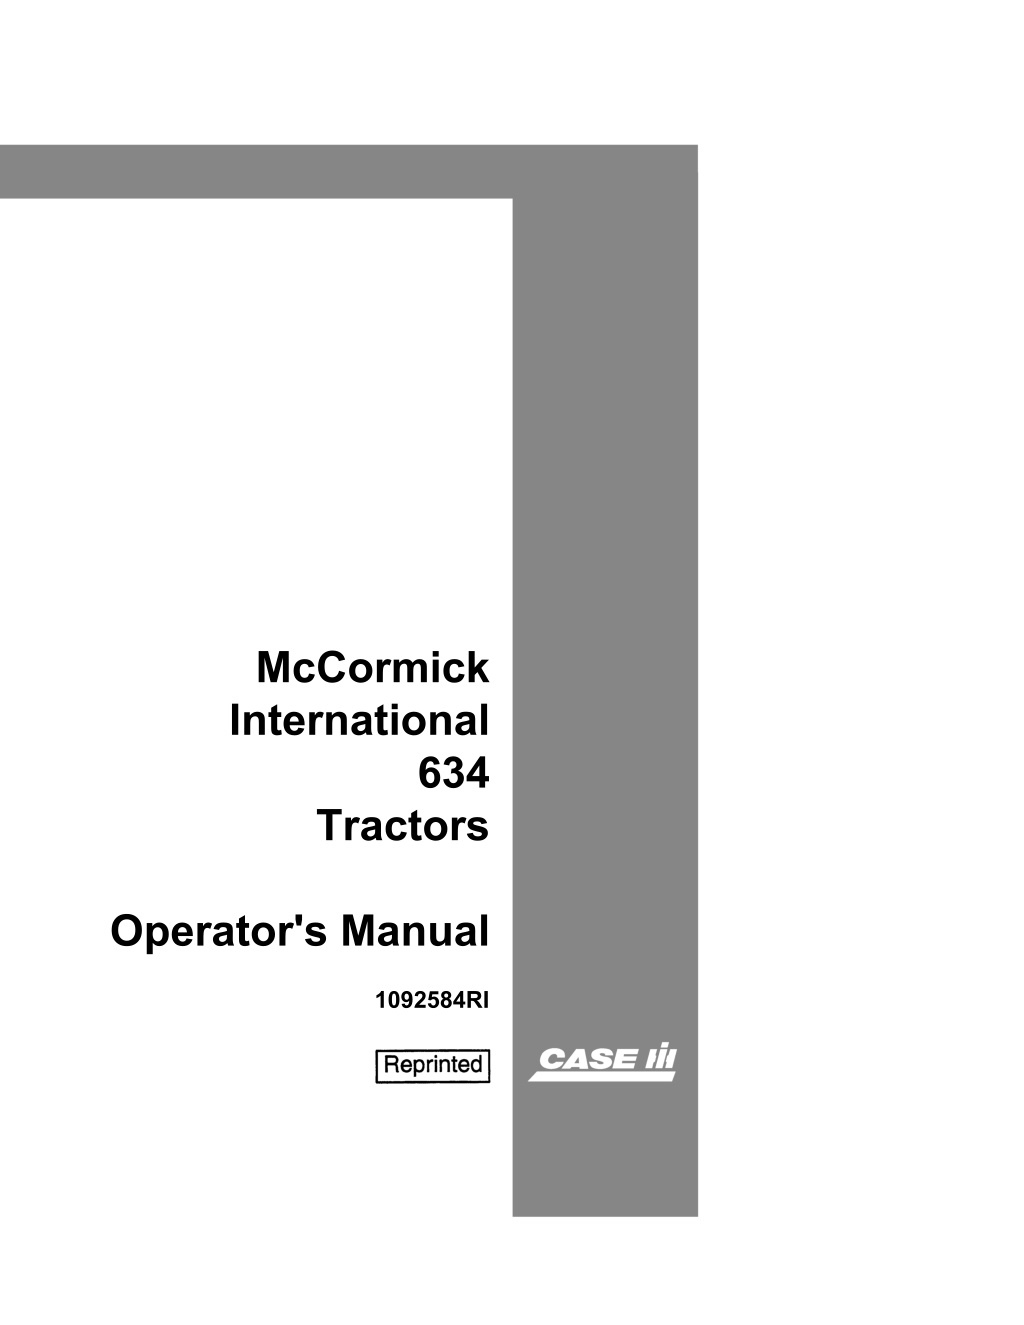
McCormick International 634 Tractors Operator's Manual 1092584RI
THIS SAFETY ALERT SYMBOL INDICATES IMPORTANT SAFETY it ALERT TO THE POSSIBILITY OF PERSONAL INJURY OR DEA TH. MESSAGES IN THIS MANUAL. WHEN YOU SEE THIS SYMBOL, , CAREFULL Y READ THE MESSAGE THA T FOLLOWS AND BE M171B If Safety Decals on this machine use the words Danger, Warning or Caution, which are defined as follows: DANGER: Indicates an immediate hazardous situation which if not avoided, will result in death or serious injury. The color associated with Danger is RED. WARNING: Indicates an potentially hazardous situation which if not avoided, will result in serious injury. The color associated with Warning is ORANGE. CAUTION: Indicates an potentially hazardous situation which if not avoided, may result in minor or moderate injury. It may also be used to alert against unsafe practices. The color associated with Caution is YELLOW. If Safety Decals on this machine are ISO two panel Pictorial, decals are defined as follows: The first panel indicates the nature of the hazard. The second panel indicates the appropriate avoidance of the hazard. Background color is YELLOW.I\:\ it WARNING IMPROPER OPERATION OF THIS MACHINE CAN CAUSE INJURY OR DEATH. BEFORE USING THIS MACHINE, MAKE CERTAIN THAT EVERY OPERATOR: Prohibition symbols such as \::::I X and e if used, are RED. Is instructed in safe and proper use of the machine. Reads and understands the Manual(s) pertaining to the machine. Reads and understands ALL Safety Decals on the machine. Clears the area of other persons. Learns and practices safe use of machine controls in a safe, clear area before operating this machine on a job site. It is your responsibility to observe pertinent laws and regulations and follow Case Corporation instructions on machine operation and maintenance. Bur 0-00000 2001 Case Corporation March, 1995 (Revised October, 1997) CASE and IH are registered trade marks of Case Corporation
.' McCORMICK . I NT'ERN'ATI O.NAL;. ,: : 634. , TRACTO, 'R' S .. '.
https://www.ebooklibonline.com Hello dear friend! Thank you very much for reading. Enter the link into your browser. The full manual is available for immediate download. https://www.ebooklibonline.com
DESCRIPTlOrJ Il/ust. 1 Front Right V i ~ " " 01 634 rrllctor ") . Il/ust. 2 fiellr Lllfr View of 634 Trllctor
CONTENTS 634 TRACTOR Page No. 1 2 3 6 10 DESCRIPrION ................ ..................... ... . . " .............................................. .. INTRODUCTION ............................................................................................ .. SPECIFICATIONS ............................................................................................ .. AND CONTROLS .................................................................. .. I N S T R U ~ N T S FOR BETTER PERFORMANCE AND SAFE OPERATION ................................ .. 11 12 BEFORE STARTING A NEW TRACTOR ........................................................... . PREPARING THE TRACTOR FOR EACH DAY'S WORK ................................. . OPERATION OPERATING THE ENGINE ........................................................................ .. OPERATING THE TRACTOR .......... " ........ " .......................................... " .. " THE VARY-TOUCH HYDRAULIC SYSTEM " ............................................ .. OPERATING REMOTE CYLINDERS .......... "" ......... " .. " ........................ " .. " .. AUXILIARY CONTROL VALVES ................ " ............................................ .. SELF-SEALING COUPLINGS ............................. ~ ...................................... .. THREE POINT LINKAGE .................................................................. " .... " .. ADJUSTABLE CHECK LINKS .................. " .............................................. .. AUTOMATIC HITCH .................................. " ............................................ .. THREE POINT LINKAGE DRAWBAR ........................................................ .. SWINGING DRAW BAR ............................ "" ............................................ .. STANDARD POWER TAKE-OFF ................................................................ .. INDEPENDENT POWER TAKE-OFF ........................................................... . BELT PULLEY ATTACHMENT ................................................................... . WATER BALLAST AND WHEEL WEIGHTS WHEEL TREAD ADJUSTMENT .................................................................. .. 13 14 17 21 22 23 24 25 26 27 28 28 ~ 29 30 31 34 .............................................. .. PREVENTIVE MAINTENANCE LUBRICANT SPECIFICATIONS .................................................................. LUBRICATION GUIDE .............................................................................. LUBRICATION CHART .............................................................................. COLD WEATHER PRECAUTIONS .............................................................. HOT WEATHER PRECAUTIONS .................................................................. ROUTINE SERVICING SCHEDULE ............................................................ 39 40 41 45 46 47 MAINTENANCE COOLING SYSTEM AIRCLEANING SYSTEM ENGINE MAINTENANCE FUEL SYSTEM ENGINE CLUTCH .............................. ............................ .......................... ............................................................................ .......................................................................... ......................................... .. 48 51 52 55 57 58
CONTENTS - Continued Page No. MAINTENANCE continued 60 AXLES. WHEELS AND STEERING BRAKES ........................................................................................................ 61 62 64 65 ................................................................................ HYDRAULIC SYSTEM INDEPENDENT P.T.O. CLUTCH ................................................................ ELECTRICAL SYSTEM .... .... ........ .... ...... ................ .... ........ .... ...................... WIRING DIAGRAM ...... .................................................................................. LEGEND FOR WIRING DIAGRAM .................................................................. _ 71 72 634 FOUR WItEEl DRIVE DESCRIPTION .................................................................................................. 74 SPECIFICATIONS ............................................................................................ OPERATION 75 ...................................................................... OPERATING THE TRACTOR 78 WHEEL TREAD ADJUSTMENT .................................................................. _.. PREVENTIVE MAINTENANCE 78 LUBRICATION GUIDE 80 LUBRICATION CHART .............................................................................. MAINTENANCE ENGINE CllirCH 81 84 84 86 ........................................................................................ TRANSMISSION AXLES. WHEELS AND STEERING .............................................................. 634 ALL WHEEL DRIVE 87 88 - DESCRIPTION SPECIFICATIONS ............................................................................................ OPERATION 91 91 .................................................................. WHEEL TREAD ADJUSTMENT STEERING STOPS PREVENTIVE MAINTENANCE 93 LUBRICATION GUIDE 94 .............................................................................. LU8RICATION CHART MA INTENANCE .......................................................................... ENGINE MAINTENANCE 98 98 ENGINE CLUTCH TRANSMISSION .......................................................................................... ELECTRICAL SYSTEM .... .... ........................................................................ 99 101 102 102 ........................................................................... STORING THE TRACTOR .R STORAGE STAhTING THE ENGINE. ............... . ATIACHMENTS 1 1 ' \ ~
INTRODUCTION Compiled in this manual are the operating and maintenance instruclIllfls fo, the Internationaf 634. 634 Four Wheel Drive and 634 Atf Wheel Drive Traclors . This materia I has been pref:8red in detai I to help the operator to betH" under- stand the correct care and efficient operation of the tractor. Throughout this manual the terms LEFT, RIGHT, FRONT and REAR are to be taken as those applicable to a person seated in the driver's seat facill!) tlw radiator. Refer to the rear of the manual for information relating to the FoUl Wheel Drive and All Wheel Drive tractors. If this information is not in the rear rages then it can be assumed the information is cOll11lon to the 634 tractor and the information wi" be found in the main text. If information is required that is not given in this manua I com;ult the International Harvester dea ler in the locality. Dea lers are kept informed of tho latest methods of servicing machines, they carry stocks of genuine I.H. service parts and are backed in every way by the full facilities of the International Harvester organisation. When in need of service parts. always quote the tractor and engine serial numbers. The tractor serial number is stamped on a name plate attached to the right side of the clutCh hOUSing (1IIust.3). The engine serial number is stamped on the right side of the engine crankcase (1IIust.4). For ready reference record these serial numbers in the spaces provided above each illustration, _____ -----'I ,---I _-----' "'IJ. fO'.4 F." .. ,. .. .-: . , ,, 1 I!'"", '1 T,Rctor Sp.rlRI Numhe, 10 ,
SPECIFICATIONS ENGINE Model I.H. BO-281 .. . ........ .............. ... . .. ........... . . . . . ..... ... ..... ..... Number of cyl inders .................................................................... .. Bore .................................................... em (in) .......................... .. Stroke ................................................ cm (in) .......................... .. Displacement .................................... em3(in3) ........................ .. Valve clearance (HOT) .................... cm (in) ........................... . Firing order .................................................................................. _ Low idle .............................................. rev/min ........................... . H igh idle ........ ...... .................... .......... rev /mi n .......................... .. Rated governed .................................. rev/min .......................... .. 4 10.80 (4.25) 13.34 (5.25) 4604 (281) 0.56 (0.022) 1-3-4-2 800 1760 ! 20 1600 ! 10 - TRANSMISSION Nl.Illber of gears Clutch size ........................................ em (in) ............................ 33.02 (13) ASG ................................................................ 8 Forward. 2 Reverse mAva SPEEDS (at rated governed engine speed) --------------- REAR TYRE SIZES 12 )( 38 11 )( 38 14 x 30 14 x 34 RANGE 15 x 30 km/h mile/11 km/h mile/11 km/h mile/11 kmlh mile/t kmlh mile/h Low 1 Low 2 Low 3 High.l High2 High 3 Low 4 High4 Low reverse Highreverse 6.51 2.78 3.73 4.58 5.37 7.21 8.84 ~ 3 . 0 0 1.73 2.32 2.85 3.34 4.48 5.50 8.07 15.68 2.11 4.08 2.66 1.66 3.58 2.23 4.39 2.73 5.15 3.20 6.90 4.29 8.45 5.26 1.70 2.84 2.30 3.83 2.81 3.32 4.45 7.36 5.46 9.02 8.02 13.29 2.74 1.70 3.67 2.28 4.50 2.80 5.28 3.28 7.08 4.40 8.68 5.40 2.74 3.70 4.52 5.34 7.16 8.79 12.90 24.82 15.46 25.59 15.90 23.98 14.90 ~ 4 3.24 2.10 3.49 4.05 6.71 1.77 2.38 2.91 3.41 4.58 5.61 8.25 12.42 7.73 12.77 7.94 4.67 5.49 . 6 1 15.30 3.35 2.08 6.43 4.00 ~ 5 . 2 1 3.39 6.56 2.17 4.17 3.27 2.03 6.31 3.92 590 -~ POWER TAKE-OFF SPEEDS At rated governed engine speed ...... rev/min ........................... . At 1475 engine speed ...................... rev/min .......................... .. HYDRAULIC SYSTEM Working pressure .............................. kg/cm2(1b/in2) .............. .. Nominal lift force at lower links .... kg lib) Maximum safe load on automatic h itch hook ........................................ kg (Ibl ............................ Power steering svstem pressure ...... kg/cm2(lblin2)................ 175.77 (2500) 2268 (5000) 1524 (3360) 105.46 (1500) COOLING SYSTB.. C"O r r P . ! ' ; ~ l I r e kn/cm21Ib/in2) .............. .. 0.4921 (7)
FOR BETTER PERFORMANCE AND SAFE OPERA nON DO - ENSURE THAT ALL SAFETY SHIELDS ARE IN PLACE AND IN GOOD CONDITION. DO - read all operating instructi ons before commencing to operate the tractor. DO - carryoutallmaintenancetaskswithoutfail. DO - keep the aircleaner clean and the oil cup filled to the correct lellui. DO - ensure that the correct lubricating oils are used and that they are replenished or changed at the correct interva Is. DO - fit new sealing rings when the filters are changed . DO - watch the oil pressure warning light and investigate any abnorrMlity immediately. DO - keep the radiator filled with clean I.H, inhibitor anti-freeze sOlution in the correct proportions for the lowest anticipated annua I temperatul e, DO - ensure thet the transmission is in NEUTRAL before starting the engine, DO - keep all fuel in CLEAN storage and use a filter when fi II ing the wnk . DO - attend to minor adjustments and repa irs as soon as necessity is appa- rant, when in doubt COrsUlt an INTERNATIONAL HARVESTER des ler. DO - aHow the engine to COOl before removing the radiator filler cap and SLOWLY remove the filler cap, DO - change into low gear before driving down steep hills, DO - ensure that the brakes and I ighting are in good working order. DO latch the brakes together when driving on the higtmay, DON'T - run the engine with the aircleaner disconnected. DON'T - start the tractor in an enclosed building unless the door and w ,,,,k .. v,; are open, DON'T - operate the tractor when lubricating or cleaning. DON'T - allOW the tractor to run out of fuel otherwise it will be neces' , II Y 10 lIent the system, DON'T - interfere with the fuel injection pump, if the seal is broken the W""dl;!Y becomes void . DON'T - allow the engine to idle for long periods, DON'T - run the engine if it is not firing on all cylinders. DON'T - ride the brakes or clutch, this will result in excessille WI'...:;r " I Ih. brake linings. clutch driven member and thrust bearing. DON'T - use the independent brakes for making turns on the highway or .I ' i, 111 speeds. ON'T - refuel the tractor with the engine running.
BEFORE STARTING A rJEW TRACTOR GENERAL The operator must be thoroughly aCQIBinted with the position and operation of all instruments and controls regardless of previous experience. DO NOT ATIEMPT TO START THE ENGINE OR DRIVE THE TRACTOR UNTIL THE FOLLOWING POINTS HAVE SEEN CHECKED. SHIP-AWAY OILS Tractors received factory filled will contain an SAE-20 oil in the engine crankcase. aircleaner and hydraulic system. and an SAE-90EP oil in the transmis- sion. The oil in the crankcase may be used for the first 25 hours of operation if the tractor is to be operated in ambient temperatures between oOC (+32OF) and +32OC( +90OF). If the embient temperature is not within this range. drain the oil fran the crankcase and aircleaner. change the oil filter element then fill with the grade of oil specified in the LUBRICATION GUIDE for the prevailing temperature. AFTER THE FIRST 25 HOURS OF OPERATION THE OIL FILTER ELEMENT AND CRANKCASE OIL MUST BE CHANGED. 'The hydraulic oil suction strainer must be removed and cleaned after the first 25 hours of operation. first 200 hours of operation and first 500 hours of operation of a new tractor. The hydraulic oil need not be changed at these periods provided it is free from contamination but must be changed after 1000 hours of operation. If the tractor is to be operated in an ambient temperature outside the range OOC (+32tlf) to +320C (+90Of) the hydraulic oil must be drained and the system filled with the grade of oil specified in the LUBRICATION GUIDE for the prevai ling temperature. The transmission oil may be used for the first 1000 hours of operation if the tractor is to be operated in ambient temperatures between OOC (+32oF) and +320C (+90Of). If the ambient temperature is not within this range drain the transmission oil then fill with the grade of oil specified in the LUBRICATION GUIDE for the prevailing temperature. LUBRICA TION Check all levels and lubricate the entire tractor referring to the LUBRICATION GUIDE for the correct lubricants to be used. AIRCLEANER Ensure that the aircleaner is intact and undamaged. tighten all connections securely. NEVER OPERATE THE ENGINE WITH THE AIRClEANER REMOVED OR ANY PART DISCONNECTED. COOLING SYSTEM Never start or operate the engine without first checking that the radiator is fi lied to the correct level. Factory filled COOling systems will contain a solution of I.H. inhibitor ant i-freeze and water. This solution wi II protect the cooling system against freez ing in temperatures as low as -34OC (+300F) and in addition the inhibiting additives will prr obtain maximum b ~ ; from these inhibitors. it is recommended that I.H. inhibitor anti -freeze solut ion is used a II year round. Every two years. change the SOlution , r ~ the interior of the system from corrosion. In order to
INSTRUMENTS AND CONTROLS GENERATOR WARNING LIGHT (4 IIlust.51 ThiS red light in the upper half of the combined instrument will glow when the keyswitch is turned but should be extinguished when the engine is runnino above low idle, thus indicating thet the battery is baing charged. If the light continues to glow with the engine running above low idle. th., charging circuit must be examined to determine the cause of the fai lure. OIL PRESSURE WARNING LIGHT (4 IIlust.51 This green light in the lower half of the combined instrument wi II glOW when the keyswitch is turned, but should be extinguished when the engine starts thus Indicating that the engine lubricating oil is circulating at the correct pressure. If the light continues to glow the engine must ba stopped and the fault located and corrected before re-starting the engine. HEAT INDICATOR (22 IIlust.5) This instrument indicates the engine coolant temperature. The needle should register in the centre of the RUN range for best engine performance. P.T.O. LEVER (13 IIlust.5) Moving this lever forward engages the P.T.O. drive and moving it rearward disengages the drive. When engaging the drive the tractor must be stationary and the engi ne Clutch pedal fully depressed. INDEPENDENTP.T.O. CLUTCH LEVER (181I1ust.5) This over-centre type lever operates the clutch contrOlling the power lak,, ofl Shaft. The clutch is fully engaged when the lever is in the down positIon. Whf'" pulled upward, the leverwi II lock in position and hold the clutch fully disengolH"d Operation of this lever does not affect the normal working of the tractor. NOTE: The P.T.O. MUST NOT be left disengaged by disengaging thl' l.p.T.n clutCh at the hand lever. Pull up the hand lever, move the P.T.O. lev'" t" II" disengaged position then return the I.P.T.O. clutch hand lever to the "n!,'O"" pOSition. INDEPENDENT P.T.O. WARNING LIGHT (23 IIlus\.51 This yell(Mt light will glow when theI.P.T.O.clutch lever is in the d I S e position and will be extinguishedwhen the clutch lever is in the engaged 1'0'., 01 ir. .. n ! I . I ~ J I : d TRACTORMETER (25 Illust.5) This instrumentrecords the approximate engine hours run. as well as s howi" ,! the engine revolutions per minute and the tractor speed. The correct P.T.O . '.< peed is indicated when the needle registers on the P.T.O. line marked on the fa c: .. (l ' the instrument. POSITION CONTROL LEVER (10 Illust.51 Moving the lever forward lowers the three point linkage; . movinn I n (' ' . " .. ~ " ' r w , .. rl " " i < : ~ s the linkaoe. ,
INSTRUMENTS AND CONTROLS DRAFT CONTROL lEVER (11 Illust.5) This lever governs the working depth of the implement. The lever is moved rearward to shallow and forward to deepen. RESPONSE CONTROL (14 IIIust.5) This control regulates the delivery from the hydraulic pump to the hydraulic system. Push in the knob and turn anti-clockwise for slow delivery rate. ISOLATING VALVE (15 l/lust.5). This valve is used to isolate the three point linkage. By closing the valve the linkage is hydraulically locked and J70vides a safety device against inadver- tent movement of the position control leVer. Tum the knob clockwise to close. NOTE: The valve must a Iways be fully closed or fully open. DROP RETARDING VALVE (16 IIlust.5) This valva is used to regulate the speed of drop of equipment being lowered. Screw out the knob to slow the speed of drop. LIGHT SWITCH (24 Illust.5) . This is a four position fight switch. First position operates the side. tai I and penel lights. second position operates the side. tail. panel and dipped main beam. third position operates side. tail. panel and full main beam and fourth position operates full main beam only. RADIATOR CURTAIN (Atlachment) Fully pullout the radiator curtain control and lower into the locking groove to lock the curtain in the fully closed position. In freezing conditions always fully close the curtain before starting the engine. then regulate as required to keep the needle of the heat indicator in the 'RUN' range.
INSTRUMENTS AND CONTROLS ,. Instrument panel light 2. Glowplug ind'clJtor 3. Goyernor control Itlver 4. Generlltor and oIl "",urn/flY I/ahts 5. Sl8rt,,, Rnd (JlolA'p/ug Ict! y-S"u .. ,tch 6. Brake peela! /tHch 7. Brake J)edh l s 8. High lOlA' lever 9. DlfferentfiJ: lock pedal 10. Position cont rol levt:f 11. DrlJft control leve r 12. Brake pedHI lock i ng letle!f 13. P.T.D. leller '4. Response! control 15. Isolatinll val ve 16. Drop ftJ'/ilr</Inf} v iJl ve 17. Geilr 't:!\' Hf 18. I .P.T.O. (; Iurch .leVf?' 19. Enuine StOp cunltol 20. Engine c l utch pt c.Jal 21. Horn button 22. HtHH In(/I(;.I(OI 23. I.P.T.O. \'j ;lIJ) l n 9 lIght 24. L.gh/ s ..... ift: h 25. 11 elr.' tvr lllt;!(t!f "'ust.5 /nslfumenls Bnd Contro ls GENERAL This section briefly explains the operation of the. instruments and cOntrol,.,. - ~ o r e details. where necessary. will be found in Ihe relevant operating s''':ti(,,, The operator must be fullyaquainted with the location and operatic ,n"truments and controls and regardless of previous experience. must rio. ... ,...,..ti,," .......... ,....1 .. .,,, npofn,.p ::tttpf'1"'ntinn to OflPr::.tp thp. tn::lrtnr. d II tI1,', .,\
INSTRUMENTS AND CONTROLS GEAR LEVER (17 IIlust.5) This is used to select the required transmission gear ratio. HIGH LOW LEVER (8 Illust.51 This is used to select the high or low speed range for anyone position of the gear lever. BRAKE PEDALS AND 8RAKE PEDAL LATCH (7 & 6 Illust.5) . There are two brake pedals. one for each rear wheel. These are used either latched together to stop the tractor or septrately to facilitate shtrp turning. CAUTION: Always latch the brake pedals together when driving on the highway and in high gear. . BRAKE PEDAL LOCKING LEVER (12 Illust.5) This is an over-centre type hand lever which is used to lock the brake pedals in the engaged position for ptrking purposes. DIFFERENTIAL LOCK PEDAL (9 IIlust.5) This controls the differential lock mechanism which locks the rear a)(le drive shafts together and thus overcanes individual rear wheel slip. CAUTION: Always ensure that the differential lock is disengaged before making tums or travelling on the highway. ENGINE CLUTCH PEDAL (20 IIlust.5) This is used to disengage the drive between the engine and transmission. The clutch is disengaged when the pedal is fully depressed. ENGINE STOP CONTROL (19 IIlust.51 Fully pulling out the engine stop control wi II shut off the fuel SUpply to the engine. The stop control will stay in this position and must be fully pushed forward before starting the engine. GOVERNOR CONTROL LEVER (3 Illust.51 This contrOls the speed of the engine and when set in a given position wi II maintain this speed even though the load may vary. Moving the lever downward will increase the engine speed. KEYSWITCH (5 IIlust.51 Turn the key clockwise to energise the instrument circuit. depress and hold to energise the glowplugs and turn fully clockwise to energise the starting motor. Release the key immediately the engine fires. GLOWPLUG INDICA Tf'l1'! (2 IIlust.51 This indicatE*> "''''ment rPllrhf!g maximlm brilliancp d correct functioning of the glowplug circuit. When the thp. nlowplups have reached the correct
SPECIFICATIONS ELECTRICAL SYSTEM Type . . . . . . . . . . . . ... . . . . . . . . Voltage ............................................................................................ Battery capacity at 20 hour rate ........ amp h Heaq lamps ........................................ watts Tail lamps .......................................... watts Side lamps .......................................... watts Plough lamp ...................................... watts Panel lamp ........................................ watts Warning lamps ...................................... watts Positive f.l<'llth 12 90 ...................... 40/40 sealed heam r, SOC (> SHC 36 SCPFA)(. r, MeC 2.2 f\.'ES BRAKES Type Size Girling disc .................................................. cm (in) .................. 17.78 x 10.1617 x 41 TYRE PRESSURES Refer to WHEEl WEIGHTS AND WATER BAllAST" AVAILABLE TREADS Refer to -WHEEL TREAD SmINGS- CAPACITIES Cooling system .................................. litres (pints) ................. . Fuel tank ............................................ litres (pints) ................. . Crankcase .......................................... litre!: (pints) ................ .. Transmiflsion case ............................ litres (pints) ................ .. Hydraulic reservoir ............................ litres (pints) ................ .. Aircleaner cup .................................. litres (pints) ................. . 25 (44) 77.3 (136) 9.09 (1n) 54.54 (96) 22 (381 1 (1 .751 These capacities are a guide to the quantities required. Always liS ! Ihtl dipsticks or level plugs to ensure that units are ti lied to the correct IPow". SPECIAL TOOOUE VALUES Cylinder head nuts Oil filter retaining bolt .................... kgm (Ibft) .......... Fuel filter bleedscrews Rear wheel to rim Standard axle ................................ kgm (Ibft) Adjustable axle ............................ kgm (Ibft) Front wheel to rim ............................ kgm (Ibft) .......... 22.1 to 24.8 (160 In 1 'W. Rear wheel to axle Standard ........................................ kgm (Ibn) .......... 57.2 to 64.2 (42( I.) . 7,)) Adjustable clamp bolts Adjustable front axle Clamp bolts .................................... kgm (Ibtt) Through bolts .................................. kgm (Ibft) .......................... kgm (Ibn) .......... 15.2 to 15.8 (110 to llS) 4.1 to 4.8 (30 In :l[.j 1.4101.7 (1n 1(112) .................. kgm (lbft) .......... 6.9 to 8.2 (!il) 1( ;1); 12.4 to 15.2 (90 In 1101 .............. kgm (Ibttl .......... 34.5 to 38.7 !25(' '0 :'.:;0, 2C> 7 f 1 r.:" 2n 7 , 1 ' 1\, rRACTOR DIMENSIONS (on 11 x 38 tyres) Wheel base Standard and adjustable axles ...... cm (inl
SPECIFICA liONS TRACTOR DIMENSIONS (on basic tyres) - continued Length overa II Standard and adjustable axles . . . em (in) Height to top of steer ing wheel ..... . em (in) Clearance under rear axle .............. . em (in) Clearance under front axle ............ . em (in) Turning circle at standard tread setting Without brakes .............................. em (inl With brakes ...................................... em (inl Drawber lateral swing ...................... em (in) Alternative elevis heights A ...................................................... em (in) B ...................................................... cm (in) C ...................................................... cm(in) 352 (138.41 174.4 (68.68) 62.1 (24.44) 42.5 (16.75) 851 (3351 716 (2821 54 (21.25) 55 (21.62) 45.4 (17.88) 35.5 (14) OPERATING WEIGHT - approximately Total weight inclusive of fuel. oi I. coolant. hydraulic system and linkage. P.T.O. and lighting .......................... kg (Ibl .................... :....... Distribution Front axle ........................................ kg (Ib) Rear axle ........................................ kg (Ib) 3102.6 (6840) 1161.22 (2560) 1941.38 (4280)
WHEEL TREAD ADJUSTMENT FIXED FRONT AXLE The construction of the wheels and rims for 6.00 l( 19 tyres is SlIch tl1ill they allow the wheel treads to be adjusted from 132 cm (51-3/4 in) t(l 1(il; em (61 in) tread width (lII05t.27). Wheels for 6.00 l( 16 tyres can be mounted to give tread settings 01133 em (52 in) ex 153 em (60 in) and wheels for 7.50 x 16 tyres can be mounted 10 give tread settings of 135 em (53-1/4 in) to 149 em (58-112 in). CAUTION: Always ensure that the rim bolts are tightened to a torque of 22 .1 to 24.8 kgm (160 to 180 Ibft). Il/ust.27 Trelld AdjustmBnt Fixlld FrOn! Axle ADJUSTABLE WIDE TREAD FRONT AXLE This axle adapts the tractor for row crop work and enables the front wh"eh to be set to track with the rear wheels. When wheels with 6.00 x 19 tyres are fitted the available tread wldt!;,. :Jr. 133cm (52 in) to 203 em (80 in) in 10 cm (4 in) increments then 206 cm (81-1 .',1 "' and 216 em (85-1/4 in). 6.00 x 16 tyres give tread widthS of 133 em (';' III) t,. 213 em (84 in) in 10 cm (4 in) increments and 7.50 l( 16 tyres give Ire ,)f 135 cm (53-1/4 in) to 193 em (77-1/4 in) in 10 em (4 in) increm .. " .1"." 19Q r'" t7R-'" inl "nO ,nq t:m tR2-112 inl. ... III\.
WHEEL TREAD ADJUSTMENT ADJUSTMENT - WIDE TREAD FRONT AXLE Raise both front wheels clear of the ground. Loosen the nuts and bolts (1 IIlust.281 on the extension clamps (3 IIlust.28) then remove the through bolts (2 Illust.281 and nuts. Remove the nut (4 IIlust.28) and bolt from the track rod end clamp (5 IIlust. 281. Move the axle extensions to the desired tread setting and move the track rod el<tension to correspond with the front al<le setting. Install the through bolts and nuts in the axle clamps then tighten the through bolts and clamp bolts to a torque of 20.7 kgm (150 Ibftl. Install the nut and bolt in the track rod clamp then securely tighten. NOTE: This adjustment. if carried out correctly. will not affect front wheel "toe-in-. ADJUSTMENT - WIDE TREAD FRONT AXLE WITH POWER STEERING This axle is adjustable for tread widths of 133 cm (52 inl to 193 cm (76 inl in 1 0 em (4 inl increments. The adjustment is similar to the wide tread axle except that the power steering cylinder 133 em and 143 c. must be mOl/ad inward so that the throURh bolts (2 Illust.28) pass through the ~ be moved along the bracket (lliust.291 and to obtain the 1. in and 56 in) settings. the extension clamps (3 Illust.281
Suggest: If the above button click is invalid. Please download this document first, and then click the above link to download the complete manual. Thank you so much for reading
WATER BALLAST AND WHEEL WEIGHTS front p.no wnights. front wheel weights Or water il.'lilast. The ohject 01 Sill I, weighting is to obtain normal and accurate slnering with stallility. For trailed equipment. e.g. trailer ploughs. four wheel tra i Inrs. ha, vm;t, , threshers etc .. the use of wheel weights or water ballast for both front and" ", wheels will improve traction and reduce slip. Use only the minimum weight for maximlm assistance. Excessive \I\I"iO"1 wd, reduce the tractor's performance and increase fuel consumption. CAUTION: When adding weight. consideration must be given to tllp carrY""1 caracity of the tyres and the follOWing tables show the pressure to which Ih,' tyres MUST be inflated when carrying various loads. _. __ ._ ._ 3.374 (48) TYRE PRESSURE kg/cm2 (lb/in2) TYRE SIZE AND .. 3.090 (44) 2.812 (40) 1.406 (20) 1.687 (24) 1.968 (28) 2.249 (32) 2.530 (36) PlY RATING MAXIMUM LOAD ON TYRE kg (Ib) - --- .- 6.00 x 16 4pty 340 (750) 340 (750) 420 (925) 420 (9251 (lOlO) 503 ( 1110) (1235) 449 (990) 449 (990) 538 379 (835) 379 (835) 458 {10101 458 415 (915) 415 (915) 494 (1090) (1185) 494 (1090) (1185) 610 (1345) (1455) 6.00 x 16 6ply 544 (1200) (12601 572 483 (1065) (1130) 513 6.00 x 19 4plY 6.00 x HI C,p!y 646 680 115001 576 (1270) 11350) (14251 708 (1560) 538 612 7.50 " 16 6ply 560 660 TYRE PRESSURE kg/cm2 (lb/in2) TYRE SIZE AND PlY RATING ------ -- 1 .546 (22) r-' 0.843 (12) 0.984 (14) 1.124 ( 16) 1.406 (20) 1.265 (18) MAXIMUM LOAD ON TYRE kg (Ib) ------ - -I .. 10 x 24 6ply 757 ( 1670) 1084 (2390) 1275 (2810) 1647 13630) 1647 (3630) 1950 (4300) 1950 (4300) 925 (2040) 1338 (2950) 1574 13470) 689 11520) 991 (2185) 1166 (2570) 1506 (3320) 1506 (3320) 1787 (3940) 1787 (3940) 816 (1800) 1170 (2580) 1379 (3040) 1778 (3920) 1778 (3920) 2109 (4650) 2109 (4650) 1892 (4170) 875 (1930) 1256 (2770) 1479 (3260) ~ n 5 121S0 I 1'111 (3110 ' 11 x 38 6ply ! i 12 x 38 6plV 14 x 30 6plV 14 x 30 8ply 2032 (4480! 1905 (4200) ~ 1 ! ' I O ' 17-1(1 15 x 30 6pIV . 15 x 30 8ply 2413 (5320) 2259 (4980) 14 x 34 6ply I
https://www.ebooklibonline.com Hello dear friend! Thank you very much for reading. Enter the link into your browser. The full manual is available for immediate download. https://www.ebooklibonline.com