Racking and Mounting of PV Panels: Training Module Overview
This training module delves into the crucial concepts of racking and ground mounting of PV panels, covering different types such as on-roof, ground, pole, weighted, and tracking mounting methods. The module emphasizes safety measures, tools required, and practical applications in the renewable energy sector.
Download Presentation

Please find below an Image/Link to download the presentation.
The content on the website is provided AS IS for your information and personal use only. It may not be sold, licensed, or shared on other websites without obtaining consent from the author.If you encounter any issues during the download, it is possible that the publisher has removed the file from their server.
You are allowed to download the files provided on this website for personal or commercial use, subject to the condition that they are used lawfully. All files are the property of their respective owners.
The content on the website is provided AS IS for your information and personal use only. It may not be sold, licensed, or shared on other websites without obtaining consent from the author.
E N D
Presentation Transcript
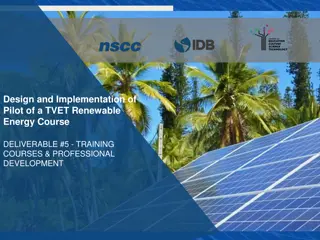
Design and Implementation of Pilot of a TVET Renewable Energy Course DELIVERABLE #5 - TRAINING COURSES & PROFESSIONAL DEVELOPMENT PV Training Session
Racking and Mounting This module introduces the concepts of racking and ground mounting of PV panels.
Racking and Mounting Racking is the bonding of parts. It is the mechanism used to hold the PV panels and all associated equipment. There will be 5 types covered in this module.
Racking and Mounting These 5 types are broken down by the equipment used to either mount or rack the PV panels together. 1. On roof mounting / racking 2. On the ground mounting / racking 3. On a pole mounting 4. Weighted (Ballast) mounting / racking 5. Tracking mounting / racking
Racking and Mounting The second type of racking and mounting to be explored is on the ground mounting / racking Often referred to as ground mount. It can be defined as a system that is anchored to the ground. The details of how these systems are anchored is covered in the Power Point Ground Mount Screws and Anchors .
Racking and Mounting Questions?
Racking and Mounting Before the introduction to racking and mounting. Safety and tools need to be identified. Fall arrest and working from heights are a prerequisite for working on the mounting and racking of PV panels. Ladder and scaffold safety is also required.
Racking and Mounting Tools: Each manufacturer has listed the tools in the instructions manual for their products. IRONRIDGE has given permission to use their information. https://www.ironridge.com/ They have a YOUTUBE channel https://www.youtube.com/c/IronRidgeSolar
Racking and Mounting Common tools are: Wrenches, Screwdrivers, Torque wrench, Rachet with sockets, tape measure, chalk line, stud finder, roofing bar, caulking gun, driver with 1/4 bit and 7/16 hex socket.
Racking and Mounting Ground mounting is when the panels are mounted to a system that is anchored to the ground. Anchored can be an in ground system. Anchored can be a ballasted system.
Racking and Mounting Why ground mount? No roof Roof not able to support panels. Roof is too small. Solar resource availability. Option to have array tiltable.
Racking and Mounting Questions?
Racking and Mounting No roof available to mount the panels. Solar system is not part of a building or there is no building. An example would be a water pumping system. Decorative display of solar panels. The panels are placed in a shape of a flower. Lined up to provide a pathway.
Racking and Mounting Pergolas to provide shade. Another would be a temporary or mobile power consumer. RV or other mobile accommodations Vehicle charging station
Racking and Mounting Questions?
Racking and Mounting Roof not able to support panels because roof is too thin or structurally weak. Out buildings such as sheds or barns that the roof is made from very thin corrugated metal sheets. Thatched roof has no structure that allows the panels to be elevated enough to provide air flow. Asbestos roofing shall not be tampered with.
Racking and Mounting Green roofs are meant to have vegetation growing on them. Panels would block the sun from the vegetation.
Racking and Mounting The roof is too small. The number of panels required take up too much space. The design for a solar PV system is based on required energy capture. Panels shall not be placed too close to the roof lines.
Racking and Mounting Questions?
Racking and Mounting It is easier to have the panels connected to one system and one roof. Splitting them into smaller systems can be complicated. Connecting panels from different locations requires more wire and added costs.
Racking and Mounting The solar resource availability. The roof is not suitable to capture the resource. The pitch is not optimum. The angle is too steep. Beyond a certain angle energy caption is reduced. The orientation is not optimum. It is facing too far in one direction East and West facing produce little energy
Racking and Mounting The roof is shaded. Early morning or late afternoon shading is not bad Midday shading reduces resource capture. Seasonal shading will need to be assessed. The ground area is better suited to capture the resource. Often the ground area will allow for various orientation and tilt options.
Racking and Mounting The ground mount system can be designed to be tilted. Why tilt an array? In Belize and other tropical areas the sun moves past the equator during certain times of the year. Being able to tilt the array to capture more energy when the sun moves past the south and into the north direction.
Racking and Mounting In areas of the world where the sun zenith is low in the winter season. It is desirable to tilt the array lower to capture more of the resource. The day light is shortened as the path it takes across the sky is reduced. The lower tilt allows snow to slide off of the panels.
Racking and Mounting There are two basic anchoring systems. The first is a ballast system which rests on the ground and does not go into the ground. The other is a system that penetrates the ground to anchor and support the racking system.
Racking and Mounting Questions?
Racking and Mounting What are considerations of a ground mount system. Panels are grouped just like on a roof. They are tilted to what ever angle that captures the solar resource best. That is not an option for roof mounted systems. Wind loading is the biggest issue with ground mounts.
Racking and Mounting The panels are held together with the same racking as on the roof. The rails instead of attaching to the roof will attach to a braced metal frame. The frame is can be made from a boxed metal shape or from schedule 40 round pipe. Ironridge has many design options.
Racking and Mounting Ironridge has documented design certifications on their website. Just like the roof, the span between supports is the variable that changes. The span changes based on regional winds. The American Society of Civil Engineers (ASCE) have defined level of wind based on geographic features.
Racking and Mounting Civil Engineers (ASCE) have defined level of wind based on geographic features. Exposure B is urban and residential with buildings less than 30 feet tall. Exposure C is open terrain with buildings less than 30 feet tall. Exposure D is coastal areas with about a mile open to sea. It does not include hurricane prone areas.
Racking and Mounting Questions?
Racking and Mounting The Ironridge certificates can be found at https://base.ironridge.com/ground-based- mounting/resources Navigate to the Certification and select a state. I picked Florida due to it being costal.
Racking and Mounting The option used was 4 panels up vertically with the XR1000 rail system and concrete based pillars. Picture courtesy IRONRIDGE
Racking and Mounting The downloaded certificate can be found at https://files.ironridge.com/groundmounting/certifi cation/XR1000SGA4/IronRidge_XR1000SGA4_ Certification_UFO_FL.pdf Picture courtesy IRONRIDGE
Racking and Mounting It has 57 pages of information. The first page sets out guidelines. The structure is a simple column (pier) and beam (cross pipe) system. The piers & cross pipes are schedule 40 steel pipes or Allied Mechanical Tubing. The tops of the piers are connected in the E-W direction by the cross pipes which cantilever over and extend past the end piers. The cross pipes are connected by proprietary IronRidge XR1000 Rails spanning up and down the slope which cantilever over and extend past the top and bottom cross pipes. There are typically two rails per column of modules. The modules are clamped to the rails by the IronRidge Module Mounting Clamps as shown in the attached Exhibit.
Racking and Mounting Picture courtesy IRONRIDGE
Racking and Mounting Picture courtesy IRONRIDGE
Racking and Mounting Picture courtesy IRONRIDGE
Racking and Mounting Picture courtesy IRONRIDGE
Racking and Mounting The pier spacing in the N-S direction is 7 -6 . The pier spacing in the E-W direction is selected from load tables determined by the structural design for the specified slope, wind load, and snow load.
Racking and Mounting This is the first of 12 span tables. Exposures from B to D are included in the tables. The maximum wind speed is 160 mph. Picture courtesy IRONRIDGE
Racking and Mounting Tables are for 2 and 3 inch piped frames that are either braced or unbraced. Picture courtesy IRONRIDGE
Racking and Mounting Spacing is 27 . Picture courtesy IRONRIDGE
Racking and Mounting Spacing is 82 . Picture courtesy IRONRIDGE
Racking and Mounting To see the results of pipe size and bracing the following conditions are looked at. Exposure D windspeed 100 mph and 40 degree tilt. For the 2 pipe unbraced the maximum span is 27 Same pipe braced the span can be increased to 82
Racking and Mounting Spacing is 83 . Picture courtesy IRONRIDGE
Racking and Mounting Spacing is 144 . Picture courtesy IRONRIDGE
Racking and Mounting To see the results of pipe size and bracing the following conditions are looked at. Exposure D windspeed 100 mph and 40 degree tilt. For the 3 pipe unbraced the maximum span is 83 Same pipe braced the span can be increased to 144
Racking and Mounting To analyze these differences one can make the conclusion that the larger the pipe the stronger it is and can take the wind forces with fewer supports. Adding braces also significantly increased the strength of the frame.
Racking and Mounting Questions?
