Learning Tutorial Observation Methods
This tutorial introduces two methods for observing presentations - the Standard Method allowing user-resizable content and the Slide Show Method for full-screen viewing. The guide includes step-by-step instructions and visuals to help users navigate through the learning process effectively.
Download Presentation

Please find below an Image/Link to download the presentation.
The content on the website is provided AS IS for your information and personal use only. It may not be sold, licensed, or shared on other websites without obtaining consent from the author.If you encounter any issues during the download, it is possible that the publisher has removed the file from their server.
You are allowed to download the files provided on this website for personal or commercial use, subject to the condition that they are used lawfully. All files are the property of their respective owners.
The content on the website is provided AS IS for your information and personal use only. It may not be sold, licensed, or shared on other websites without obtaining consent from the author.
E N D
Presentation Transcript
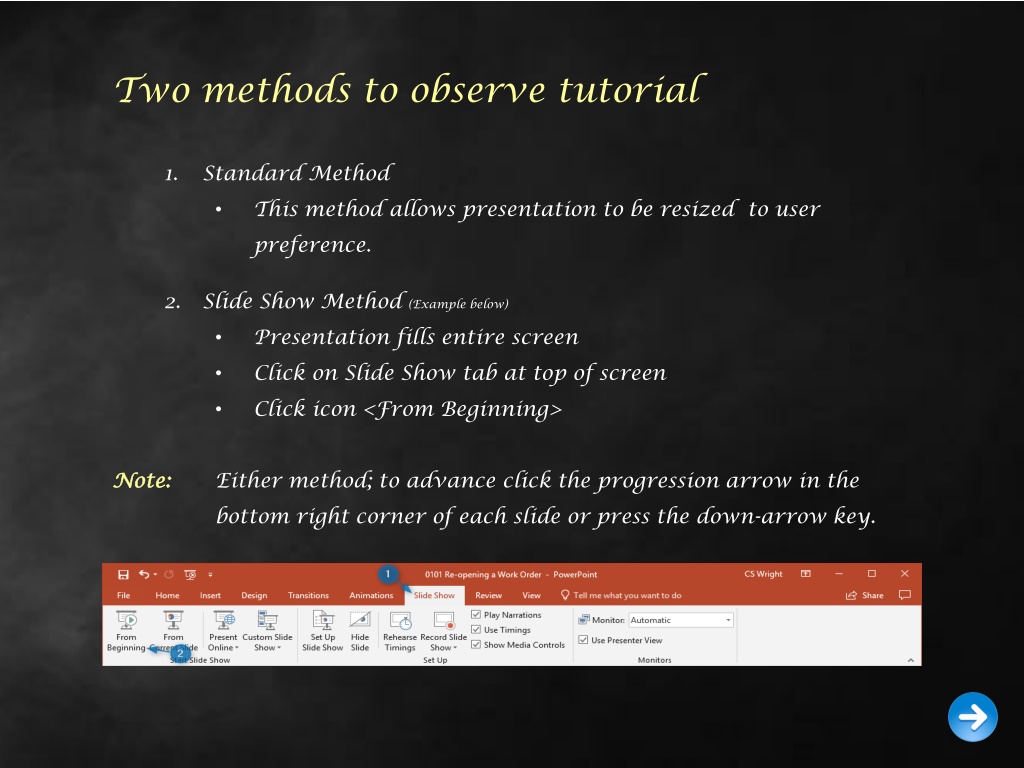
Two methods to observe tutorial 1. Standard Method This method allows presentation to be resized to user preference. 2. Slide Show Method (Example below) Presentation fills entire screen Click on Slide Show tab at top of screen Click icon <From Beginning> Note: Note: Either method; to advance click the progression arrow in the bottom right corner of each slide or press the down-arrow key.
Welcome to BSIP 101 Transaction Procedures Preventative Maintenance Review & Print Instructor: Stephen Wright DPI Technical Consultant
Purpose: Purpose: Review and print DP02Preventative Maintenance work orders
One transaction is required to complete this procedure: ZIP24 Let s get started -
Window: SAP R/3 Easy Access Input ZIP24; or Favorites menu, <Select> transaction ZIP24 Maintenance Scheduling
Window opens: Maintenance Scheduling: Selection Criteria <Click> Get Variant icon
Window opens: Maintenance Scheduling: Selection Criteria Find Variant Variant Field Input DPI* Created By Field Remove username <Click> Execute icon
Window opens: Maintenance Scheduling: Selection Criteria ABAP: Variant Directory of Program ZEV_RIMHI000 <Double-Click> DPI_PM
Window opens: Maintenance Scheduling: Selection Criteria Maintenance Plant Field Input four- digit code (i.e., Alamance = 6001) <Click> Execute icon
Window opens: Maintenance Scheduling: Maintenance Scheduling Overview List Column Descriptions Maintenance item description Field SAP inventory number and type of maintenance schedule. Order Field Work order Due Packages Field Inspection type Sort Field (Optional) Mechanics name, School, etc. Counter Reading Field Mileage at time of refueling Next Plan Count Reading Field Counter reading before the PM is late Total Count Reading Field Total miles (includes vehicles with odometer replacements and odometers which have rolled over)
Window opens: Maintenance Scheduling: Maintenance Scheduling Overview List Column Descriptions (Continued) Difference Field Difference between the last mileage entered (Counter Reading) and the mileage when the vehicle will be due a PM (NxtPlan CountReading field). Work Order Status (Important) CRTD = Created REL = Released TECO = Technically Completed CNF = Confirmed PRT = Printed NMAT = No material components MANC = Material availability not checked PRC = Pre-costed
Window opens: Maintenance Scheduling: Maintenance Scheduling Overview List Column Descriptions (Continued) Maintenance Plan SAP maintenance plan number for each vehicle (The schedule for when PM s are due) Equipment SAP generated equipment number of vehicle
Window opens: Maintenance Scheduling: Maintenance Scheduling Overview List Make Selection (Three Methods) Select Individually <Click> Select icon to the left of the row. Select multiple rows by holding <Ctrl> key and clicking; or Select Group <Click> Select icon of the top-left of the group Hold <Shift> key <Click> Select icon of the bottom-left of the group ; or Select All <Click> Select All icon
Window opens: Maintenance Scheduling: Maintenance Scheduling Overview List <Click> Environment (Top Menu) <Click> Orders
Window opens: Change PM Orders: List of Orders <Click> Select All icon <Click> Change Display icon <Click> Release order icon
Window opens: Change PM orders: List of Orders <Click> Update icon Tip: REL will automatically display in the System Status column for each work order released
Window opens: Change PM orders: List of Orders <Click> Select All icon <Click> Order (Third Menu)
Window opens: Display DPI Preventative Maintenance Order {Work Order}: Central Header <Click> Order (Top Menu) <Click> Print <Click> Order
Window opens: Display DPI Preventative Maintenance Order {Work Order}: Central Header Select Shop Papers <Click> Select icon (Left of Maintenance Order To select) <Click> Select icon (Left of DPI 30 Day Inspection To unselect) <Click> Tip: Repeat as necessary
Window opens: Change PM orders: List of Orders <Click> Update icon Tip: PRT will automatically display in the System Status column for each work order printed <Click> Back icon <Click> Exit icon (Twice)
Questions Questions Email: Email: Stephen.Wright@dpi.nc.gov
Thank You! Thank You! Stephen Wright Stephen Wright DPI Technical Consultant DPI Technical Consultant
