Caterpillar Cat 340F Excavator (Prefix SGH) Service Repair Manual Instant Download
Please open the website below to get the complete manualnn// n
Download Presentation

Please find below an Image/Link to download the presentation.
The content on the website is provided AS IS for your information and personal use only. It may not be sold, licensed, or shared on other websites without obtaining consent from the author. Download presentation by click this link. If you encounter any issues during the download, it is possible that the publisher has removed the file from their server.
E N D
Presentation Transcript
Service Repair Manual Models 340F Excavator
340F Excavator SGH00001-UP (MACHINE) POWERED BY C9.3 Engine(M007991... 1/8 Shutdown SIS Previous Screen Product: EXCAVATOR Model: 340F EXCAVATOR SGH Configuration: 340F Excavator SGH00001-UP (MACHINE) POWERED BY C9.3 Engine Disassembly and Assembly 340F Excavator Machine Systems Media Number -UENR6797-01 Publication Date -01/09/2015 Date Updated -21/12/2016 i05393341 Swing Drive - Disassemble SMCS - 5459-015 S/N - DKF1-UP S/N - RBC1-UP S/N - SGH1-UP S/N - ZBJ1-UP Disassembly Procedure Table 1 Required Tools Tool Part Number Part Description Qty A 138-7573 Link Bracket 2 B 5P-5197 Retaining Ring Pliers As 1 Start By: a. Remove the swing drive. 1. Position the swing drive onto suitable cribbing. The weight of the swing drive is approximately 281 kg (620 lb). 2. Put an alignment mark on the cover and the housing of the swing drive for assembly purposes. https://127.0.0.1/sisweb/sisweb/techdoc/techdoc_print_page.jsp?returnurl=/sis... 2020/12/11
340F Excavator SGH00001-UP (MACHINE) POWERED BY C9.3 Engine(M007991... 2/8 Illustration 1 g02115775 3. Attach Tooling (A) and a suitable lifting device to cover (2). The weight of cover (2) is approximately 23 kg (51 lb). Remove bolts (1) and cover (2). Illustration 2 g02115813 4. Remove sun gear (3) and spacer (4). 5. Use two people in order to remove carrier assembly (5). The weight of carrier assembly (5) is approximately 23 kg (50 lb). Illustration 3 g02115814 https://127.0.0.1/sisweb/sisweb/techdoc/techdoc_print_page.jsp?returnurl=/sis... 2020/12/11
https://www.ebooklibonline.com Hello dear friend! Thank you very much for reading. Enter the link into your browser. The full manual is available for immediate download. https://www.ebooklibonline.com
340F Excavator SGH00001-UP (MACHINE) POWERED BY C9.3 Engine(M007991... 3/8 6. Drive spring pin (10) into planetary shaft (6) with a suitable hammer and a suitable punch. 7. Remove planetary shaft (6), thrust washer (7), thrust washer (11), planetary gear (9), and bearing assembly (8) from the carrier assembly. 8. Remove spring pin (10) from planetary shaft (6) with a suitable hammer and a suitable punch. 9. Repeat Step 6 through Step 8 in order to remove the other three planetary gears from the carrier assembly. Illustration 4 g02115853 10. Remove retaining ring (12) and sun gear (14) from the carrier. 11. Remove retaining ring (13) from sun gear (14). Illustration 5 g02115915 https://127.0.0.1/sisweb/sisweb/techdoc/techdoc_print_page.jsp?returnurl=/sis... 2020/12/11
340F Excavator SGH00001-UP (MACHINE) POWERED BY C9.3 Engine(M007991... 4/8 Illustration 6 g02115916 12. Remove spacer (16). 13. Remove retaining ring (15) that holds carrier assembly (17) in position. 14. Use a suitable piece of steel bar stock between the planetary gears in carrier assembly (17). Make sure that the steel bar stock is centered in carrier assembly (17). Attach a suitable lifting device to the steel bar stock. Slowly lift carrier assembly (17) from the swing drive housing. The weight of carrier assembly (17) is approximately 39 kg (86 lb). Illustration 7 g02115917 15. Drive spring pin (22) into planetary shaft (19) with a suitable hammer and a suitable punch. 16. Remove planetary shaft (19), thrust washer (18), thrust washer (23), planetary gear (21), and bearing assemblies (20) from the carrier assembly. 17. Remove spring pin (22) from planetary shaft (19) with a suitable hammer and a suitable punch. 18. Repeat Step 15 through Step 17 in order to remove the other three planetary gears from the carrier assembly. https://127.0.0.1/sisweb/sisweb/techdoc/techdoc_print_page.jsp?returnurl=/sis... 2020/12/11
340F Excavator SGH00001-UP (MACHINE) POWERED BY C9.3 Engine(M007991... 5/8 Illustration 8 g02115919 19. Attach Tooling (A) and a suitable lifting device to ring gear (24). The weight of ring gear (24) is approximately 39 kg (86 lb). Remove ring gear (24). Illustration 9 g02116593 20. Use Tooling (B) in order to remove retaining ring (25). Illustration 10 g03409949 https://127.0.0.1/sisweb/sisweb/techdoc/techdoc_print_page.jsp?returnurl=/sis... 2020/12/11
340F Excavator SGH00001-UP (MACHINE) POWERED BY C9.3 Engine(M007991... 6/8 Illustration 11 g03409942 21. Attach Tooling (A) and a suitable lifting device to swing drive housing (26). Position swing drive housing (26) in a suitable press. The combined weight of swing drive housing (26), the pinion shaft, and the bearing cage is approximately 136 kg (300 lb). 22. Position suitable cribbing directly under the pinion shaft in order to prevent the pinion shaft from falling when pressed out. 23. Remove pinion shaft (28) and spacer (27) from swing drive housing (26). https://127.0.0.1/sisweb/sisweb/techdoc/techdoc_print_page.jsp?returnurl=/sis... 2020/12/11
340F Excavator SGH00001-UP (MACHINE) POWERED BY C9.3 Engine(M007991... 7/8 Illustration 12 g03410004 24. Put an alignment mark on cage (30) and swing drive housing (26) for assembly purposes. 25. Remove bolts (29) that secure cage (30) to the swing drive housing. Remove cage (30), O- ring seal (31), and bearing (33). 26. Remove lip seals (28) from cage (30). Illustration 13 g03410014 27. Remove bearing (34) from swing drive housing (26). https://127.0.0.1/sisweb/sisweb/techdoc/techdoc_print_page.jsp?returnurl=/sis... 2020/12/11
340F Excavator SGH00001-UP (MACHINE) POWERED BY C9.3 Engine(M007991... 1/7 Shutdown SIS Previous Screen Product: EXCAVATOR Model: 340F EXCAVATOR SGH Configuration: 340F Excavator SGH00001-UP (MACHINE) POWERED BY C9.3 Engine Disassembly and Assembly 340F Excavator Machine Systems Media Number -UENR6797-01 Publication Date -01/09/2015 Date Updated -21/12/2016 i06272523 Swing Drive - Disassemble SMCS - 5459-015 S/N - EAR1-UP S/N - SGH1-UP S/N - YBF1-UP Disassembly Procedure Table 1 Required Tools Tool Part Number Part Description Qty A 439-3938 Link Bracket 2 Start By: a. Remove the swing drive. Note: Cleanliness is an important factor. Before the disassembly procedure, the exterior of the component should be thoroughly cleaned. This will prevent dirt from entering the internal mechanism. NOTICE Keep all parts clean from contaminants. Contamination of the hydraulic system with foreign material will reduce the service life of the hydraulic system components. https://127.0.0.1/sisweb/sisweb/techdoc/techdoc_print_page.jsp?returnurl=/sis... 2020/12/11
340F Excavator SGH00001-UP (MACHINE) POWERED BY C9.3 Engine(M007991... 2/7 To prevent contaminants from entering the hydraulic system, always plug or cap the lines, fittings, or hoses as they are disconnected. Cover any disassembled components and clean them properly before assembly. Clean the hydraulic system properly after any major component exchange or especially after a component failure, to remove any contamination. 1. Position the swing drive onto suitable cribbing. The weight of the swing drive is approximately 514 kg (1133 lb). 2. Put an alignment mark on the cover and the housing of the swing drive for assembly purposes. Illustration 1 g02115775 3. Attach Tooling (A) and a suitable lifting device to cover (2). The weight of cover (2) is approximately 23 kg (51 lb). Remove bolts (1) and cover (2). Illustration 2 g03879823 4. Remove sun gear (3) and spacer (4). https://127.0.0.1/sisweb/sisweb/techdoc/techdoc_print_page.jsp?returnurl=/sis... 2020/12/11
340F Excavator SGH00001-UP (MACHINE) POWERED BY C9.3 Engine(M007991... 3/7 5. Use two people to remove carrier assembly (5). The weight of carrier assembly (5) is approximately 23 kg (50 lb). Illustration 3 g03879897 6. Remove retaining ring (6). 7. Remove planetary shaft (10), thrust washer (7), thrust washer (11), planetary gear (8), and bearing assembly (9) from the carrier assembly. 8. Repeat Step 4 through Step 7 to remove the other two planetary gears from the carrier assembly. Illustration 4 g03879903 9. Remove retaining ring (12) and sun gear (14) from the carrier. 10. Remove retaining ring (13) from sun gear (14). https://127.0.0.1/sisweb/sisweb/techdoc/techdoc_print_page.jsp?returnurl=/sis... 2020/12/11
340F Excavator SGH00001-UP (MACHINE) POWERED BY C9.3 Engine(M007991... 4/7 Illustration 5 g02115915 Illustration 6 g03879905 11. Remove spacer (16). 12. Remove retaining ring (15) that holds carrier assembly (17) in position. 13. Use a suitable piece of steel bar stock between the planetary gears in carrier assembly (17). Make sure that the steel bar stock is centered in carrier assembly (17). Attach a suitable lifting device to the steel bar stock. Slowly lift carrier assembly (17) from the swing drive housing. The weight of carrier assembly (17) is approximately 70 kg (154 lb). Illustration 7 g03879907 https://127.0.0.1/sisweb/sisweb/techdoc/techdoc_print_page.jsp?returnurl=/sis... 2020/12/11
340F Excavator SGH00001-UP (MACHINE) POWERED BY C9.3 Engine(M007991... 5/7 14. Drive spring pin (22) into planetary shaft (19) with a suitable hammer and a suitable punch. 15. Remove planetary shaft (19), thrust washers (18), planetary gear (21), and bearing assemblies (20) from the carrier assembly. 16. Remove spring pin (22) from planetary shaft (19) with a suitable hammer and a suitable punch. 17. Repeat Step 14 through Step 16 to remove the other three planetary gears from the carrier assembly. Illustration 8 g03879916 Illustration 9 g03879914 18. Attach Tooling (A) and a suitable lifting device to ring gear (23). The weight of ring gear (23) is approximately 60 kg (132 lb). 19. Remove bolts (24) and ring gear (23). https://127.0.0.1/sisweb/sisweb/techdoc/techdoc_print_page.jsp?returnurl=/sis... 2020/12/11
340F Excavator SGH00001-UP (MACHINE) POWERED BY C9.3 Engine(M007991... 6/7 Illustration 10 g02116593 20. Remove retaining ring (25). Illustration 11 g03409949 Illustration 12 g03879933 21. Attach Tooling (A) and a suitable lifting device to swing drive housing (26). Position swing drive housing (26) in a suitable press. The combined weight of swing drive housing (26), the pinion shaft, and the bearing cage is approximately 292 kg (644 lb). 22. Position suitable cribbing directly under the pinion shaft to prevent the pinion shaft from falling when pressed out. https://127.0.0.1/sisweb/sisweb/techdoc/techdoc_print_page.jsp?returnurl=/sis... 2020/12/11
340F Excavator SGH00001-UP (MACHINE) POWERED BY C9.3 Engine(M007991... 7/7 23. Remove pinion shaft (28) and spacer (27) from swing drive housing (26). Illustration 13 g03879949 24. Put an alignment mark on cage (30) and swing drive housing (26) for assembly purposes. 25. Remove bolts (29) that secure cage (30) to the swing drive housing. Remove cage (30), O- ring seal (31), and bearing (33). 26. Remove lip seals (32) from cage (30). Illustration 14 g03410014 27. Remove bearing (34) from swing drive housing (26). Copyright 1993 - 2020 Caterpillar Inc. Fri Dec 11 11:03:04 UTC+0800 2020 All Rights Reserved. Private Network For SIS Licensees. https://127.0.0.1/sisweb/sisweb/techdoc/techdoc_print_page.jsp?returnurl=/sis... 2020/12/11
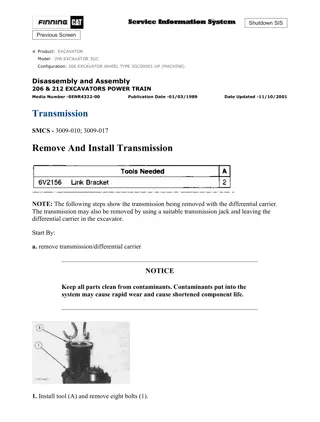
340F Excavator SGH00001-UP (MACHINE) POWERED BY C9.3 Engine(M007991... 1/8 Shutdown SIS Previous Screen Product: EXCAVATOR Model: 340F EXCAVATOR SGH Configuration: 340F Excavator SGH00001-UP (MACHINE) POWERED BY C9.3 Engine Disassembly and Assembly 340F Excavator Machine Systems Media Number -UENR6797-01 Publication Date -01/09/2015 Date Updated -21/12/2016 i03873519 Swing Drive - Assemble SMCS - 5459-016 S/N - DKF1-UP S/N - RBC1-UP S/N - SGH1-UP S/N - ZBJ1-UP Assembly Procedure Table 1 Required Tools Tool Part Number Part Description Qty A 138-7573 Link Bracket 2 B 5P-5197 Retaining Ring Pliers As 1 C 5P-3931 Anti-Seize Compound - D 5P-0960 Grease Cartridge - E 1U-8846 Gasket Sealant - https://127.0.0.1/sisweb/sisweb/techdoc/techdoc_print_page.jsp?returnurl=/sis... 2020/12/11
340F Excavator SGH00001-UP (MACHINE) POWERED BY C9.3 Engine(M007991... 2/8 Illustration 1 g02116597 Illustration 2 g02117257 1. Install lip seals (33) in cage (27), as shown. Apply Tooling (D) to the lips of lip seals (33). Install O-ring seal (32). Illustration 3 g02117583 Note: Do not damage the lip seals when cage (27) is installed over pinion shaft (31). 2. Apply Tooling (C) to the inside diameter and the outside diameter of bearing (30). 3. Lower the temperature of pinion shaft (31). Carefully install cage (27) over pinion shaft (31). Use a suitable press in order to install roller bearing (30) on pinion shaft (31). Install spacer (29). https://127.0.0.1/sisweb/sisweb/techdoc/techdoc_print_page.jsp?returnurl=/sis... 2020/12/11
340F Excavator SGH00001-UP (MACHINE) POWERED BY C9.3 Engine(M007991... 3/8 Illustration 4 g02117588 4. Attach Tooling (A) and a suitable lifting device to swing drive housing (28). The weight of swing drive housing (28) is approximately 86 kg (190 lb). Position swing drive housing (28) in a suitable press. 5. Position pinion shaft (31), cage (27), roller bearing (30), and spacer (29) as a unit in swing drive housing (28). Use the suitable press in order to install pinion shaft (31), cage (27), roller bearing (30), and spacer (29) as a unit. Make sure that the alignment marks that were made on cage (27) and on swing drive housing (28) are in alignment. 6. Install bolts (26). Illustration 5 g02117834 7. Reposition swing drive housing (28) with pinion shaft (31) upside-down. The combined weight of swing drive housing (28), pinion shaft (31), and the cage is approximately 136 kg (300 lb). Position the unit in a suitable press. Support the unit on the end of pinion shaft (31). 8. Apply Tooling (C) to the inside diameter and the outside diameter of roller bearing (34). Use a suitable sleeve and a suitable press in order to install roller bearing (34). Install roller bearing (34). https://127.0.0.1/sisweb/sisweb/techdoc/techdoc_print_page.jsp?returnurl=/sis... 2020/12/11
340F Excavator SGH00001-UP (MACHINE) POWERED BY C9.3 Engine(M007991... 4/8 Illustration 6 g02116593 9. Use Tooling (B) to install retaining ring (25). Illustration 7 g02115919 10. Attach Tooling (A) and a suitable lifting device to ring gear (24). Apply Tooling (E) to the mating surface of ring gear (24) and the swing drive housing. Install ring gear (24). Illustration 8 g02115917 Note: Make sure that the spring pin hole in planetary shaft (19) is aligned with the spring pin hole in the carrier. https://127.0.0.1/sisweb/sisweb/techdoc/techdoc_print_page.jsp?returnurl=/sis... 2020/12/11
340F Excavator SGH00001-UP (MACHINE) POWERED BY C9.3 Engine(M007991... 5/8 11. Install bearing assemblies (20), planetary gear (21), thrust washer (18), thrust washer (23), planetary shaft (19), and spring pin (22) into the carrier. Install spring pin (22) until spring pin (22) is even with the outside surface of the carrier. Align the split in spring pin (22) to the top or the bottom. Illustration 9 g02117533 12. Make a stake mark on each side of the spring pin hole in the carrier, as shown. This will prevent the spring pin from falling out of the spring pin hole. Make a stake mark at Dimension (X). Dimension (X) is 1.5 mm (0.06 inch). 13. Repeat Step 11 through Step 12 in order to install the other three planetary gears in the carrier assembly. Illustration 10 g02115916 Illustration 11 g02115915 https://127.0.0.1/sisweb/sisweb/techdoc/techdoc_print_page.jsp?returnurl=/sis... 2020/12/11
340F Excavator SGH00001-UP (MACHINE) POWERED BY C9.3 Engine(M007991... 6/8 14. Use a suitable piece of steel bar stock between the planetary gears in carrier assembly (17). Make sure that the steel bar stock is centered in carrier assembly (17). Attach a suitable lifting device to the suitable steel bar stock. The weight of carrier assembly (17) is approximately 39 kg (86 lb). Carefully, lower carrier assembly (17) into position in the ring gear. 15. Install retaining ring (15) that secures carrier assembly (17) in position. 16. Install spacer (16). Illustration 12 g02115853 17. Install retaining ring (13) in sun gear (14). 18. Position sun gear (14) in the carrier and install retaining ring (12). Illustration 13 g02115814 19. Install bearing assembly (8), planetary gear (9), thrust washer (7), thrust washer (11), planetary shaft (6), and spring pin (10) in the carrier. Install spring pin (10) until spring pin (10) is even with the outside surface of the carrier. Align the split in spring pin (10) to the top or the bottom. https://127.0.0.1/sisweb/sisweb/techdoc/techdoc_print_page.jsp?returnurl=/sis... 2020/12/11
340F Excavator SGH00001-UP (MACHINE) POWERED BY C9.3 Engine(M007991... 7/8 Illustration 14 g02117533 20. Make a stake mark on each side of the spring pin hole in the carrier, as shown. This will prevent the spring pin from falling out of the spring pin hole. Make a stake mark at Dimension (X). Dimension (X) is 1.5 mm (0.06 inch). 21. Repeat Step 19 through Step 20 in order to install the other three planetary gears in the carrier assembly. Illustration 15 g02115813 22. Use two people in order to install carrier assembly (5). The weight of carrier assembly (5) is approximately 23 kg (50 lb). 23. Install spacer (4) and sun gear (3). Illustration 16 g02115775 https://127.0.0.1/sisweb/sisweb/techdoc/techdoc_print_page.jsp?returnurl=/sis... 2020/12/11
340F Excavator SGH00001-UP (MACHINE) POWERED BY C9.3 Engine(M007991... 8/8 24. Apply Tooling (E) on the mating surfaces of the ring gear and cover (2). Attach Tooling (A) and a suitable lifting device to cover (2). The weight of cover (2) is approximately 23 kg (51 lb). Install cover (2). 25. Install bolts (1). Tighten bolts (1) to a torque of 270 40 N m (200 30 lb ft). End By: a. Install the swing drive. Copyright 1993 - 2020 Caterpillar Inc. Fri Dec 11 11:04:01 UTC+0800 2020 All Rights Reserved. Private Network For SIS Licensees. https://127.0.0.1/sisweb/sisweb/techdoc/techdoc_print_page.jsp?returnurl=/sis... 2020/12/11
340F Excavator SGH00001-UP (MACHINE) POWERED BY C9.3 Engine(M007991... 1/8 Shutdown SIS Previous Screen Product: EXCAVATOR Model: 340F EXCAVATOR SGH Configuration: 340F Excavator SGH00001-UP (MACHINE) POWERED BY C9.3 Engine Disassembly and Assembly 340F Excavator Machine Systems Media Number -UENR6797-01 Publication Date -01/09/2015 Date Updated -21/12/2016 i06273870 Swing Drive - Assemble SMCS - 5459-016 S/N - EAR1-UP S/N - SGH1-UP S/N - YBF1-UP Assembly Procedure Table 1 Required Tools Tool Part Number Part Description Qty A 439-3938 Link Bracket 2 B - Loctite C5A Copper Anti-Seize - C 452-6006 Grease - D - Loctite 5188 - https://127.0.0.1/sisweb/sisweb/techdoc/techdoc_print_page.jsp?returnurl=/sis... 2020/12/11
340F Excavator SGH00001-UP (MACHINE) POWERED BY C9.3 Engine(M007991... 2/8 Illustration 1 g02116597 Illustration 2 g02117257 1. Install lip seals (33) in cage (27), as shown. Apply Tooling (C) to the lips of lip seals (33). Install O-ring seal (32). Illustration 3 g02117583 Note: Do not damage the lip seals when cage (27) is installed over pinion shaft (31). 2. Apply Tooling (B) to the inside diameter and the outside diameter of bearing (30). 3. Lower the temperature of pinion shaft (31). Carefully install cage (27) over pinion shaft (31). Use a suitable press to install roller bearing (30) on pinion shaft (31). Install spacer (29). https://127.0.0.1/sisweb/sisweb/techdoc/techdoc_print_page.jsp?returnurl=/sis... 2020/12/11
Suggest: If the above button click is invalid. Please download this document first, and then click the above link to download the complete manual. Thank you so much for reading
340F Excavator SGH00001-UP (MACHINE) POWERED BY C9.3 Engine(M007991... 3/8 Illustration 4 g02117588 4. Attach Tooling (A) and a suitable lifting device to swing drive housing (28). The weight of swing drive housing (28) is approximately 148 kg (326 lb). Position swing drive housing (28) in a suitable press. 5. Position pinion shaft (31), cage (27), roller bearing (30), and spacer (29) as a unit in swing drive housing (28). Use the suitable press to install pinion shaft (31), cage (27), roller bearing (30), and spacer (29) as a unit. Make sure that the alignment marks that were made on cage (27) and swing drive housing (28) during the disassembly. 6. Install bolts (26). Illustration 5 g02117834 7. Reposition swing drive housing (28) with pinion shaft (31) upside-down. The combined weight of swing drive housing (28), pinion shaft (31), and the cage is approximately 292 kg (644 lb). Position the unit in a suitable press. Support the unit on the end of pinion shaft (31). 8. Apply Tooling (B) to the inside diameter and the outside diameter of roller bearing (34). Use a suitable sleeve and a suitable press to install roller bearing (34). Install roller bearing (34). https://127.0.0.1/sisweb/sisweb/techdoc/techdoc_print_page.jsp?returnurl=/sis... 2020/12/11
https://www.ebooklibonline.com Hello dear friend! Thank you very much for reading. Enter the link into your browser. The full manual is available for immediate download. https://www.ebooklibonline.com

