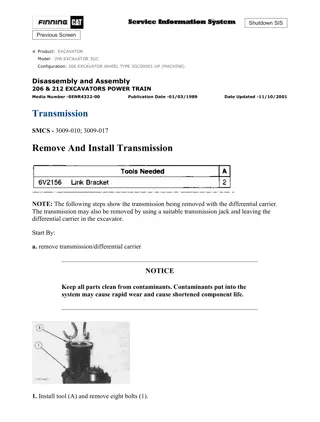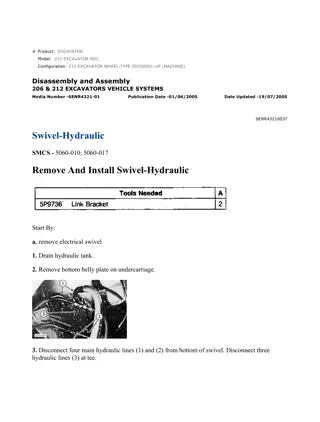
Caterpillar Cat 322N EXCAVATOR (Prefix 9JL) Service Repair Manual Instant Download
Please open the website below to get the complete manualnn// n
Download Presentation

Please find below an Image/Link to download the presentation.
The content on the website is provided AS IS for your information and personal use only. It may not be sold, licensed, or shared on other websites without obtaining consent from the author. Download presentation by click this link. If you encounter any issues during the download, it is possible that the publisher has removed the file from their server.
E N D
Presentation Transcript
Service Repair Manual Model 322NEXCAVATOR
322 L, 322 LN AND 322 N EXCAVATORS 9JL00001-UP (MACHINE) POWERED ... 1/3 Shutdown SIS Previous Screen Product: EXCAVATOR Model: 322-A N EXCAVATOR 9JL Configuration: 322 L, 322 LN AND 322 N EXCAVATORS 9JL00001-UP (MACHINE) POWERED BY 3116 ENGINE Disassembly and Assembly Air Conditioning and Heating R134a for All Caterpillar Machines Media Number -SENR5664-31 Publication Date -01/05/2015 Date Updated -23/10/2018 i05907617 General Information SMCS - 1808; 7309 Refrigeration System Personal injury can result from contact with refrigerant. This system is under pressure at all times, even if the engine is not running. Heat should never be applied to a charged system. Contact with refrigerant can cause frost bite. Keep face and hands away to help prevent injury. Protective goggles must always be worn when refrigerant lines are opened, even if the gauges indicate the system is empty of refrigerant. Always use caution when a fitting is removed. Slowly loosen the fitting. If the system is still under pressure, evacuate the system recovering the refrigerant before removing the fitting. Personal injury or death can result from inhaling refrigerant through a lit cigarette. Inhaling air conditioner refrigerant gas through a lit cigarette or other smoking method or inhaling fumes released from a flame contacting air conditioner refrigerant gas, can cause bodily harm or death. Do not smoke when servicing air conditioners or wherever refrigerant gas may be present. Before any checks of the air conditioning and heating system are made, move the machine to a smooth horizontal surface. Lower all implements https://127.0.0.1/sisweb/sisweb/techdoc/techdoc_print_page.jsp?returnurl=/sis... 2019/9/12
322 L, 322 LN AND 322 N EXCAVATORS 9JL00001-UP (MACHINE) POWERED ... 2/3 to the ground. Make sure the transmission is in neutral or park and that the parking brake is engaged. Keep all other personnel away from the machine or where they can be seen. Personal injury can result from hot coolant. Any contact with hot coolant or with steam can cause severe burns. Allow cooling system components to cool before the cooling system is drained. All refrigerant lines that are metal or flexible hose must be free of sharp bends. Also, do not use a refrigerant line that is kinked. Sharp bends will cause a restriction in the refrigerant flow. Restrictions in the refrigerant lines are identified by cold spots or frost on the line at the location of the restriction. Restrictions in the lines reduce the performance and the efficiency of the system. The radius of bends in the flexible hose must never be less than ten times the outside diameter of the hose. Do not allow the flexible hoses to come within 63.5 mm (2.50 inch) of the exhaust manifold. The hoses need to be inspected yearly for leaks and for hardness. Conduct a leak test on all the hoses and the lines. Refer to the Testing and Adjusting, "Refrigerant Leakage - Test" section. Replace hoses if leaks or hardness are in the hoses. Replace hoses with new hose that is sealed and free of contaminants. The correct use of wrenches is important when connections are made. The type of wrench that is used is also important. Only use wrenches that are made for use with tube-type fittings. When a hose is connected or disconnected from the system, use a wrench on the fitting and use a wrench on the nut. When a metal line is connected or disconnected from the system, use a wrench on the fitting and use a wrench on the nut. Install protective plugs or protective caps on all components and hoses that are disconnected or removed. O-ring seals and O-ring seats must be in good condition. Small cuts, scratches, or particles of dirt will cause a leak in the system. Put new mineral oil (397-7507) on all new O-ring seals at the time of installation. Do not use any sealant on connections. Dust caps on the compressor block fittings are the primary seals on the air conditioning system. All machines should have an identification tag that specifies the refrigerant charge for the machine. The tag should be located in the operator compartment. https://127.0.0.1/sisweb/sisweb/techdoc/techdoc_print_page.jsp?returnurl=/sis... 2019/9/12
https://www.ebooklibonline.com Hello dear friend! Thank you very much for reading. Enter the link into your browser. The full manual is available for immediate download. https://www.ebooklibonline.com
322 L, 322 LN AND 322 N EXCAVATORS 9JL00001-UP (MACHINE) POWERED ... 3/3 If water is in the vents, check the non-return valve. If water leaks from the air conditioning system, check the non-return valve. The non-return valve should have the proper position and the proper direction. If engine coolant is leaking into the operator compartment, check for loose clamps on the heater hoses. Copyright 1993 - 2019 Caterpillar Inc. Thu Sep 12 14:28:40 UTC+0800 2019 All Rights Reserved. Private Network For SIS Licensees. https://127.0.0.1/sisweb/sisweb/techdoc/techdoc_print_page.jsp?returnurl=/sis... 2019/9/12
322 L, 322 LN AND 322 N EXCAVATORS 9JL00001-UP (MACHINE) POWERED ... 1/5 Shutdown SIS Previous Screen Product: EXCAVATOR Model: 322-A N EXCAVATOR 9JL Configuration: 322 L, 322 LN AND 322 N EXCAVATORS 9JL00001-UP (MACHINE) POWERED BY 3116 ENGINE Disassembly and Assembly 446 and 446B Backhoe Loaders, Lexion 450 Combine, 3114 and 3116 Engines, IT18F Integrated Toolcarrier, D6M Track-Type Tractor and 928F, 950F and 950G Wheel Loaders Media Number -SENR3611-18 Publication Date -01/05/2009 Date Updated -27/05/2009 i01928293 Fuel Priming Pump and Primary Fuel Filter - Remove and Install SMCS - 1258-010; 1260-010 Removal Procedure NOTICE Keep all parts clean from contaminants. Contaminants may cause rapid wear and shortened component life. NOTICE Care must be taken to ensure that fluids are contained during performance of inspection, maintenance, testing, adjusting, and repair of the product. Be prepared to collect the fluid with suitable containers before opening any compartment or disassembling any component containing fluids. Refer to Special Publication, NENG2500, "Dealer Service Tool Catalog" for tools and supplies suitable to collect and contain fluids on Cat products. Dispose of all fluids according to local regulations and mandates. https://127.0.0.1/sisweb/sisweb/techdoc/techdoc_print_page.jsp?returnurl=/sis... 2019/9/12
322 L, 322 LN AND 322 N EXCAVATORS 9JL00001-UP (MACHINE) POWERED ... 2/5 Illustration 1 g00678475 1. Disconnect tube assembly (2) from primary fuel filter base (1). Illustration 2 g00678476 2. Remove bolts (4) from the fuel priming pump (3). 3. Remove fuel priming pump (3) from the primary fuel filter base. Illustration 3 g00678479 4. Remove bolt (5) from the primary fuel filter base. https://127.0.0.1/sisweb/sisweb/techdoc/techdoc_print_page.jsp?returnurl=/sis... 2019/9/12
322 L, 322 LN AND 322 N EXCAVATORS 9JL00001-UP (MACHINE) POWERED ... 3/5 5. Remove filter element (6) and housing (7) from the primary fuel filter base. Illustration 4 g00773124 6. Remove bolts (8) from the primary fuel filter base (1). 7. Remove primary fuel filter base (1) from the engine. Installation Procedure NOTICE Keep all parts clean from contaminants. Contaminants may cause rapid wear and shortened component life. https://127.0.0.1/sisweb/sisweb/techdoc/techdoc_print_page.jsp?returnurl=/sis... 2019/9/12
322 L, 322 LN AND 322 N EXCAVATORS 9JL00001-UP (MACHINE) POWERED ... 4/5 Illustration 5 g00773124 1. Install bolts (8) that secure primary fuel filter base (1) to the engine. Illustration 6 g00678479 2. Install filter element (6) and housing (7) to the primary filter base with bolt (5). Illustration 7 g00678476 https://127.0.0.1/sisweb/sisweb/techdoc/techdoc_print_page.jsp?returnurl=/sis... 2019/9/12
322 L, 322 LN AND 322 N EXCAVATORS 9JL00001-UP (MACHINE) POWERED ... 5/5 3. Install bolts (4) that secure fuel priming pump (3) to the primary fuel filter base. Illustration 8 g00678475 4. Connect tube assembly (2) to primary fuel filter base (1). Copyright 1993 - 2019 Caterpillar Inc. Thu Sep 12 14:40:24 UTC+0800 2019 All Rights Reserved. Private Network For SIS Licensees. https://127.0.0.1/sisweb/sisweb/techdoc/techdoc_print_page.jsp?returnurl=/sis... 2019/9/12
322 L, 322 LN AND 322 N EXCAVATORS 9JL00001-UP (MACHINE) POWERED ... 1/4 Shutdown SIS Previous Screen Product: EXCAVATOR Model: 322-A N EXCAVATOR 9JL Configuration: 322 L, 322 LN AND 322 N EXCAVATORS 9JL00001-UP (MACHINE) POWERED BY 3116 ENGINE Disassembly and Assembly 446 and 446B Backhoe Loaders, Lexion 450 Combine, 3114 and 3116 Engines, IT18F Integrated Toolcarrier, D6M Track-Type Tractor and 928F, 950F and 950G Wheel Loaders Media Number -SENR3611-18 Publication Date -01/05/2009 Date Updated -27/05/2009 i01928670 Fuel Transfer Pump - Remove SMCS - 1256-011 Removal Procedure Note: The governor and the fuel transfer pump have been removed from the engine for photographic purposes only. This procedure may be done with the governor on the engine. Illustration 1 g00623633 https://127.0.0.1/sisweb/sisweb/techdoc/techdoc_print_page.jsp?returnurl=/sis... 2019/9/12
322 L, 322 LN AND 322 N EXCAVATORS 9JL00001-UP (MACHINE) POWERED ... 2/4 Illustration 2 g00623671 Personal injury can result from parts and/or covers under spring pressure. Spring force will be released when covers are removed. Be prepared to hold spring loaded covers as the bolts are loosened. 1. Hold cover (1) in place and remove bolts (2) in order to release the spring beneath cover (1). Remove cover (1). https://127.0.0.1/sisweb/sisweb/techdoc/techdoc_print_page.jsp?returnurl=/sis... 2019/9/12
322 L, 322 LN AND 322 N EXCAVATORS 9JL00001-UP (MACHINE) POWERED ... 3/4 Illustration 3 g00623686 2. Remove fitting (3) and the check valve from cover (1). Remove the filter screen (if equipped) from fitting (3). Illustration 4 g00623687 3. Remove spring (4) and piston (5). 4. Remove upper O-ring seal (6). Illustration 5 g00623714 https://127.0.0.1/sisweb/sisweb/techdoc/techdoc_print_page.jsp?returnurl=/sis... 2019/9/12
322 L, 322 LN AND 322 N EXCAVATORS 9JL00001-UP (MACHINE) POWERED ... 4/4 5. Remove sleeve assembly (7). Inspect the face of lifter (8) for excessive wear. Inspect the surface of the camshaft that is inside of the governor for excessive wear or damage. 6. Remove lower O-ring seal (9). Illustration 6 g00623719 7. Remove fitting (10) and the check valve. Note: For information on reusability of the components in the fuel transfer pump, refer to Guideline For Reusable Parts And Salvage Operations, SEBF8434, "3100 Governor Inspection and General Information for Mechanical Governor Groups Used in 3114, 3116, and 3126 Engines Equipped with Mechanical Unit Injectors (MUI)". Copyright 1993 - 2019 Caterpillar Inc. Thu Sep 12 14:41:20 UTC+0800 2019 All Rights Reserved. Private Network For SIS Licensees. https://127.0.0.1/sisweb/sisweb/techdoc/techdoc_print_page.jsp?returnurl=/sis... 2019/9/12
322 L, 322 LN AND 322 N EXCAVATORS 9JL00001-UP (MACHINE) POWERED ... 1/4 Shutdown SIS Previous Screen Product: EXCAVATOR Model: 322-A N EXCAVATOR 9JL Configuration: 322 L, 322 LN AND 322 N EXCAVATORS 9JL00001-UP (MACHINE) POWERED BY 3116 ENGINE Disassembly and Assembly 446 and 446B Backhoe Loaders, Lexion 450 Combine, 3114 and 3116 Engines, IT18F Integrated Toolcarrier, D6M Track-Type Tractor and 928F, 950F and 950G Wheel Loaders Media Number -SENR3611-18 Publication Date -01/05/2009 Date Updated -27/05/2009 i01928343 Fuel Transfer Pump - Install SMCS - 1256-012 Installation Procedure Table 1 Required Tools Tool Part Number Part Description Qty A 8T-2998 Lubricant 1 NOTICE Keep all parts clean from contaminants. Contaminants may cause rapid wear and shortened component life. Note: For information on reusability of the components in the fuel transfer pump, refer to Guideline For Reusable Parts And Salvage Operations, SEBF8434, "3100 Governor Inspection and General Information for Mechanical Governor Groups Used in 3114, 3116, and 3126 Engines Equipped with Mechanical Unit Injectors (MUI)". https://127.0.0.1/sisweb/sisweb/techdoc/techdoc_print_page.jsp?returnurl=/sis... 2019/9/12
322 L, 322 LN AND 322 N EXCAVATORS 9JL00001-UP (MACHINE) POWERED ... 2/4 Illustration 1 g00623719 1. Lubricate fitting (10) and the bore with clean engine oil. Install the check valve and fitting (10). Illustration 2 g00623714 2. Inspect the condition of the O-ring seal. Replace the O-ring seal, if necessary. Install lower O-ring seal (9). 3. Apply Tooling (A) on the face of lifter (8). Install sleeve assembly (7). Ensure that the flat on the sleeve aligns with the flat in the bore of the housing. Illustration 3 g00623687 https://127.0.0.1/sisweb/sisweb/techdoc/techdoc_print_page.jsp?returnurl=/sis... 2019/9/12
322 L, 322 LN AND 322 N EXCAVATORS 9JL00001-UP (MACHINE) POWERED ... 3/4 4. Lubricate piston (5) with clean engine oil. Install piston (5) and spring (4). Illustration 4 g00623686 5. Lubricate fitting (3) and the bore for the check valve with clean engine oil. Install the check valve with the sealing face toward the fitting. 6. Install the O-ring seal and fitting (3). Illustration 5 g00623671 https://127.0.0.1/sisweb/sisweb/techdoc/techdoc_print_page.jsp?returnurl=/sis... 2019/9/12
322 L, 322 LN AND 322 N EXCAVATORS 9JL00001-UP (MACHINE) POWERED ... 4/4 Illustration 6 g00623633 Improper assembly of parts that are spring loaded can cause bodily injury. To prevent possible injury, follow the established assembly procedure and wear protective equipment. 7. Place cover (1) over spring (4). Install bolts (2) in order to compress spring (4). Copyright 1993 - 2019 Caterpillar Inc. Thu Sep 12 14:42:15 UTC+0800 2019 All Rights Reserved. Private Network For SIS Licensees. https://127.0.0.1/sisweb/sisweb/techdoc/techdoc_print_page.jsp?returnurl=/sis... 2019/9/12
322 L, 322 LN AND 322 N EXCAVATORS 9JL00001-UP (MACHINE) POWERED ... 1/3 Shutdown SIS Previous Screen Product: EXCAVATOR Model: 322-A N EXCAVATOR 9JL Configuration: 322 L, 322 LN AND 322 N EXCAVATORS 9JL00001-UP (MACHINE) POWERED BY 3116 ENGINE Disassembly and Assembly 446 and 446B Backhoe Loaders, Lexion 450 Combine, 3114 and 3116 Engines, IT18F Integrated Toolcarrier, D6M Track-Type Tractor and 928F, 950F and 950G Wheel Loaders Media Number -SENR3611-18 Publication Date -01/05/2009 Date Updated -27/05/2009 i01928366 Fuel Shutoff Solenoid - Remove and Install SMCS - 1259-010 Removal Procedure Table 1 Required Tools Tool Part Number Part Description Qty Spanner Wrench(1) A 9U-5120 1 (1)This tool is part of the 128-8822 Fuel System and Governor Tool Group. NOTICE Keep all parts clean from contaminants. Contaminants may cause rapid wear and shortened component life. NOTICE Care must be taken to ensure that fluids are contained during performance of inspection, maintenance, testing, adjusting, and repair of the product. Be prepared to collect the fluid with suitable containers before opening any compartment or disassembling any component containing fluids. https://127.0.0.1/sisweb/sisweb/techdoc/techdoc_print_page.jsp?returnurl=/sis... 2019/9/12
322 L, 322 LN AND 322 N EXCAVATORS 9JL00001-UP (MACHINE) POWERED ... 2/3 Refer to Special Publication, NENG2500, "Dealer Service Tool Catalog" for tools and supplies suitable to collect and contain fluids on Cat products. Dispose of all fluids according to local regulations and mandates. Illustration 1 g00585831 1. Disconnect the harness assembly (2) from fuel shutoff solenoid (1). 2. Use Tooling (A) to remove the fuel shutoff solenoid from the governor. 3. Remove the O-ring seal from the shutoff solenoid . Installation Procedure Table 2 Required Tools Tool Part Number Part Description Qty Spanner Wrench(1) A 9U-5120 1 (1)This tool is part of the 128-8822 Fuel System and Governor Tool Group. NOTICE Keep all parts clean from contaminants. Contaminants may cause rapid wear and shortened component life. NOTICE https://127.0.0.1/sisweb/sisweb/techdoc/techdoc_print_page.jsp?returnurl=/sis... 2019/9/12
322 L, 322 LN AND 322 N EXCAVATORS 9JL00001-UP (MACHINE) POWERED ... 3/3 Care must be taken to ensure that fluids are contained during performance of inspection, maintenance, testing, adjusting, and repair of the product. Be prepared to collect the fluid with suitable containers before opening any compartment or disassembling any component containing fluids. Refer to Special Publication, NENG2500, "Dealer Service Tool Catalog" for tools and supplies suitable to collect and contain fluids on Cat products. Dispose of all fluids according to local regulations and mandates. Illustration 2 g00585831 1. Inspect the O-ring seal on the fuel shutoff solenoid. If the O-ring seal is worn or damaged, use new parts for replacement. 2. Install the O-ring seal on the fuel shutoff solenoid. 3. Install the fuel shutoff solenoid in the governor. Use Tooling (A) and a suitable torque wrench to tighten the fuel shutoff solenoid to the following torque 30 5 N m (22 4 lb ft). 4. Connect the harness assembly to the fuel shutoff solenoid. Copyright 1993 - 2019 Caterpillar Inc. Thu Sep 12 14:43:11 UTC+0800 2019 All Rights Reserved. Private Network For SIS Licensees. https://127.0.0.1/sisweb/sisweb/techdoc/techdoc_print_page.jsp?returnurl=/sis... 2019/9/12
322 L, 322 LN AND 322 N EXCAVATORS 9JL00001-UP (MACHINE) POWERED ... 1/5 Shutdown SIS Previous Screen Product: EXCAVATOR Model: 322-A N EXCAVATOR 9JL Configuration: 322 L, 322 LN AND 322 N EXCAVATORS 9JL00001-UP (MACHINE) POWERED BY 3116 ENGINE Disassembly and Assembly 446 and 446B Backhoe Loaders, Lexion 450 Combine, 3114 and 3116 Engines, IT18F Integrated Toolcarrier, D6M Track-Type Tractor and 928F, 950F and 950G Wheel Loaders Media Number -SENR3611-18 Publication Date -01/05/2009 Date Updated -27/05/2009 i01928381 Governor - Remove SMCS - 1264-011 Removal Procedure Table 1 Required Tools Tool Part Number Part Description Qty Governor Pliers(1) A 136-4149 1 (1)This tool is part of the 128-8822 Fuel System and Governor Tool Group. Start By: a. Remove the fuel shutoff solenoid. Refer to Disassembly and Assembly, "Fuel Shutoff Solenoid - Remove and Install". NOTICE Care must be taken to ensure that fluids are contained during performance of inspection, maintenance, testing, adjusting, and repair of the product. Be prepared to collect the fluid with suitable containers before opening any compartment or disassembling any component containing fluids. Refer to Special Publication, NENG2500, "Dealer Service Tool Catalog" for tools and supplies suitable to collect and contain fluids on Cat products. Dispose of all fluids according to local regulations and mandates. https://127.0.0.1/sisweb/sisweb/techdoc/techdoc_print_page.jsp?returnurl=/sis... 2019/9/12
322 L, 322 LN AND 322 N EXCAVATORS 9JL00001-UP (MACHINE) POWERED ... 2/5 Illustration 1 g00613041 1. Disconnect the governor control cable. 2. Remove oil tube assembly (1). Remove tube assembly (2) and tube assembly for fuel ratio control (3), if equipped. Plug and cap all connections. Illustration 2 g00613071 3. Remove clip (4). https://127.0.0.1/sisweb/sisweb/techdoc/techdoc_print_page.jsp?returnurl=/sis... 2019/9/12
322 L, 322 LN AND 322 N EXCAVATORS 9JL00001-UP (MACHINE) POWERED ... 3/5 Illustration 3 g00655975 4. Use Tooling (A) to slide tube assembly (5) into the cylinder head. Illustration 4 g00613149 5. Remove the clip and use Tooling (A) to remove the clevis pin (6). Note: Clevis pin (6) must stay with the governor in order to be adjusted. https://127.0.0.1/sisweb/sisweb/techdoc/techdoc_print_page.jsp?returnurl=/sis... 2019/9/12
322 L, 322 LN AND 322 N EXCAVATORS 9JL00001-UP (MACHINE) POWERED ... 4/5 Illustration 5 g00613563 6. Remove bolts (7) and the washers that hold the governor in position. Illustration 6 g00673182 7. Remove the governor from the engine. Illustration 7 g00673180 8. Remove O-ring seal (3) on the governor. Illustration 8 g00672742 https://127.0.0.1/sisweb/sisweb/techdoc/techdoc_print_page.jsp?returnurl=/sis... 2019/9/12
322 L, 322 LN AND 322 N EXCAVATORS 9JL00001-UP (MACHINE) POWERED ... 5/5 9. Remove the O-ring seal and tube assembly (5) from the cylinder head. Illustration 9 g00672733 10. Remove O-ring seal (2) on the tube assembly (5). Illustration 10 g00673178 11. Remove O-ring seal (1) from the cylinder head. Note: For more information on the governor, refer to Service Manual, SENR6454, "3114, 3116, & 3126 Engine Governors". The Service Manual, SENR6454 requires the use of a 1U-7326 Governor Calibration Bench. For information on reusability of components in the governor, refer to Guideline For Reusable Parts And Salvage Operations, SEBF8434, "3100 Governor Inspection and General Information for Mechanical Governor Groups Used in 3114, 3116, and 3126 Engines Equipped with Mechanical Unit Injectors (MUI)". Copyright 1993 - 2019 Caterpillar Inc. Thu Sep 12 14:44:07 UTC+0800 2019 All Rights Reserved. Private Network For SIS Licensees. https://127.0.0.1/sisweb/sisweb/techdoc/techdoc_print_page.jsp?returnurl=/sis... 2019/9/12
322 L, 322 LN AND 322 N EXCAVATORS 9JL00001-UP (MACHINE) POWERED ... 1/5 Shutdown SIS Previous Screen Product: EXCAVATOR Model: 322-A N EXCAVATOR 9JL Configuration: 322 L, 322 LN AND 322 N EXCAVATORS 9JL00001-UP (MACHINE) POWERED BY 3116 ENGINE Disassembly and Assembly 446 and 446B Backhoe Loaders, Lexion 450 Combine, 3114 and 3116 Engines, IT18F Integrated Toolcarrier, D6M Track-Type Tractor and 928F, 950F and 950G Wheel Loaders Media Number -SENR3611-18 Publication Date -01/05/2009 Date Updated -27/05/2009 i01928419 Governor - Install SMCS - 1264-012 Installation Procedure Table 1 Required Tools Tool Part Number Part Description Qty Governor Pliers(1) A 136-4149 1 128-8827 Pin(1) 1 B 1U-7523 Pin Pilot(1) 1 (1)This tool is part of the 128-8822 Governor Tool Group. NOTICE Keep all parts clean from contaminants. Contaminants may cause rapid wear and shortened component life. Note: For more information on the governor, refer to Service Manual, SENR6454, "3114, 3116, & 3126 Engine Governors". The Service Manual, SENR6454 requires the use of a 1U-7326 Governor Calibration Bench. For information on reusability of components in the governor, refer to Guideline For Reusable Parts And Salvage Operations, SEBF8434, "3100 Governor Inspection and General Information for Mechanical Governor Groups Used in 3114, 3116, and 3126 Engines Equipped with Mechanical Unit Injectors (MUI)". https://127.0.0.1/sisweb/sisweb/techdoc/techdoc_print_page.jsp?returnurl=/sis... 2019/9/12
322 L, 322 LN AND 322 N EXCAVATORS 9JL00001-UP (MACHINE) POWERED ... 2/5 Illustration 1 g00673178 1. Apply lubricant to the new O-ring seal (1). Install new O-ring seal (1) in the cylinder head. Illustration 2 g00672733 2. Apply lubricant to the new O-ring seal (2). Install new O-ring seal (2) on the tube assembly (5). Illustration 3 g00672742 3. Install the O-ring seal and tube assembly (5) in the cylinder head. https://127.0.0.1/sisweb/sisweb/techdoc/techdoc_print_page.jsp?returnurl=/sis... 2019/9/12
322 L, 322 LN AND 322 N EXCAVATORS 9JL00001-UP (MACHINE) POWERED ... 3/5 Illustration 4 g00673180 4. Apply lubricant to the new O-ring seal (3). Install new O-ring seal (3) on the governor. Illustration 5 g00673182 5. Place the governor in position on the engine. Illustration 6 g00613563 6. Install the washers and bolts (7) that hold the governor in place. https://127.0.0.1/sisweb/sisweb/techdoc/techdoc_print_page.jsp?returnurl=/sis... 2019/9/12
322 L, 322 LN AND 322 N EXCAVATORS 9JL00001-UP (MACHINE) POWERED ... 4/5 Illustration 7 g00672755 7. Install clevis pin (6) in Tooling (B). Illustration 8 g00672752 8. Use Tooling (B) to install clevis pin (6) and the clip. 9. Check the fuel setting adjustment. Refer to Testing and Adjusting, SENR5118. https://127.0.0.1/sisweb/sisweb/techdoc/techdoc_print_page.jsp?returnurl=/sis... 2019/9/12
Suggest: If the above button click is invalid. Please download this document first, and then click the above link to download the complete manual. Thank you so much for reading
322 L, 322 LN AND 322 N EXCAVATORS 9JL00001-UP (MACHINE) POWERED ... 5/5 Illustration 9 g00655975 10. Use Tooling (A) to slide tube assembly (5) into the governor. Illustration 10 g00613071 11. Install clip (4). Illustration 11 g00613041 12. Install oil tube assembly (1). Install tube assembly (2) and tube assembly for fuel ratio control (3), if equipped. Plug and cap all connections. 13. Install the governor control cable. End By: a. Install the fuel shutoff solenoid. Refer to Disassembly and Assembly, "Fuel Shutoff Solenoid - Remove and Install". Copyright 1993 - 2019 Caterpillar Inc. Thu Sep 12 14:45:02 UTC+0800 2019 All Rights Reserved. Private Network For SIS Licensees. https://127.0.0.1/sisweb/sisweb/techdoc/techdoc_print_page.jsp?returnurl=/sis... 2019/9/12
https://www.ebooklibonline.com Hello dear friend! Thank you very much for reading. Enter the link into your browser. The full manual is available for immediate download. https://www.ebooklibonline.com

