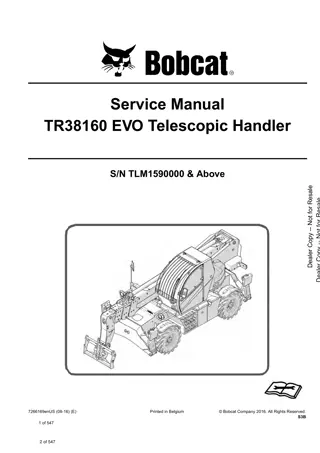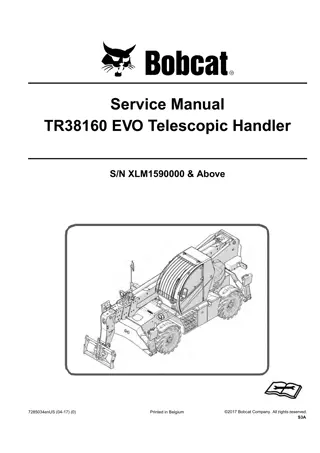
Bobcat TR40250 EVO Telescopic Handler Service Repair Manual Instant Download (SN XVX1550000 and Above)
Please open the website below to get the complete manualnn// n
Download Presentation

Please find below an Image/Link to download the presentation.
The content on the website is provided AS IS for your information and personal use only. It may not be sold, licensed, or shared on other websites without obtaining consent from the author. Download presentation by click this link. If you encounter any issues during the download, it is possible that the publisher has removed the file from their server.
E N D
Presentation Transcript
MAINTENANCE SAFETY Instructions are necessary before operating or servicing machine. Read and understand the Operation & Maintenance Manual, Operator s Handbook and signs (decals) on machine. Follow warnings and instructions in the manuals when making repairs, adjustments or servicing. Check for correct function after adjustments, repairs or service. Untrained operators and failure to follow instructions can cause injury or death. WARNING W-2003-0807 CORRECT Safety Alert Symbol: This symbol with a warning statement, means: Warning, be alert! Your safety is involved! message that follows. Carefully read the P-90216 Never service the Bobcat telescopic handler without instructions. CORRECT WRONG WRONG NA5432 NA5433 NA5428 Cleaning and maintenance are required daily. Disconnecting or loosening any hydraulic tubeline, hose, fitting, component or a part failure can cause boom to drop. Do not go under boom when raised unless supported by an approved boom stop. Replace if damaged. Never handler with boom up unless boom is held by an approved boom stop. Replace if damaged. Never modify equipment or add attachments not approved by Bobcat Company. work on telescopic WRONG WRONG WRONG NA5434 NA5436 B-6589 Lead-acid flammable and explosive gases. Keep arcs, sparks, flames and lighted tobacco batteries. Batteries contain acid which burns eyes or skin on contact. Wear protective clothing. If acid contacts body, flush well with water. For eye contact flush well and get immediate attention. batteries produce Have good ventilation when welding or grinding painted parts. Wear dust mask when grinding painted parts. Toxic dust and gas can be produced. Avoid exhaust fume leaks which can kill without warning. Exhaust system must be tightly sealed. Keep body, jewelry and clothing away from moving electrical contact, hot parts and exhaust. Wear eye protection to guard from battery acid, compressed springs, fluids under pressure and flying debris when engines are running or tools are used. Use eye protection approved for type of welding. parts, away from medical Maintenance procedures which are given in the Operation & Maintenance Manual can be performed by the owner/operator without any specific technical training. Maintenance procedures which are not in the Operation & Maintenance Manual must be performed ONLY BY QUALIFIED BOBCAT SERVICE PERSONNEL. Always use genuine Bobcat replacement parts. MSW43-EN-0211
CONTENTS FOREWORD . . . . . . . . . . . . . . . . . . . . . . . . . . . . . . . . . . . . . . . . . . . . . . . . . . . . . . . . . . . . 1-05 SAFETY & MAINTENANCE . . . . . . . . . . . . . . . . . . . . . . . . . . . . . . . . . . . . . . . . . . . . . . . . 10-01 HYDRAULIC SYSTEM . . . . . . . . . . . . . . . . . . . . . . . . . . . . . . . . . . . . . . . . . . . . . . . . . . . . 20-01 HYDROSTATIC SYSTEM . . . . . . . . . . . . . . . . . . . . . . . . . . . . . . . . . . . . . . . . . . . . . . . . . . 30-01 DRIVE SYSTEM . . . . . . . . . . . . . . . . . . . . . . . . . . . . . . . . . . . . . . . . . . . . . . . . . . . . . . . . . 40-01 MAINFRAME . . . . . . . . . . . . . . . . . . . . . . . . . . . . . . . . . . . . . . . . . . . . . . . . . . . . . . . . . . . 50-01 ELECTRICAL SYSTEM AND ANALYSIS . . . . . . . . . . . . . . . . . . . . . . . . . . . . . . . . . . . . . . 60-01 ENGINE SERVICE . . . . . . . . . . . . . . . . . . . . . . . . . . . . . . . . . . . . . . . . . . . . . . . . . . . . . . . 70-01 SPECIFICATIONS . . . . . . . . . . . . . . . . . . . . . . . . . . . . . . . . . . . . . . . . . . . . . . . . . . . . SPEC-01 ALPHABETICAL INDEX . . . . . . . . . . . . . . . . . . . . . . . . . . . . . . . . . . . . . . . . . . . . . . . .INDEX-01 1-3 TR40250, TR50210 EVO Service Manual
https://www.ebooklibonline.com Hello dear friend! Thank you very much for reading. Enter the link into your browser. The full manual is available for immediate download. https://www.ebooklibonline.com
FOREWORD FOREWORD . . . . . . . . . . . . . . . . . . . . . . . . . . . . . . . . . . . . . . . . . . . . . . . . . . . . . . . . . . . . . 1-7 SAFETY INSTRUCTIONS . . . . . . . . . . . . . . . . . . . . . . . . . . . . . . . . . . . . . . . . . . . . . . . . . . . 1-9 Safe Operation Is The Operator s Responsibility . . . . . . . . . . . . . . . . . . . . . . . . . . . . . . . 1-9 Safe Operation Needs A Qualified Operator . . . . . . . . . . . . . . . . . . . . . . . . . . . . . . . . . . . 1-9 Avoid Silica Dust . . . . . . . . . . . . . . . . . . . . . . . . . . . . . . . . . . . . . . . . . . . . . . . . . . . . . . . 1-10 Dismantling And Disposal . . . . . . . . . . . . . . . . . . . . . . . . . . . . . . . . . . . . . . . . . . . . . . . . 1-10 FIRE PREVENTION . . . . . . . . . . . . . . . . . . . . . . . . . . . . . . . . . . . . . . . . . . . . . . . . . . . . . . . 1-11 Maintenance . . . . . . . . . . . . . . . . . . . . . . . . . . . . . . . . . . . . . . . . . . . . . . . . . . . . . . . . . . 1-11 Operation . . . . . . . . . . . . . . . . . . . . . . . . . . . . . . . . . . . . . . . . . . . . . . . . . . . . . . . . . . . . 1-11 Electrical . . . . . . . . . . . . . . . . . . . . . . . . . . . . . . . . . . . . . . . . . . . . . . . . . . . . . . . . . . . . . 1-11 Hydraulic System . . . . . . . . . . . . . . . . . . . . . . . . . . . . . . . . . . . . . . . . . . . . . . . . . . . . . . 1-11 Fueling . . . . . . . . . . . . . . . . . . . . . . . . . . . . . . . . . . . . . . . . . . . . . . . . . . . . . . . . . . . . . . 1-11 Starting . . . . . . . . . . . . . . . . . . . . . . . . . . . . . . . . . . . . . . . . . . . . . . . . . . . . . . . . . . . . . . 1-11 Welding And Grinding . . . . . . . . . . . . . . . . . . . . . . . . . . . . . . . . . . . . . . . . . . . . . . . . . . . 1-12 Fire Extinguishers . . . . . . . . . . . . . . . . . . . . . . . . . . . . . . . . . . . . . . . . . . . . . . . . . . . . . . 1-12 SERIAL NUMBER LOCATIONS . . . . . . . . . . . . . . . . . . . . . . . . . . . . . . . . . . . . . . . . . . . . . . 1-13 Telescopic Handler Serial Numbers . . . . . . . . . . . . . . . . . . . . . . . . . . . . . . . . . . . . . . . . 1-13 Engine Serial Number . . . . . . . . . . . . . . . . . . . . . . . . . . . . . . . . . . . . . . . . . . . . . . . . . . . 1-13 Other Serial Numbers . . . . . . . . . . . . . . . . . . . . . . . . . . . . . . . . . . . . . . . . . . . . . . . . . . . 1-13 DELIVERY REPORT . . . . . . . . . . . . . . . . . . . . . . . . . . . . . . . . . . . . . . . . . . . . . . . . . . . . . . 1-14 BOBCAT TELESCOPIC HANDLER IDENTIFICATION . . . . . . . . . . . . . . . . . . . . . . . . . . . . 1-15 TR50190, TR50210 And TR40250 . . . . . . . . . . . . . . . . . . . . . . . . . . . . . . . . . . . . . . . . . 1-15 1-5 TR40250, TR50210 EVO Service Manual
FOREWORD This manual is for the Bobcat telescopic handler mechanic. It provides necessary servicing and adjustment procedures for the Bobcat telescopic handler and its component parts and systems. Refer to the Operation & Maintenance Manual for operating instructions, starting procedure, daily checks, etc. A general inspection of the following items must be made after the telescopic handler has had service or repair: 1. Check that ROPS/FOPS (Including right side window) is in good condition and is not modified. 9. Enclosure door latches must open and close freely. 2. Check that ROPS mounting hardware is tightened and is Bobcat approved. 10. Attachment locking pins must function correctly and be in good condition. 3. The seat belt must be correctly installed, functional and in good condition. 11. Safety treads must be in good condition. 4. Check boom support device, replace if damaged. 12. Check for correct function of indicator lamps and gauges. 5. Machine signs must be legible and in the correct location. 13. Check hydraulic fluid level, engine oil level and fuel supply. 6. Check tires for wear and pressure. Use only approved tires. 14. Inspect for fuel, oil or hydraulic fluid leaks. 7. Check for correct function of the work lights. 15. Lubricate the telescopic handler. 8. The parking brake must function correctly. 16. Check the condition of the battery and cables. FW TLS EMEA-0411 SM 1-7 TR40250, TR50210 EVO Service Manual
17. Inspect the air cleaner for damage or leaks. Check the condition of the element. 20. Operate the telescopic handler and check all functions. 18. Check the electrical charging system. 21. Check for any field modification not completed. 19. Inspect for loose or broken parts or connections. 22. Recommend to the owner that all necessary corrections be made before the machine is returned to service. FW TLS EMEA-0411 SM 1-8 TR40250, TR50210 EVO Service Manual
SAFETY INSTRUCTIONS Safe Operation Needs A Qualified Operator For an operator to be qualified, he or she must not use drugs or alcoholic drinks which impair alertness or co- ordination while working. An operator who is taking prescription drugs must get medical advice to determine if he or she can safely operate a machine. A Qualified Operator Must Do The Following: Understand the Written Instructions, Rules and Regulations The written instructions from Bobcat Company include the Delivery Maintenance Manual, Operator s Handbook and machine signs (decals). Check the rules and regulations at your location. The rules may include an employer s work safety requirements. For driving on public roads, the machine must be equipped as stipulated by the local regulations authorizing operation on public roads in your specific country. Regulations may identify a hazard such as a utility line. For operating the machine, some countries require an operator license. Check the regulations at your location. Safe Operation Is The Operator s Responsibility Safety Alert Symbol This symbol with a warning statement means: Warning, be alert! Your safety is involved! Carefully read the message that follows. Report, Operation & WARNING Operator must have instructions before operating the machine. Untrained operators can cause injury or death. W-2001-0502 IMPORTANT Have Training with Actual Operation Operator training must consist of a demonstration and verbal instruction. This training is given by your Bobcat dealer before the product is delivered. The new operator must start in an area without bystanders or structures and use all the controls until he or she can operate the machine and attachment safely under all conditions of the work area. Always fasten seat belt before operating. Know the Work Conditions Know the weight of the materials being handled. Avoid exceeding the Rated Load Capacity of the machine (as indicated on the Load Capacity Charts). Material which is very dense will be heavier than the same volume of less dense material. Reduce the size of load if handling dense material. The operator must know any prohibited uses or work areas, for example, he or she needs to know about excessive slopes. Know the location of any underground lines. Wear tight fitting clothing. Always wear safety glasses when doing maintenance or service. Safety glasses, respiratory equipment, hearing protection or Front Window Guard are required for some work. See your Bobcat dealer about Bobcat Safety Equipment. This notice identifies procedures which must be followed to avoid damage to the machine. I-2019-0284 DANGER The signal word DANGER on the machine and in the manuals indicates a hazardous situation which, if not avoided, will result in death or serious injury. D-1002-1107 WARNING The signal word WARNING on the machine and in the manuals indicates a potentially hazardous situation which, if not avoided, could result in death or serious injury. W-2044-1107 The telescopic handler and attachment must be in good operating condition before use. Check all of the items on the Bobcat Service Schedule Decal under the 8-10 hour column or as shown in the Operation & Maintenance Manual. SI TH EMEA-1015 SM 1-9 TR40250, TR50210 EVO Service Manual
SAFETY INSTRUCTIONS (CONTD) Dismantling And Disposal Safe Operation Needs A Qualified Operator (Cont d) On the completion of its useful life, the machine and its parts shall be disposed of in an environmental friendly manner. Please contact your local dealer. Parts of the machine can be re manufactured like the engine depending on its age and condition, or recycled like metals, plastics, rubbers and glasses. Respect the environment and dispose of waste properly. Worn or damaged parts shall not be left in the environment. Oils, brake fluid, cooling refrigerants, batteries and cells shall be disposed of in a proper manner through your local dealer or recycling center. Where overhead power lines are present in the operating area, ensure sufficient clearance between the nearest of these lines and any part of the machine. VOLTAGE MINIMUM DISTANCE up to 50 kV beyond 50 kV 3 m (10 ft) 5 m (16.5 ft) The operator must survey his / her field of vision when operating the telescopic handler. Adjust mirrors to obtain the best visibility. Clean mirrors every day and more often when necessary. Immediately replace any broken or damaged mirrors. If a suspended load or the resulting boom geometry blocks the vision of the operator alternative carrying means must be considered. The operator must know the wind speed. Do not use the telescopic handler with wind speeds over 12,5 m/s (28 mph). Avoid Silica Dust Cutting or drilling concrete containing sand or rock containing quartz may result in exposure to silica dust. Use a respirator, water spray or other means to control dust. SI TH EMEA-1015 SM 1-10 TR40250, TR50210 EVO Service Manual
FIRE PREVENTION Hydraulic System Check hydraulic tubes, hoses and fittings for damage and leakage. Never use open flame or bare skin to check for leaks. Hydraulic tubes and hoses must be properly routed and have adequate support and secure clamps. Tighten or replace any parts that show leakage. Maintenance Always clean fluid spills. Do not use petrol or diesel fuel for cleaning parts. Use commercial non-flammable solvents. The machine and some attachments have components that are at high temperatures under normal operating conditions. The primary source of high temperatures is the engine and exhaust system. The electrical system, if damaged or incorrectly maintained, can be a source of arcs or sparks. Fueling Flammable debris (leaves, straw, etc.) must be removed regularly. If flammable debris is allowed to accumulate, it can cause a fire hazard. Clean often to avoid this accumulation. Flammable compartment is a potential fire hazard. debris in the engine Stop the engine and let it cool before adding fuel. No smoking! Do not refuel a machine near open flames or sparks. Fill the fuel tank outdoors. The operator s area, engine compartment and engine cooling system must be inspected every day and cleaned if necessary to prevent fire hazards and overheating. Ultra Low Sulfur Diesel (ULSD) poses a greater static ignition hazard than earlier diesel formulations with higher Sulfur content. Avoid death or serious injury from fire or explosion. Consult with your fuel or fuel system supplier to ensure the delivery system is in compliance with fueling standards for proper grounding and bonding practices. All fuels, most lubricants and some coolants mixtures are flammable. Flammable fluids that are leaking or spilled onto hot surfaces or onto electrical components can cause a fire. Operation Starting Do not use the machine where exhaust, arcs, sparks or hot components can contact flammable material, explosive dust or gases. Do not use ether or starting fluids on any engine that has glow plugs. These starting aids can cause explosion and injure you or bystanders. Electrical Use the procedure in the Operation & Maintenance Manual for connecting the battery and for jump starting. Check all electrical wiring and connections for damage. Keep the battery terminals clean and tight. Repair or replace any damaged part or wires that are loose or frayed. Battery gas can explode and cause serious injury. Use the procedure in the Operation & Maintenance Manual for connecting the battery and for jump starting. Do not jump start or charge a frozen or damaged battery. Keep any open flames or sparks away from batteries. Do not smoke in battery charging area. SI TH EMEA-1015 SM 1-11 TR40250, TR50210 EVO Service Manual
FIRE PREVENTION (CONTD) Welding And Grinding Always clean the machine and attachment, disconnect the battery, and disconnect the wiring from the Bobcat controllers before welding. Cover rubber hoses, battery and all other flammable parts. Keep a fire extinguisher near the machine when welding. Have good ventilation when grinding or welding painted parts. Wear dust mask when grinding painted parts. Toxic dust or gas can be produced. Dust generated from repairing non-metallic parts such as hoods, fenders or covers can be flammable or explosive. Repair such components in a well ventilated area away from open flames or sparks. Fire Extinguishers Know where fire extinguishers and first aid kits are located and how to use them. Inspect the fire extinguisher and service the fire extinguisher regularly. Obey the recommendations on the instructions plate. Sl TH EMEA-1015 SM 1-12 TR40250, TR50210 EVO Service Manual
SERIAL NUMBER LOCATIONS Engine Serial Number Always use the serial number of the telescopic handler when requesting service information or when ordering parts. Early or later models (identification made by serial number) can use different parts, or it can be necessary to use a different procedure in doing a specific service operation. Figure 3 Telescopic Handler Serial Numbers 1 Figure 1 S36149 1 The engine serial number plate is located on the engine (Item 1) [Figure 3]. Other Serial Numbers Other components can also have serial numbers and an identification plate. Always use these serial numbers when ordering parts. S36814 Figure 2 1 S36815 The telescopic handler serial number plates (Item 1) [Figure 1] and (Item 1) [Figure 2] are located on the left side below the seat, in the operator cab and outside the machine on the left side of the front outrigger beams. 1-13 TR40250, TR50210 EVO Service Manual
DELIVERY REPORT Figure 4 B-16315 The delivery report [Figure 4] must be completed by the dealer and signed by the owner or operator when the Bobcat telescopic handler is delivered. An explanation of the form must be given to the owner. Make sure it is complete. 1-14 TR40250, TR50210 EVO Service Manual
BOBCAT TELESCOPIC HANDLER IDENTIFICATION TR40250 And TR50210 1 2 30 17 16 3 29 31 32 28 4 18 27 15 14 13 25 26 5 6 23 7 22 9 12 8 20 21 11 24 19 10 EM5813 EM5814 ITEM DESCRIPTION ITEM DESCRIPTION 1 Operator s Handbook and Operation & Maintenance Manual Toolbox External Hydraulic Fluid Filter Battery Front Left Light Attachment Holder Plate Front Left Outrigger Beam Left Machine Leveling Cylinder Planetary Reduction Gear Wheel Rear Left Outrigger Beam Rear Left Light Control Unit Control Unit and Timing System Hood Timing System Fuel Tank 17 Hydraulic Fluid Tank 2 3 4 5 6 7 8 9 18 19 20 21 22 23 24 25 26 27 28 29 30 31 32 Oscillation Lock Cylinder Rear Right Outrigger Beam Engine Cover Engine Right Machine Leveling Cylinder Front Right Outrigger Beam Boom Head Electrical Connector Boom Head Work Spotlight Telescopic Boom Front Right Light Right Rear-view Mirror Operator Cab Front Work Spotlight on The Cab Approved Boom Stop Upperstructure Slew Lock 10 11 12 13 14 15 16 1-15 TR40250, TR50210 EVO Service Manual
SAFETY & MAINTENANCE LIFTING AND BLOCKING THE TELESCOPIC HANDLER . . . . . . . . . . . . . . . . . . . . . . 10-10-1 Procedure . . . . . . . . . . . . . . . . . . . . . . . . . . . . . . . . . . . . . . . . . . . . . . . . . . . . . . . . . 10-10-1 OPERATOR CAB . . . . . . . . . . . . . . . . . . . . . . . . . . . . . . . . . . . . . . . . . . . . . . . . . . . . . . 10-20-1 Description . . . . . . . . . . . . . . . . . . . . . . . . . . . . . . . . . . . . . . . . . . . . . . . . . . . . . . . . 10-20-1 Cab Door . . . . . . . . . . . . . . . . . . . . . . . . . . . . . . . . . . . . . . . . . . . . . . . . . . . . . . . . . . 10-20-2 Cab Door Window . . . . . . . . . . . . . . . . . . . . . . . . . . . . . . . . . . . . . . . . . . . . . . . . . . . 10-20-2 Cab Rear Window . . . . . . . . . . . . . . . . . . . . . . . . . . . . . . . . . . . . . . . . . . . . . . . . . . . 10-20-3 Cab Roof Window . . . . . . . . . . . . . . . . . . . . . . . . . . . . . . . . . . . . . . . . . . . . . . . . . . . 10-20-3 Cab Light . . . . . . . . . . . . . . . . . . . . . . . . . . . . . . . . . . . . . . . . . . . . . . . . . . . . . . . . . . 10-20-3 Cab Ventilation, Heating And Air Conditioning . . . . . . . . . . . . . . . . . . . . . . . . . . . . . 10-20-4 Recirculation / Fresh Air Control . . . . . . . . . . . . . . . . . . . . . . . . . . . . . . . . . . . . . . . . 10-20-5 Rotating Beacon . . . . . . . . . . . . . . . . . . . . . . . . . . . . . . . . . . . . . . . . . . . . . . . . . . . . 10-20-6 Hazard Lights . . . . . . . . . . . . . . . . . . . . . . . . . . . . . . . . . . . . . . . . . . . . . . . . . . . . . . 10-20-6 Emergency Stop Switch . . . . . . . . . . . . . . . . . . . . . . . . . . . . . . . . . . . . . . . . . . . . . . 10-20-7 Road Light Switch . . . . . . . . . . . . . . . . . . . . . . . . . . . . . . . . . . . . . . . . . . . . . . . . . . . 10-20-7 TRANSPORTING THE TELESCOPIC HANDLER . . . . . . . . . . . . . . . . . . . . . . . . . . . . . 10-30-1 Procedure . . . . . . . . . . . . . . . . . . . . . . . . . . . . . . . . . . . . . . . . . . . . . . . . . . . . . . . . . 10-30-1 TOWING THE TELESCOPIC HANDLER . . . . . . . . . . . . . . . . . . . . . . . . . . . . . . . . . . . . 10-40-1 Procedure . . . . . . . . . . . . . . . . . . . . . . . . . . . . . . . . . . . . . . . . . . . . . . . . . . . . . . . . . 10-40-1 Deactivating The External Parking Brake Manually . . . . . . . . . . . . . . . . . . . . . . . . . 10-40-3 SERVICE SCHEDULE . . . . . . . . . . . . . . . . . . . . . . . . . . . . . . . . . . . . . . . . . . . . . . . . . . 10-50-1 Maintenance Intervals . . . . . . . . . . . . . . . . . . . . . . . . . . . . . . . . . . . . . . . . . . . . . . . . 10-50-1 Contents Of The Inspection Checkbook (logbook) . . . . . . . . . . . . . . . . . . . . . . . . . . 10-50-3 AIR CLEANER SERVICE . . . . . . . . . . . . . . . . . . . . . . . . . . . . . . . . . . . . . . . . . . . . . . . . 10-60-1 Replacing The Air Filter . . . . . . . . . . . . . . . . . . . . . . . . . . . . . . . . . . . . . . . . . . . . . . 10-60-1 ENGINE COOLING SYSTEM . . . . . . . . . . . . . . . . . . . . . . . . . . . . . . . . . . . . . . . . . . . . 10-70-1 Cleaning The Cooling System . . . . . . . . . . . . . . . . . . . . . . . . . . . . . . . . . . . . . . . . . 10-70-1 Checking The Coolant Level . . . . . . . . . . . . . . . . . . . . . . . . . . . . . . . . . . . . . . . . . . . 10-70-2 Removing And Replacing The Coolant . . . . . . . . . . . . . . . . . . . . . . . . . . . . . . . . . . . 10-70-3 FUEL SYSTEM . . . . . . . . . . . . . . . . . . . . . . . . . . . . . . . . . . . . . . . . . . . . . . . . . . . . . . . 10-80-1 Fuel Specifications . . . . . . . . . . . . . . . . . . . . . . . . . . . . . . . . . . . . . . . . . . . . . . . . . . 10-80-1 Biodiesel Blend Fuel . . . . . . . . . . . . . . . . . . . . . . . . . . . . . . . . . . . . . . . . . . . . . . . . . 10-80-1 Filling The Fuel Tank . . . . . . . . . . . . . . . . . . . . . . . . . . . . . . . . . . . . . . . . . . . . . . . . . 10-80-2 Fuel Filters . . . . . . . . . . . . . . . . . . . . . . . . . . . . . . . . . . . . . . . . . . . . . . . . . . . . . . . . 10-80-2 Cleaning The Fuel Tank . . . . . . . . . . . . . . . . . . . . . . . . . . . . . . . . . . . . . . . . . . . . . . 10-80-4 ENGINE LUBRICATION SYSTEM . . . . . . . . . . . . . . . . . . . . . . . . . . . . . . . . . . . . . . . . . 10-90-1 Checking And Adding Engine Oil . . . . . . . . . . . . . . . . . . . . . . . . . . . . . . . . . . . . . . . 10-90-1 Engine Oil Chart . . . . . . . . . . . . . . . . . . . . . . . . . . . . . . . . . . . . . . . . . . . . . . . . . . . . 10-90-1 Removing And Replacing Oil And Filter . . . . . . . . . . . . . . . . . . . . . . . . . . . . . . . . . . 10-90-2 10-1 TR40250, TR50210 EVO Service Manual
HYDRAULIC / HYDROSTATIC SYSTEM . . . . . . . . . . . . . . . . . . . . . . . . . . . . . . . . . . . 10-100-1 Hydraulic / Hydrostatic Fluid Chart . . . . . . . . . . . . . . . . . . . . . . . . . . . . . . . . . . . . . 10-100-1 Checking And Adding Hydraulic / Hydrostatic Fluid . . . . . . . . . . . . . . . . . . . . . . . . 10-100-2 Replacing Hydraulic / Hydrostatic Fluid And Filters . . . . . . . . . . . . . . . . . . . . . . . . 10-100-3 Cylinder Lock Valve . . . . . . . . . . . . . . . . . . . . . . . . . . . . . . . . . . . . . . . . . . . . . . . . . 10-100-6 AXLES (FRONT AND REAR) . . . . . . . . . . . . . . . . . . . . . . . . . . . . . . . . . . . . . . . . . . . . 10-110-1 Checking And Adding Oil (Planetary Carrier) . . . . . . . . . . . . . . . . . . . . . . . . . . . . . 10-110-1 Removing And Replacing Oil (Planetary Carrier) . . . . . . . . . . . . . . . . . . . . . . . . . . 10-110-1 Checking And Adding Oil (Front And Rear Differential) . . . . . . . . . . . . . . . . . . . . . 10-110-2 Removing And Replacing Oil (Front And Rear Differential) . . . . . . . . . . . . . . . . . . 10-110-2 Checking And Adding Oil (Drive Box) . . . . . . . . . . . . . . . . . . . . . . . . . . . . . . . . . . . 10-110-2 Removing And Replacing Oil (Drive Box) . . . . . . . . . . . . . . . . . . . . . . . . . . . . . . . . 10-110-2 LUBRICATING THE TELESCOPIC HANDLER . . . . . . . . . . . . . . . . . . . . . . . . . . . . . . 10-120-1 Lubrication Locations . . . . . . . . . . . . . . . . . . . . . . . . . . . . . . . . . . . . . . . . . . . . . . . 10-120-1 TELESCOPIC BOOM MAINTENANCE . . . . . . . . . . . . . . . . . . . . . . . . . . . . . . . . . . . . 10-120-3 Telescopic Boom Wear Blocks . . . . . . . . . . . . . . . . . . . . . . . . . . . . . . . . . . . . . . . . 10-120-3 Telescopic Boom Chain Inspection, Adjustment And Lubrication . . . . . . . . . . . . . . 10-120-4 TIRE MAINTENANCE . . . . . . . . . . . . . . . . . . . . . . . . . . . . . . . . . . . . . . . . . . . . . . . . . 10-130-1 Wheel Nuts . . . . . . . . . . . . . . . . . . . . . . . . . . . . . . . . . . . . . . . . . . . . . . . . . . . . . . . 10-130-1 Tire Rotating . . . . . . . . . . . . . . . . . . . . . . . . . . . . . . . . . . . . . . . . . . . . . . . . . . . . . . 10-130-1 Tire Mounting . . . . . . . . . . . . . . . . . . . . . . . . . . . . . . . . . . . . . . . . . . . . . . . . . . . . . 10-130-1 Tire Pressure . . . . . . . . . . . . . . . . . . . . . . . . . . . . . . . . . . . . . . . . . . . . . . . . . . . . . 10-130-1 ENGINE COVER . . . . . . . . . . . . . . . . . . . . . . . . . . . . . . . . . . . . . . . . . . . . . . . . . . . . . 10-140-1 Opening And Closing . . . . . . . . . . . . . . . . . . . . . . . . . . . . . . . . . . . . . . . . . . . . . . . 10-140-1 APPROVED BOOM STOP . . . . . . . . . . . . . . . . . . . . . . . . . . . . . . . . . . . . . . . . . . . . . . 10-150-1 Installing The Approved Boom Stop . . . . . . . . . . . . . . . . . . . . . . . . . . . . . . . . . . . . 10-150-1 ANTI TIPPING DEVICE . . . . . . . . . . . . . . . . . . . . . . . . . . . . . . . . . . . . . . . . . . . . . . . . 10-160-1 Description . . . . . . . . . . . . . . . . . . . . . . . . . . . . . . . . . . . . . . . . . . . . . . . . . . . . . . . 10-160-1 Display Panel Data . . . . . . . . . . . . . . . . . . . . . . . . . . . . . . . . . . . . . . . . . . . . . . . . . 10-160-2 Bypass Key Switch . . . . . . . . . . . . . . . . . . . . . . . . . . . . . . . . . . . . . . . . . . . . . . . . . 10-160-4 Attachment Selector . . . . . . . . . . . . . . . . . . . . . . . . . . . . . . . . . . . . . . . . . . . . . . . . 10-160-5 Anti Tipping Device Inspection . . . . . . . . . . . . . . . . . . . . . . . . . . . . . . . . . . . . . . . . 10-160-6 Alarm Codes . . . . . . . . . . . . . . . . . . . . . . . . . . . . . . . . . . . . . . . . . . . . . . . . . . . . . . 10-160-7 10-2 TR40250, TR50210 EVO Service Manual
LIFTING AND BLOCKING THE TELESCOPIC HANDLER 9. Switch off the engine by turning the ignition key switch to the STOP position and remove the ignition key. Procedure 10. Place a maintenance work in progress sign in the cab. Perform the front axle leveling and rear axle oscillation locking procedure: Perform the following procedure to lift the telescopic handler: 1. Place any loads on the ground. Figure 10-10-2 2. Completely retract and lower the telescopic boom. 3. Place the machine on a flat, solid and level surface. 4. Align the upperstructure with the lower frame. 5. Lock upperstructure swing with the slew lock (See Operation & Maintenance manual). The leveling device can only be used when the upperstructure swing is locked. Figure 10-10-1 2 1 S36822 Put the floor jack (Item 1) [Figure 10-10-2] under the center of the rear axle. Lift the telescopic handler and install jackstands (Item 1) [Figure 10-10-3]. Figure 10-10-3 3 1 EM5757 2 2 6. Level the machine by acting on the front axle leveling switch (Item 1) [Figure 10-10-1] on the right instrument panel. Press the switch to the left to tilt the frame to the left; press to the right to tilt right. 1 1 7. Ensure the machine is leveled correctly by using the spirit level (Item 2) [Figure 10-10-1]. The maximum allowed tilt is 2 . S36825 8. Act on the rear axle oscillation lock switch (Item 3) [Figure 10-10-1] on the right instrument panel. Put the floor jack under the center of the front axle. Lift the telescopic handler and install jackstands (Item 2) [Figure 10-10-3]. NOTE: When the switch (Item 3) [Figure 10-10-1] is pressed, the pilot light on the switch lights up as well as the pilot light on the center indicator and instrument panel. 10-10-1 TR40250, TR50210 EVO Service Manual
OPERATOR CAB WARNING Description Figure 10-20-1 EXPOSURE TO CHEMICALS CAN CAUSE SERIOUS INJURY OR DEATH Read and follow chemical instructions for use of personal protection equipment. The cab is not a substitute for personal protection equipment. Do not carry or store contaminated equipment or clothing in cab. Comply with local regulations for proper disposal of hazardous materials. Agricultural chemicals are hazardous. Improper selection or use can seriously injure people, animals, plants, soil, etc. Follow instructions from chemical manufacturer to select, apply and handle each chemical. 1 manufacturer's S43259 W-2911-0311 The telescopic handler has an operator cab (Item 1) [Figure 10-20-1] that is ROPS (Roll-Over Protective Structure) / FOPS (Fall-Object Protective Structure) as standard equipment to protect the operator if the telescopic handler is tipped over. The seat belt must be worn for the ROPS / FOPS protection. WARNING Never modify operator cab or canopy by welding, grinding, drilling holes or adding attachments unless instructed to do so by Bobcat. Do not operate without right window. Changes to the cab or canopy can cause loss of operator protection from rollover and falling objects, and result in serious injury or death. Check the ROPS / FOPS cab, mounting hardware for damage. Never modify the ROPS / FOPS cab. Replace the cab and hardware if damaged. The cab is classified as CATEGORY 1 ; The cab approved as a category 1 does not offer full protection against the ingress of dust, aerosols and vapors. Consult and follow the instructions provided by the manufacture if the chemicals (such as pesticides, fungicides, herbicides, etc.) and those supplied by manufactures of the sprayer. Use the appropriate personnel protective equipment and clothing (PPE) when indicated in these instructions, even when inside the cab. W-2396-1202 10-20-1 TR40250, TR50210 EVO Service Manual
OPERATOR CAB (CONTD) Cab Door Window Cab Door Figure 10-20-4 1 Figure 10-20-2 2 2 1 S43260 Figure 10-20-5 S43134 1 Figure 10-20-3 1 S43137 Figure 10-20-6 S43135 The cab door can be opened from the outside of the cab using the latch (Item 1) [Figure 10-20-2] and opened from the inside of the cab when you squeeze the handle (Item 1) [Figure 10-20-3] upward. 1 The cab door can be locked (Item 2) [Figure 10-20-2] with the start key. S43138 To open the cab door window (Item 1) [Figure 10-20-4], turn the handle (Item 1) [Figure 10-20-5] clockwise. Push the window fully open until it latches against the cab (Item 2) [Figure 10-20-4]. To close the window, push the button (Item 1) [Figure 10- 20-6], inside the cab, to disengage the latch and pull the window toward you until closed. Turn the handle (Item 1) [Figure 10-20-5] anticlockwise to lock the window in the closed position. 10-20-2 TR40250, TR50210 EVO Service Manual
MORE MANUALS: https://www.ebooklibonline.com/ Suggest: If the above button click is invalid. Please download this document first, and then click the above link to download the complete manual. Thank you so much for reading
OPERATOR CAB (CONTD) Cab Roof Window Cab Rear Window Figure 10-20-9 Figure 10-20-7 1 1 1 S43141 S43139 Figure 10-20-8 To open the roof window, grip the handles (Item 1) [Figure 10-20-9] and push then upward until they lock in the open position. To close the roof window, grip the handles (Item 1) [Figure 10-20-9] and pull down until they are in the locked position. Cab Light Figure 10-20-10 S43140 2 The window can be opened by pushing the handle (Item 1) [Figure 10-20-7] and pushing the window outward [Figure 10-20-8]. 1 NOTE: Do not fully open the cab rear window during operation of the machine as damage to the rear window could occur. S43017 Press the button (Item 1) on the edge of the light (Item 2) [Figure 10-20-10] to turn light ON. Press again to turn light OFF. 10-20-3 TR40250, TR50210 EVO Service Manual
https://www.ebooklibonline.com Hello dear friend! Thank you very much for reading. Enter the link into your browser. The full manual is available for immediate download. https://www.ebooklibonline.com

