Lead Dust Wipe Sampling Techniques and Guidelines
This resource provides valuable information on lead dust wipe sampling techniques for Lead Dust Sampling Technicians. It covers the objectives, measuring lead dust, sampling strategy, sampling locations based on EPA RRP Rule, and HUD clearance regulations. Techniques for taking dust wipe samples, identifying sampling locations, and understanding lead dust levels are explained in detail.
Download Presentation

Please find below an Image/Link to download the presentation.
The content on the website is provided AS IS for your information and personal use only. It may not be sold, licensed, or shared on other websites without obtaining consent from the author. Download presentation by click this link. If you encounter any issues during the download, it is possible that the publisher has removed the file from their server.
E N D
Presentation Transcript
3-1 Chapter 3 Lead Dust Wipe Sampling Lead Dust Sampling Technician June 2013
3-2 Objectives Learn when and where to take a dust wipe sample Learn how to take a dust wipe sample Sample 3 surfaces where dust is collected Learn the difference between single- surface and composite sampling Lead Dust Sampling Technician June 2013
3-3 A Lead Dust Wipe Measures: Total amount of lead dust on a specific surface area (lead loading) The EPA lead dust clearance standards use this type of measurement. Lead present at the time and location of sample collection Does not tell you about past or future levels Lead levels can change depending on the activity in the house or in different locations Lead Dust Sampling Technician June 2013
3-4 Sampling Strategy You must wait at least 1 hour after final cleanup is completed and visual inspection is passed before collecting samples to allow time for dust to settle out of the air and onto surfaces. When choosing sampling locations, identify areas where the most dust was generated during the job. Whenever possible sample hard floors, not carpets. Make sure to follow the sampling requirements in the next slides or the Field Guide to select your final sample locations. Lead Dust Sampling Technician June 2013
3-5 Lead Dust Wipe Sampling Locations: EPA RRP Rule If there is more than 1 room, hallway, or stairwell within the work area, take: 1 windowsill sample and 1 floor sample within each room, hallway, or stairwell (no more than 4 rooms, hallways, or stairwells need be sampled) If the windows were not closed and covered with plastic during the renovation, also take 1 window trough sample in each room, hallway, or stairwell (no more than 4 need be sampled). 1 floor sample adjacent to the work area, but not in an area that has been cleaned For Federally-assisted housing, take these samples if the work area is contained, otherwise, clear the whole unit, as discussed in the previous slide. Lead Dust Sampling Technician June 2013
3-6 Lead Dust Wipe Sampling Locations: EPA RRP Rule (cont.) If the work area is a single room, hallway, or stairwell, or a smaller area, take: 1 windowsill sample and 1 floor sample If the windows were not closed and covered with plastic during the renovation, also take 1 window trough sample. 1 floor sample adjacent to the work area, but not in an area that has been cleaned. Lead Dust Sampling Technician June 2013
3-7 HUD Clearance HUD does not allow clearance to be performed on a work area alone that has not been adequately contained HUD clearance can be done in several ways Whole unit clearance in most cases Worksite-only clearance in some cases Clearance for interior work when containment is used LDST should discuss sampling strategy with renovator prior to start of work See HUD Sampling Appendix and optional HUD Sampling Exercise for detailed descriptions of HUD sampling strategies. Lead Dust Sampling Technician June 2013
3-8 Activity: Where To Take Samples You are now going to practice sampling area strategies. Your instructor will provide you with a hypothetical renovation scenario and diagram. Read the scenario and mark the location(s) of where you think dust wipe samples should be taken. Lead Dust Sampling Technician June 2013
3-9 Remember Be strategic about laying out sampling area to capture areas were the highest dust generating tasks occurred during the job. Refer to the Field Guide or Chapter 3 to determine the appropriate places to take your samples. Lead Dust Sampling Technician June 2013
3-10 How To Take Dust Wipe Samples Now that you know where and when to sample, the next section will cover the most important part of the course: How to take dust wipe samples. Regardless of the rule you are working under, the methods for taking and later analyzing dust wipe samples are identical. Lead Dust Sampling Technician June 2013
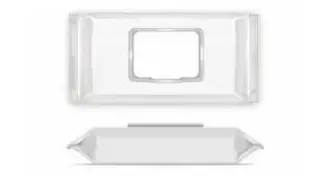
3-11 Dust Wipe Sampling Materials Wipes - Disposable individually packaged wipes. Check with you laboratory, they often provide these Disposable gloves - Should be non-sterilized and non- powdered Disposable shoe covers - Use of disposable shoe covers helps to minimize the transfer of settled dust from one location to another. Containers - Centrifuge tubes or other hard plastic, non- glass containers. They should be non-sterilized, plastic tubes equipped with a sealable lid. Reusable template - A 12 x 12 reusable template for floors. Lead Dust Sampling Technician June 2013
3-12 Dust Wipe Sampling Materials (cont.) Tape - Painter s or masking tape works well Ruler -To measure sampling areas if templates are not available Sample collection forms and chain-of-custody forms Labeling and cleanup supplies. Permanent markers, trash bags, labels, re-sealable storage bags, and sanitary wipes Pen -To complete the sample collection form, label tubes, and write down notes Calculator - To assist in the calculation of sampling area dimensions Lead Dust Sampling Technician June 2013
3-13 Blank Samples A new, unused wipe that is tested at the laboratory to determine whether the sampling medium is contaminated. Laboratory should not know they are blanks Blanks should be assigned sample numbers and locations Only your copy of the sample collection form should identify which samples are blanks. One blank sample should be submitted For each job tested From each wipe lot Lead Dust Sampling Technician June 2013
3-14 How To Collect Samples Step 1: Put on disposable shoe covers and lay out the sample area. Step 2: Prepare the tubes. Step 3: Put on clean gloves. Step 4: Sample the selected area and place wipe in tube. Step 5: Measure the sample area. Step 6: Record sample area (dimensions) on forms. Step 7: Clean up. Lead Dust Sampling Technician June 2013
3-15 Step 1: Put on Disposable Shoe Covers and Lay Out the Sample Area Put on shoe covers. Outline sample area with tape or a template. Templates should be durable material. Floor sample is generally 12 x 12 Make sure you clean the template with a new wipe. Tape can also be used to outline the sample area. Lay out tape squarely so you can accurately measure the sample area later. Do NOT touch area inside the sample area. Lead Dust Sampling Technician June 2013
3-16 Taping Template to Floor Lead Dust Sampling Technician June 2013
3-17 Outlining Sample Area with Tape Lead Dust Sampling Technician June 2013
3-18 Taping Window Sill Lead Dust Sampling Technician June 2013
3-19 Step 2: Prepare the Tubes Use clean, hard-sided tubes. Make sure tube is labeled with an ID number. Record ID number on sample collection form and chain-of-custody form. Partially unscrew tube cap. Place tube near sample area. Lead Dust Sampling Technician June 2013
3-20 Step 3: Put on Clean Gloves Use disposable gloves. Use new gloves for each sample. After putting on the gloves, do NOT touch anything else before you pick up the wipe. Lead Dust Sampling Technician June 2013
3-21 Step 4: Wipe Sample Areas The procedures for taking dust wipe samples from floors, windowsills, and troughs are listed on the following slides. The procedure for sampling floors is different than the procedure for sampling windowsills and troughs. Step 4 of lead dust wipe sampling is also described in the Lead Dust Sampling Technician Field Guide. Lead Dust Sampling Technician June 2013
3-22 Step 4: Wipe Sample Area Floors Do not touch other objects. They can contaminate the wipe. Press the wipe down firmly (with fingers, not the palm of the hand) at an upper corner of the sample area. Make as many S like motions as needed to wipe the entire sample area, moving from side to side. Do not cross the outer border of the tape or template. Fold the wipe in half, keeping the dirty side in, and repeat the wiping procedure ( S like motion). Folding wipe carefully helps to prevent the loss of any collected dust. Lead Dust Sampling Technician June 2013
3-23 Step 4: Wipe Sample Area Floors (cont.) Fold the wipe in half again, keeping all the dust in the wipe, and repeat the wiping procedure one more time, concentrating on collecting dust from the corners within the selected surface area. Wipes are folded to keep the collected dust within the wipe, avoid dust losses, and to expose a clean wipe surface for further collection. Lead Dust Sampling Technician June 2013
3-24 Step 4: Wipe Sample Area Floors (cont.) Fold the wipe again with the sample side folded in, and place the folded wipe into the sample tube. Avoid contact with other surfaces. Cap the container. Discard the gloves into a trash bag. Lead Dust Sampling Technician June 2013
3-25 Floor Sampling Lead Dust Sampling Technician June 2013
3-26 Floor Sampling Lead Dust Sampling Technician June 2013
3-27 Floor Sampling Lead Dust Sampling Technician June 2013
3-28 Step 4: Wipe Sample Area Windowsills and Troughs Sampling interior windowsills and troughs Hold fingers together and flat against surface. Wipe surface in a single pass while applying constant pressure. Fold wipe in half with wiped side in and wipe in both directions. Fold wipe in half again with wiped side in and concentrate on corners and edges. Place the folded wipe in the tube. Lead Dust Sampling Technician June 2013
3-29 Step 4: Wipe Sample Area Windowsills and Troughs (cont.) Sampling interior windowsills and troughs Cap the tube Label the tube properly. Measure and record the dimensions of the selected sampling area. Discard the gloves into a trash bag then close the bag. Lead Dust Sampling Technician June 2013
3-30 Sampling a Windowsill Lead Dust Sampling Technician June 2013
3-31 Sampling a Window Trough Lead Dust Sampling Technician June 2013
3-32 Step 5: Measure the Sample Area Measure width and length (unless template was used). Area must be at least 16 square inches (2 inches by 8 inches). Measure to 1/8 inch. Measure exact area after sample is taken. Length of sill or trough between inside edges of tape Tape across width of sill or trough (front to back) Do not remove tape until after measurements are taken. Lead Dust Sampling Technician June 2013
3-33 Measuring Window Sill Lead Dust Sampling Technician June 2013
3-34 Step 6: Record Sample Area on Forms Record measurement on sample collection form and lab chain-of-custody form. Calculate area outlined by the tape and record on the sample collection form and lab chain-of-custody form. In some cases, conversion from inches to feet will be necessary. To make these calculations easier, measurements should always be converted from fractions to decimals (e.g., 0.5 rather than 1/2). Check with analytical laboratory for additional recording requirements. Lead Dust Sampling Technician June 2013
3-35 Step 7: Clean Up Clean template with a clean sampling wipe; place template in a plastic bag for storage. Remove materials from site: Gloves, tape from floors and windows, used shoe covers Put items in plastic bag, NOTin client s containers Clean clothing and remove shoe covers before leaving the work area. Clean face and hands with warm, soapy water Use sanitary wipes if no access to warm, soapy water Lead Dust Sampling Technician June 2013
3-36 Hands-on Activity: Let s Try It You are now going to practice taking dust wipe samples. Each individual must demonstrate proficiency. Follow your instructor s directions for taking samples. You can refer to your Field Guide or Attachment 3-D for a list of key steps. Lead Dust Sampling Technician June 2013
3-37 Avoiding Common Mistakes These common mistakes can give incorrect results: - Incorrect measurement - Contaminated wipe - Contaminated gloves - Sample area is disturbed - Sloppy recording Lead Dust Sampling Technician June 2013
3-38 Composite Dust Wipe Sampling In composite sampling, samples are collected from common components in different rooms and analyzed as one. You may receive a request to take a composite sample during lead dust clearance testing. Analytical laboratories often have difficulty processing composite samples. Contact your laboratory before taking any composite samples. Lead Dust Sampling Technician June 2013
3-39 Rules for a Composite Sample Measures average amount of lead dust on several surfaces (up to 4) of the same type. Sample container holds up to 4 dust wipes Do not use more than 4 wipes. Do not mix samples from different types of surfaces. Sample equal areas with each wipe, and use templates where possible. Interior sills or troughs: use smallest sill or trough to set area Lead Dust Sampling Technician June 2013
3-40 Composite Sampling Procedures Outline all areas to wipe for composite before collecting sample. Use a new wipe for each subsample. Follow single wipe sampling procedures. Use a separate chain of custody form for each composite sample. It is not necessary to change gloves between subsamples. Lead Dust Sampling Technician June 2013
3-41 Proper Hygiene After Completing Sampling Job Hand washing Face washing Check your clothing and shoes (especially soles) before leaving work site Lead Dust Sampling Technician June 2013

 undefined


 undefined
 undefined
