Creating a CMS Simulation: Grid Domain Activity Dataset Development
Developing a CMS simulation involves loading bathymetry data, setting boundary conditions, creating grid domains (land/water), and choosing between Quadtree or Cartesian grid structures. Learn how to manage survey datasets, add new coverages, define grid frames, and set up the land/water interface for Activity Classification coverage.

Download Presentation

Please find below an Image/Link to download the presentation.
The content on the website is provided AS IS for your information and personal use only. It may not be sold, licensed, or shared on other websites without obtaining consent from the author. Download presentation by click this link. If you encounter any issues during the download, it is possible that the publisher has removed the file from their server.
E N D
Presentation Transcript
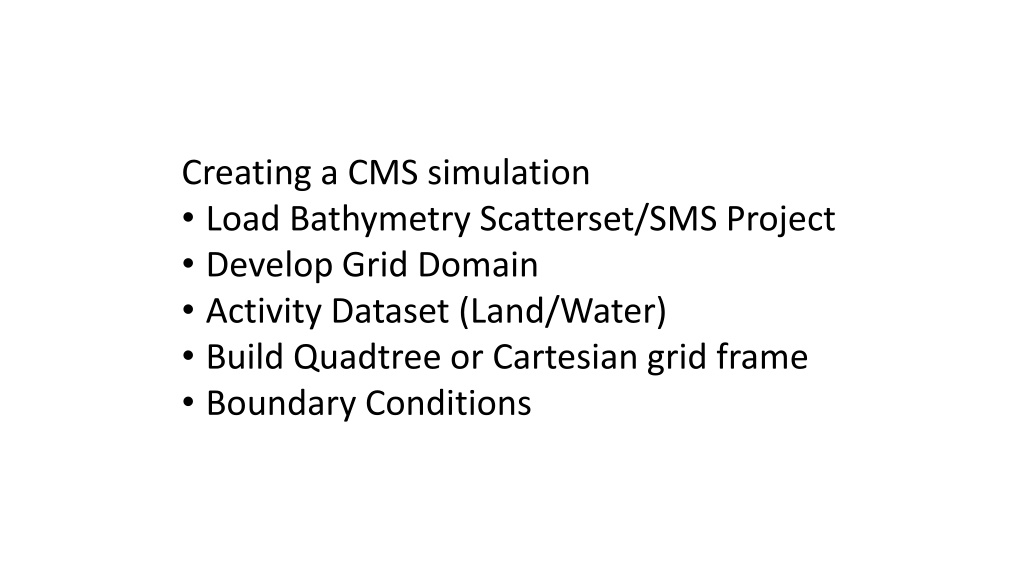
Creating a CMS simulation Load Bathymetry Scatterset/SMS Project Develop Grid Domain Activity Dataset (Land/Water) Build Quadtree or Cartesian grid frame Boundary Conditions
Old survey datasets in project are not necessary once the final merged bathymetry is set. Others can be removed from project.
Add New Coverages for CMS Models | CMS-Flow | Boundary Conditions Generic | Activity Classification Depending on whether you want to use a Quadtree or Cartesian grid, choose one of the following: Generic | Quadtree Generator Generic | CGrid Generator
Since there are several coverages that will be used from the Map Module, we will want to see some of the information from other coverages while we work on some others. To enable this, choose Display | Display Options Click Map from the options on the left, then place a check in the box named Inactive coverage from the options on the right.
Select Quadtree/CGrid Generator Coverage Select Create Grid Frame tool Define domain of CMS grid by clicking three points (order or extreme accuracy is not necessary) Grid Frame is built but may be partially hidden from view by filled display contours. Making contours semi- transparent can help.
Click Select Grid Frame tool Click frame selector You can now resize with corner or edge center points You can rotate around IJ Axis with handle Make sure to SAVE frequently as you go along.
Double Clicking the Grid Frame selector will bring up a property dialog. After experimenting with the handles and rotating, enter the values as shown in the top section only. This defines the exact origin, I and J extents and rotation angle to our desired area. We will come back later to add resolution for telescoping or Cartesian grids.
Next, we define the Land/Water interface with the Activity Classification coverage. Click the Activity Classification coverage in the Data Tree Right Click your final bathymetry dataset in the scatter module. Choose Convert | Scatter Contours Map Destination coverage should be Activity Classification Elevation = 0 m Spacing = 10 m Note: Using 0.0 is just an example. Realistically, you would consider the tidal range and other factors when determining the land/water interface.
Usually after the previous steps, you will need to clean up excess feature arcs. Click the Feature Arc selection tool. Click the first arc you wish to remove, then click subsequent arcs while holding the Shift key down to multi-select and delete. Continue for your entire domain area. To pan your screen while selecting, hold the F2 key down and drag with your mouse, then release and keep selecting.
If you want to remove some sharp angles or other points from the boundary arc, select feature vertices with the tool. Once selected, hit the delete key to simplify the feature arc.
Additional way to bring in a shoreline from a Coastline database Coastline database The ArcGIS shape file can be directly loaded into SMS for part of the coastline arcs. https://shoreline.noaa.gov/data/datasheets/cusp.html. (one example)
If you have an elevation dataset in the shape file to match with the coastline, it can be selected. We will just click Finish This is an older set of files without the full bay area. The files included in the HandsOn are complete.
Create a polygon with coastlines to define the land (non-computational) area. With the Activity Classification coverage selected and active. Choose the Create arc tool and enclose the polygon using the existing end points of the coastline arc. Choose Feature Objects | Build Polygons Click the Select Polygon tool and click the land polygon. Right-click, then choose Attributes and make sure Inactive is specified for a Land area.
Nothing has to be exact right now. All of this will show up better once the Quadtree or Cartesian grid has been constructed. Be sure and save your project. This project has been saved in the Workshop/Initial/Aftercoastline Folder as Base.sms for use in future steps.